

Fair enough, looks nice so far.Originally Posted by miahallen


Fair enough, looks nice so far.

Well, not good....according to MLL rad/pump optimizer. It says flow of the XT block is around 1.2 GPM and the GPU blocks (EK-FC GTX 480) are around 2 GPM....that means you guys are right....the CPU block will be getting less flow than the GPUs.
If Swiftech wasn't sponsoring the build, I think I'd use the EK HF block, it's much more similar (flow characteristics) to the GPU blocks.
I personally prefer the ST block anyway, so maybe I'll have to run it in series.....I think I'll test both ways
[CENTER]The post counter is not an intelligence meter!
MAX11L - "It's like a console...with the suck turned down and the awesome turned up" -tet5uo
Heat Team IRONMODS
You doubted us?
Martin, where do you find the time man?
upgrading...
I think you are jumping the gun here ,you can't go by the optimizer in your case ,this new FC blocks are fin design and not the old wave ,there for a lot more restrictive .The only way to find out is by some testing ..you might be OK
Yeah, I guess we'll see
[CENTER]The post counter is not an intelligence meter!
MAX11L - "It's like a console...with the suck turned down and the awesome turned up" -tet5uo
Heat Team IRONMODS
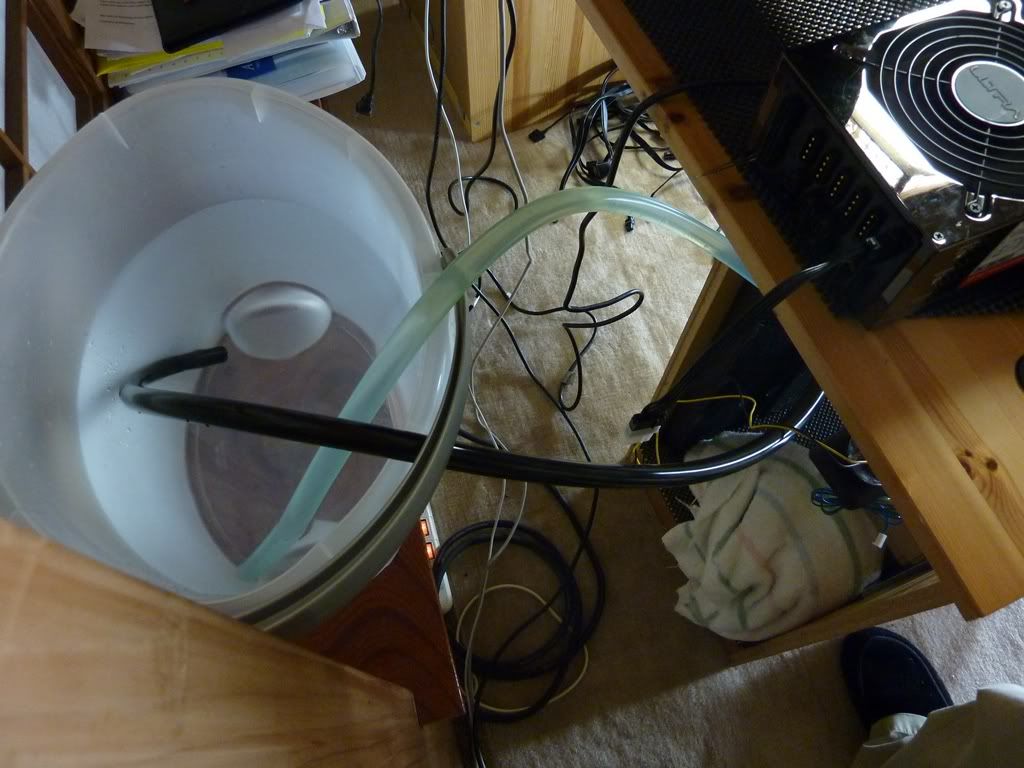
3rd flush in progress....3 gallons of fresh distilled:
After this, I'll clean out the blocks before the final flush/fill/leak test.
But that will have to wait until my next day off
[CENTER]The post counter is not an intelligence meter!
MAX11L - "It's like a console...with the suck turned down and the awesome turned up" -tet5uo
Heat Team IRONMODS
Eh, the path of least resistance is a myth. It's actually more complex than that. If you have an inlet-outlet pressure of P, and four parallel blocks, one with resistance R1, and three with resistance R2, the flow rate is given by:
F1=P/R1, F2=F3=F4=P/R2.
This, of course, assumes a fixed inlet-outlet pressure.
If you want to compare proportion of flow, it's a little harder to work out the details. If you have total flow Ft, then all the other flows add to Ft. Ft=F1+F2+F3+F4. If you add up the resistances, you'll find that
Rt=1/(1/R1 + 3/R2)
The 3/R2 is because there are three blocks with resistance R2.
Then, flow rate through an given branch is:
Fx=Rt*Ft/(Rx+Rt)
That shows you that as the resistance of a given block increases, more flow will go to the other blocks, and less flow will go to the high resistance block. It doesn't mean that a higher resistance block gets no flow. This is why the so-called path of least resistance is an oversimplification.
Thank you Annirak, that's what I was TRYING to say
[CENTER]The post counter is not an intelligence meter!
MAX11L - "It's like a console...with the suck turned down and the awesome turned up" -tet5uo
Heat Team IRONMODS
I partially disagree. The pump is trying to take in as much as it pumps out and tubing + blocks = resistance to flow.
physics101.jpg
If path A will allow maximum flow, then path B may fill with water but will become static with the resistance of a block added.
I believe that these three EK gpu blocks in parallel will pose less resistance than tubing alone so there's no energy left to push water further.
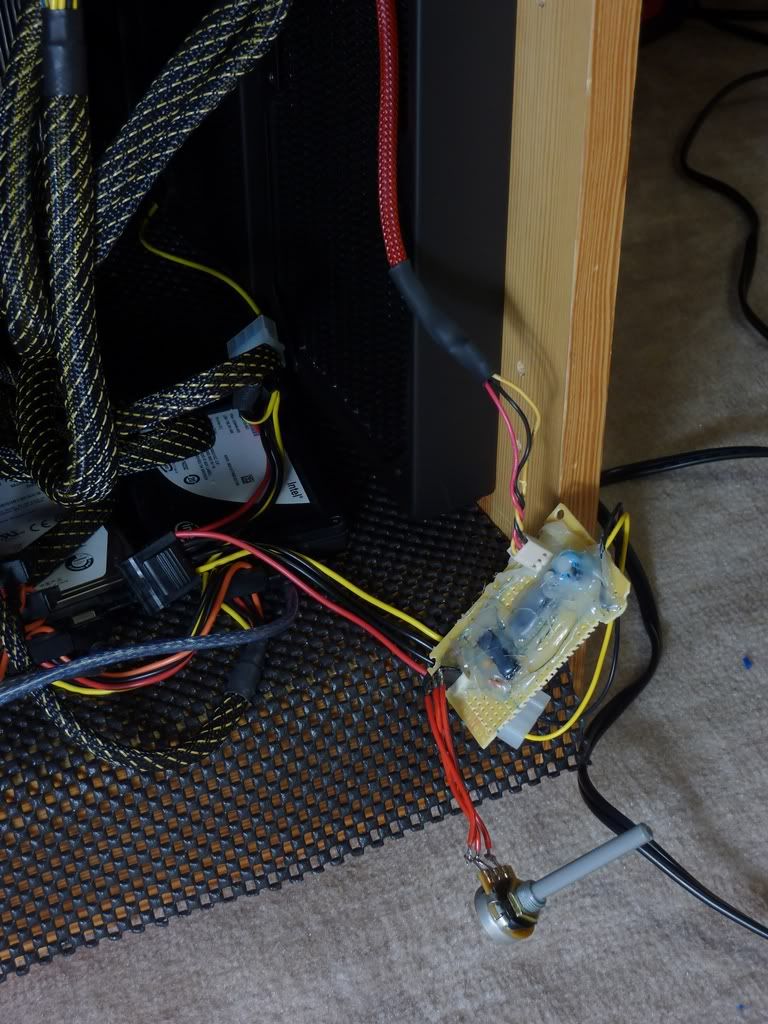
OK, I've got another brief update.....I'm very happy to report that the PWM controller that Bobnova and xXSebasXx built for me is working perfectly, and all the fans seem to be in sync and running exactly how I'd hoped
I wired them all together with three common PWM lines, a single 12V connection, and a single ground. Then I terminated all the monitor lines except one, which I will plug into one of the fan headers on the mobo to keep track of the RPM of the fans on the wall.
Then I hooked up the PWM controller and tested....works great
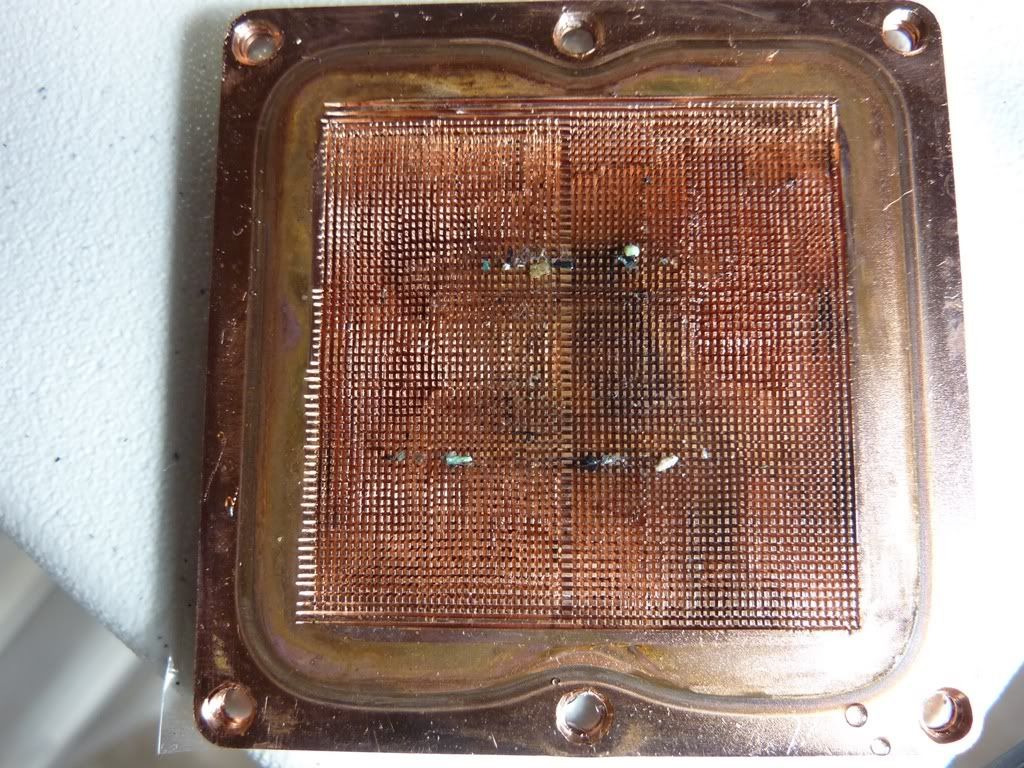
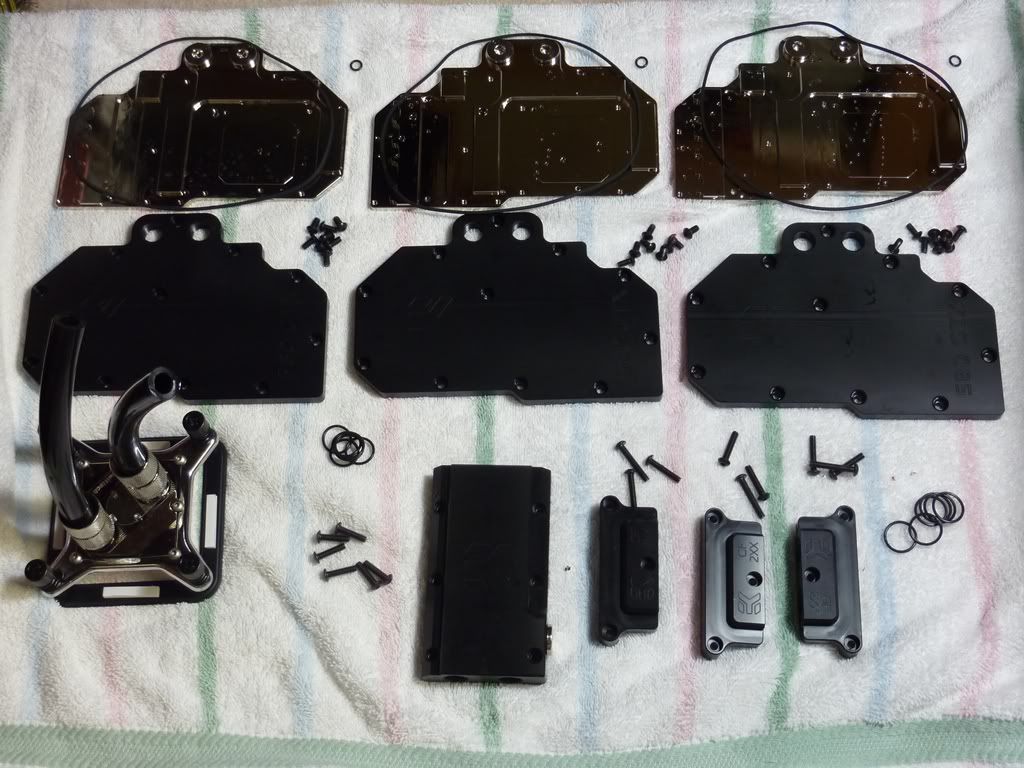
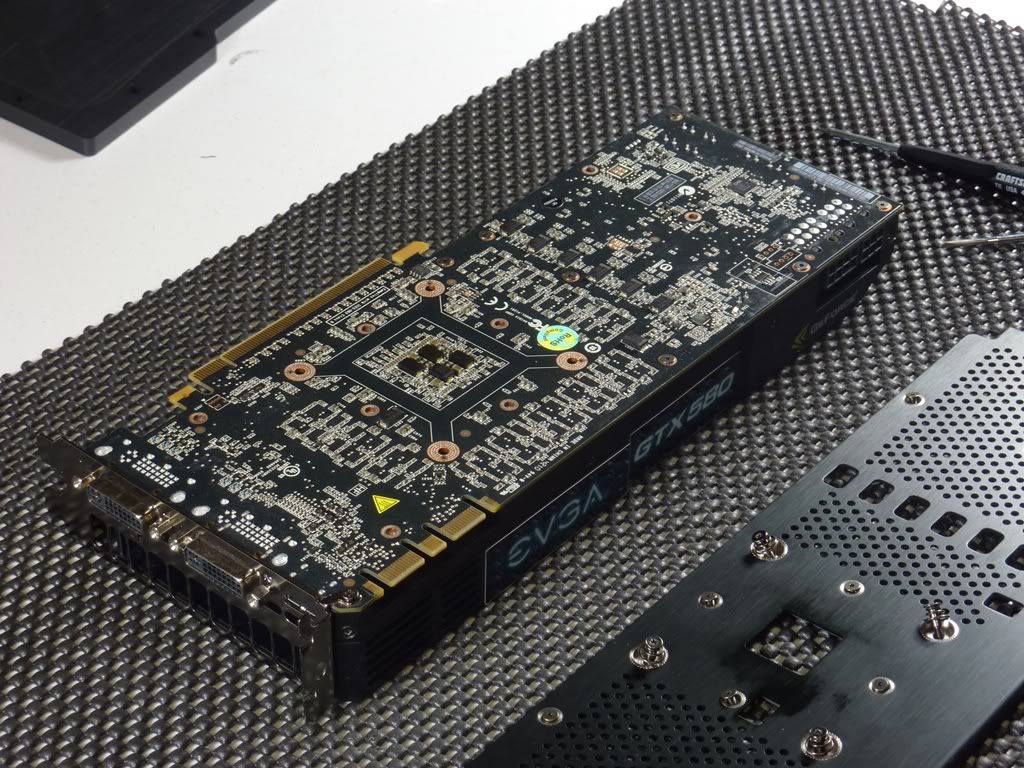
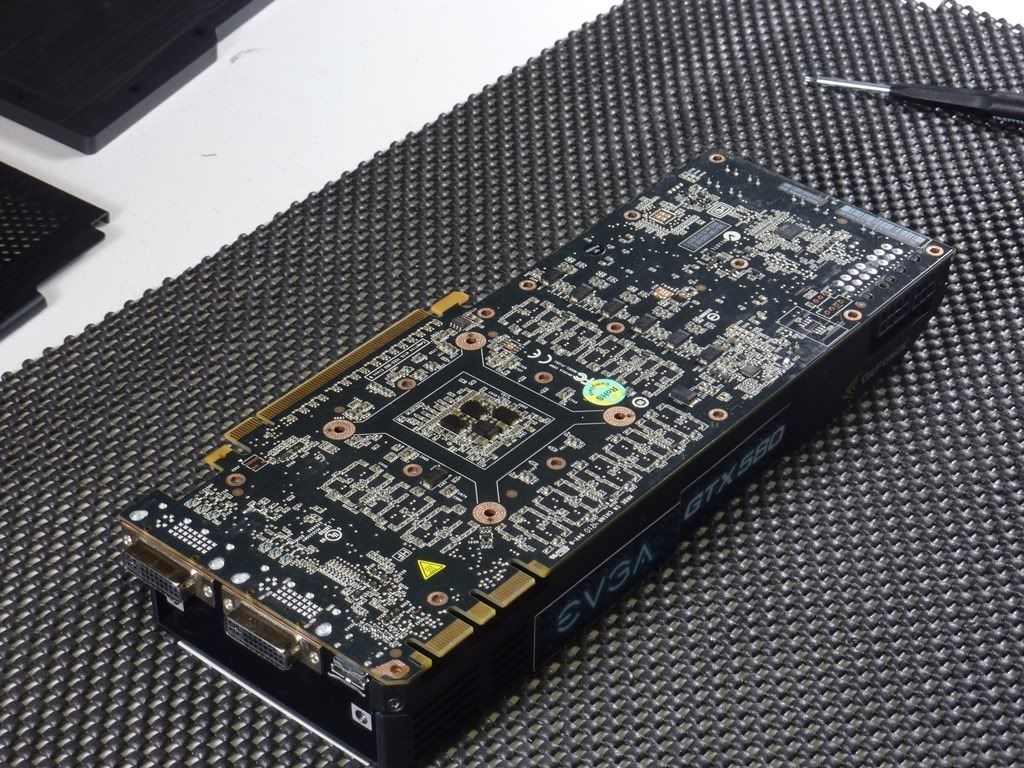
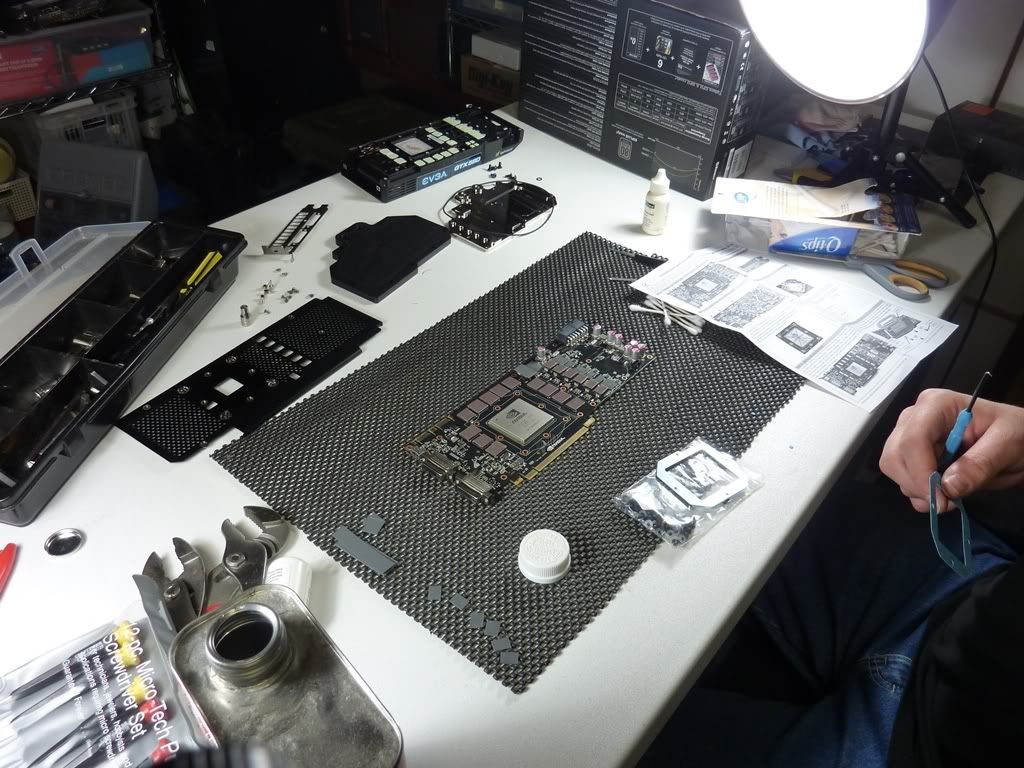
Next (based on dengyong's advice) I disassembled all the blocks to see if then filtered out anything from the rads during the 1st flush.
Top tip: if flushing from the tap like I did, put your blocks before your rads
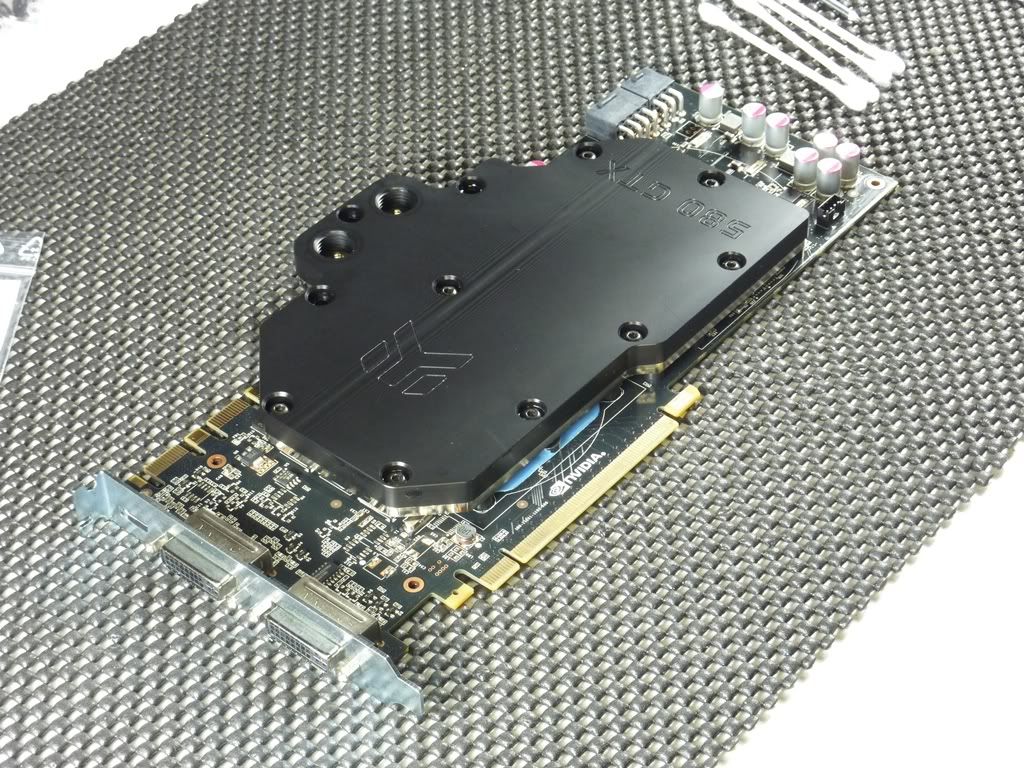
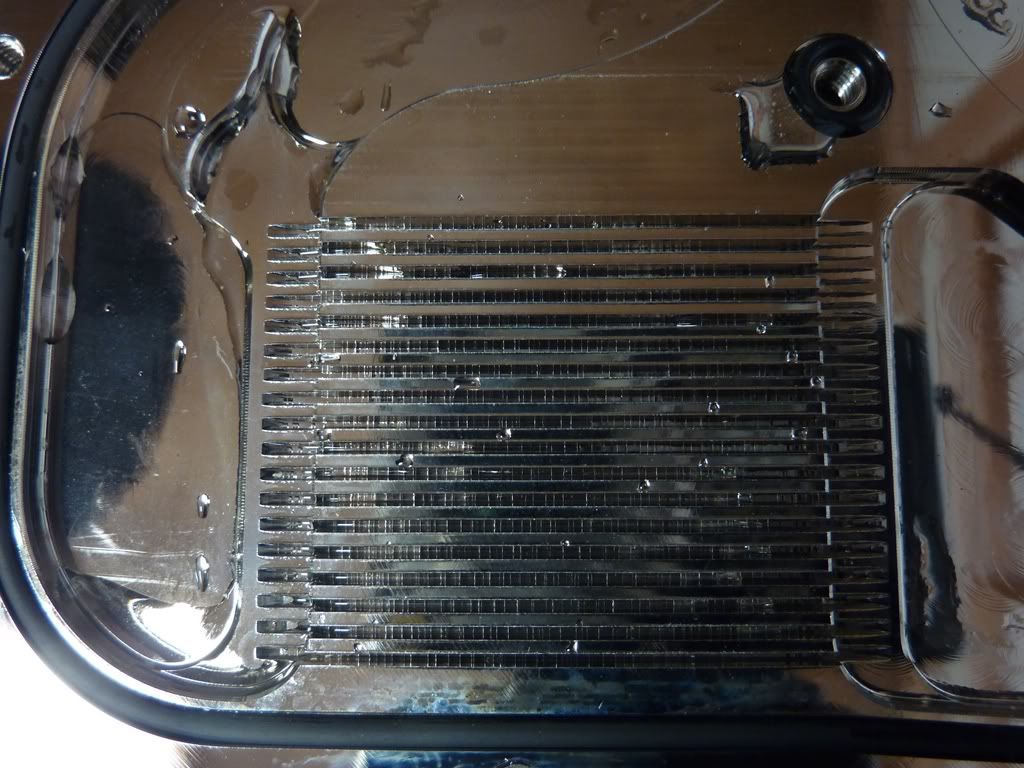
The CPU block was a mess, but the GPU block came out clean.
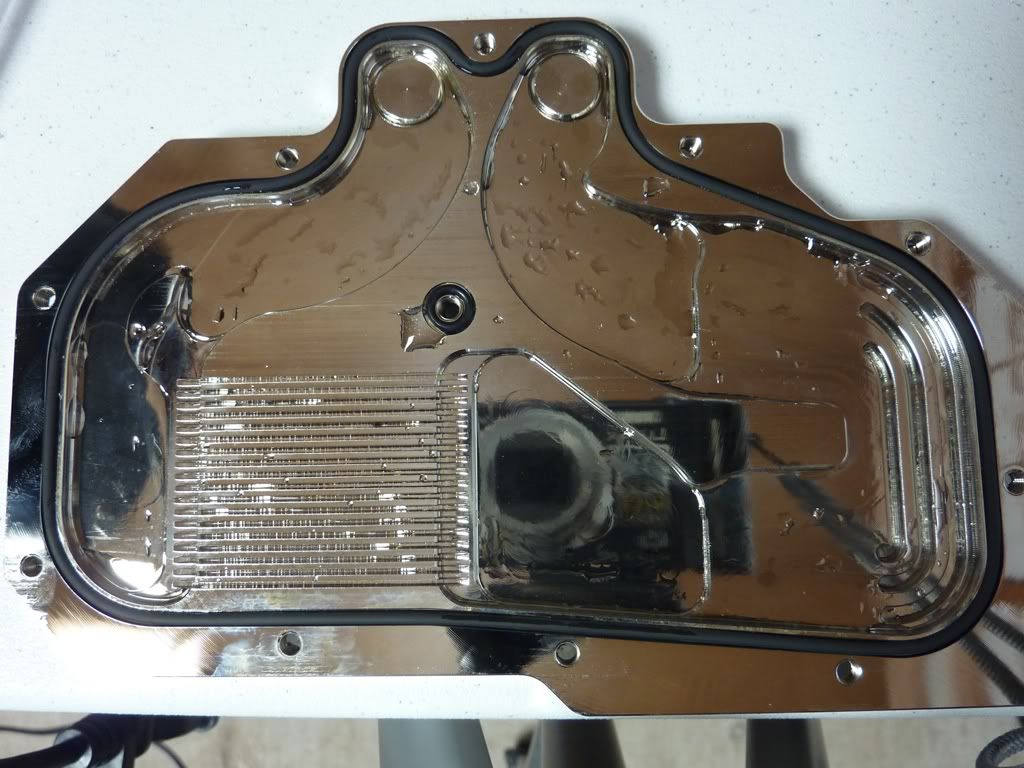
All disassembled
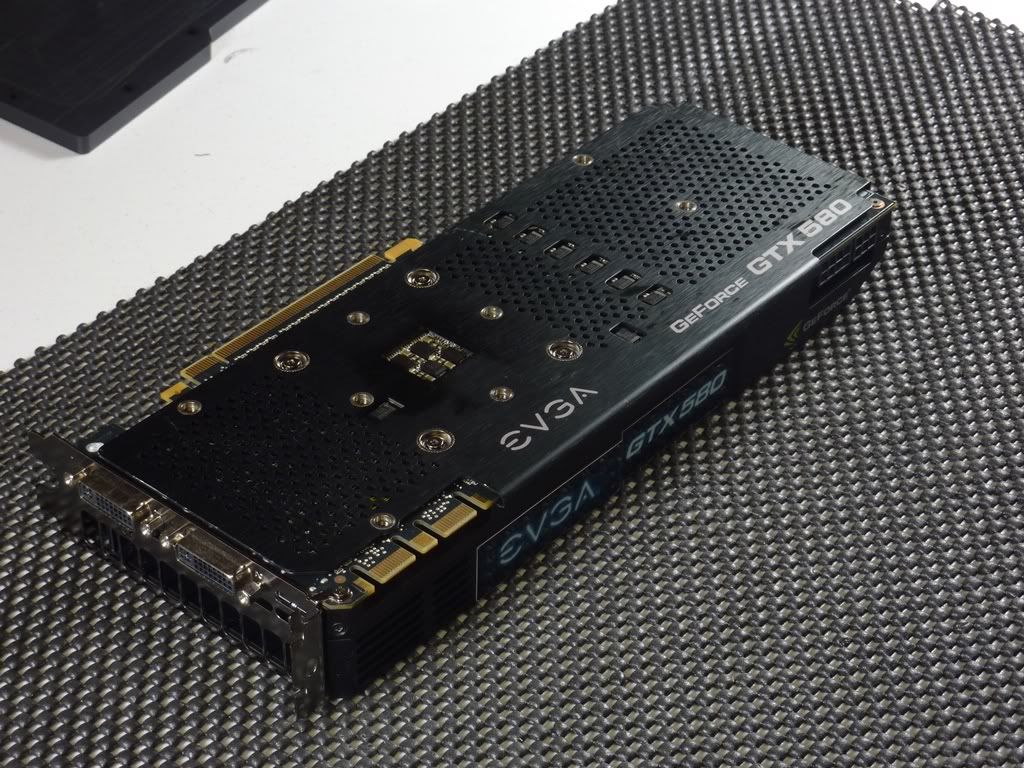
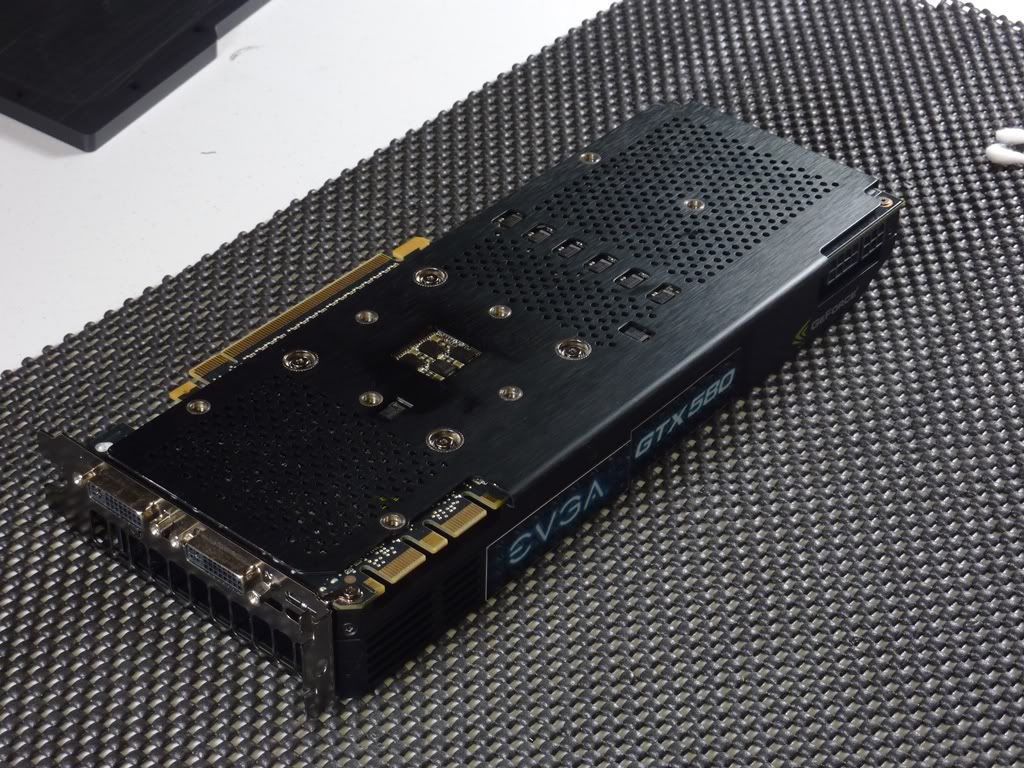
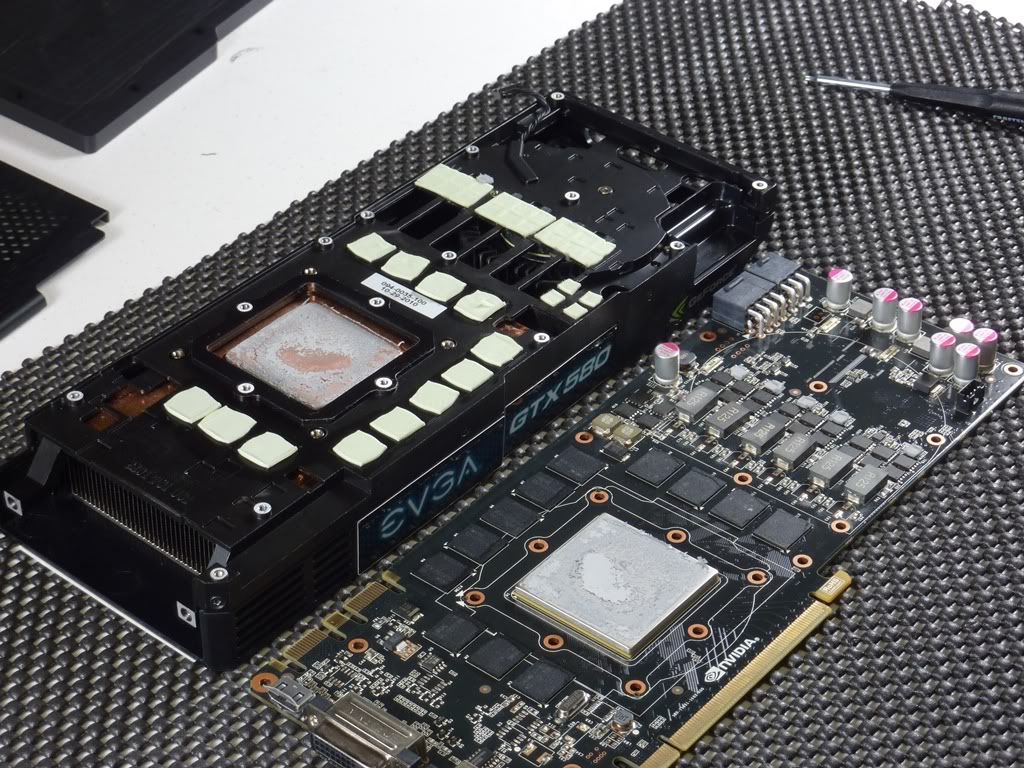
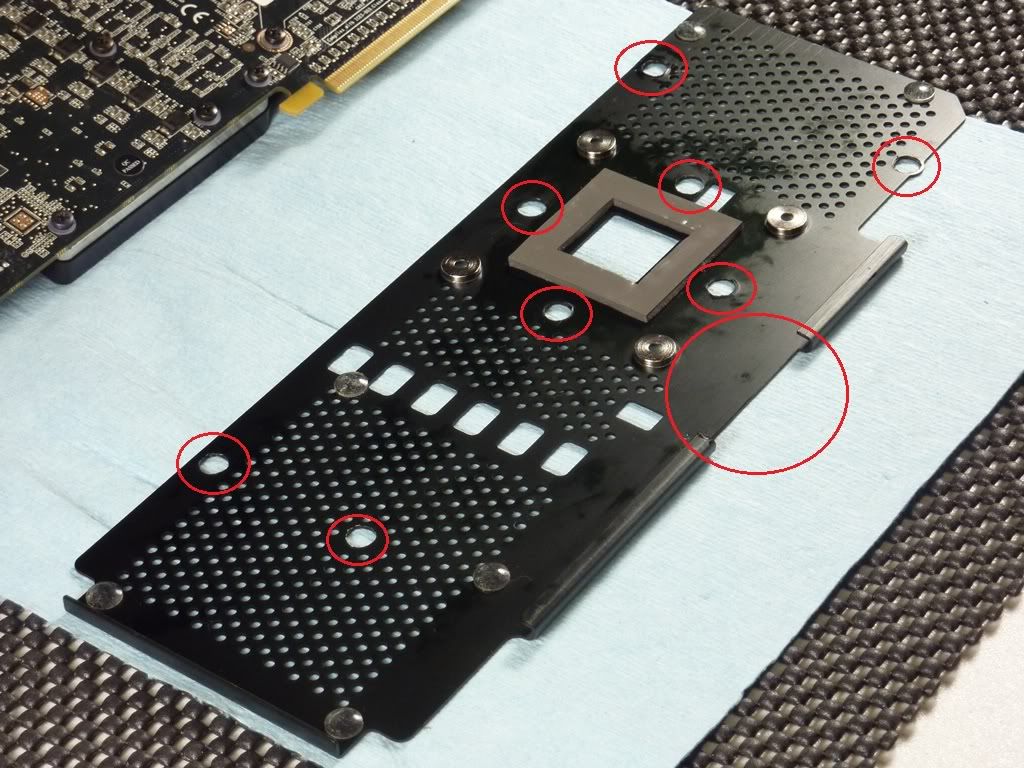
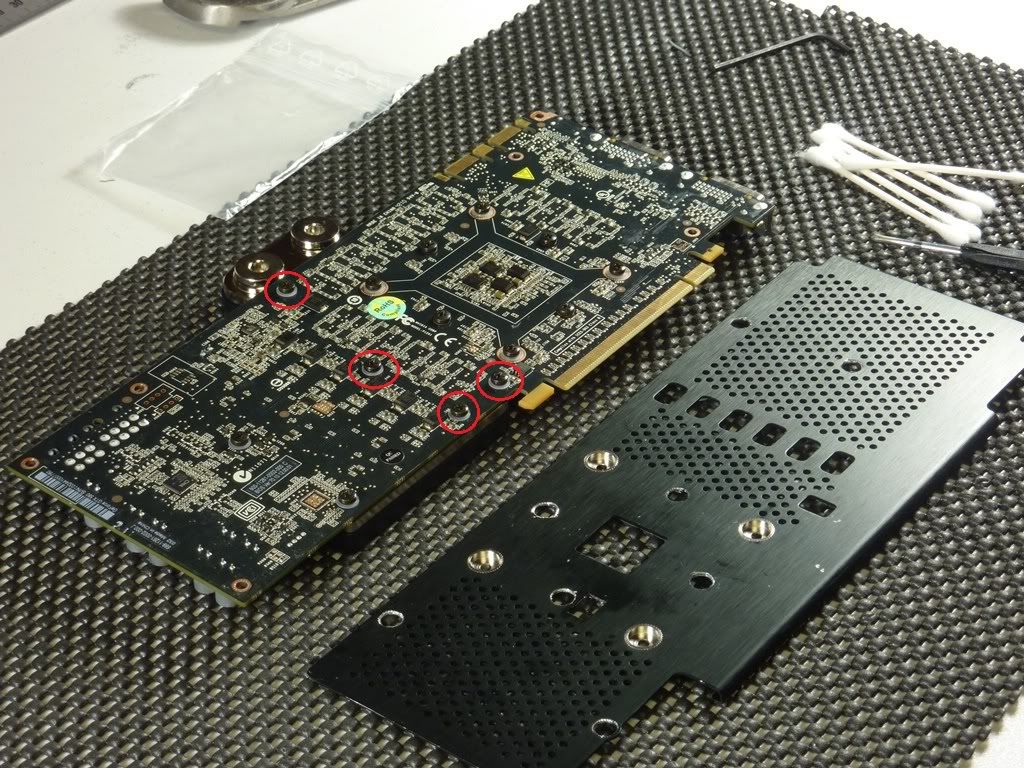
I have three eVGA backplates, and my intention was to use them in this build. But I didn't want the logos.
So with some acetone and a Q-tip, they were taken care of
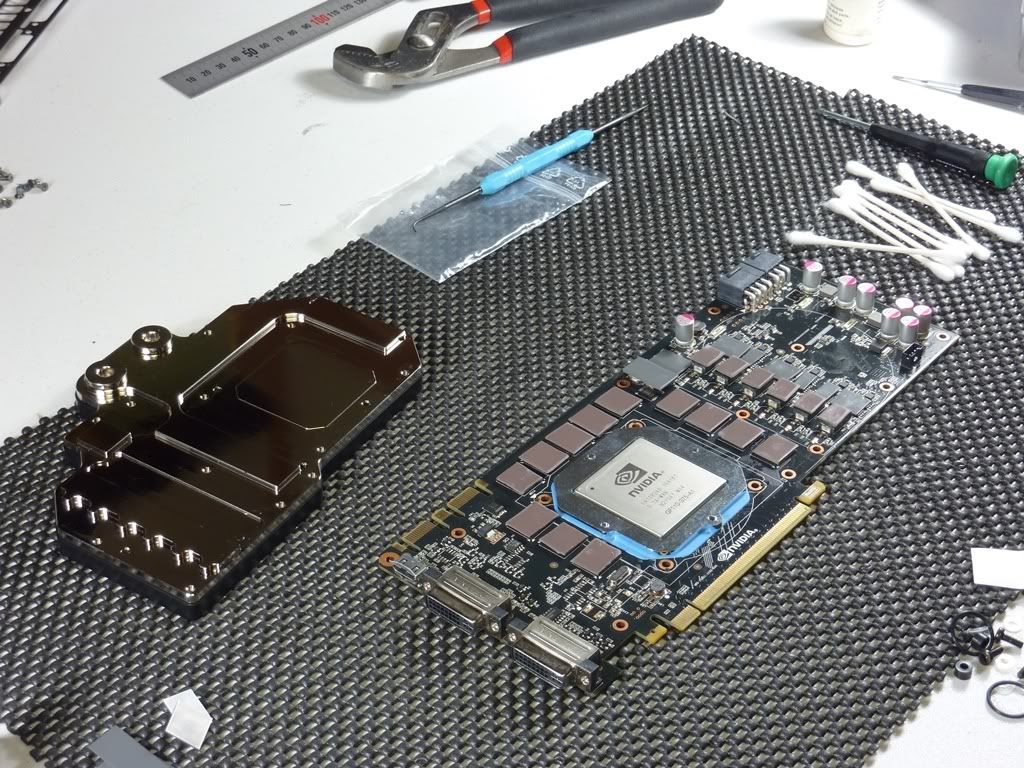
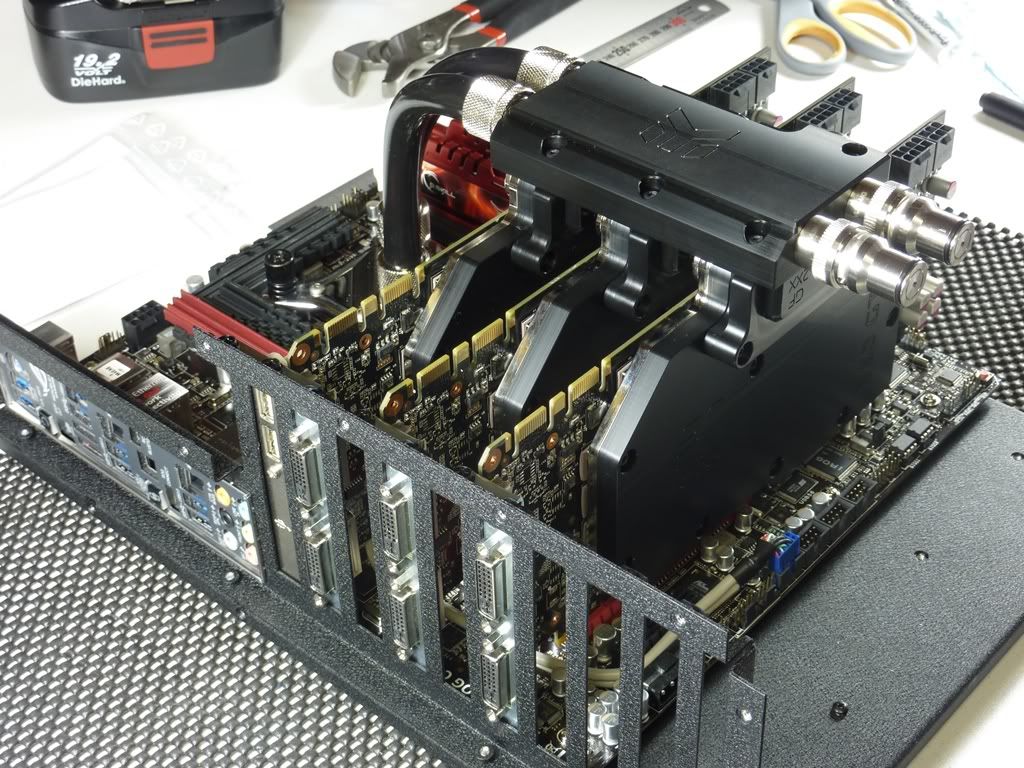
GPU block mounting (self explanatory)
Now the time came for the backplate mounting, but it seems the eVGA backplates are not compatible with the EK block. The mounting screw heads are too big for the backplate mounting screw receptacle. So I drilled them out (except for the four corners of the GPU, which are big enough), and touched up the holes with a permanent marker (picture taken prior to black touch-ups)....but even still the backplate would not go one due to interference with the water block inlets/outlets
Any opinions? Should I modify the backplates again to make room for the water block, or should I abandon them?
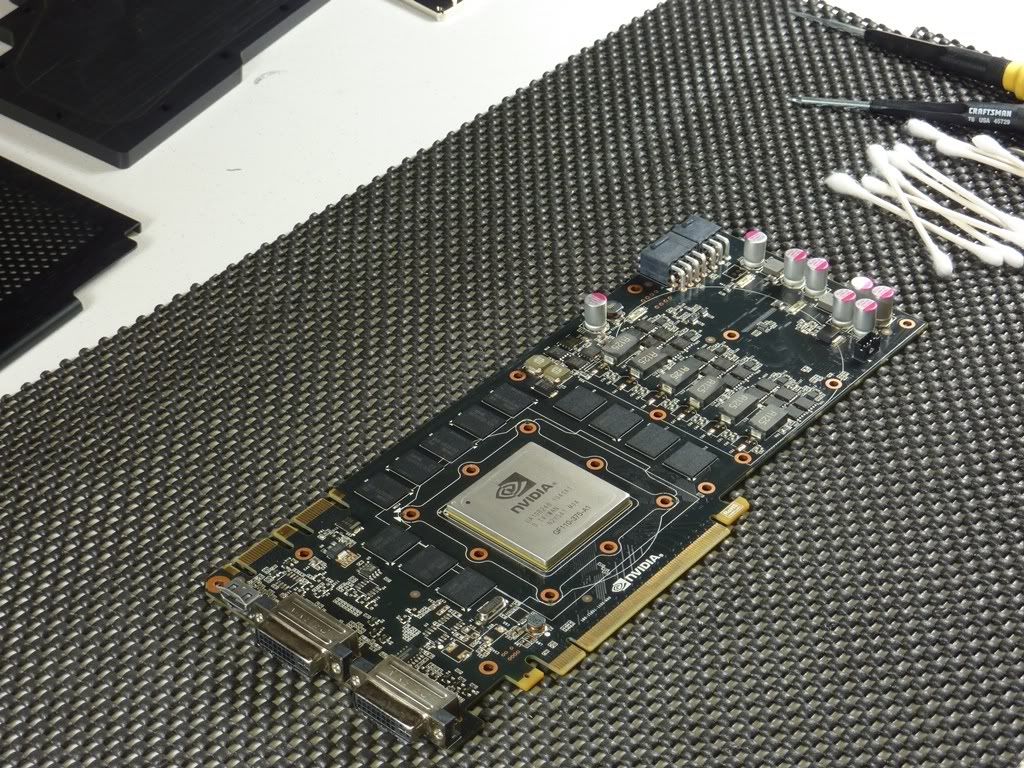
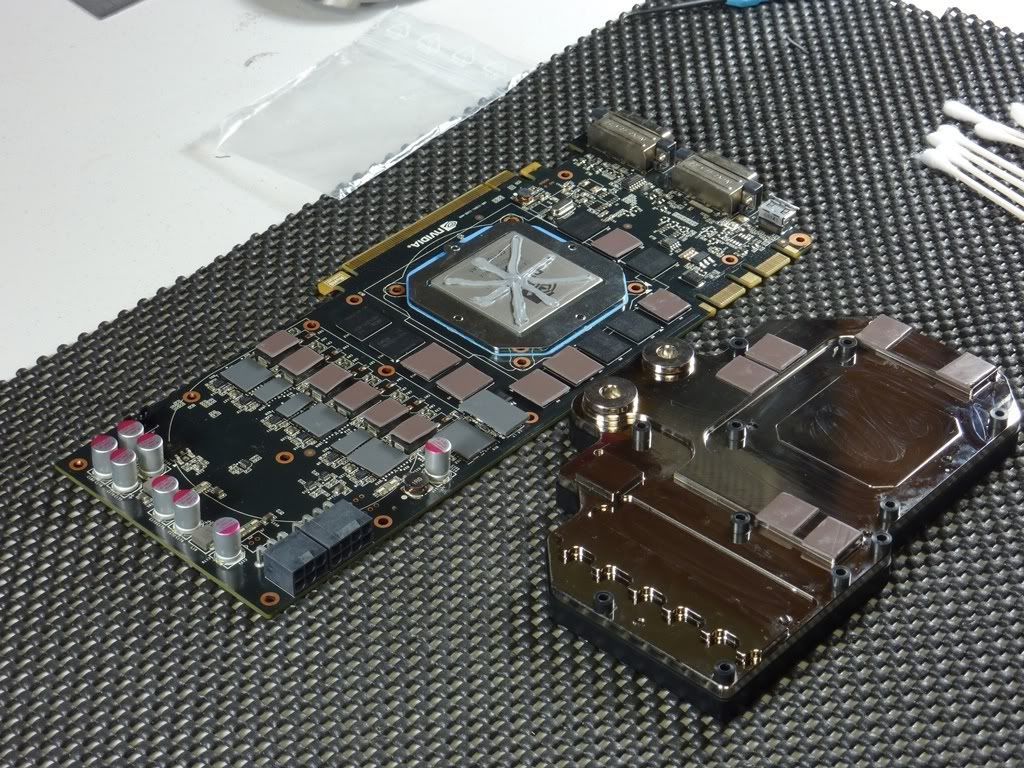
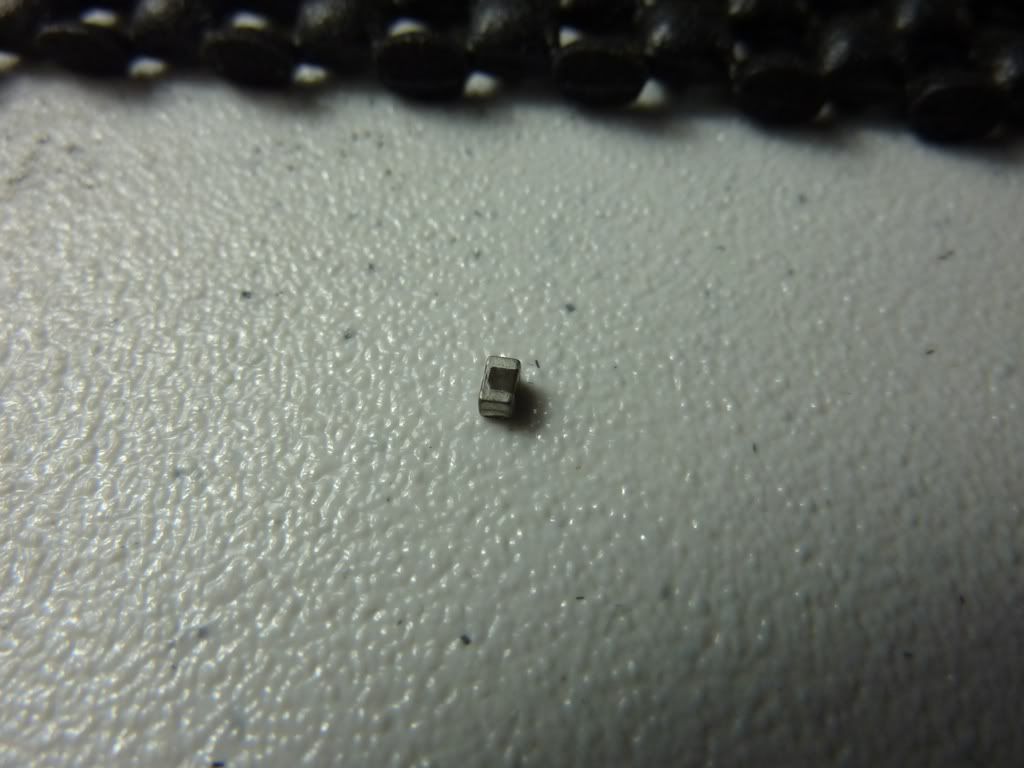
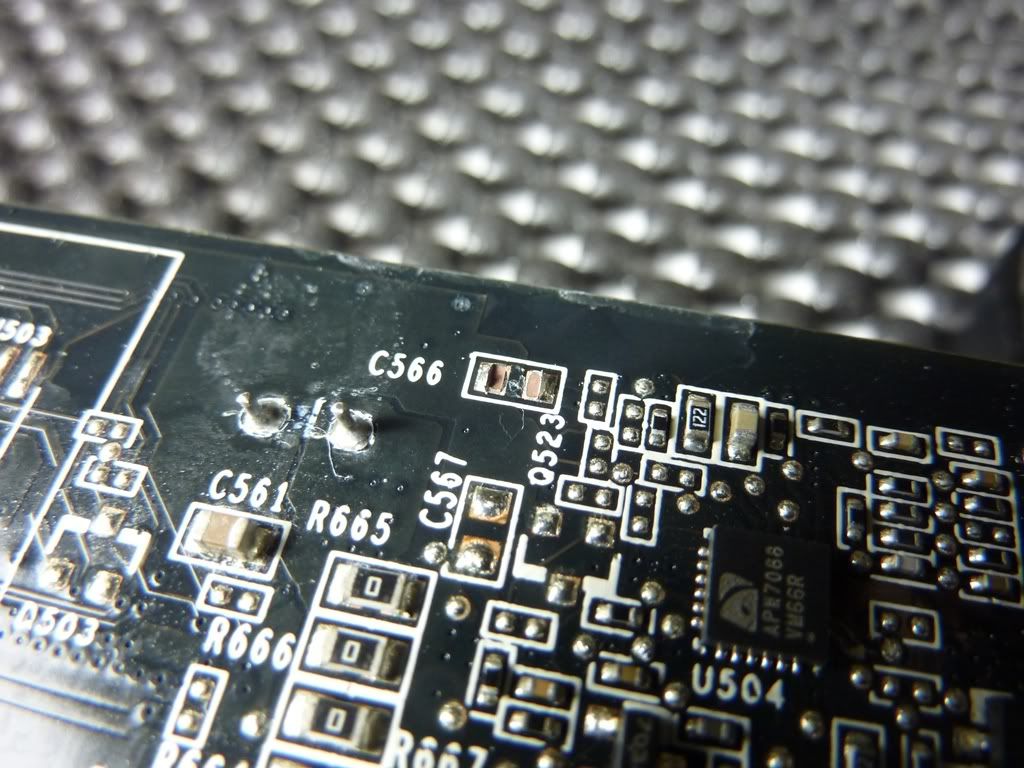
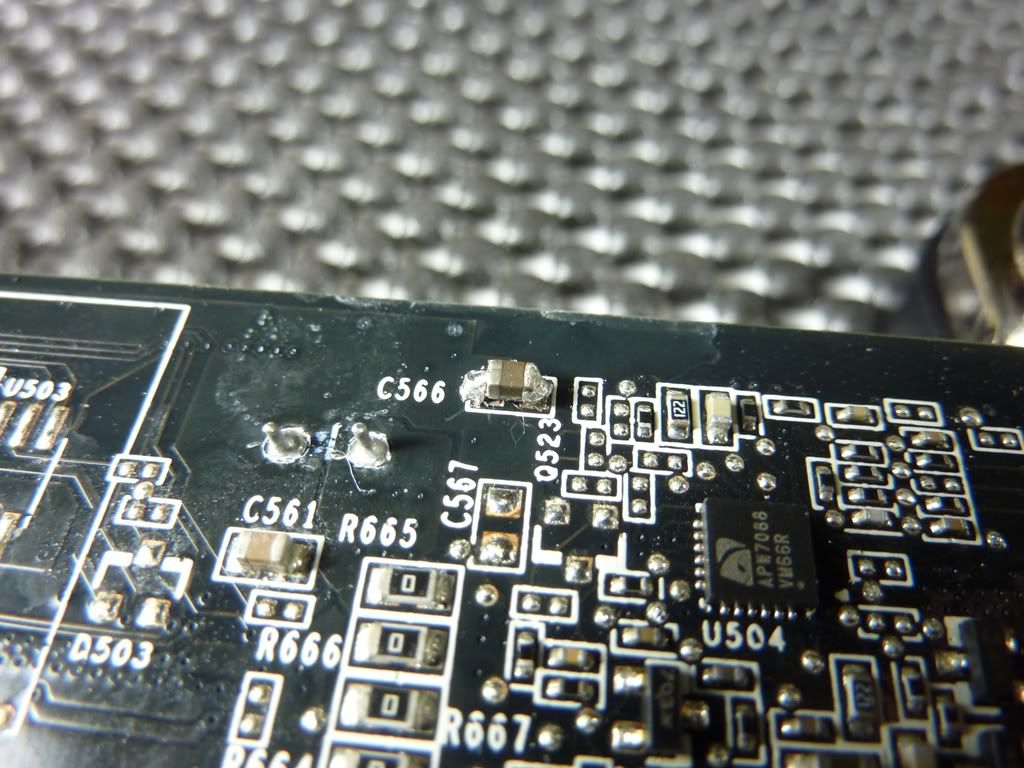
Next, I flipped over the card and heard something hit the table....it was this:
Uh oh, I thought....where did that come from. After scouring the card for a couple minutes, I found the resistor's home
...and promptly soldered it back
So, two cards are now done, and I'll have the third finished shortly....I'll post another update later today
Last edited by miahallen; 05-19-2011 at 04:08 PM.
[CENTER]The post counter is not an intelligence meter!
MAX11L - "It's like a console...with the suck turned down and the awesome turned up" -tet5uo
Heat Team IRONMODS
I didn't know EK was using straight fins in the 580 block. I've got one on my 580 and it's by far the coolest running video card I've ever owned. (using TX-4 spread thin)
I love this build, very inspirational. I have been wanting to turn my desk into a case for a while now, but I haven't figured out how I want to do it. Now back to the build log, you said the backplate does not fit because of the fitting holes? Can you trim the backplate to fit it? Quick question about your PMW controller, isn't the purpose of the PMW controller is to adjust the speed of the fans based on the load? So what do you have the PMW connected to on the MB? Just a fan header? If so, then why the RPM monitoring from the fans themselves?
CPUID http://valid.canardpc.com/show_oc.php?id=484051
http://valid.canardpc.com/show_oc.php?id=484051
http://valid.canardpc.com/show_oc.php?id=554982
New DO Stepping http://valid.canardpc.com/show_oc.php?id=555012
4.8Ghz - http://valid.canardpc.com/show_oc.php?id=794165
Desk Build
FX8120 @ 4.6Ghz 24/7 / Asus Crosshair V /HD7970/ 8Gb (4x2Gb) Gskill 2133Mhz / Intel 320 160Gb OS Drive, WD 256GB Game Storage
W/C System
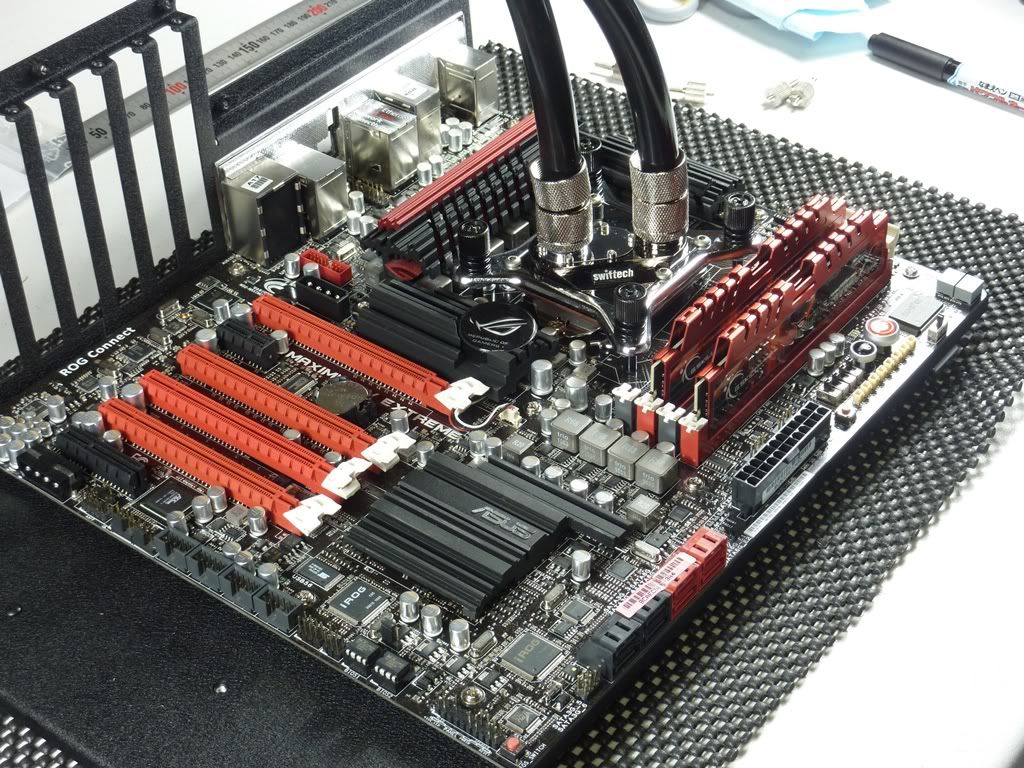
(CPU) Swiftech HD (GPU) EK HD7970 with backplate (RAM) MIPS Ram block (Rad/Pump) 3 x Thermochill 120.3 triple rads and Dual MCP355's with Heatkiller dual top and Cyberdruid Prism res / B*P/Koolance Compression Fittings and Quick Disconnects.
Its the new design....Eddy says its good for up to a 5C improvement
[CENTER]The post counter is not an intelligence meter!
MAX11L - "It's like a console...with the suck turned down and the awesome turned up" -tet5uo
Heat Team IRONMODS
You can open up the holes for M3 screws (get longer-round head stainless screws,you will need to different lengths ) under-cut the backplate behind the fittings if you have to
and you good to go,it looks and it feels better once you install them ;
Uploaded with ImageShack.us
Last edited by coolhandluke41; 05-19-2011 at 06:52 PM.
Thanks Luke, that looks great....I may have to give it another shot later
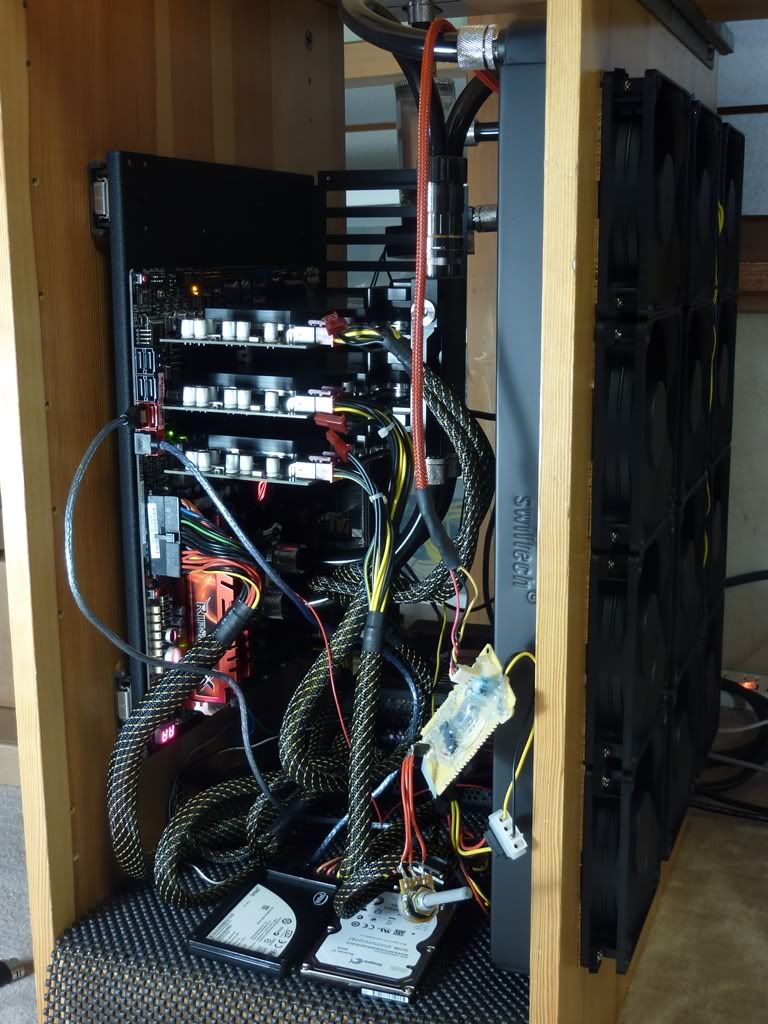
The rig is up and running
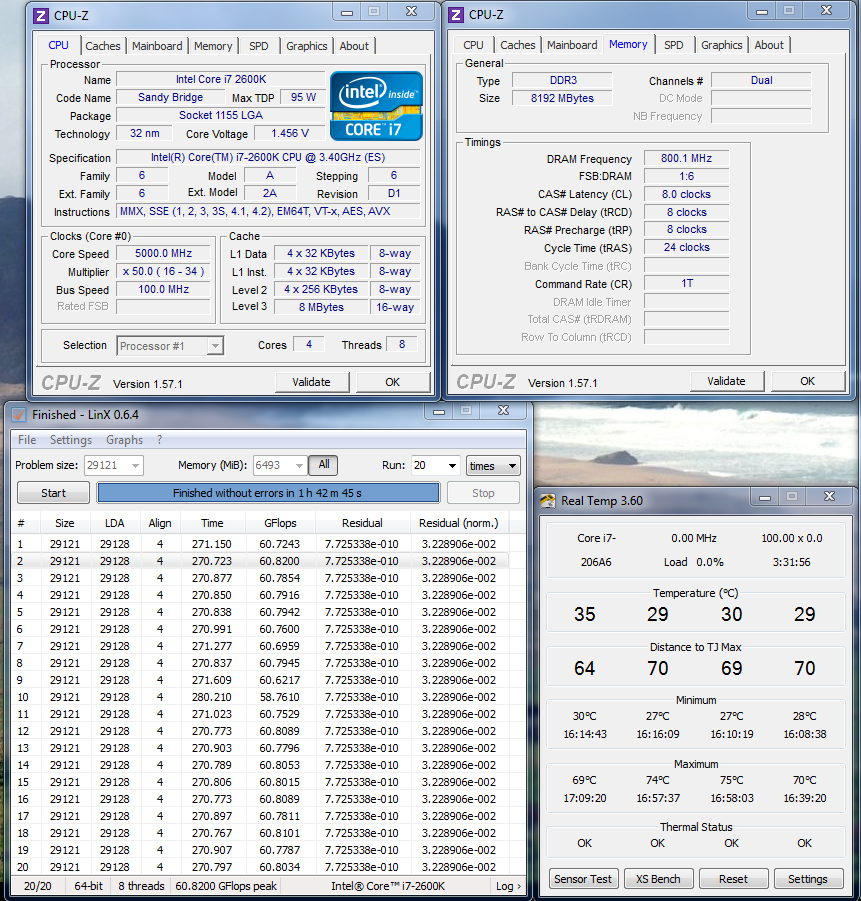
The CPU is stress testing right now about 20C cooler than on air (mid 50s at 4.6GHz). This seems to support my theory that the CPU block would get plenty of flow....but I have more testing to know for sure.
Here are a few more pics to bring you all up to speed.
I did these modifications to the backplate:
But these four screws were still in the way and making the backplate bulge....
so I could have looked for some with smaller heads to use instead (but I didn't find any in my shop), or I could cut the backplate to try to allow them space...this is the route I went, but the backplate got a bit chewed up in the process. Oh well, it wasn't meant to be
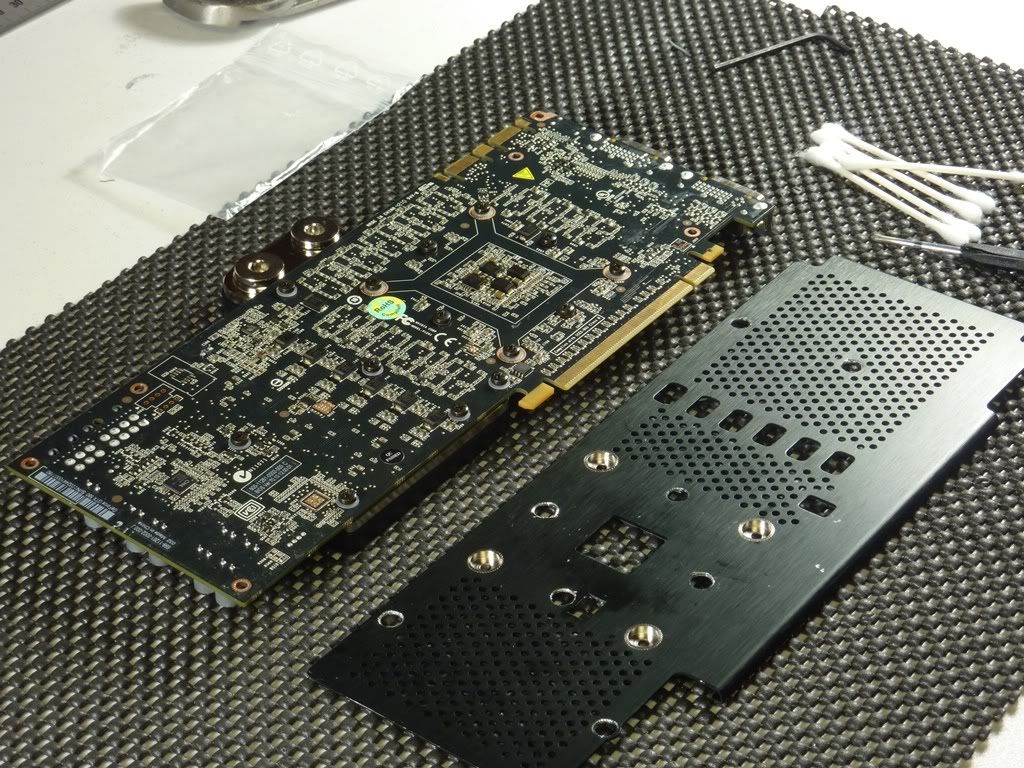
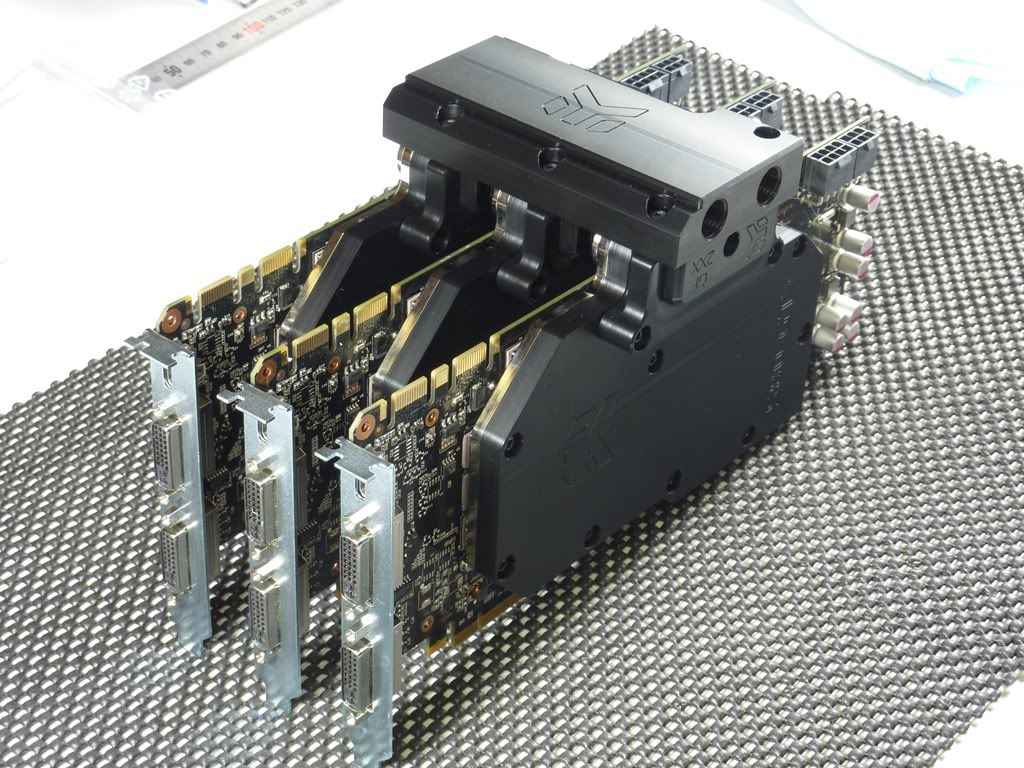
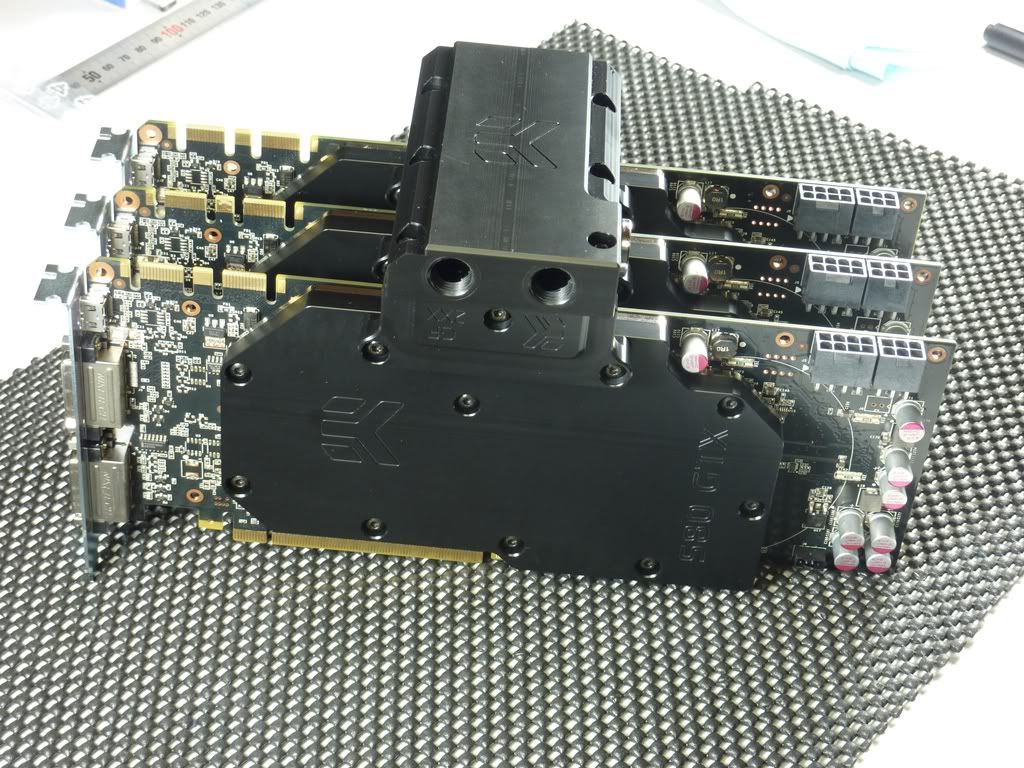
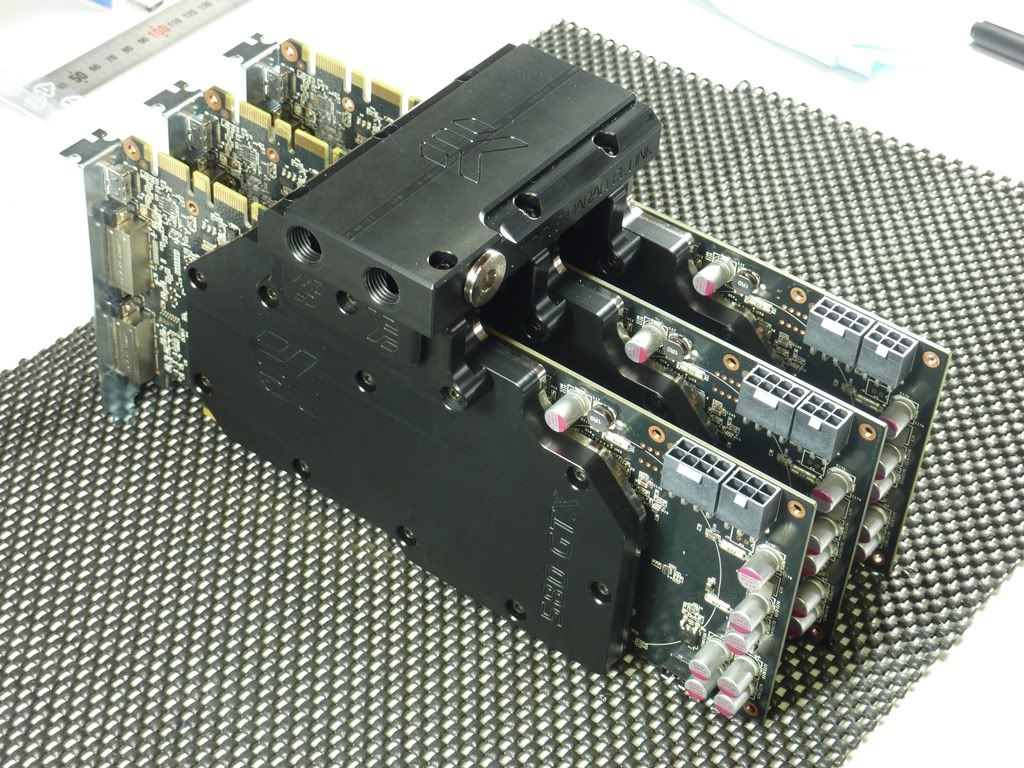
So, the GPU block now looks like this:
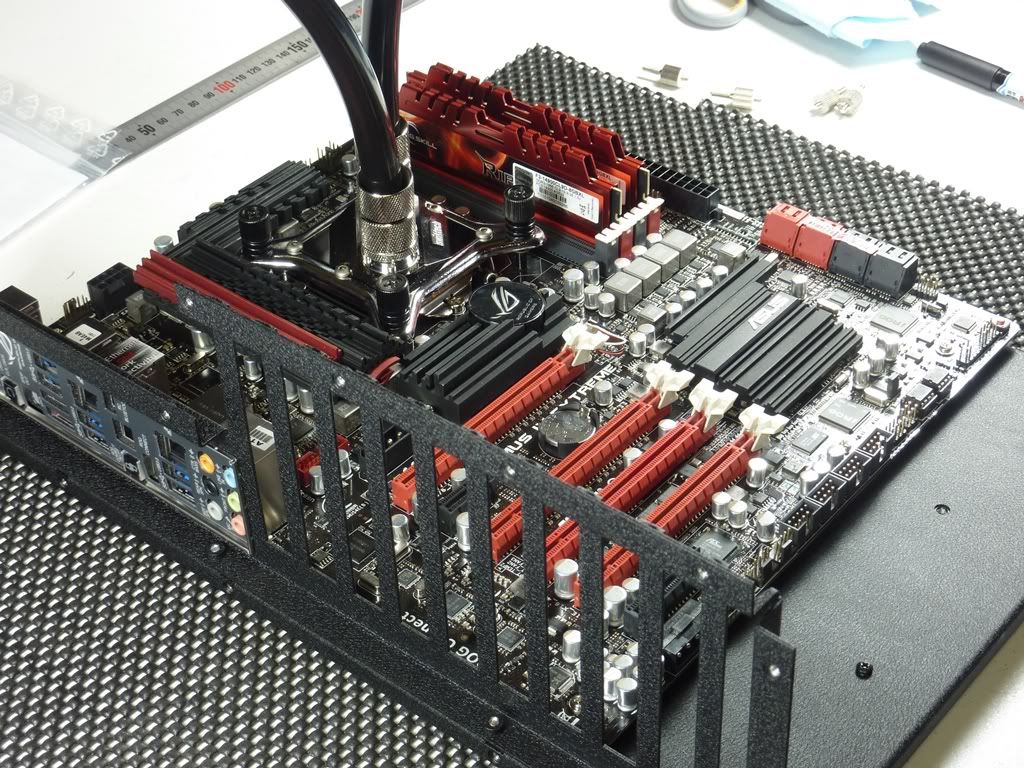
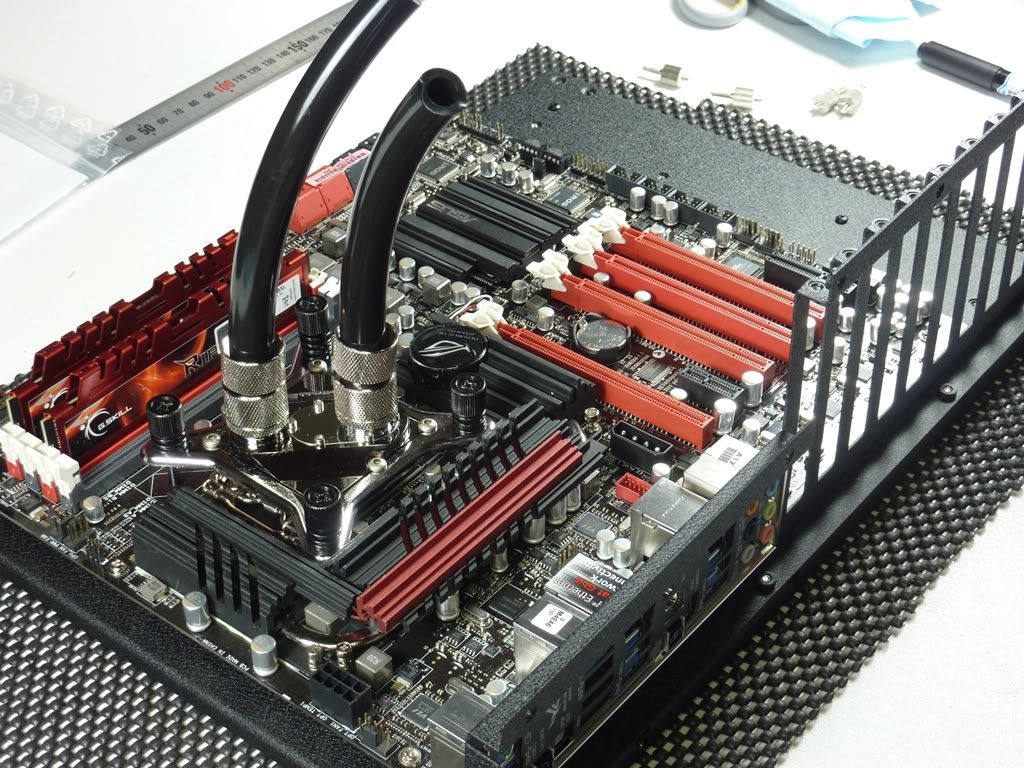
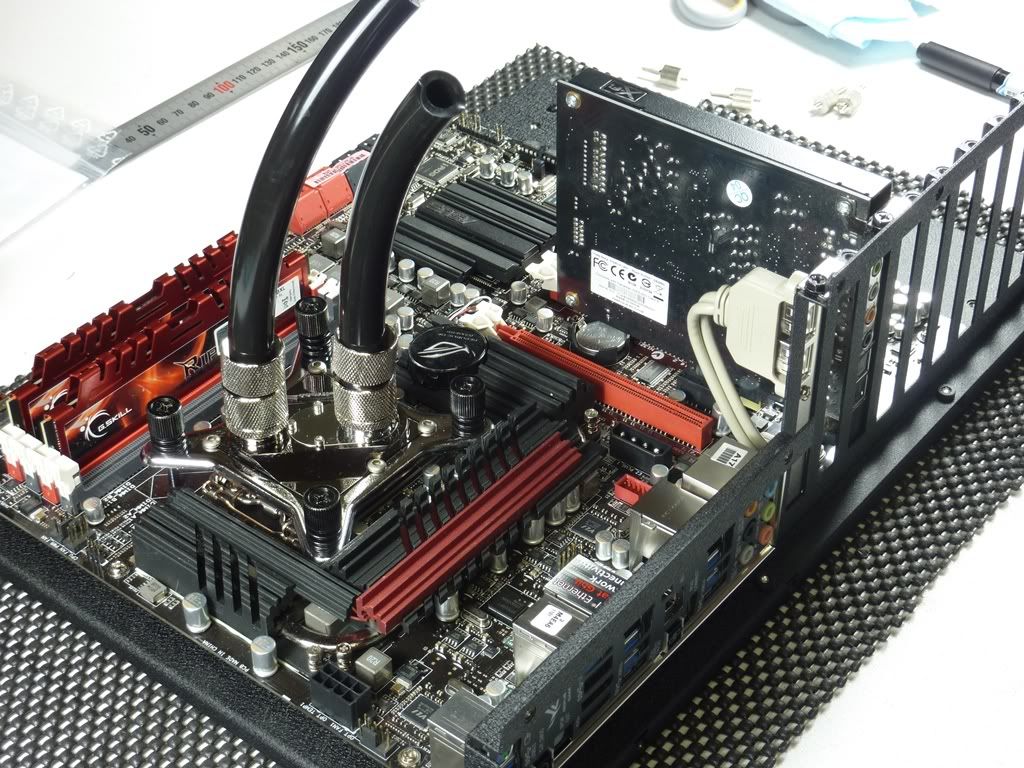
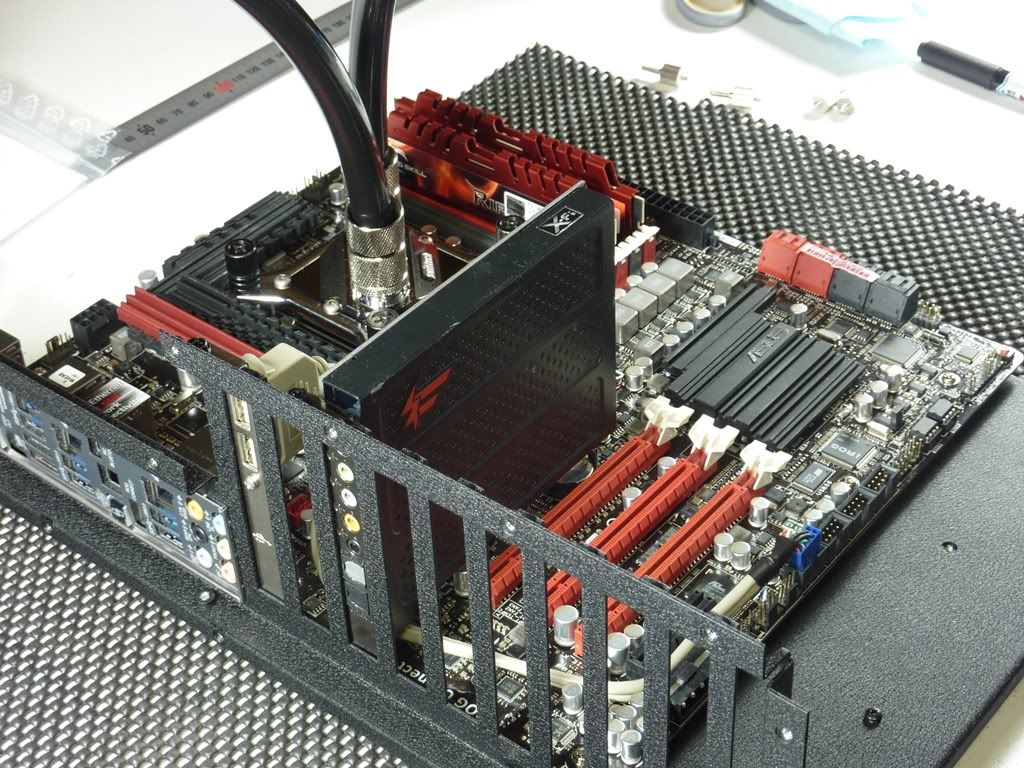
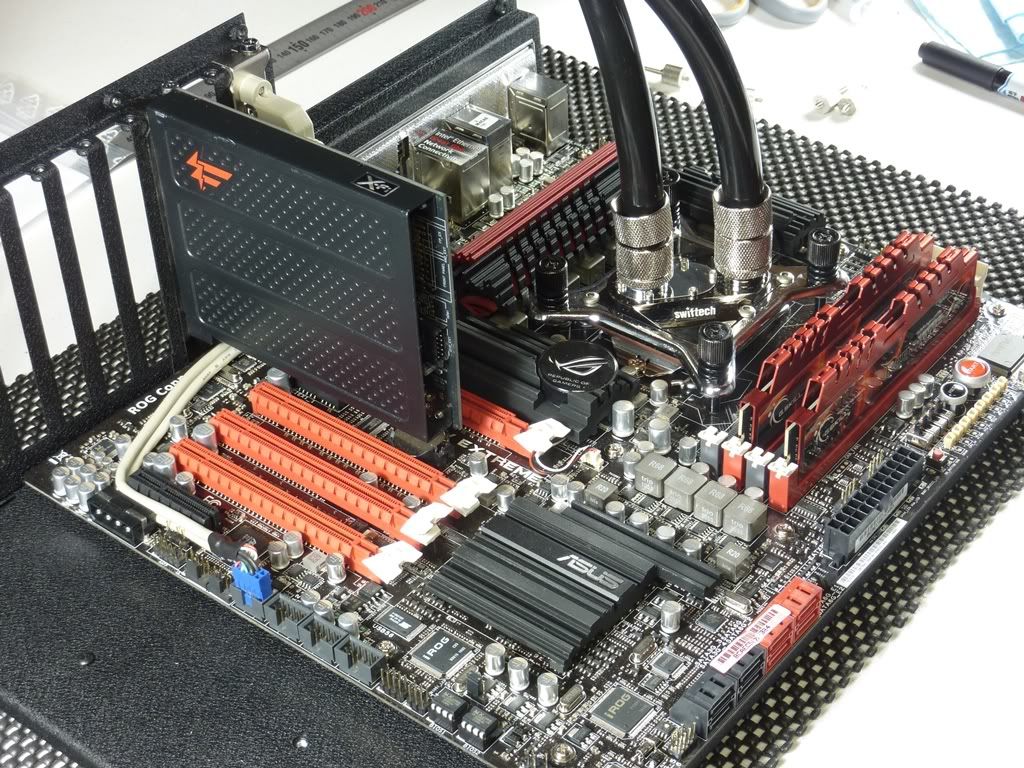
And my 1st assembly of the system with water cooling gear looked like this.
I had been planning to use an X-Fi soundcard for this build....
But apparently, the EK SLI bridge prevents the use of normal height PCI/PCIe cards
I may remove the bridge later and use normal SLI fitting instead, but for now, I'll just use onboard audio.
As I mentioned earlier, the fans are all working well, and I'm getting a reading of 400RPM at minimum (and virtually silent), and 2600RPM at full tilt
Last edited by miahallen; 06-13-2011 at 03:41 AM.
[CENTER]The post counter is not an intelligence meter!
MAX11L - "It's like a console...with the suck turned down and the awesome turned up" -tet5uo
Heat Team IRONMODS
Some initial thoughts about my PWM fan wall:
At 0% the fans are barely spinning at around 400 RPM and dead silent......and I still get GREAT cooling
At 100% the fans are all spinning at 2600RPM and the noise level is much higher.....but its a very "whooshy" sound, lots of wind noise, and none of that annoying high pitched squeeling or anything
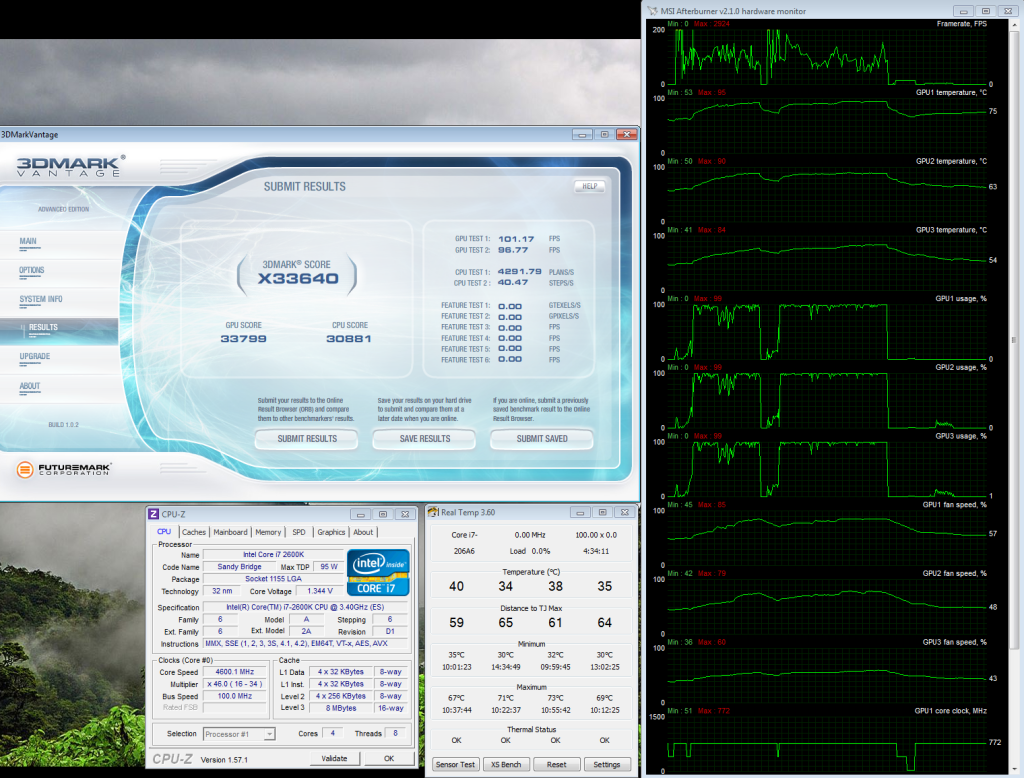
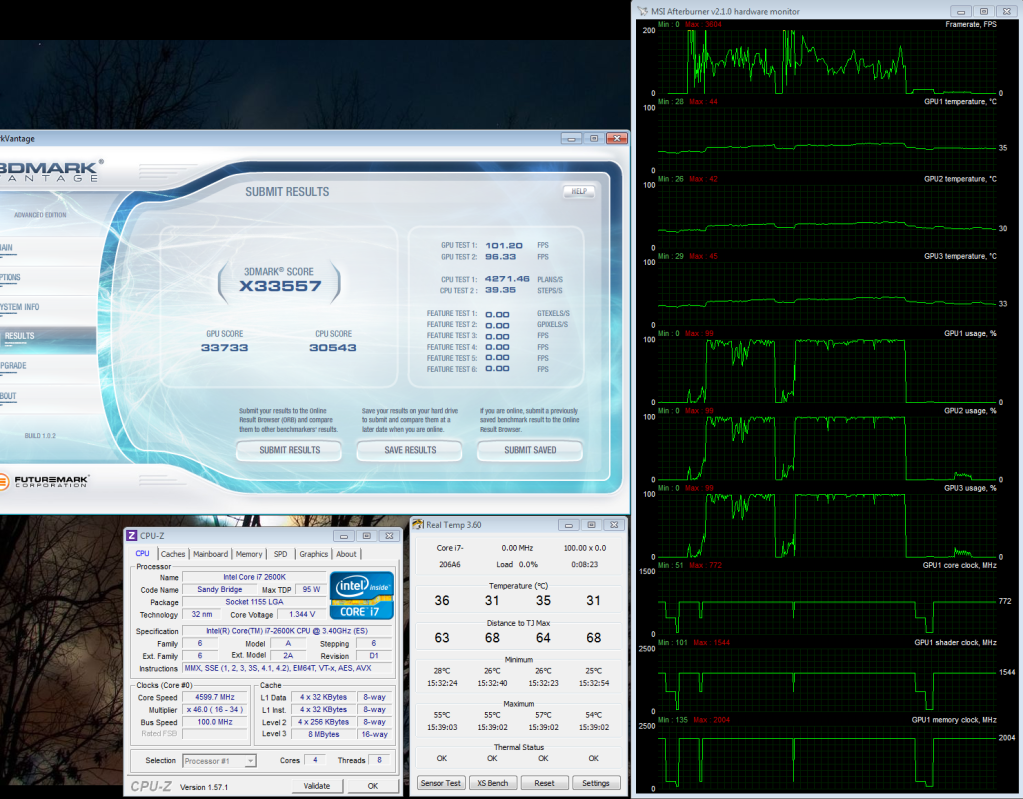
I'm stressing my 2600K at 5GHz right now with fans at minimum...at the wall, the power draw is about 650W....when I crank up the fans to max, the draw shoots up to over 800W150W just for fans
http://www.youtube.com/watch?v=JodFluDnrrk
[CENTER]The post counter is not an intelligence meter!
MAX11L - "It's like a console...with the suck turned down and the awesome turned up" -tet5uo
Heat Team IRONMODS
that's... that's just nuts!
i7 2600k, 8GB 1866Mhz DDR3, GTX560 Ti, Gigabyte Z68XP-UD4, CM Cosmos 1000 Case, and some green crap everywhere.
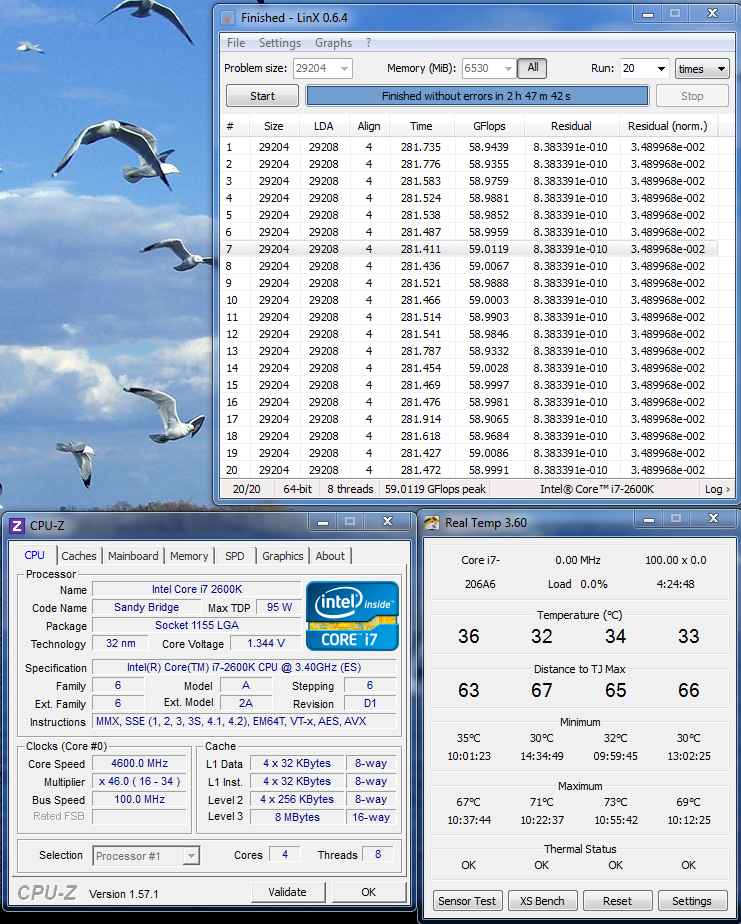
My rough goal was to keep the CPU under 75C for 20 passes of LinX with the fans at minimum speed, and the pump being temp controlled by the mobo.
CPU on air @ 4.6GHz - max temp - 67/71/73/69 (I realized 1/2 way through that my clock was an hour behind, which explains the 2+ hour stress test)
GPUs on air - max temp - 95/90/84
CPU on water @ 4.6GHz - max temp - 55/56/58/55 (thats in improvement of 12/15/15/14...and much quieter)
GPUs on water - max temp - 42/44/45 (thats an improvement of 53/46/39 degrees and MUCH MUCH quieter
CPU on water @ 5.0GHz - max temp - 69/74/75/70 (not finished yet)
[CENTER]The post counter is not an intelligence meter!
MAX11L - "It's like a console...with the suck turned down and the awesome turned up" -tet5uo
Heat Team IRONMODS
Looks like I was wrong in this case.
Those fans at full tilt sound like a swarm of bees.
Work continues, slowly but surely.
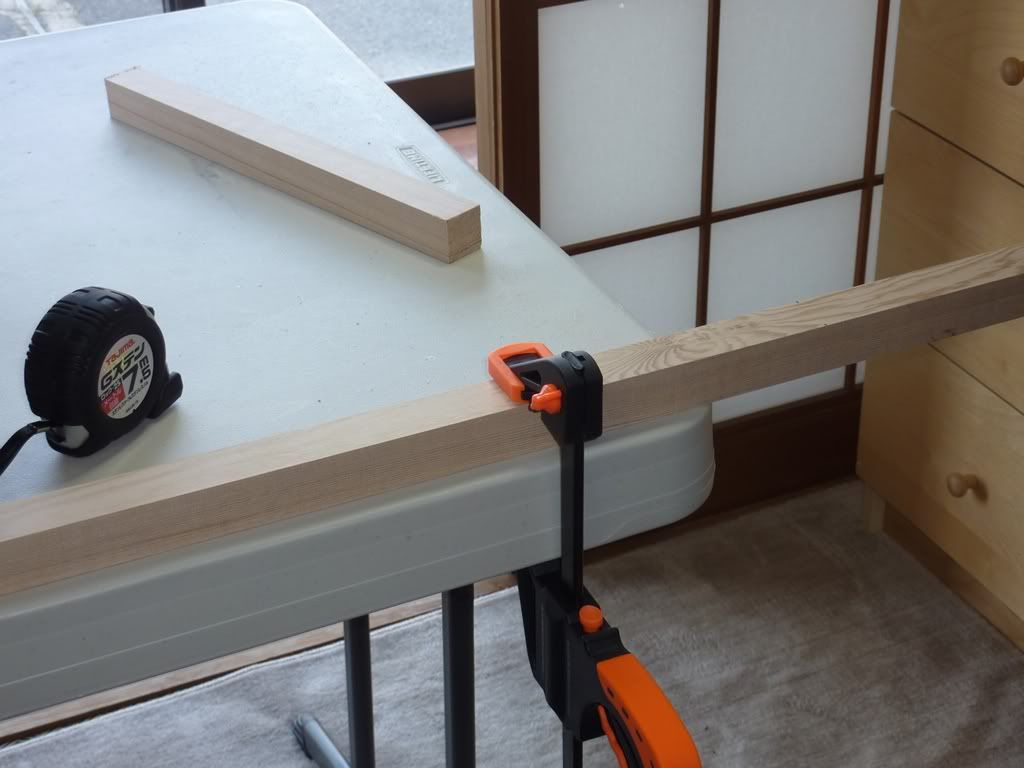
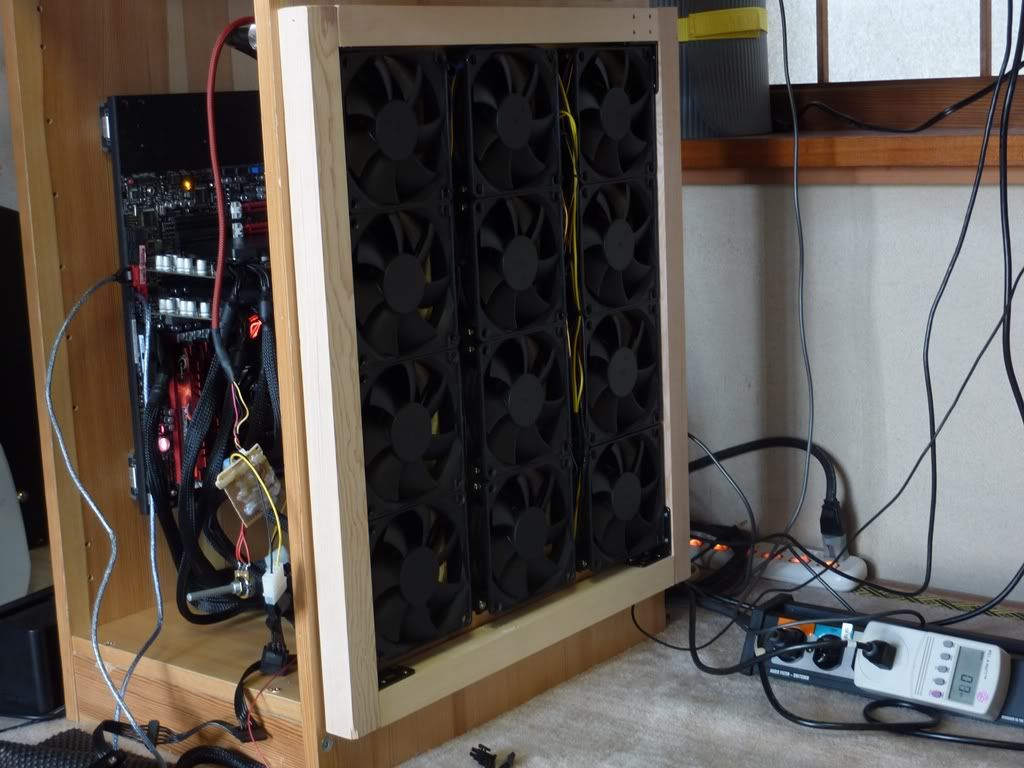
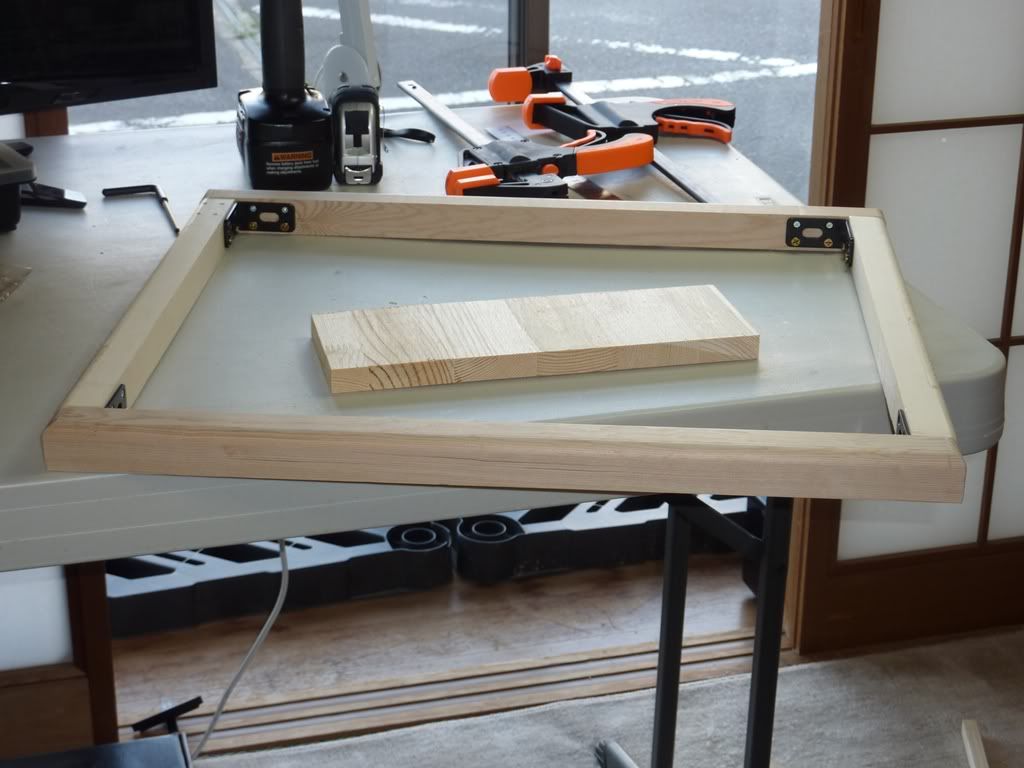
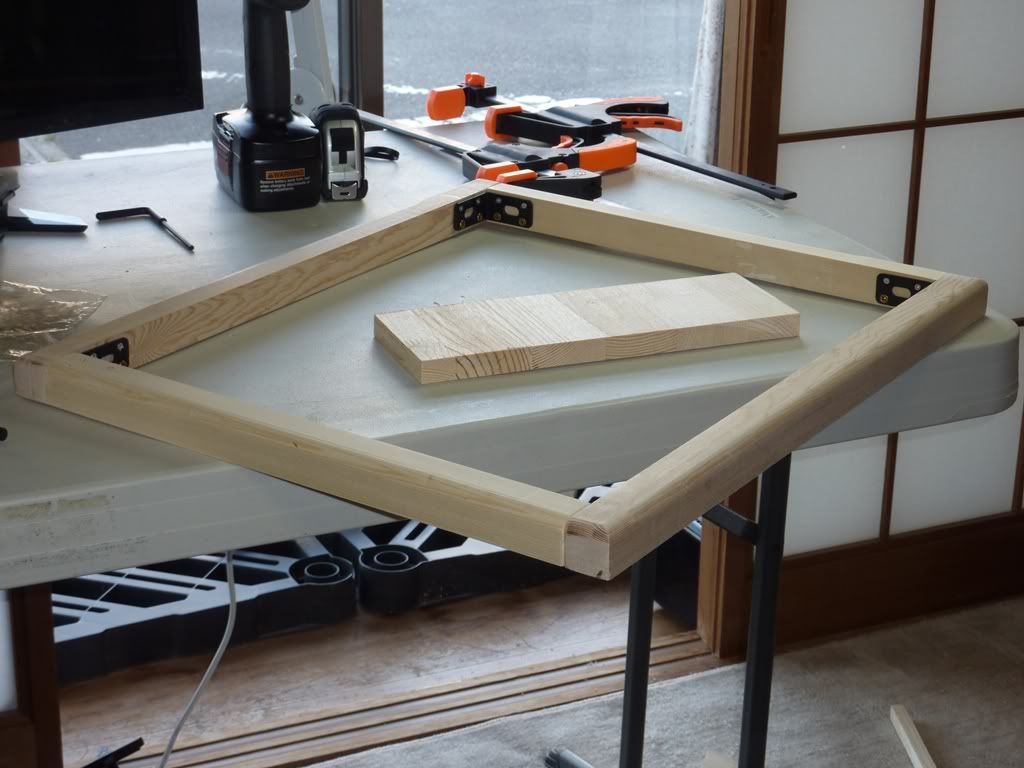
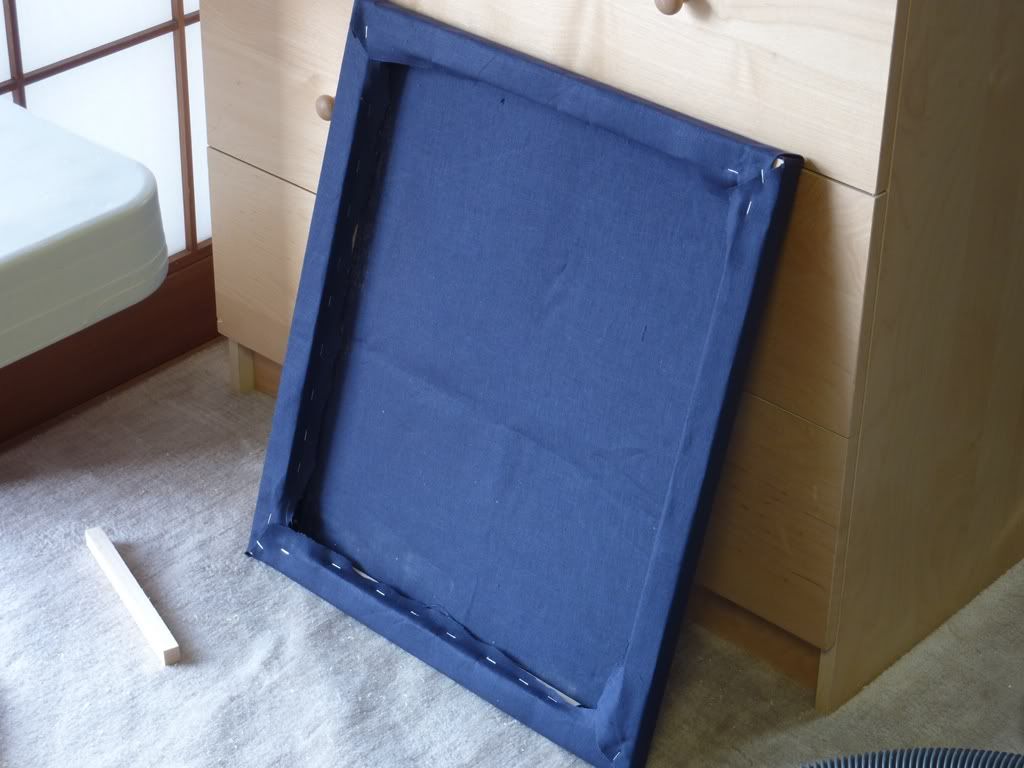
Yesterday I worked on the dust filter for the fans....unfortunately, it's not gonna cut it. But I'm getting ahead of myself.
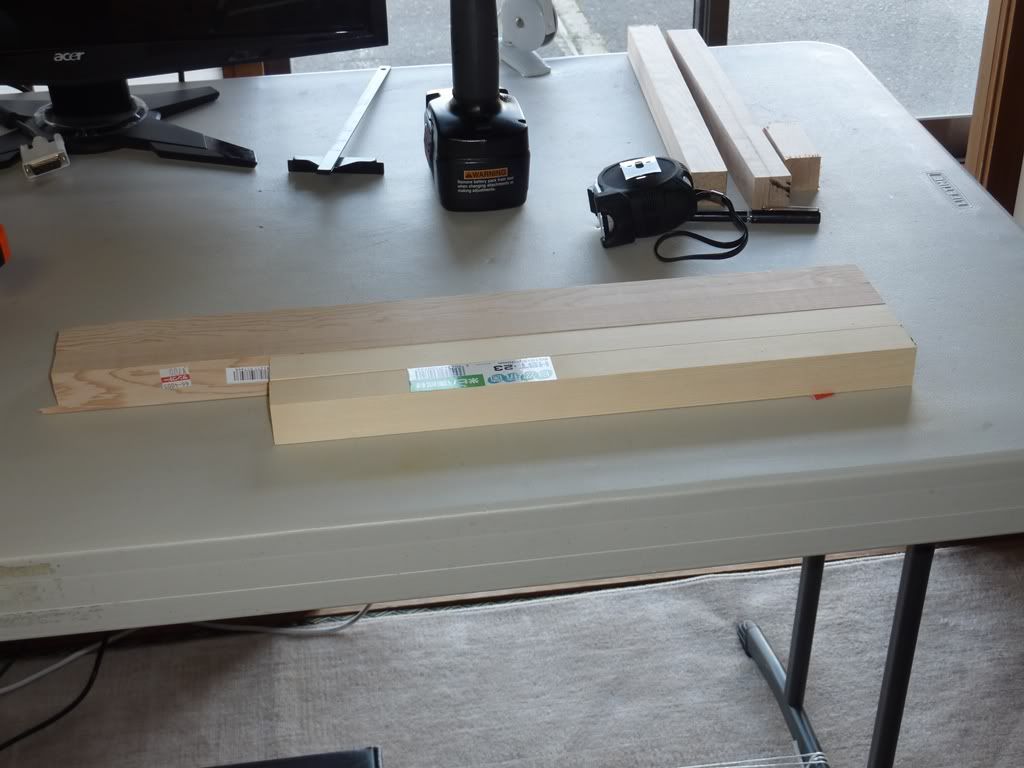
I started with some 30x30mm pine and chopped it up to make the frame.
Four sides cut
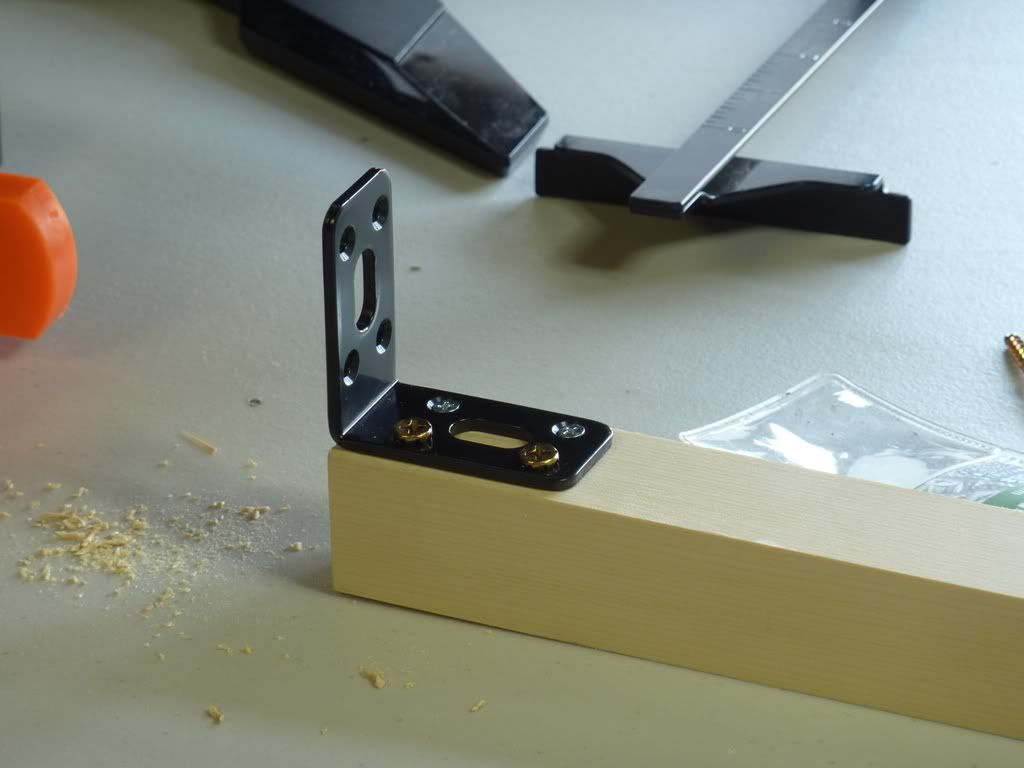
I installed brakets at the four corners to hold the frame together
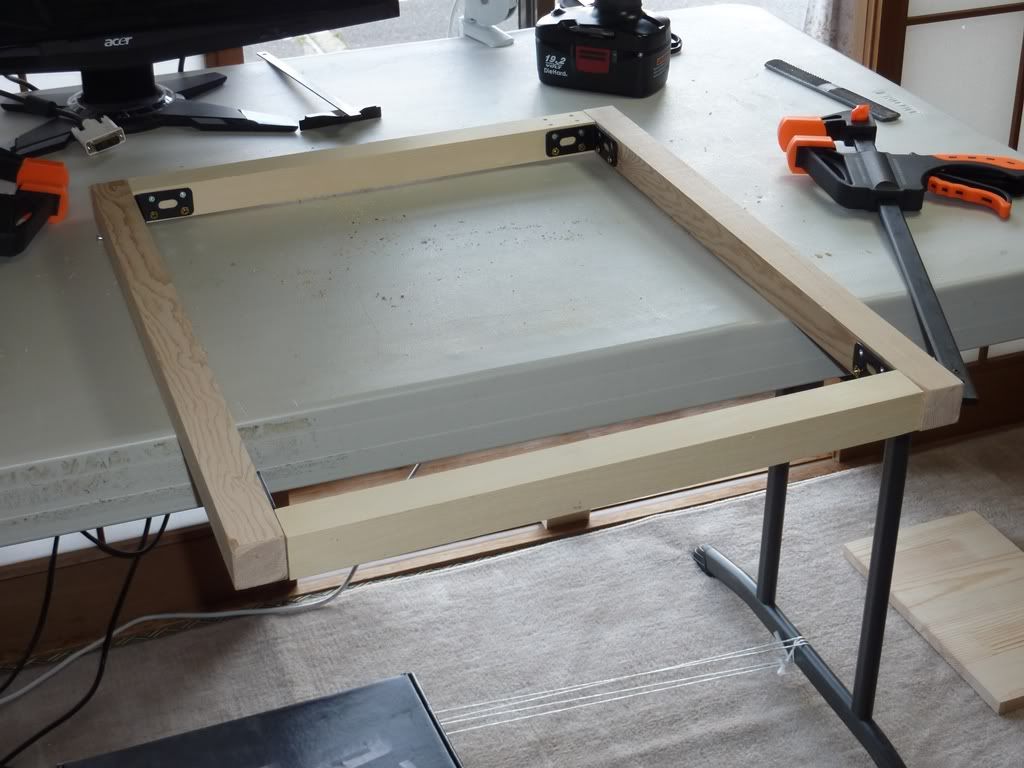
Frame complete
And a test fitting shows a perfect fit
First time I've ever used a router....worked very well
And then I sanded down everything and evened up the edges
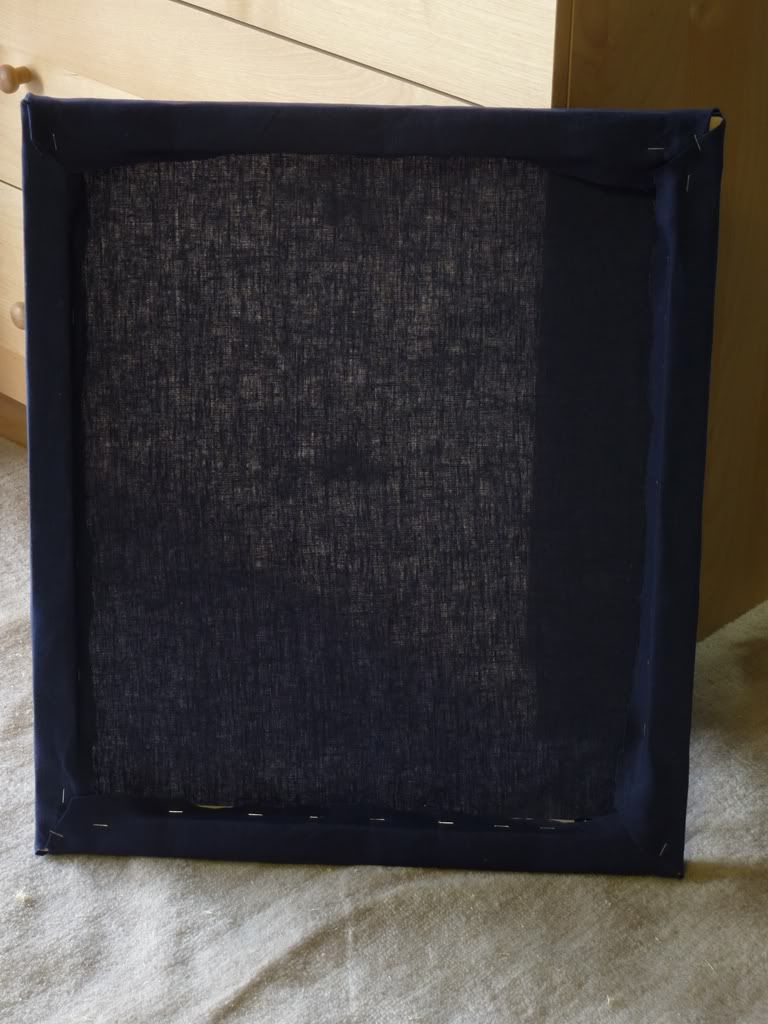
Then I wrapped and stapled some linen in place
Completed filter
Now the downside....this fabric was the most breathable stuff I could get at the Joanne fabric place I went to in Burlington Washington when I was on vacation a few months ago, now I have to source a replacement....stretchy speaker grill cloth is what I have in mind....but I'll probably have to find it online.
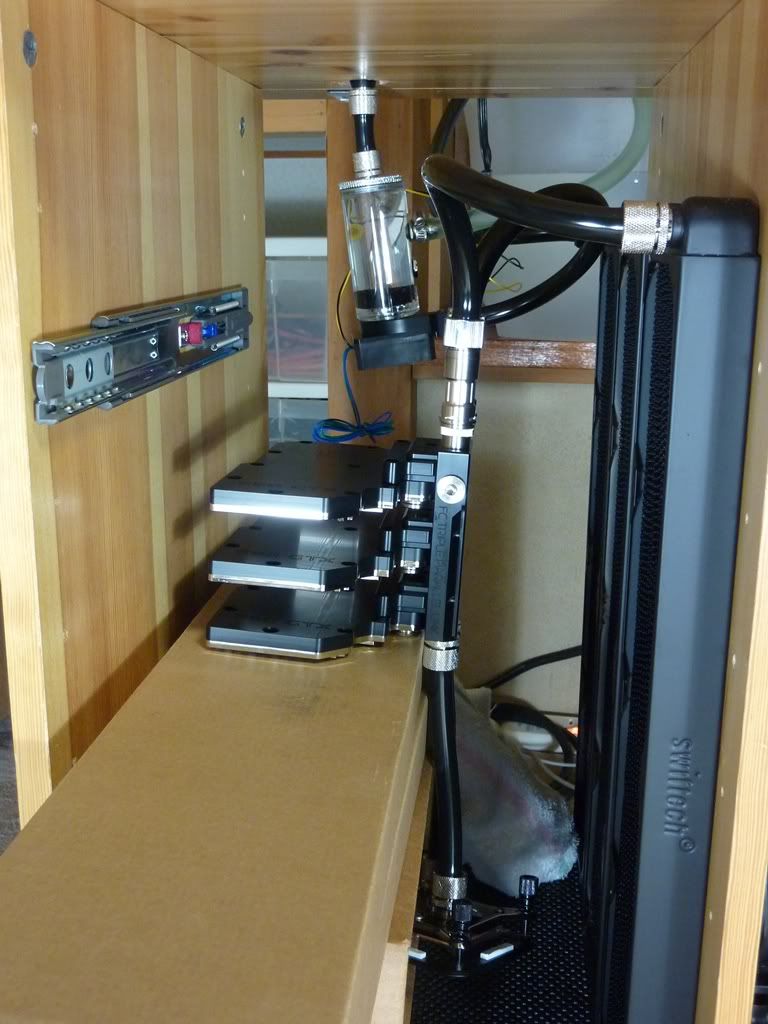
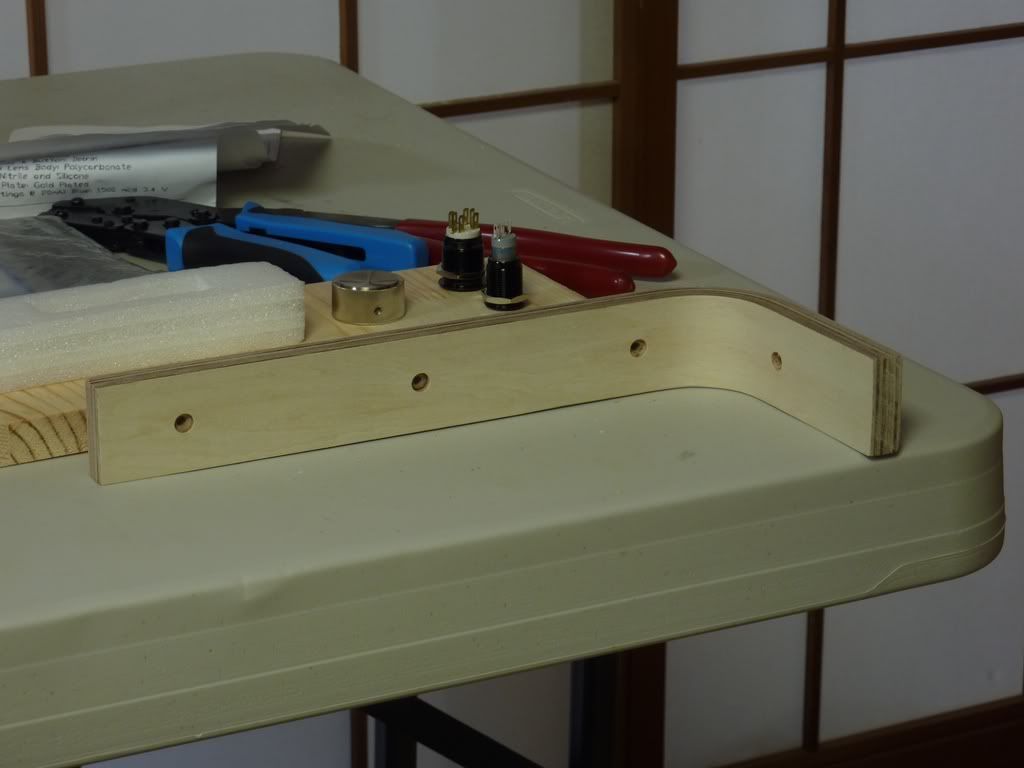
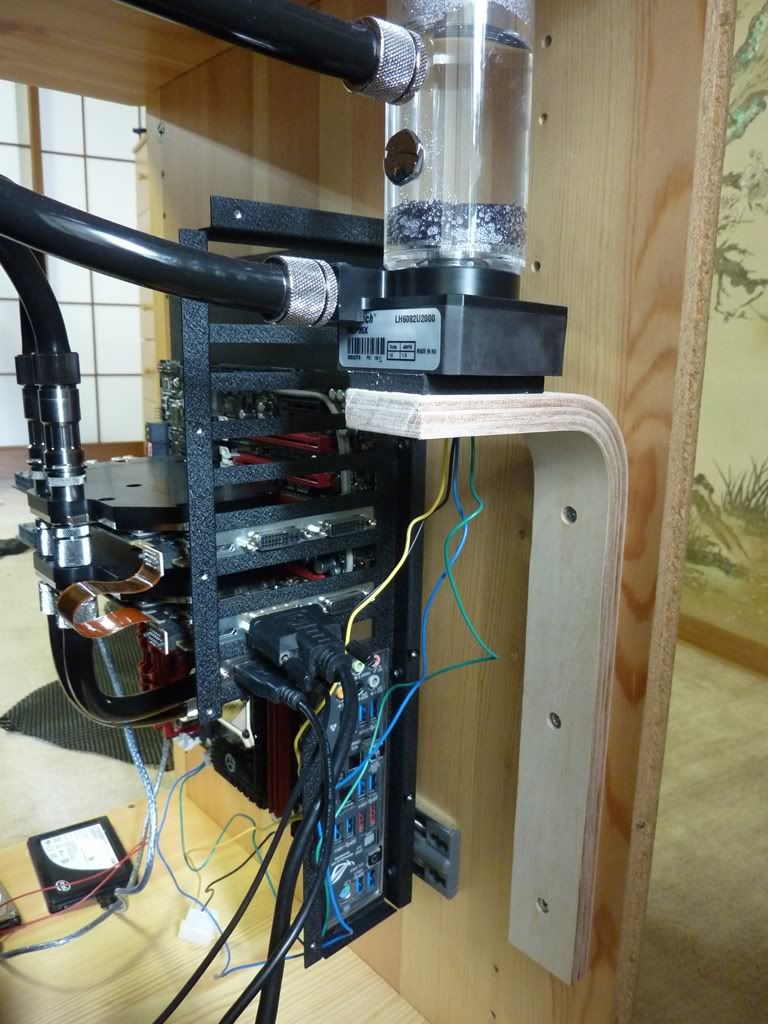
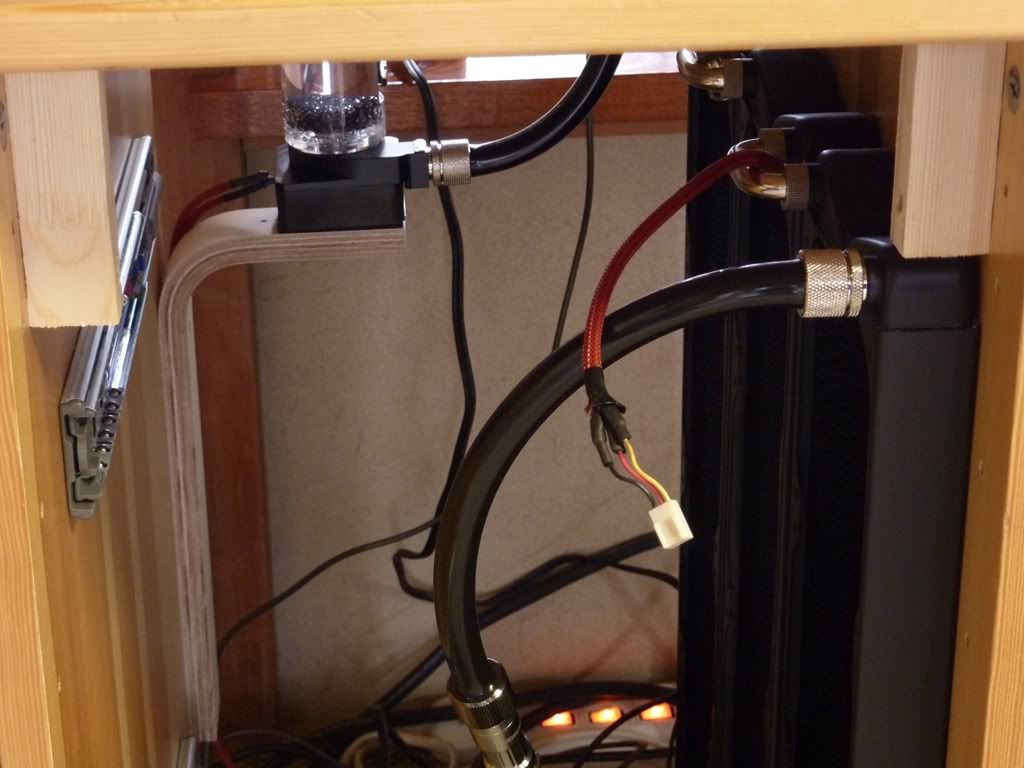
Next up was a bracket for the pump & res. A few people commented that they were concerned about the pump hanging from the desktop, so last trip to the HW store, this wooden sheft holder caught my eye and I thought it would be perfect.
(pic was taken after I cut it down, sorry)
Mounted up, it looks great!
Last but not least, I've made a video which shows in detail the other issue I've been working through; power issues. I think I may have overestimated the power in my home, and underestimated the power needs of these three GPUs....
http://www.youtube.com/watch?v=DfgOwM7xIcU
[CENTER]The post counter is not an intelligence meter!
MAX11L - "It's like a console...with the suck turned down and the awesome turned up" -tet5uo
Heat Team IRONMODS
Mia,
Excellent work as usual! Although is does look like you are building a speaker.
Victory May Be Fleeting, But Obscurity Lasts Forever!
Last Project http://www.xtremesystems.org/forums/...d.php?t=213829
Canceled Project http://www.xtremesystems.org/forums/...d.php?t=265292
New Project http://www.xtremesystems.org/forums/...d.php?t=269440
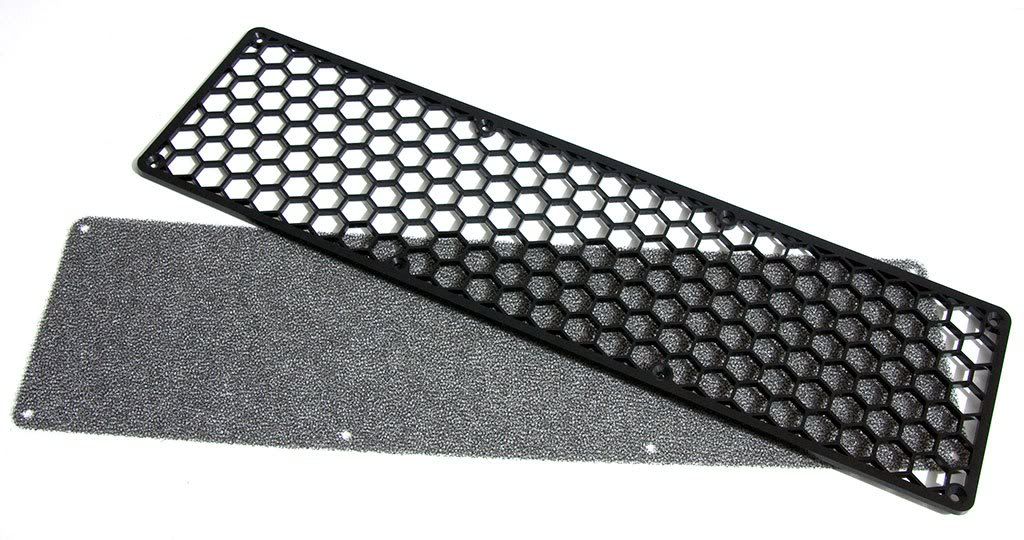
Coldzero Team has generously offered to supply me with some dust filters to solve my dust filter problems....they'll look like this
They're also sending me three backplates for my 580sThanks a ton Coldzero Team

[CENTER]The post counter is not an intelligence meter!
MAX11L - "It's like a console...with the suck turned down and the awesome turned up" -tet5uo
Heat Team IRONMODS
More like a swarm of vuvuzela's!
Little expense had been spared to create the impression that no expense had been spared. - Hitchhiker's GuideMondays:It's better to ask dumb questions now, than to look stupid later
I've gotten a lot of work done since my last update. Here is the status.
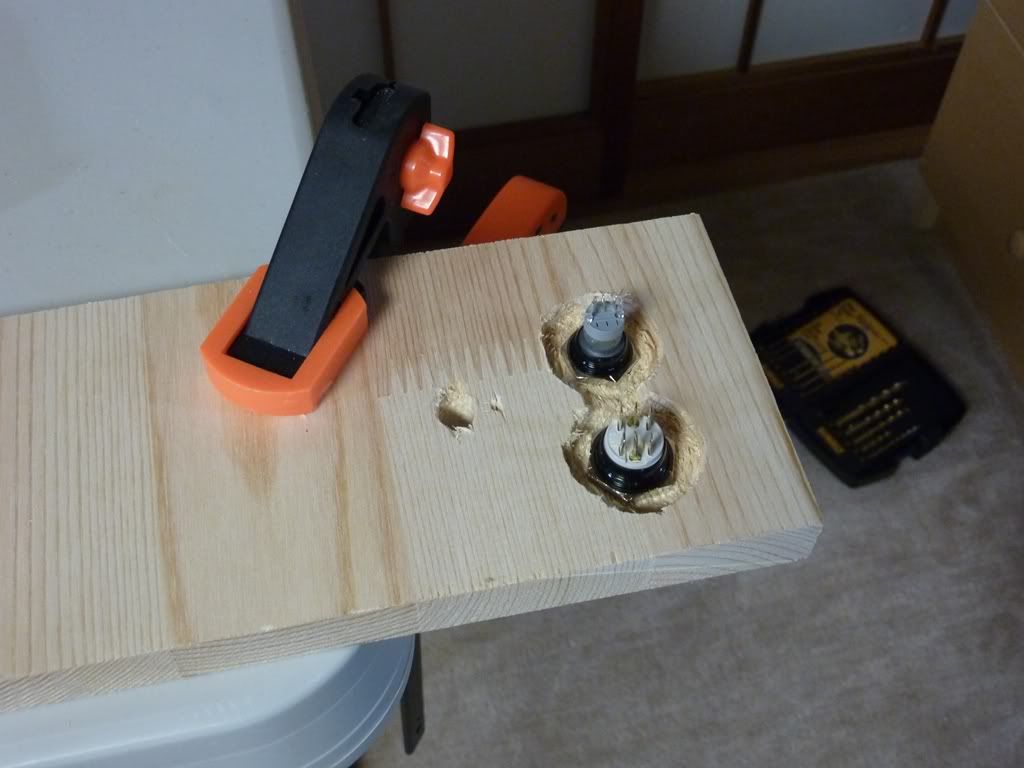
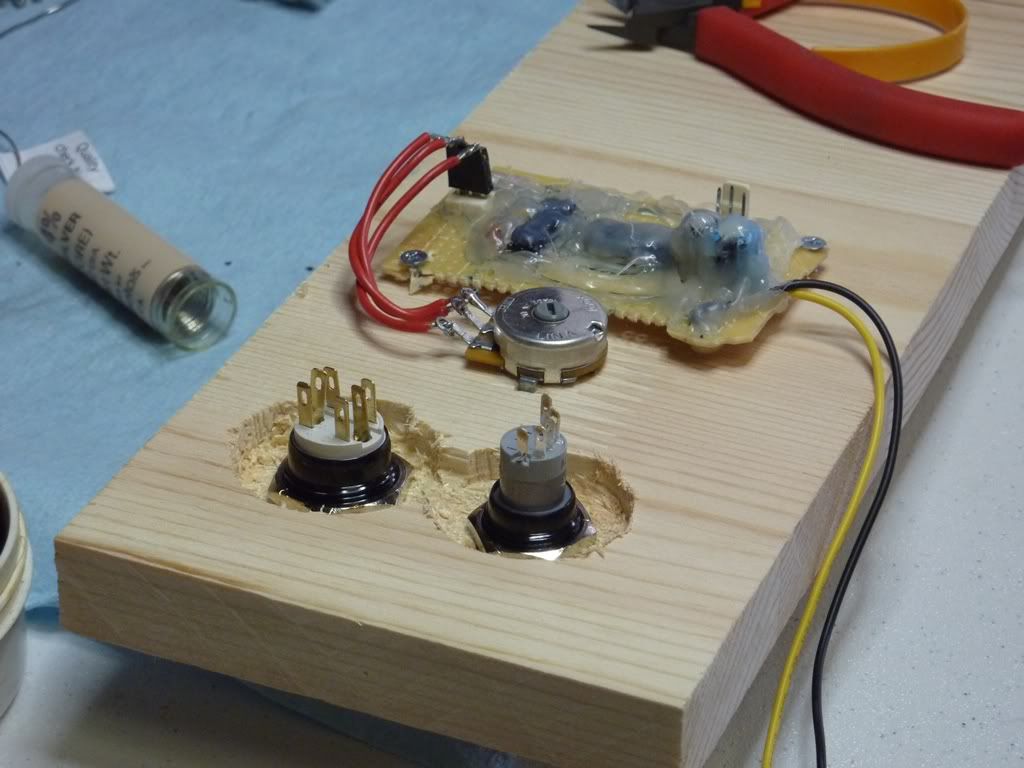
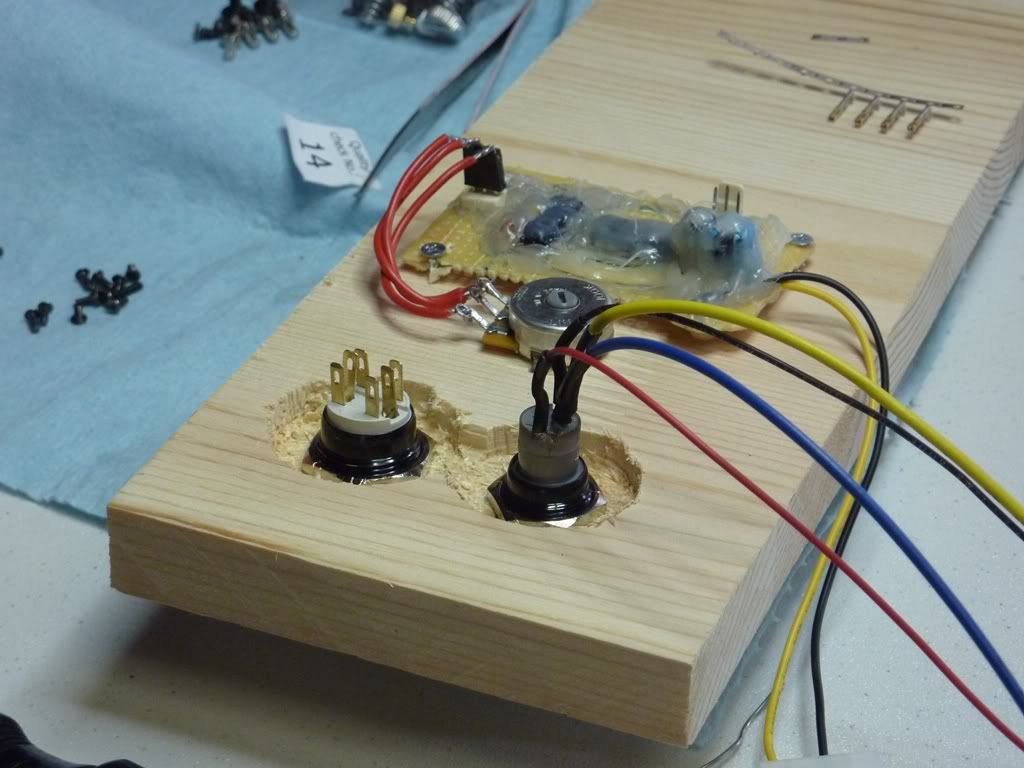
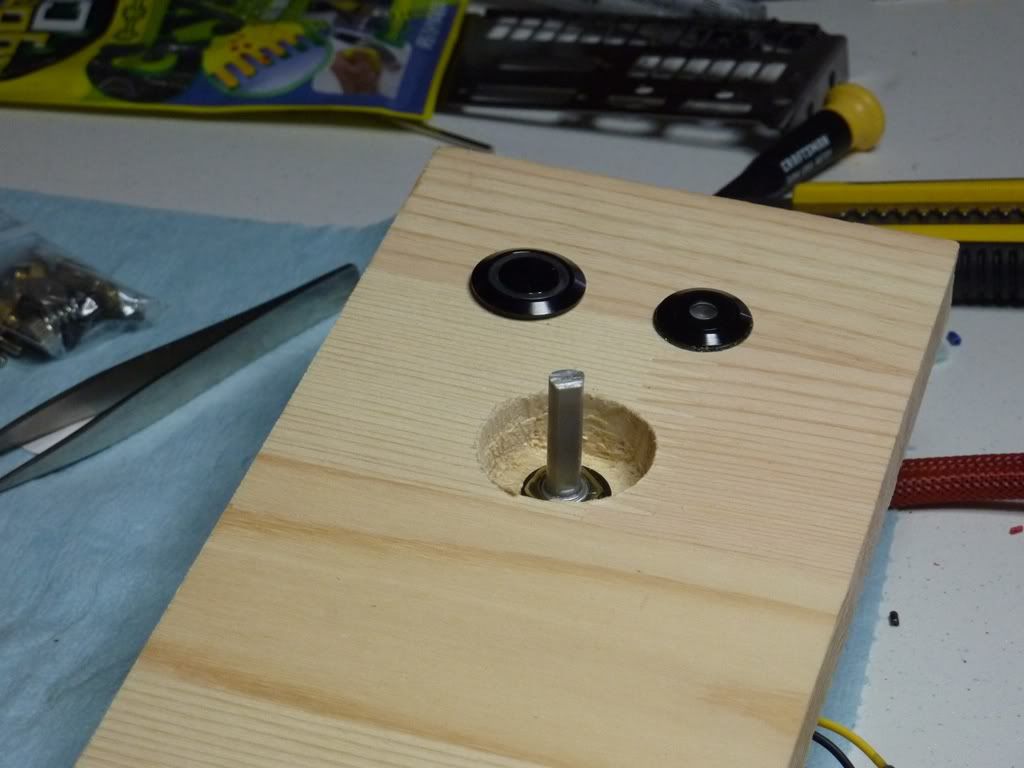
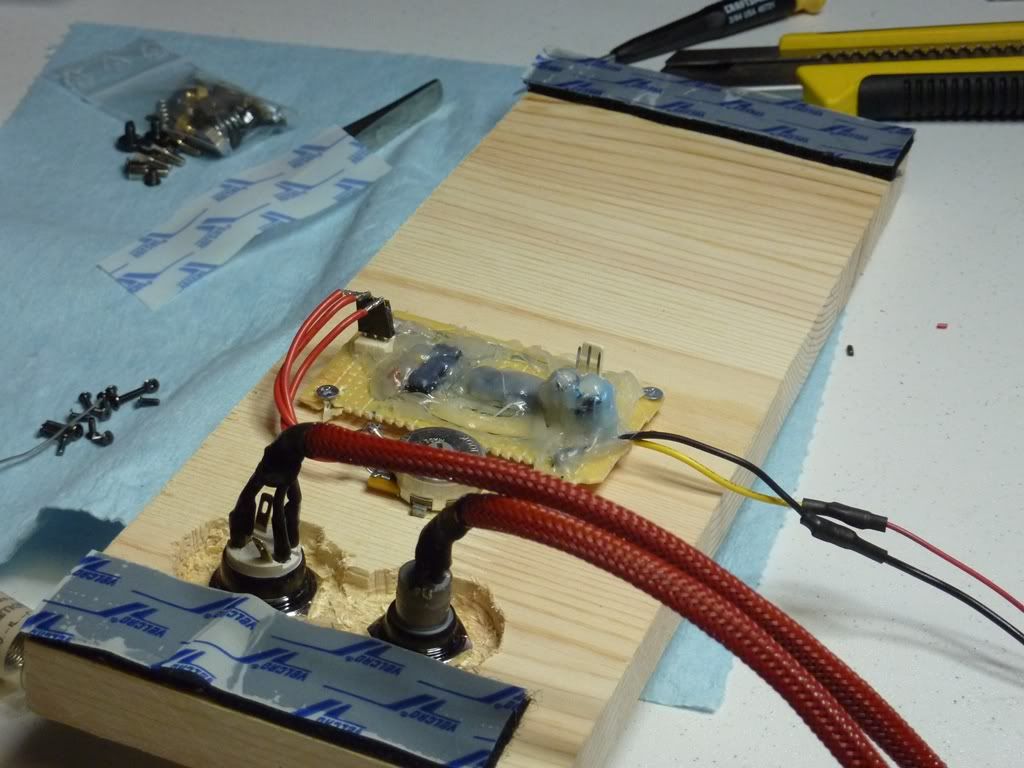
I worked on the front panel a bit. I stated by mounting my power and reset buttons, the wood was a bit thick so I had to carve out the back side to mount the buttons. The extra hole was drilled for the PWM controller potentiometer.
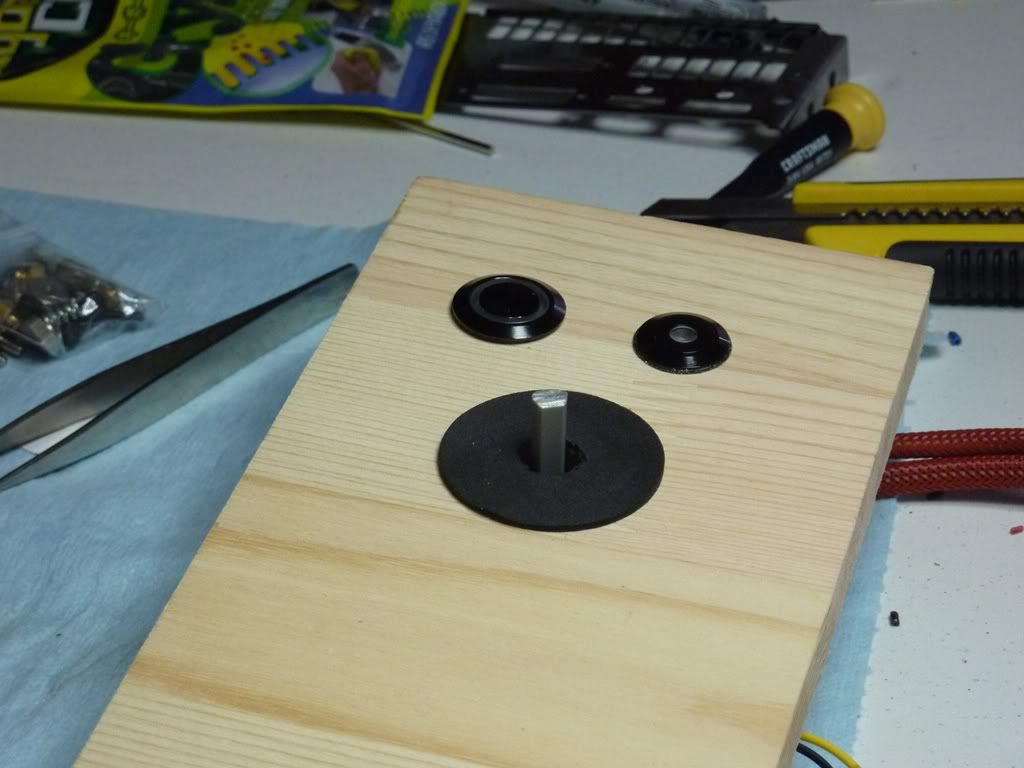
In order to mount the potentiometer, I had to carve out the hole a bit on the front side.
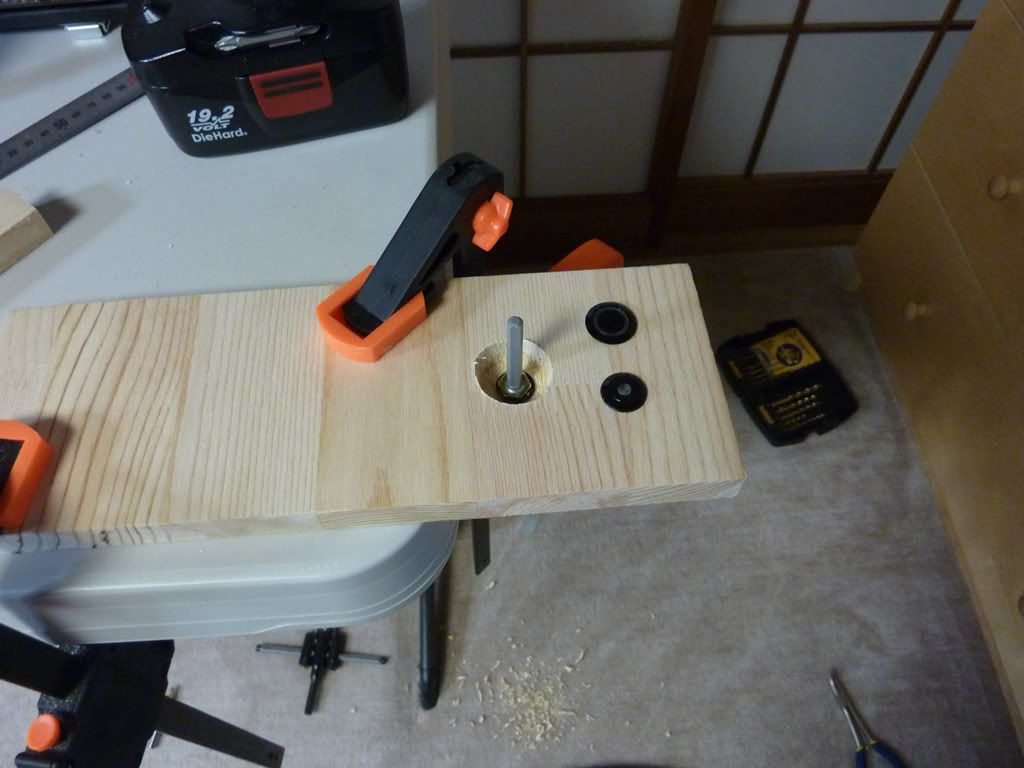
But, the carved out area was a bit too large for the knob I planned to use, and it looked a bit funny.
So, I brainstormed a bit on how to improve the aesthetics. First I tried attaching a rubber piece to the knob, but it was too large to be effective.
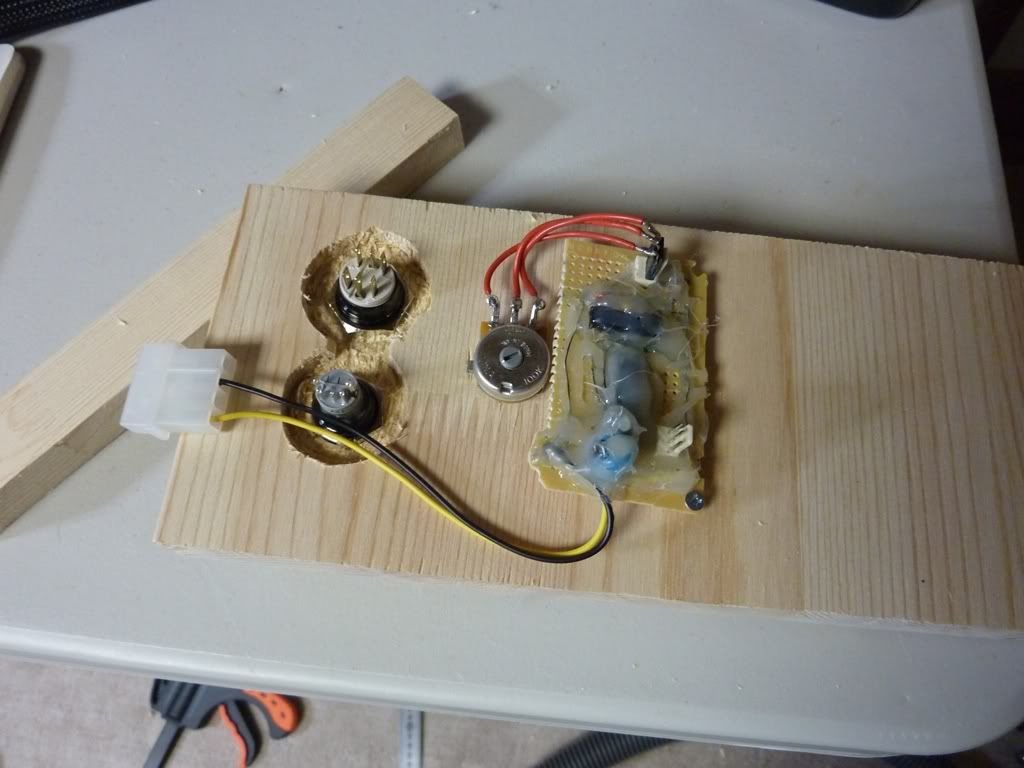
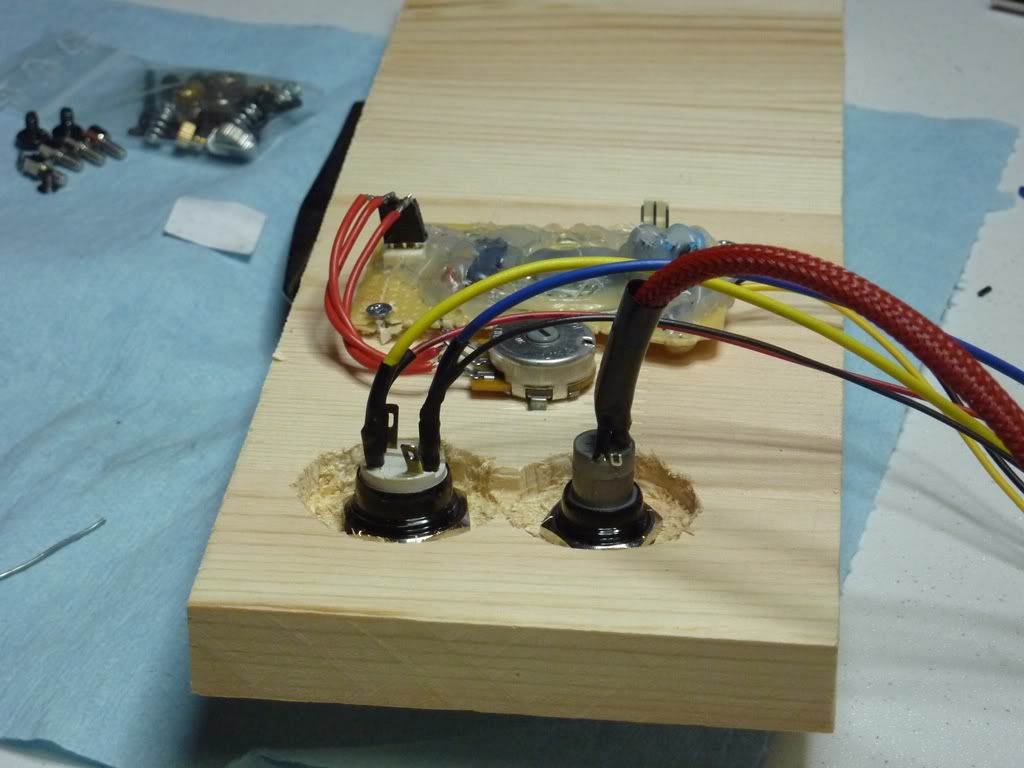
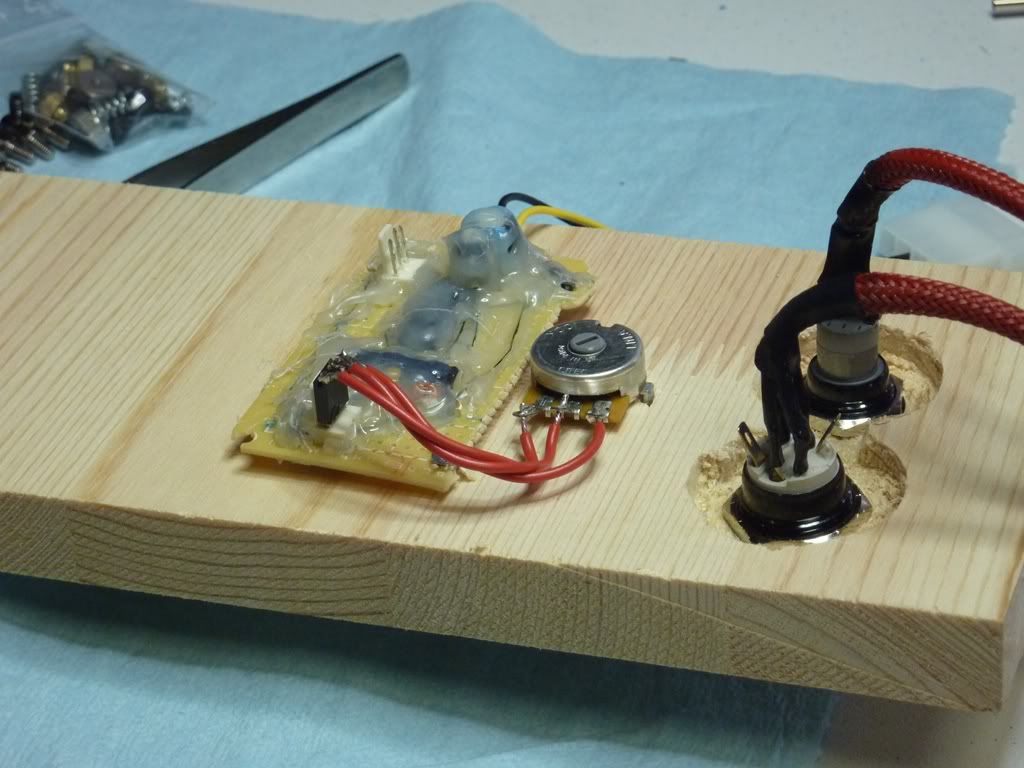
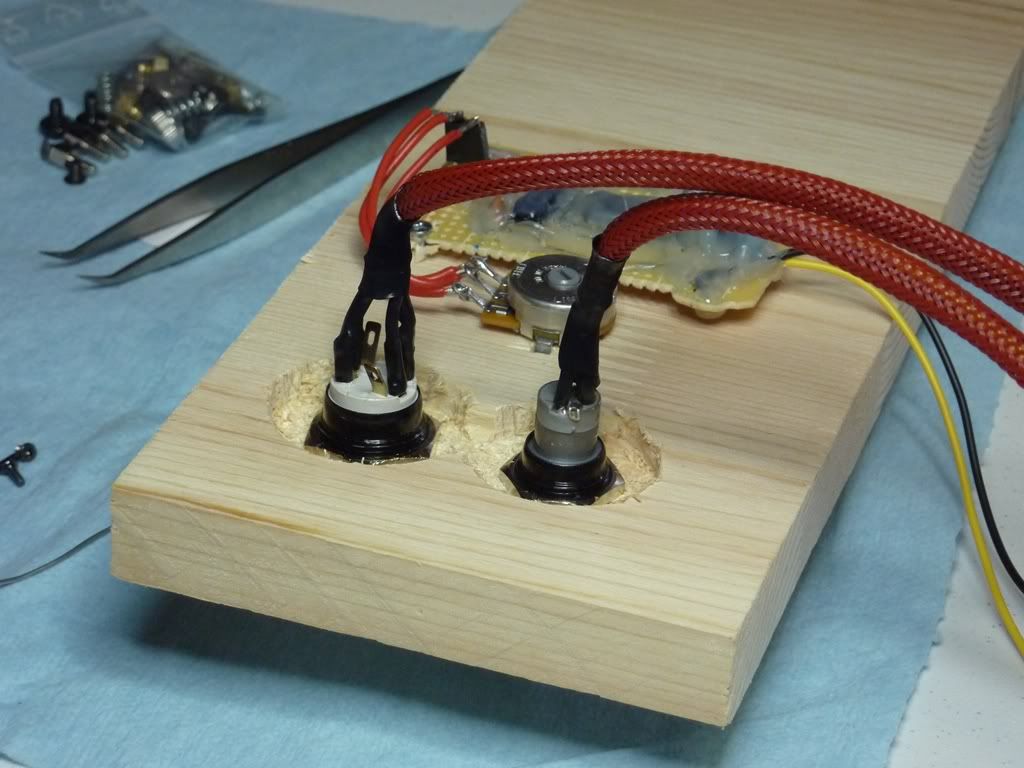
I thought I'd look for something at the HW store to solve that issue, and moved onto something I could work on in the meantime.....wiring. First I mounted the PWM controller.
Then wired the reset switch.
Followed by the power switch.
And then sleeved the wiring.
Then I went back to my previous issue.
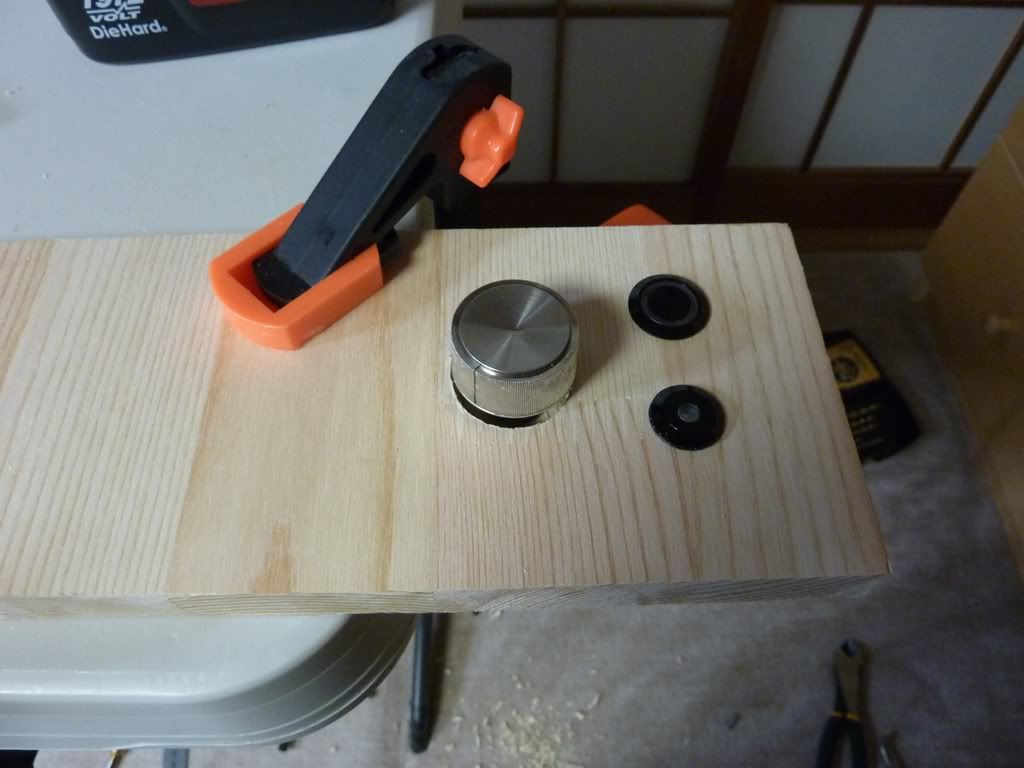
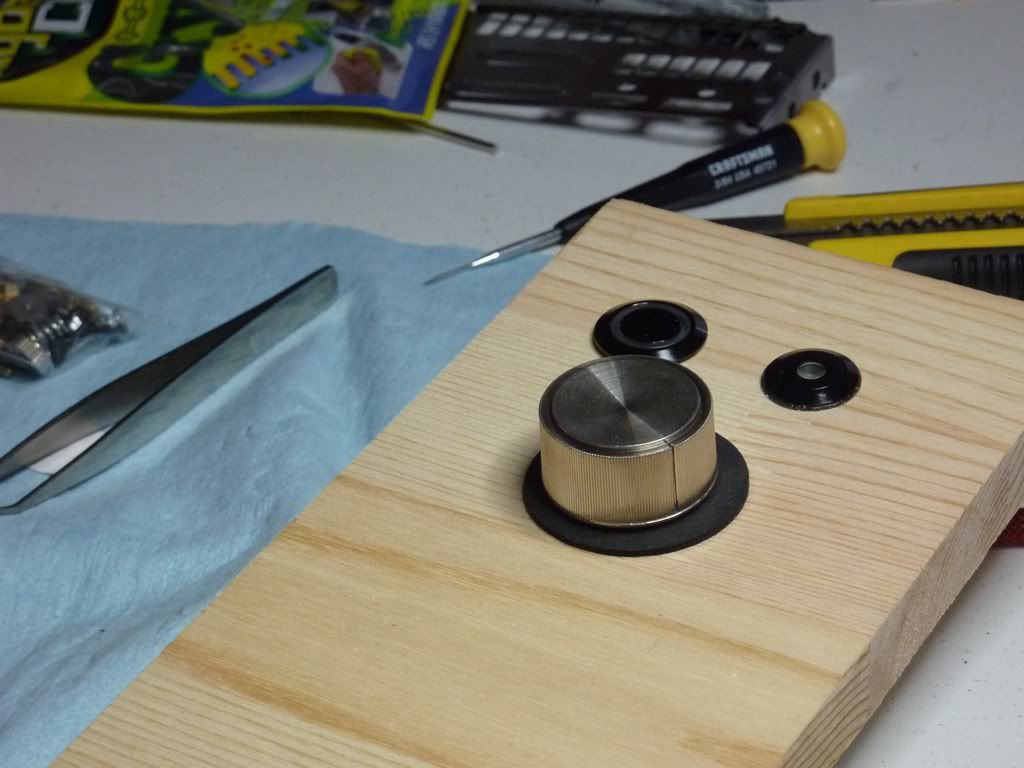
A quick trip to the HW store and I found some foam pads use for furniture feet. I like the new look.
I found the knob while digging through my friend's junk drawer....he's an audiophile and builds audio components and such. After a quick cleaning, it looked pretty nice.
I did not want the front panel permanently attached...in case I wanted to reconfigure stuff or if it was in the way of system maintenance. So I'm using velcro to attach it to a couple brackets which are permanently attached.
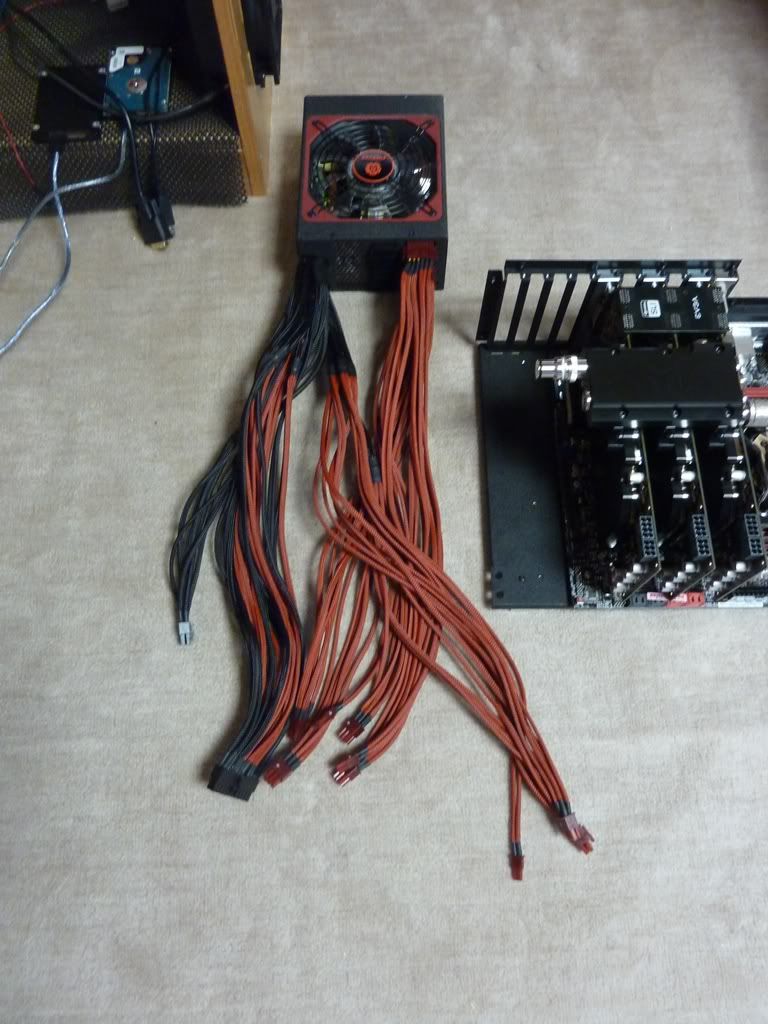
Last thing for now, I completed sleeving the PSU. My sleeving work is still pretty amateur, so I'll leave you with the long shots :p
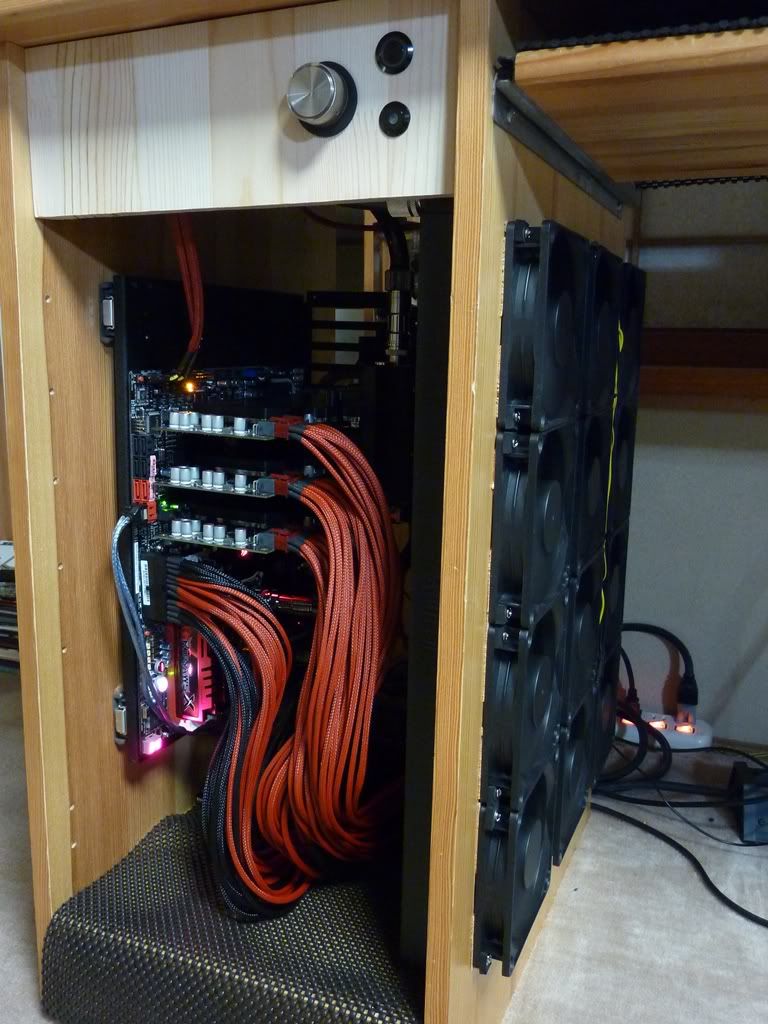
And here with the front panel installed
I'm still waiting for someone to develop a front panel USB3.0 product that has motherboard headers instead of male connections for the back I/O panel....anyone know of anything?
Once that happens, I'll cut a hole for the FP USB3.0 device, and an optical drive.
Oh, I also have a part change to announce...I upgraded the OS drive from the X25M to a 120GB OCZ Vertex 3
Last edited by miahallen; 06-05-2011 at 01:55 AM.
[CENTER]The post counter is not an intelligence meter!
MAX11L - "It's like a console...with the suck turned down and the awesome turned up" -tet5uo
Heat Team IRONMODS
Love the build Bud,
Excellent craftsmanship
 Posting Permissions


 Reply With Quote


Bookmarks