

wow, does that give enough cooling to hard drives? looks sick anyway


wow, does that give enough cooling to hard drives? looks sick anyway
Worklog: Project Black Copper
Lian Li PC-P80 | Thermochill PA140.3 | Noiseblocker fans | mdpc-x stuff


:P http://www.koolance.com/water-coolin...product_id=911Originally Posted by The_Gnu

Signatures make my posts look huge... but I'm not humble enough to completely remove my signature, so I kept this note explaining it.
Another crazy mdf. Holly
, Impresive looking biuld
It depends of what you mean with "enough". I guess it'll atleast be better than nothing.. From what Ive heard Hard drives are designed to dissipate the heat to the sides, not shure how true that statement is but there are similar coolers on the market so I guess the concept works...But we'll see
wow..The price is just as over the top as the product itself, but atleast it's quiet :P Thanks for the link
Thanks a lot
awesome and impressive build
makes me want to have all of those tools
Thanks a lot, Well regarding the tools... once you started collecting them they stack pretty fast
After the Hd-blocks were done, I could countinue with the case itself. These parts are for supporting the top and bottom part of the case...and to get that round shape. It'l probably make more sense in the next uppdate when there will be some more parts added.
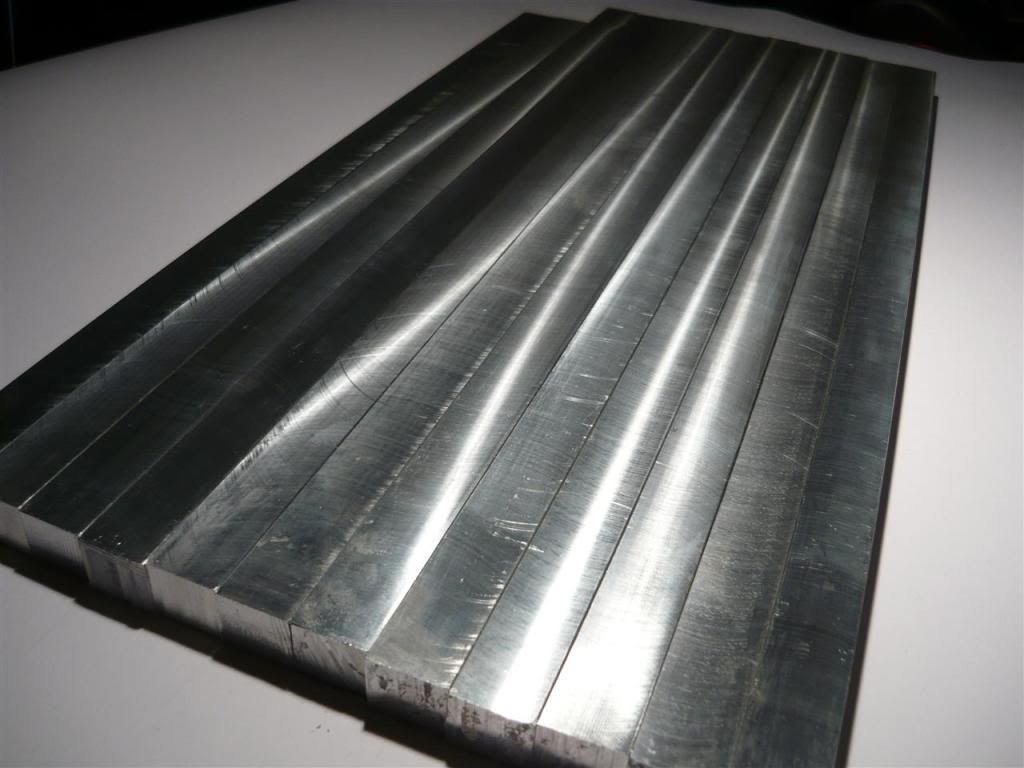
Some 10mm Alu cut to a basic shape.
(CLICK TO ZOOM)
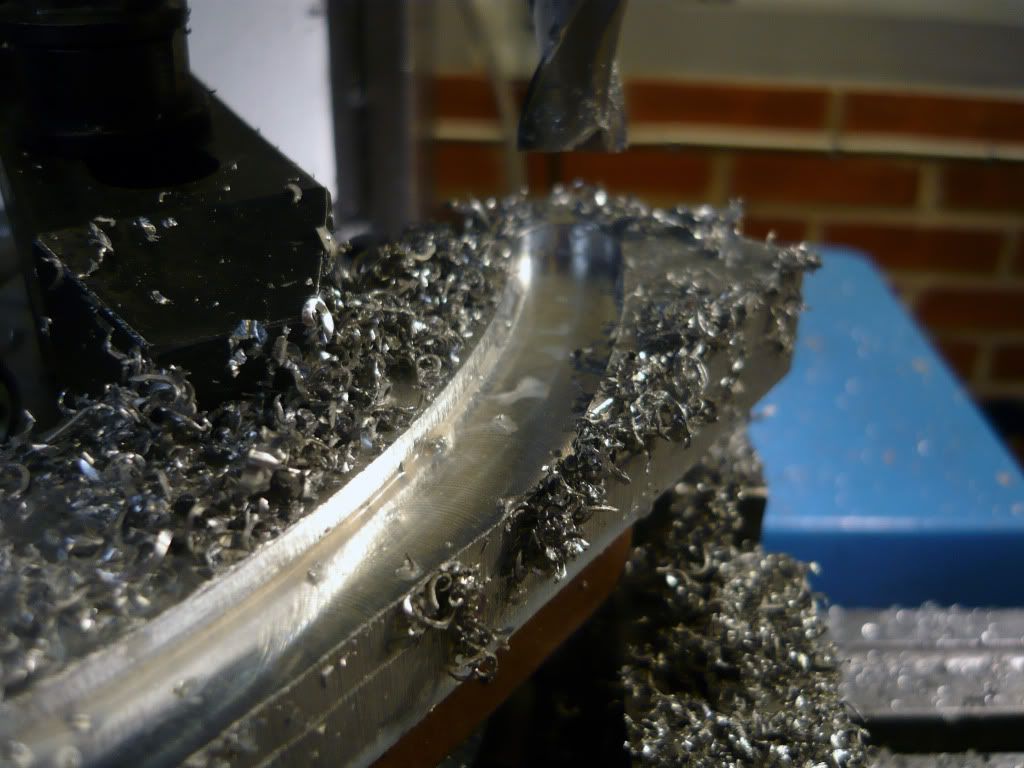
A rotary table is used to get a curved shape. a
(CLICK TO ZOOM)
(CLICK TO ZOOM)
(CLICK TO ZOOM)
(CLICK TO ZOOM)
Hate those nasty edges but, it's good theyr pretty easy to remove.
(CLICK TO ZOOM)
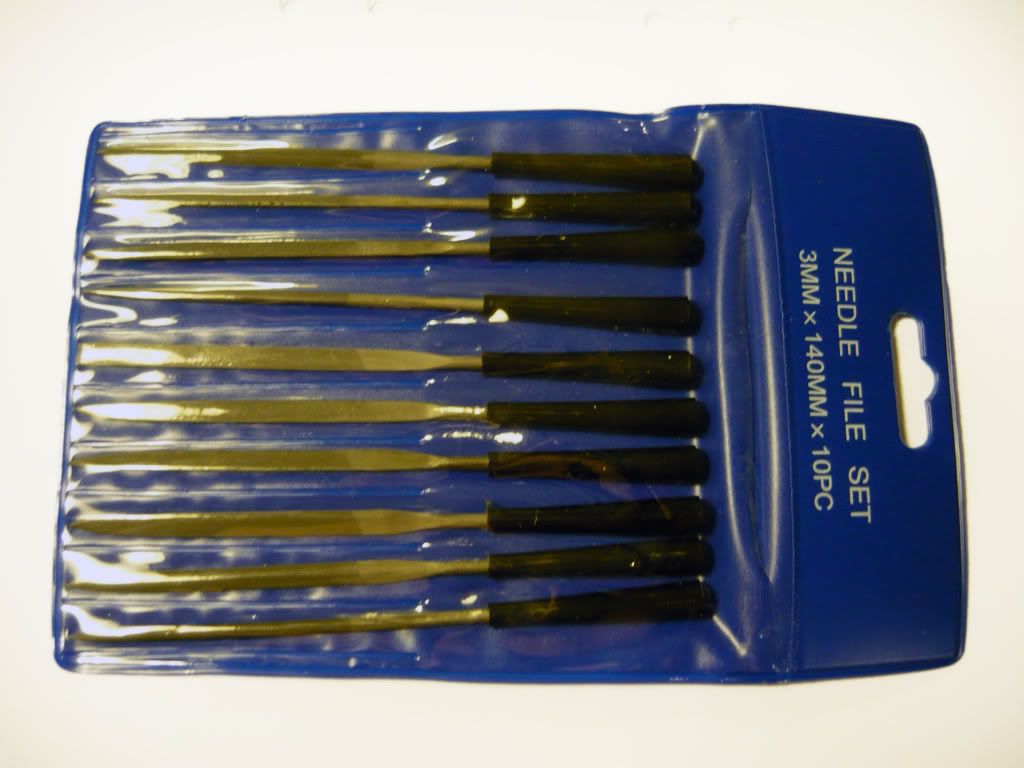
I was needed to upgrade my tools with a set of 3mm needle files.
(CLICK TO ZOOM)
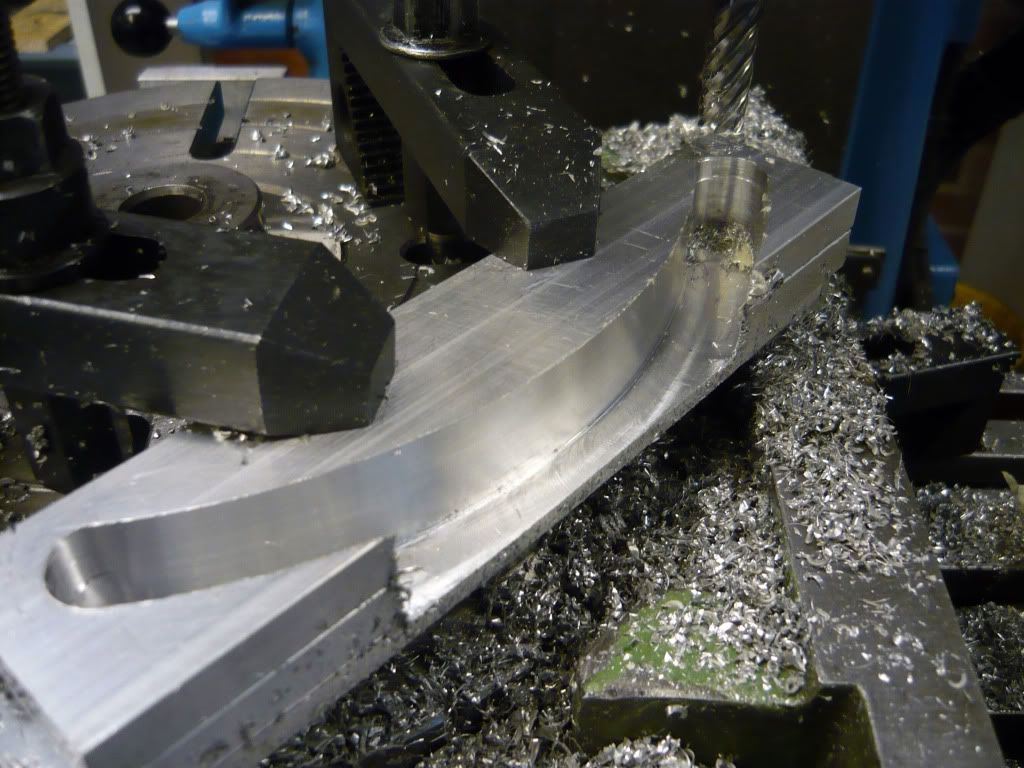
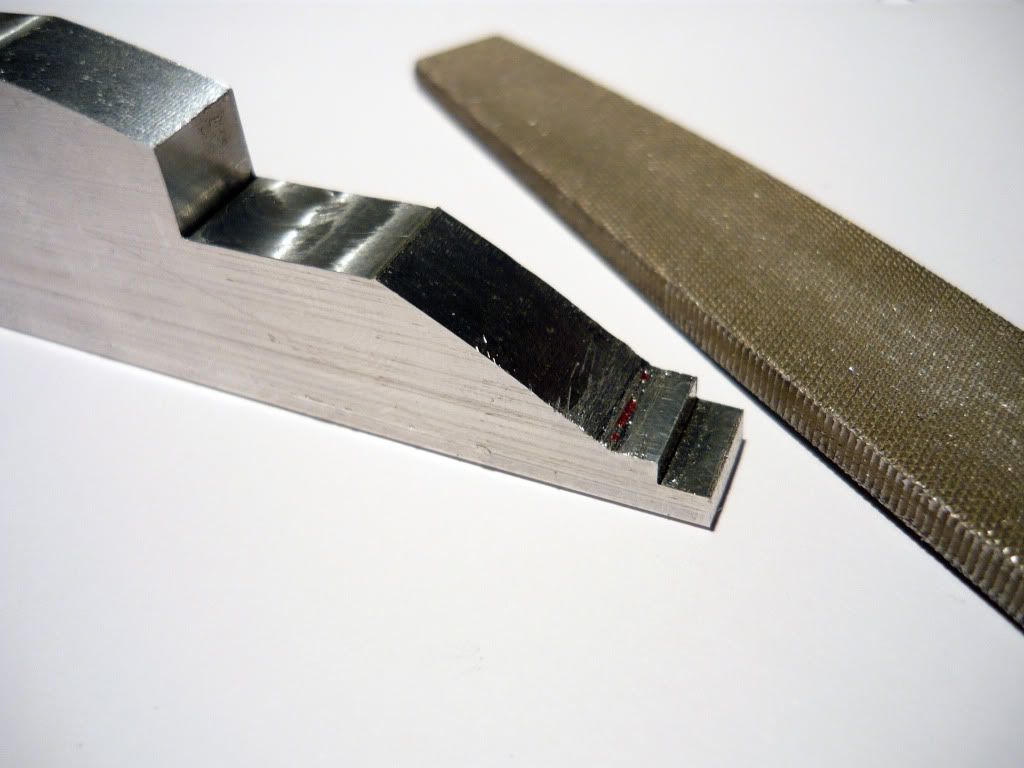
The parts could not be completed in the mill alone and therfore I had to do the last shaping by hand, these red parts had to be removed since i needed a straight edge without a radius.
(CLICK TO ZOOM)
I used a regular file to get that basic shape...
(CLICK TO ZOOM)
then there were a copule of houres for me and the needle files to get to know each other... One almost done, 7 to go :S
(CLICK TO ZOOM)
(CLICK TO ZOOM)
(CLICK TO ZOOM)
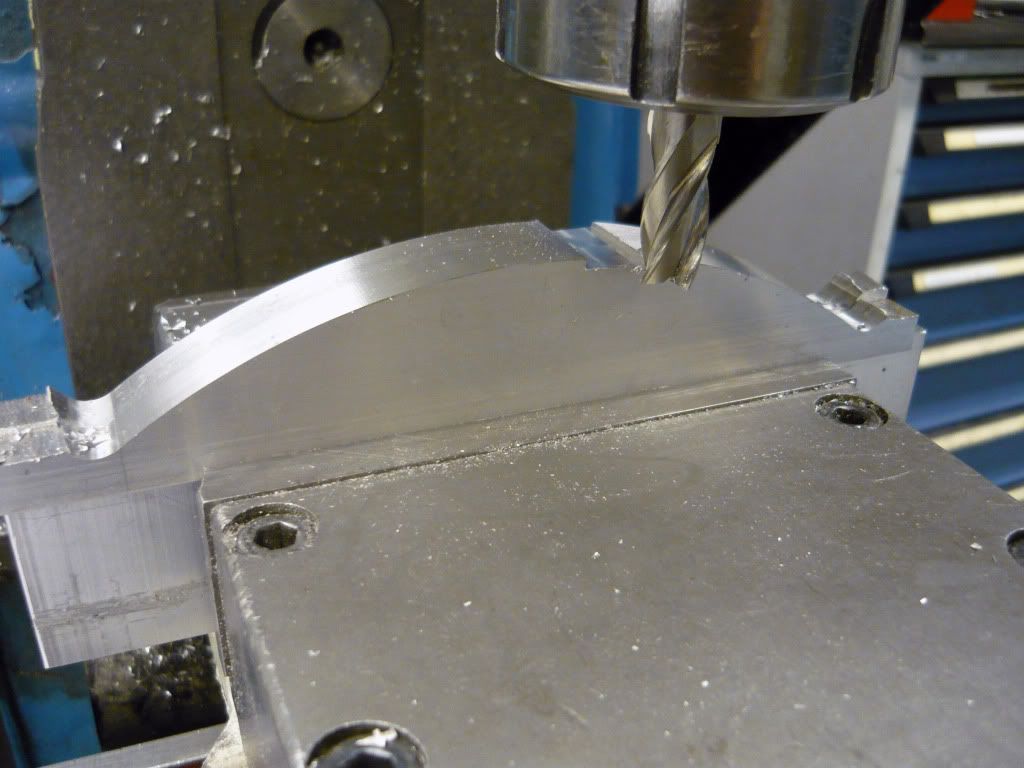
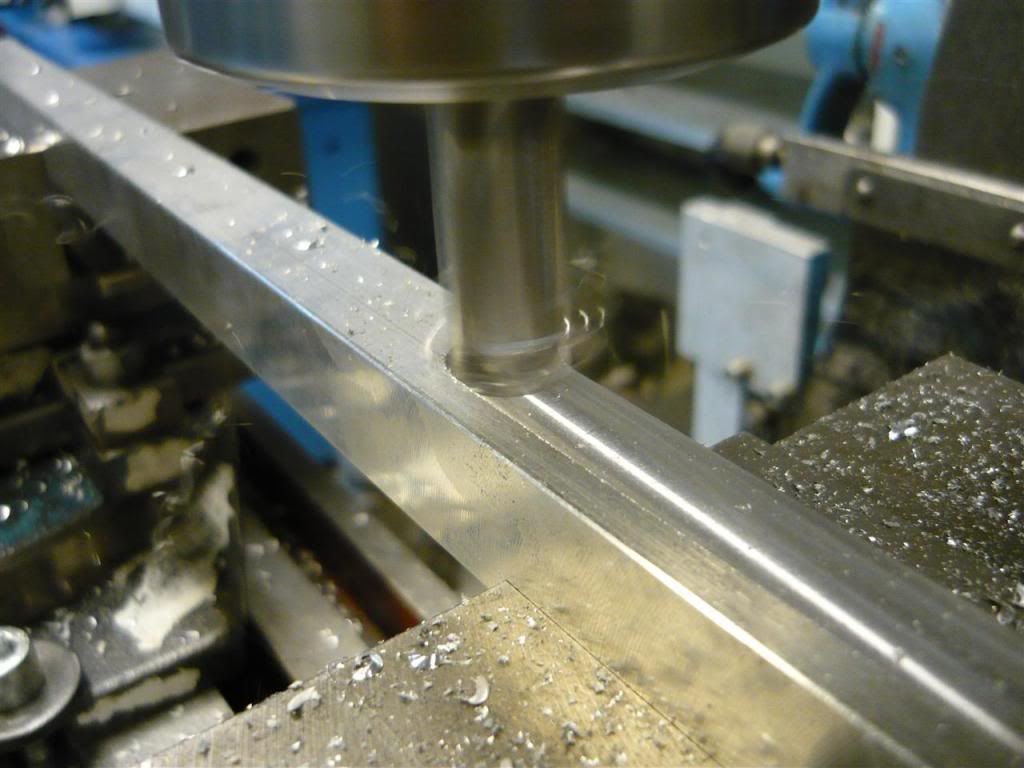
Countersunk the holes with an endmill to make the screwheads fit.
(CLICK TO ZOOM)
(CLICK TO ZOOM)
(CLICK TO ZOOM)
After some hours of filing and wetsanding all 8 sides where done. Was really hard not to mess up that radius but I think it turned out ok.
Thats it if for this day.
Feel free to post any comments, questions or criticism
/GNU
(CLICK TO ZOOM)
The part of the build im currently in right now is the top and bottom of the case. This is one really timeconsuming and hard part of the build. Also most of the parts look the same which might result in less pics.
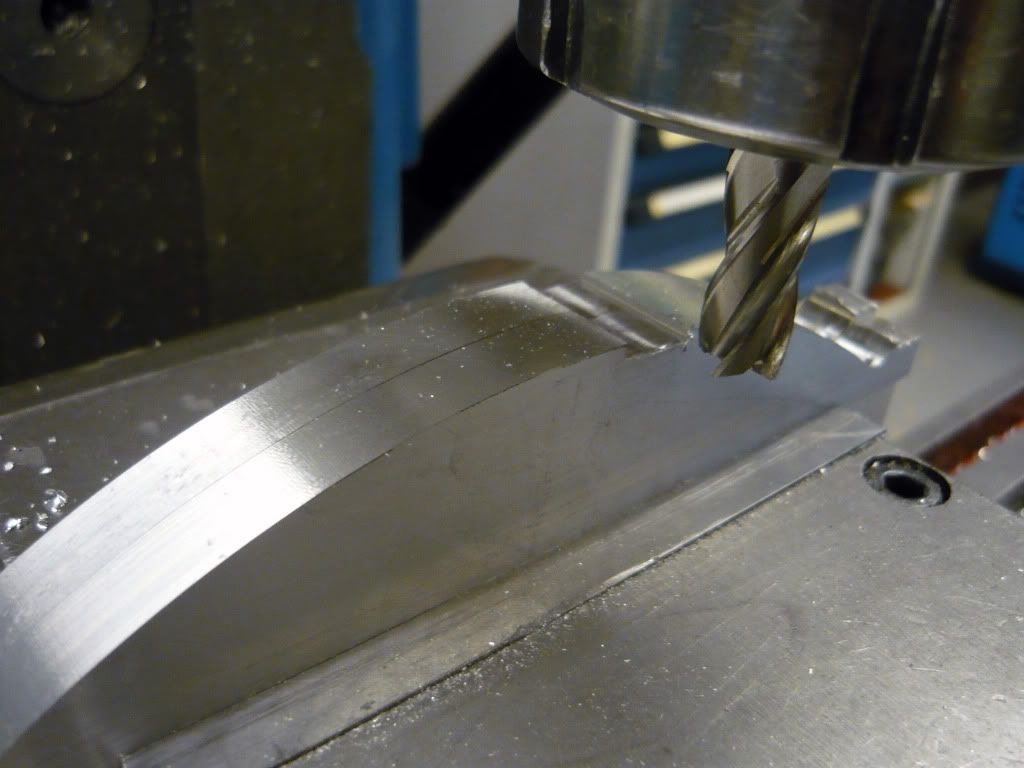
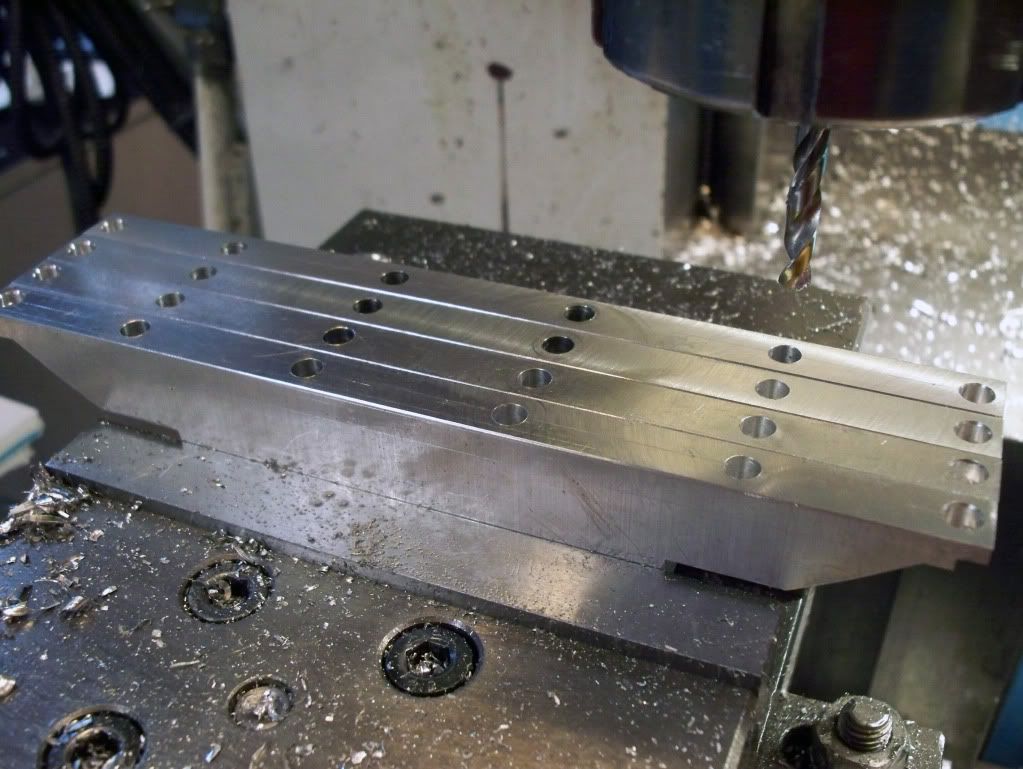
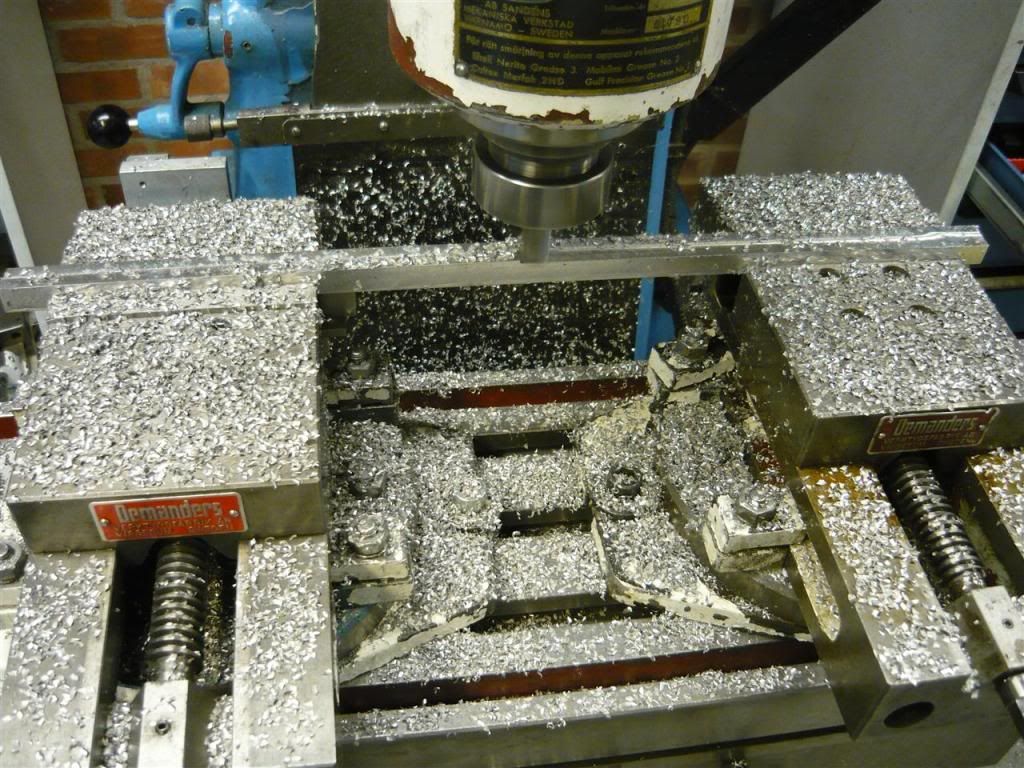
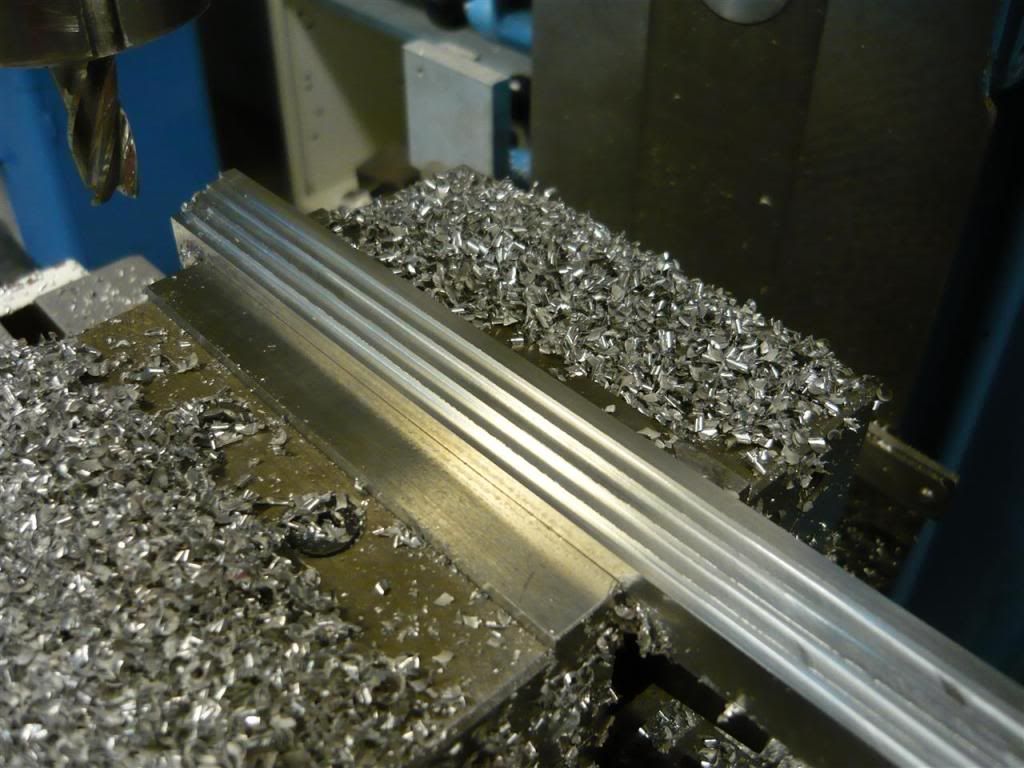
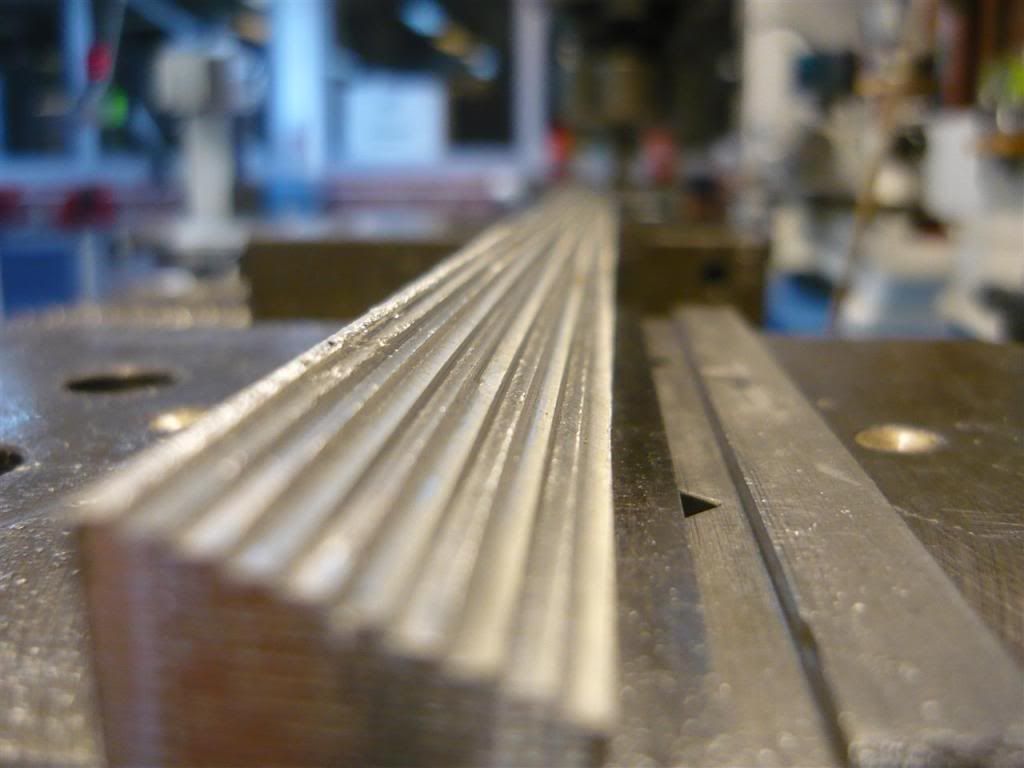
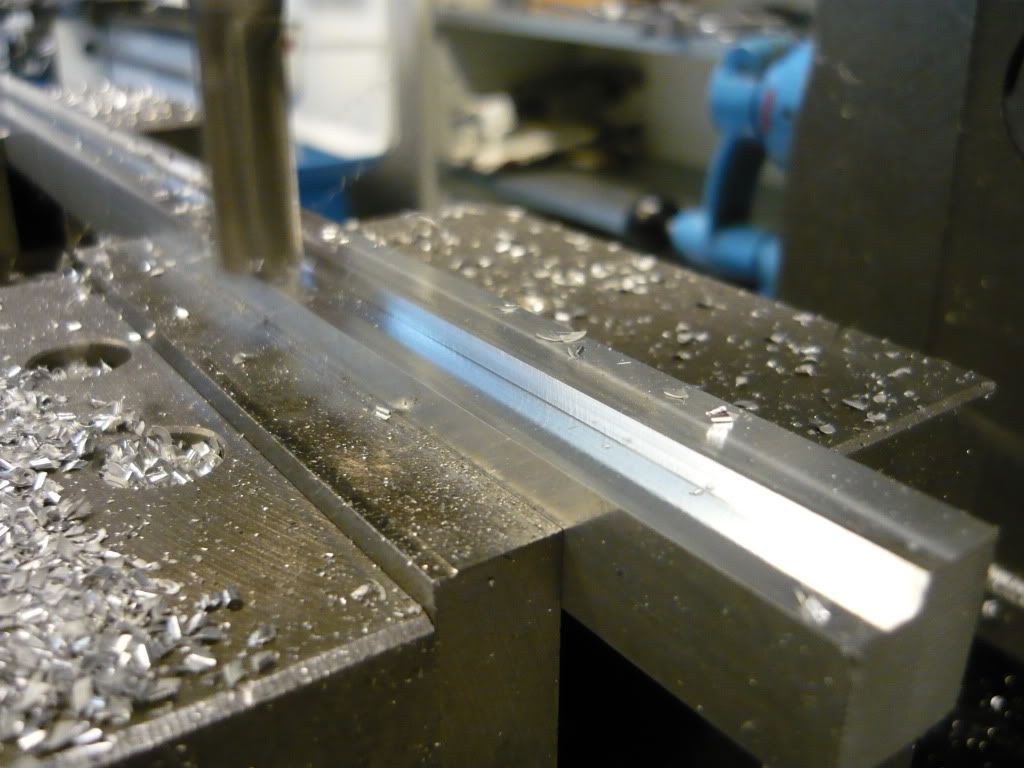
Maybe you remember these 12 alubars, They need to be milled down in a step patern following a radius to make the sanding easier. Since I don't have acess to a cnc, I'll have to do it by hand. It might sound simple to just mill them down in straight steps and I thought that too. Well it turned out not to be that easy when you have 2 different vices. Pain in the ass to align them.
(CLICK TO ZOOM)
First steps milling down to the right height
(CLICK TO ZOOM)
(CLICK TO ZOOM)
(CLICK TO ZOOM)
(CLICK TO ZOOM)
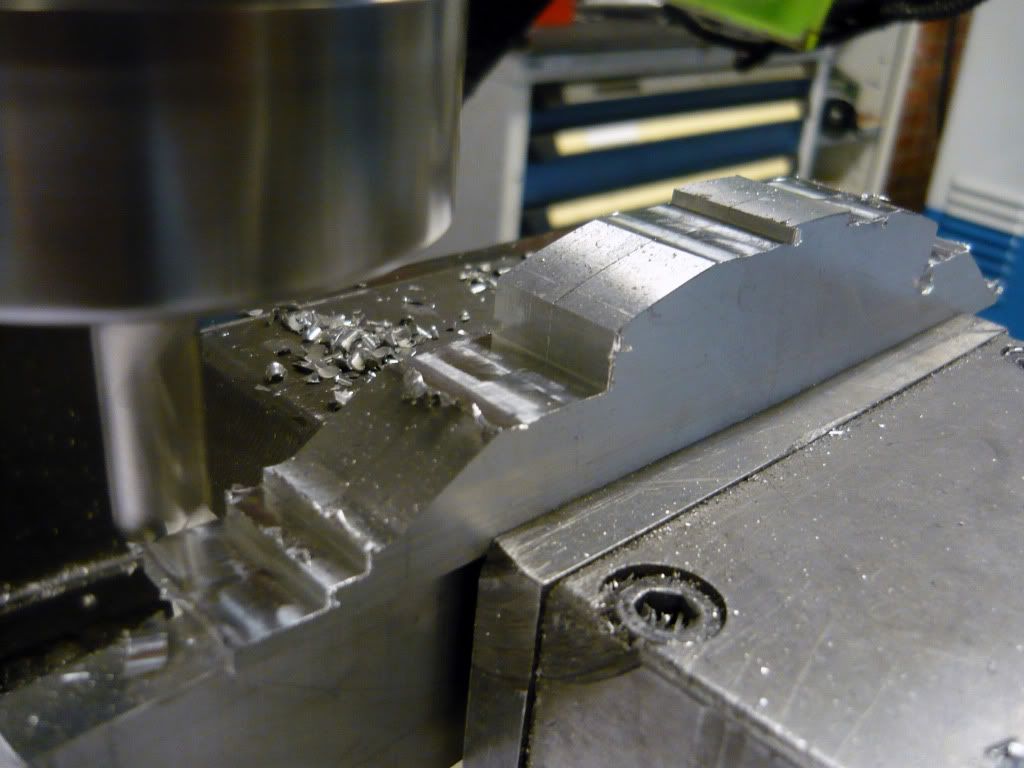
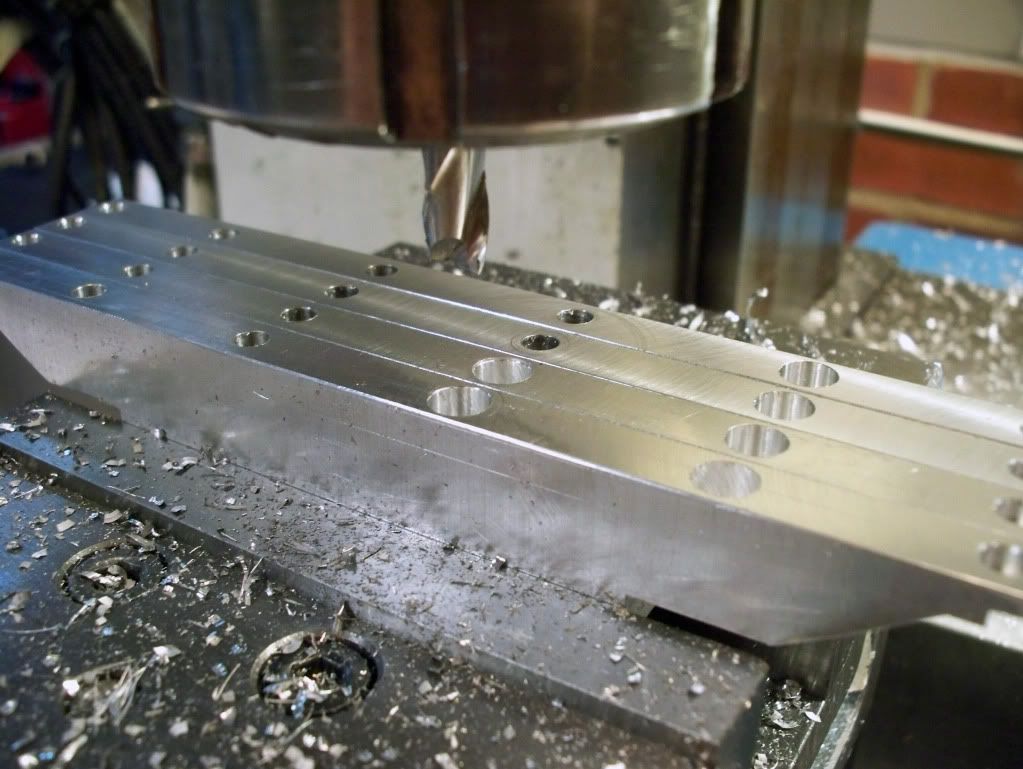
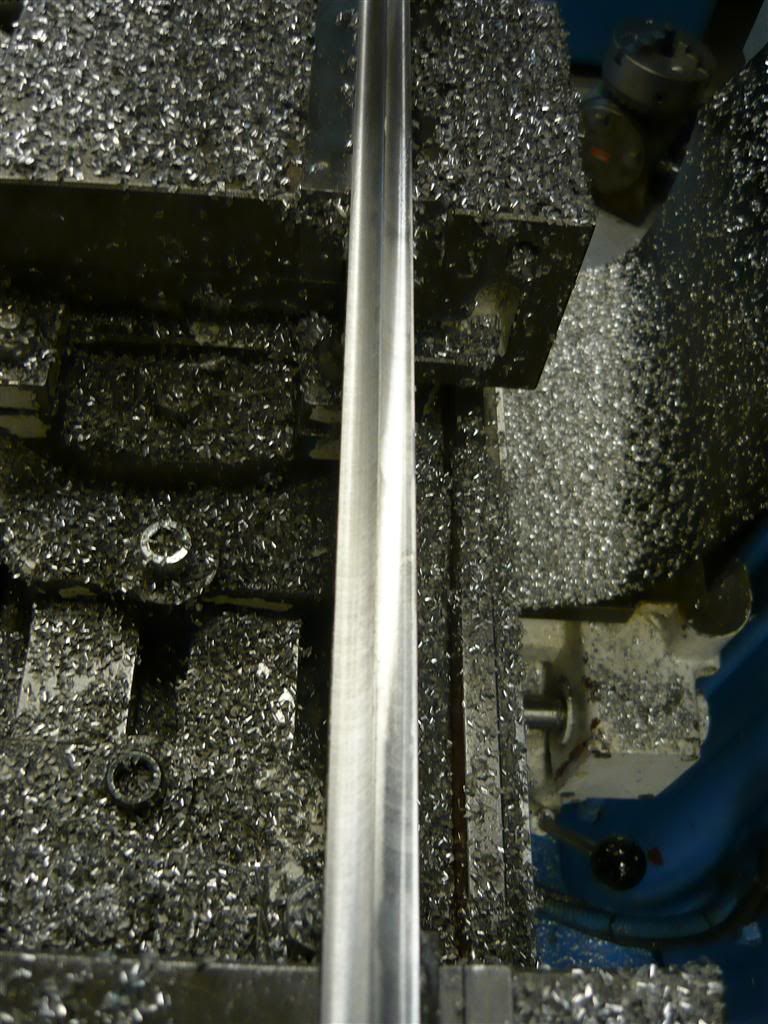
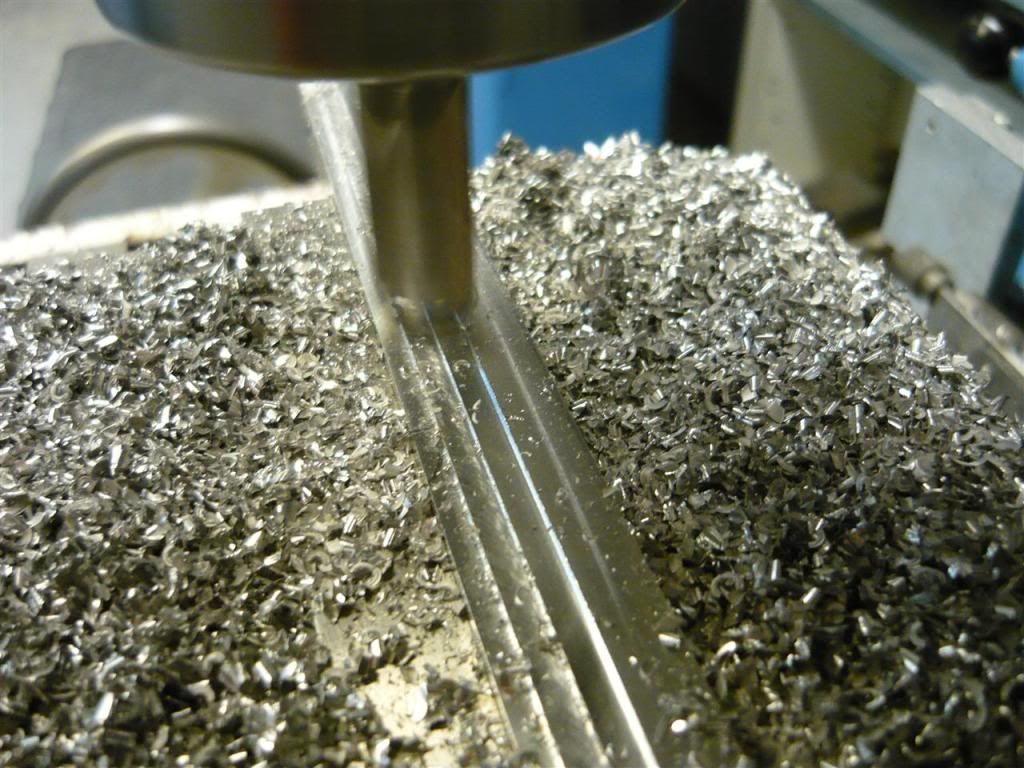
Then it's time to mill the steps..
(CLICK TO ZOOM)
(CLICK TO ZOOM)
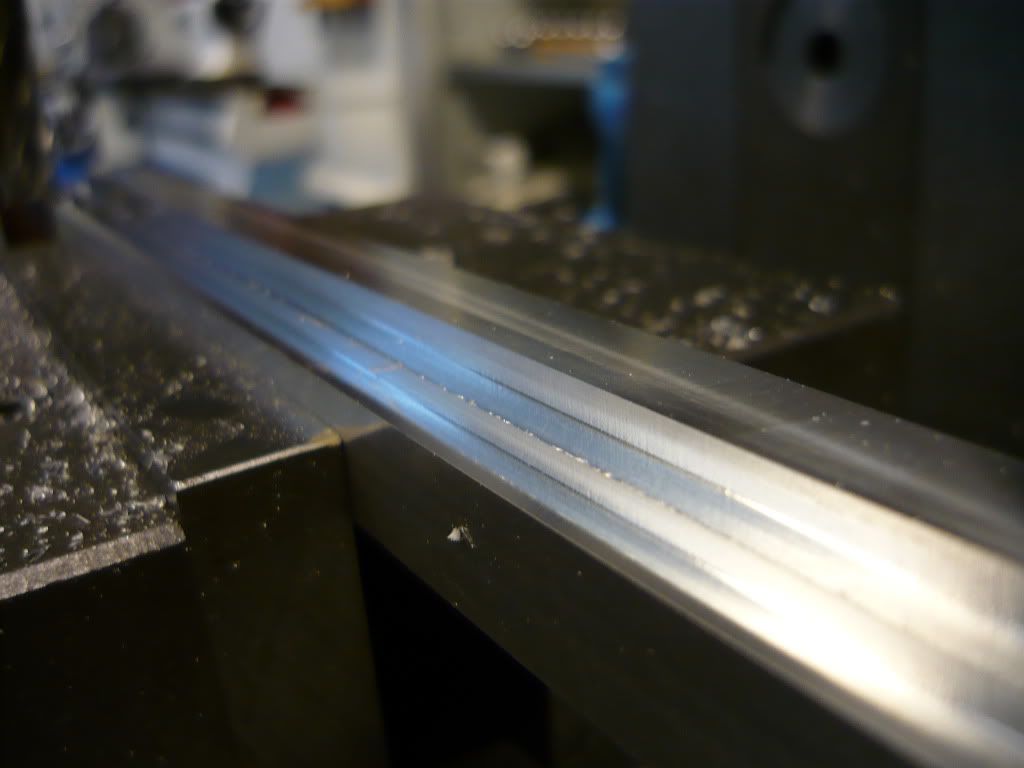
First part done..
(CLICK TO ZOOM)
Second one in the making, slightly different.
(CLICK TO ZOOM)
(CLICK TO ZOOM)
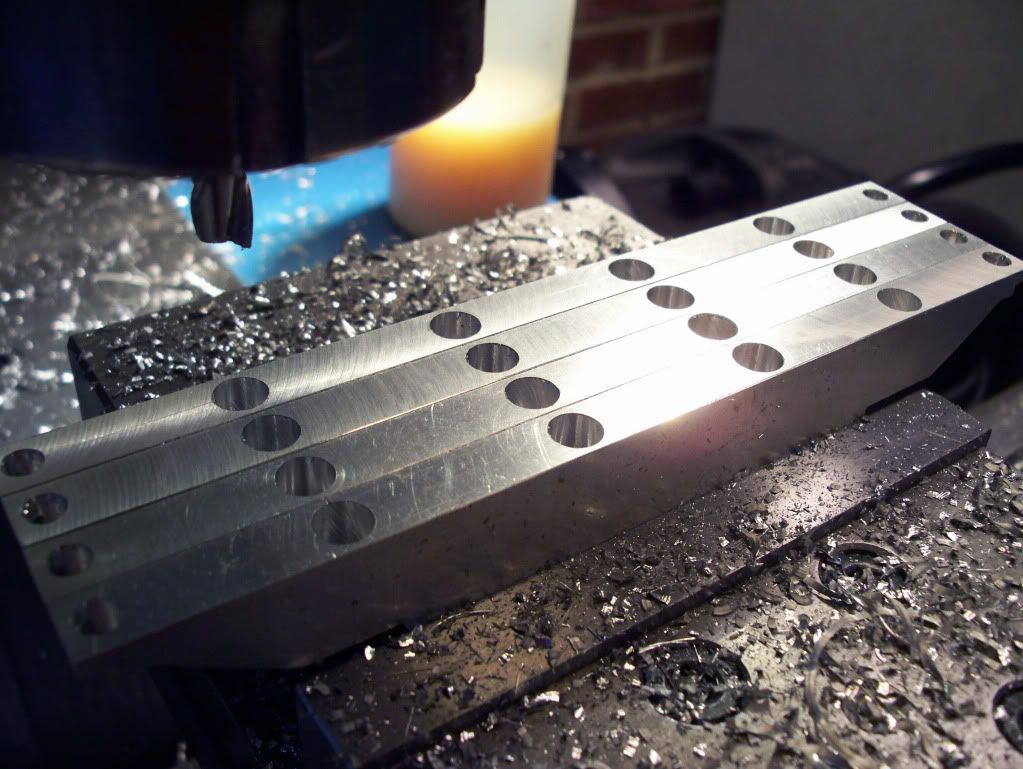
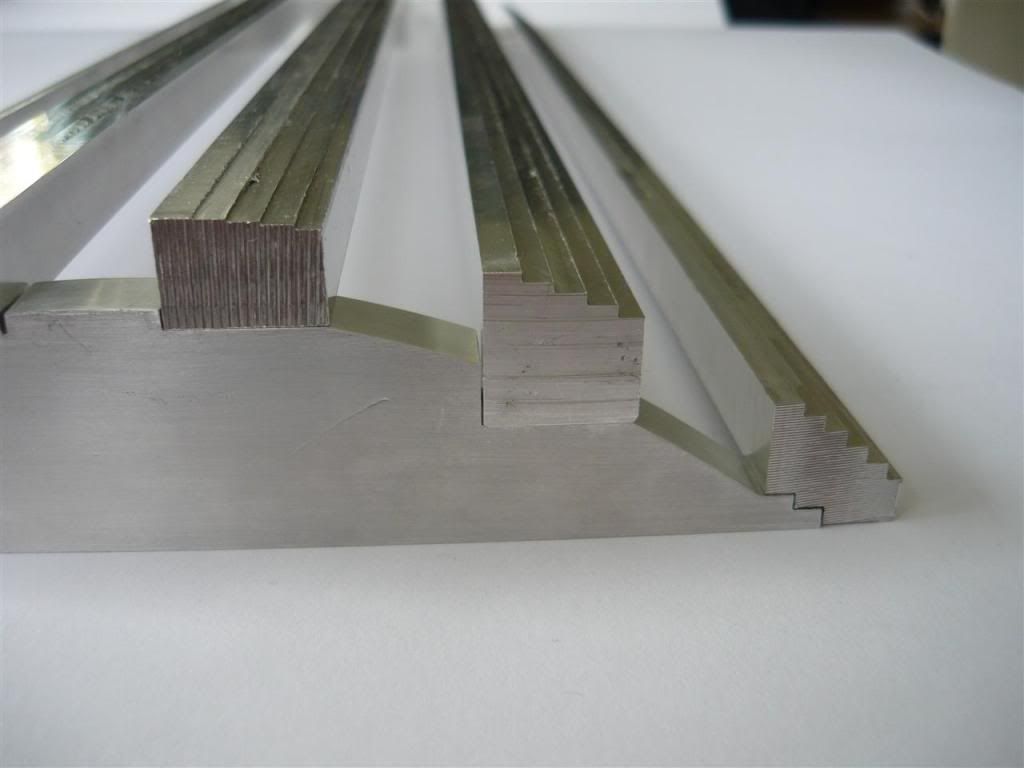
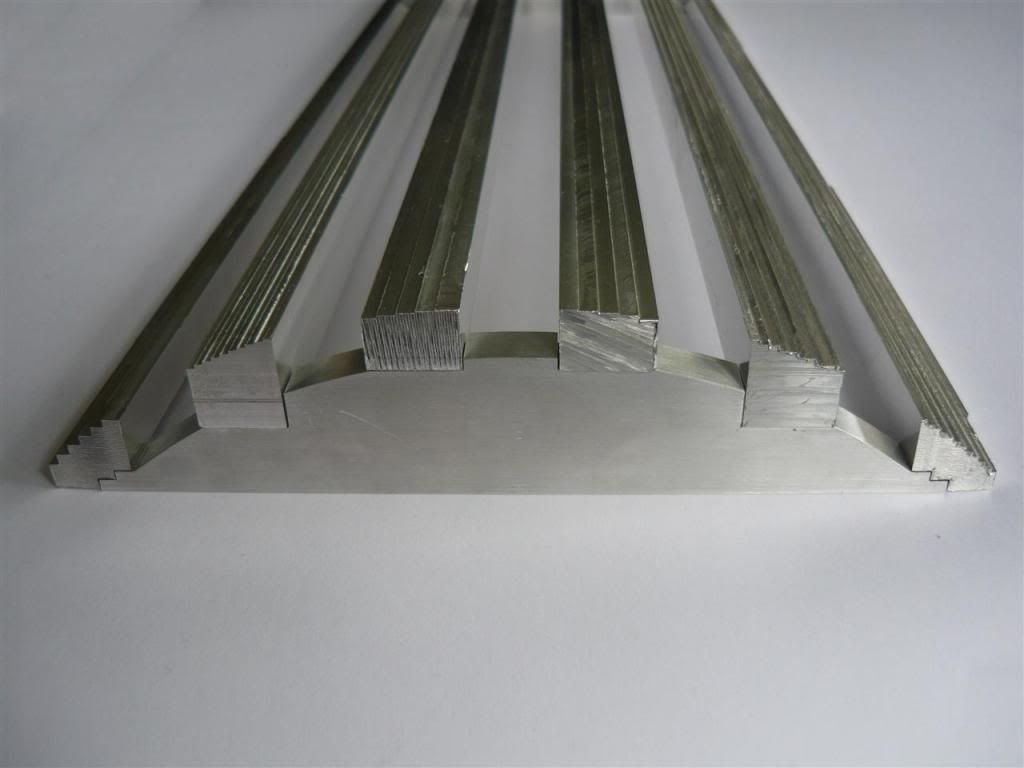
Here I am testfitting the parts and realized that those steps are probably to large. Will take a long time to sand them down by hand and I risk loosing the shape. Will have to make smaller steps..
(CLICK TO ZOOM)
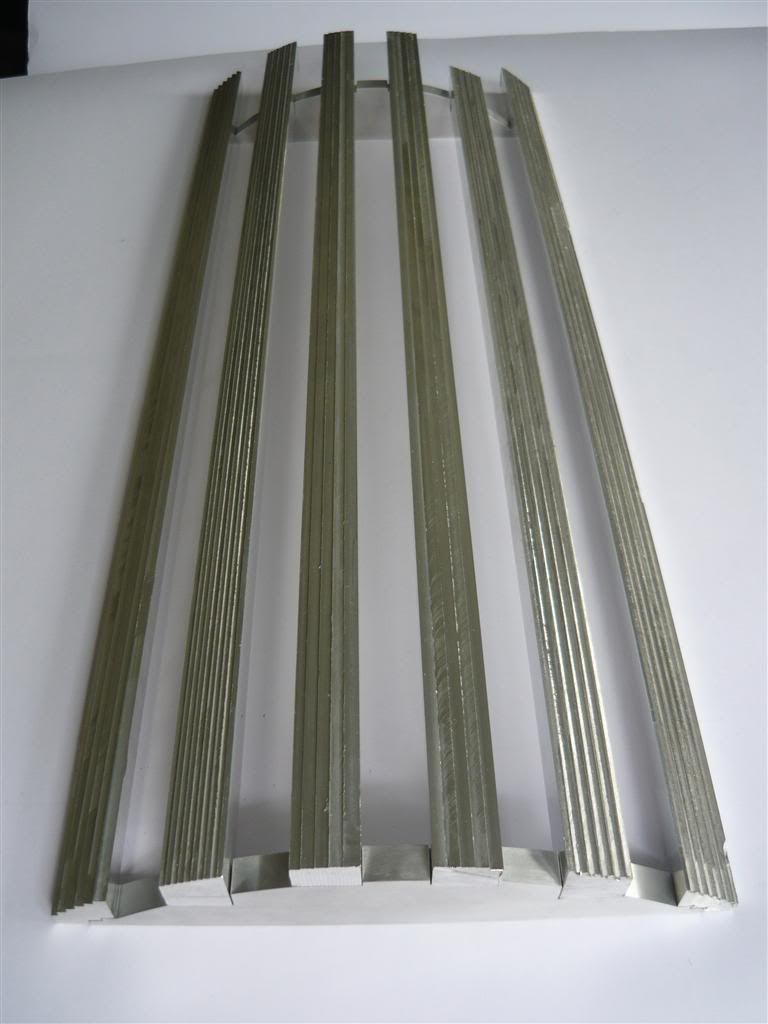
..like these ones.
(CLICK TO ZOOM)
(CLICK TO ZOOM)
(CLICK TO ZOOM)
(CLICK TO ZOOM)
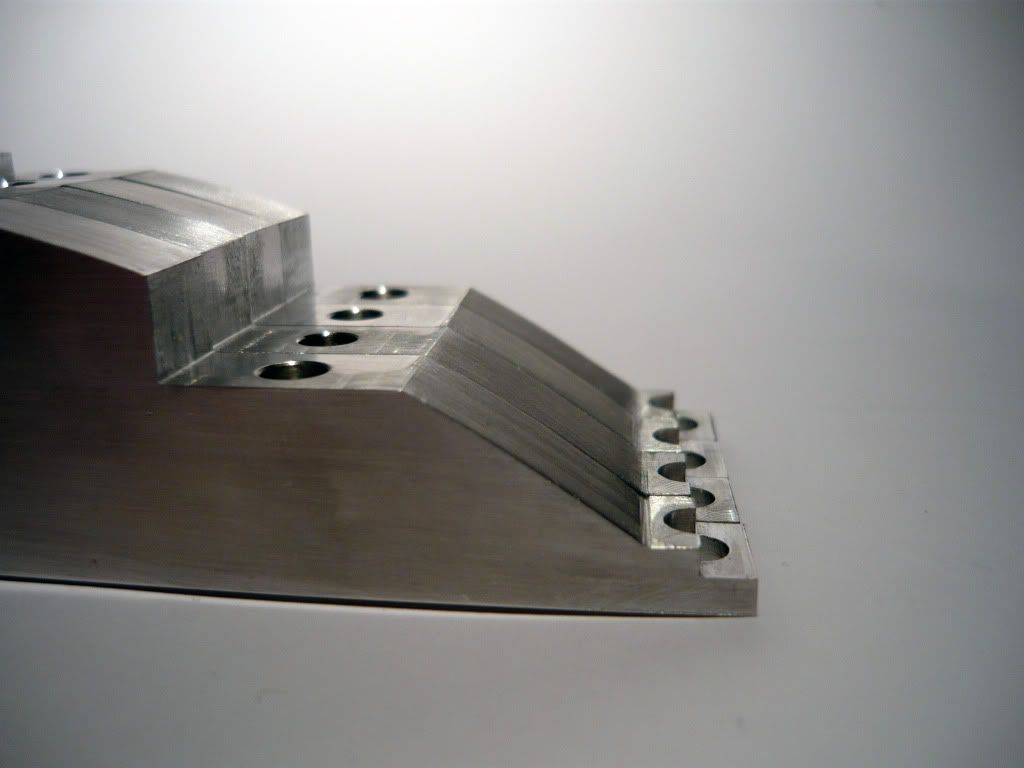
Now thats better. But the part in the middle is 1mm to high And I will need to mill that of the bottom, because this hurts my eyez.
(CLICK TO ZOOM)
(CLICK TO ZOOM)
(CLICK TO ZOOM)
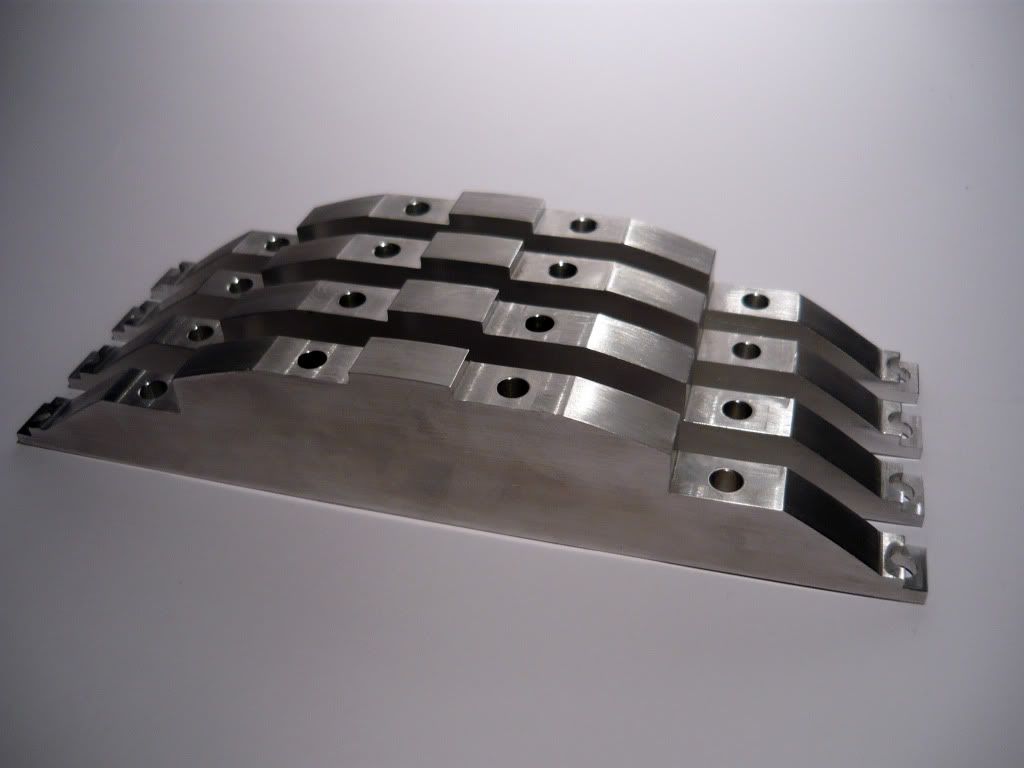
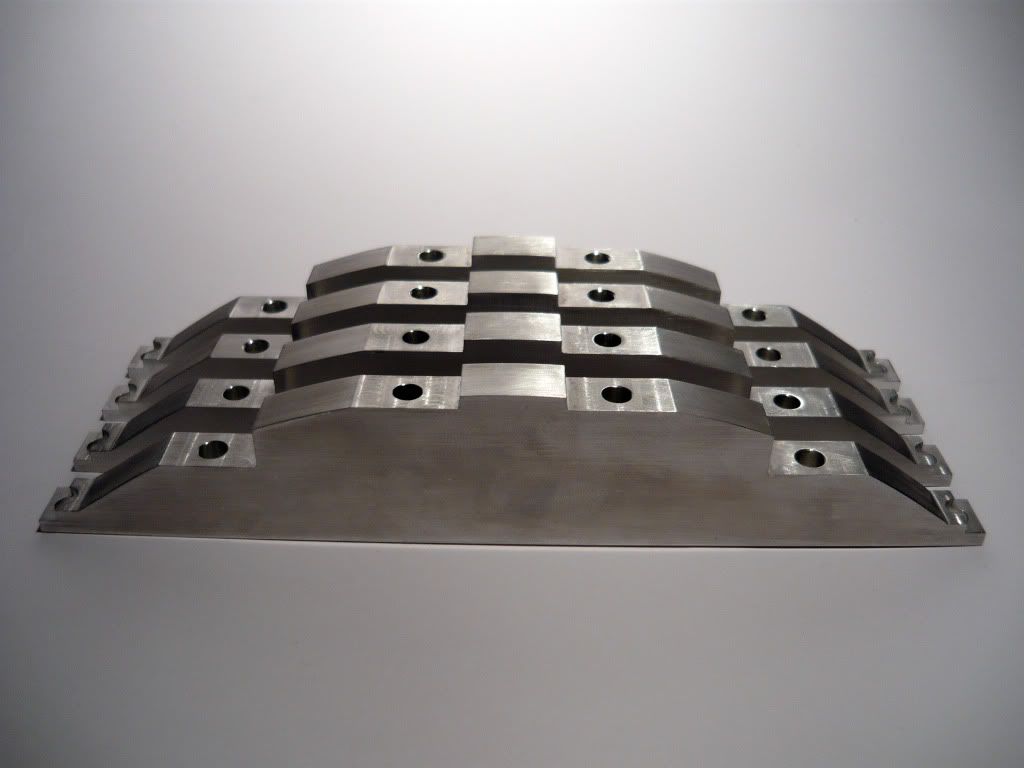
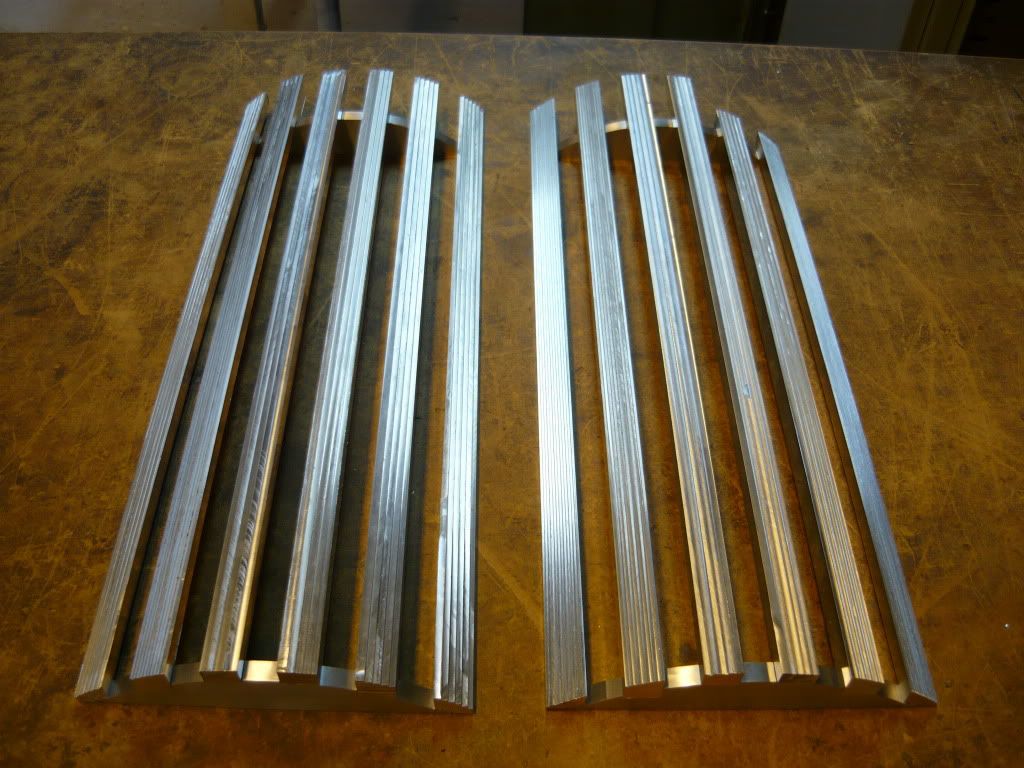
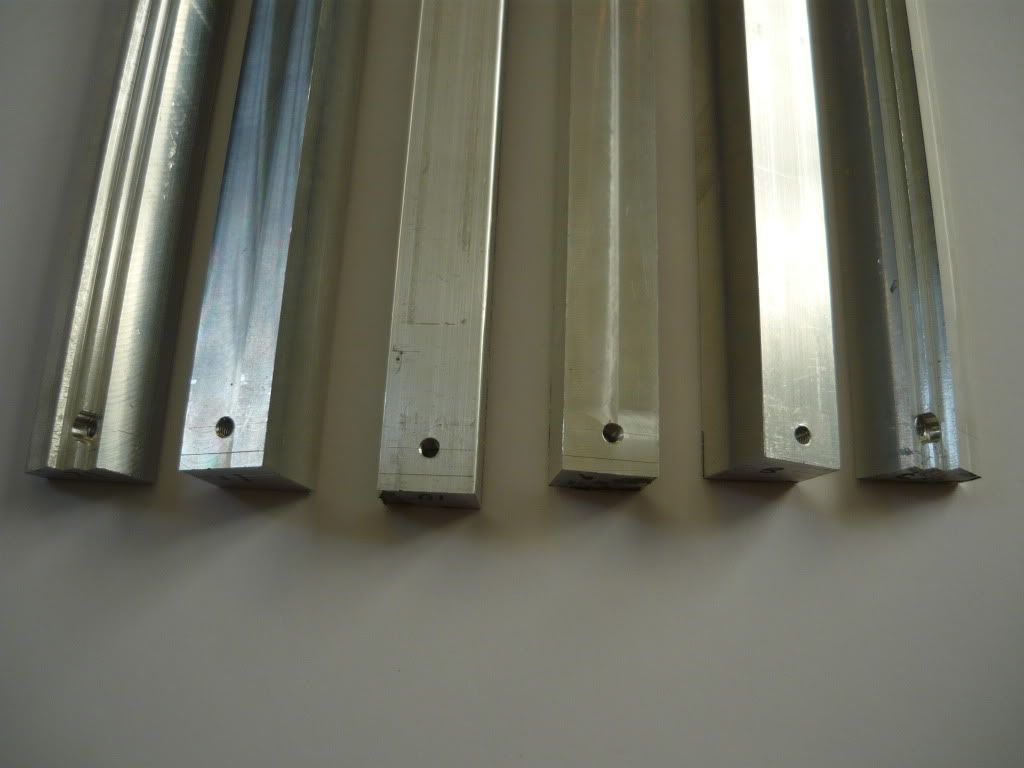
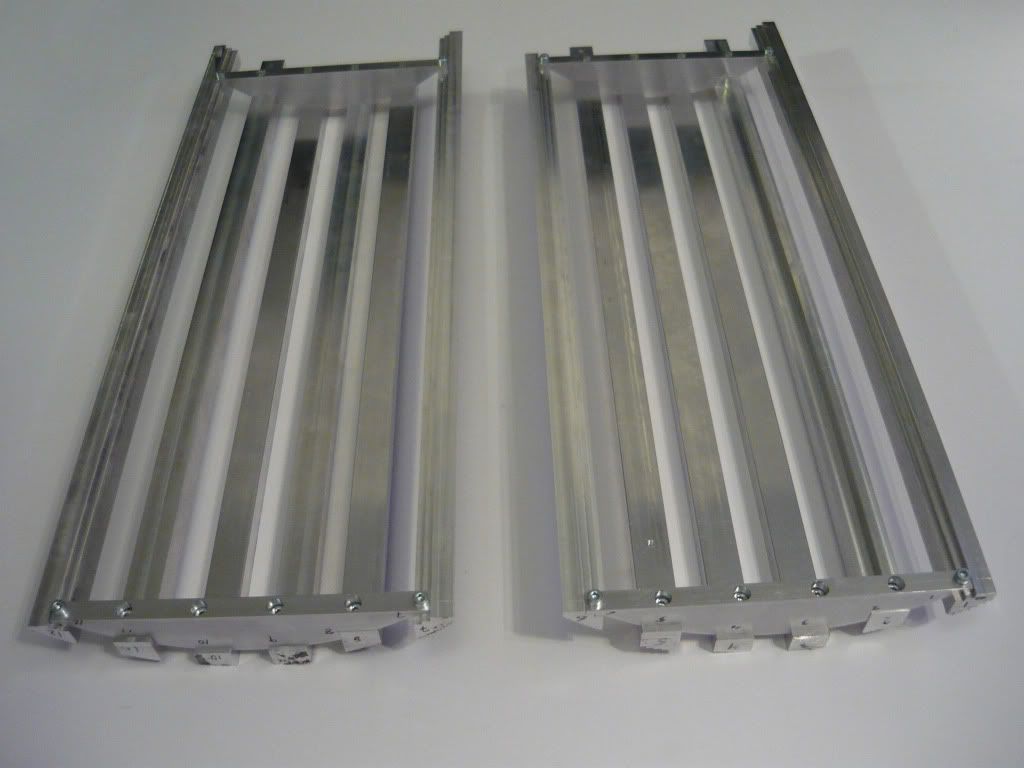
Here you can get a glimpse of what the finished top will look like. The bars need to be cut to the right lenght, the one that's shorter is already cut...duh
(CLICK TO ZOOM)
Now I'll just have to do this all over again for the bottom pieces.:sigh: I so hope the finished result will meet my expectations.
See ya.
/GNU
So much work done yet so much still to come.. Hope you can make it all the way trough!
Not into xtreme builds anymore, just like to keep things silent.
Asus P6T Deluxe V2 - Intel i7 920 3.6 GHz - 6 Gb 1800 MHz DDR3 - AMD HD5850
Great start! Can't wait to see it finished!
Donate to XS forums
Yeah there is quite a lot left, but I try to tell myself that the hardest parts are almost done. It will be done, that I can ashure you but I reckon that all the waterblocks will cause som headache. But it'll be fun atleast
Thanks..

I'm speechless... :O. This is definitely my all-time favorite here. Gotta say that I'm really jealous of you having all the equipment and patience for that... And also gotta hate you for making such an awesome case that makes me wanna cry when I look at mine xD.
Specs:
HW: Lian Li PC-A71F | i7 920 | P6T Deluxe | HD5870 | 6GB OCZ Platinum 2000mhz | AX850W | Asus Xonar D2X 7.1 | Intel X25-M 80GB SSD | WD 2TB Caviar Green
WC: EK-FC5870 | EK Supreme HF | Swiftech MCP655 with EK top | ThermoChill PA120.2 | ThermoChill PA120.3 | EK Multioption 250
Other: Scythe Gentle Typhoon fans | Aqua Computer Aquaero | Bitspower Comp. Fittings
Thanks for the very nice comment. Patience is my middle name and the tools are just a bonus
Here we go again.
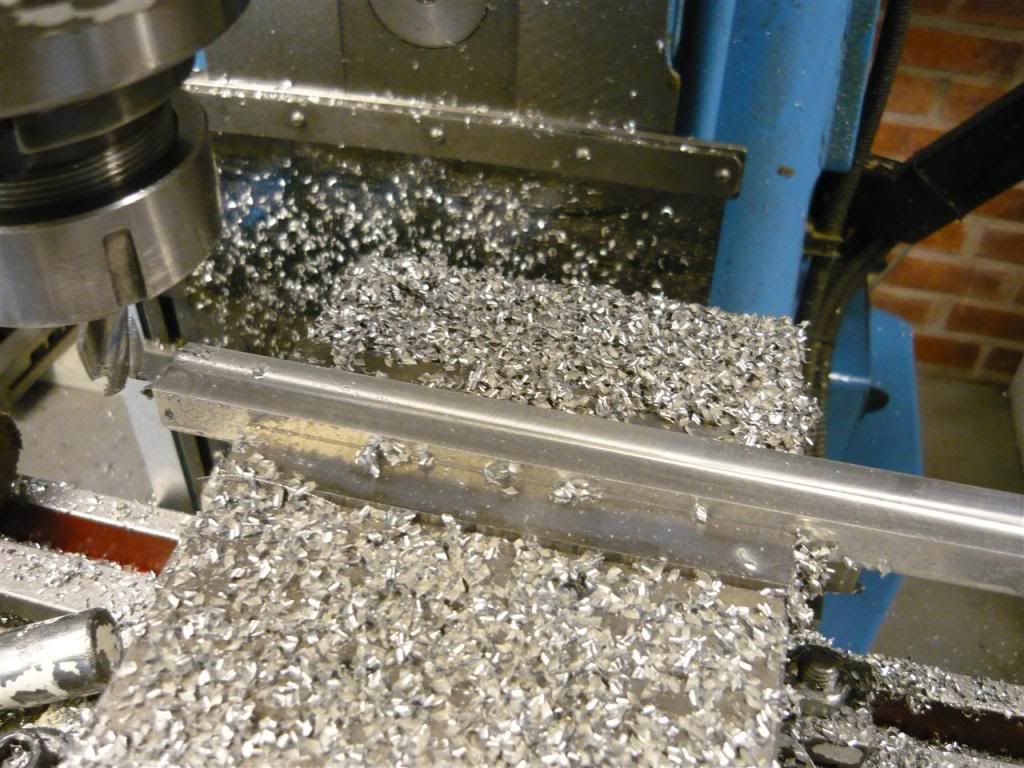
I managed to get to the workshop and finish the milling of the last rods for the top and bottom of the case. Since there are 12 in total, these milling pictures might seem somewhat familiar to the previous pictures buut anyway, here they are.
(CLICK TO ZOOM)
(CLICK TO ZOOM)
(CLICK TO ZOOM)
(CLICK TO ZOOM)
(CLICK TO ZOOM)
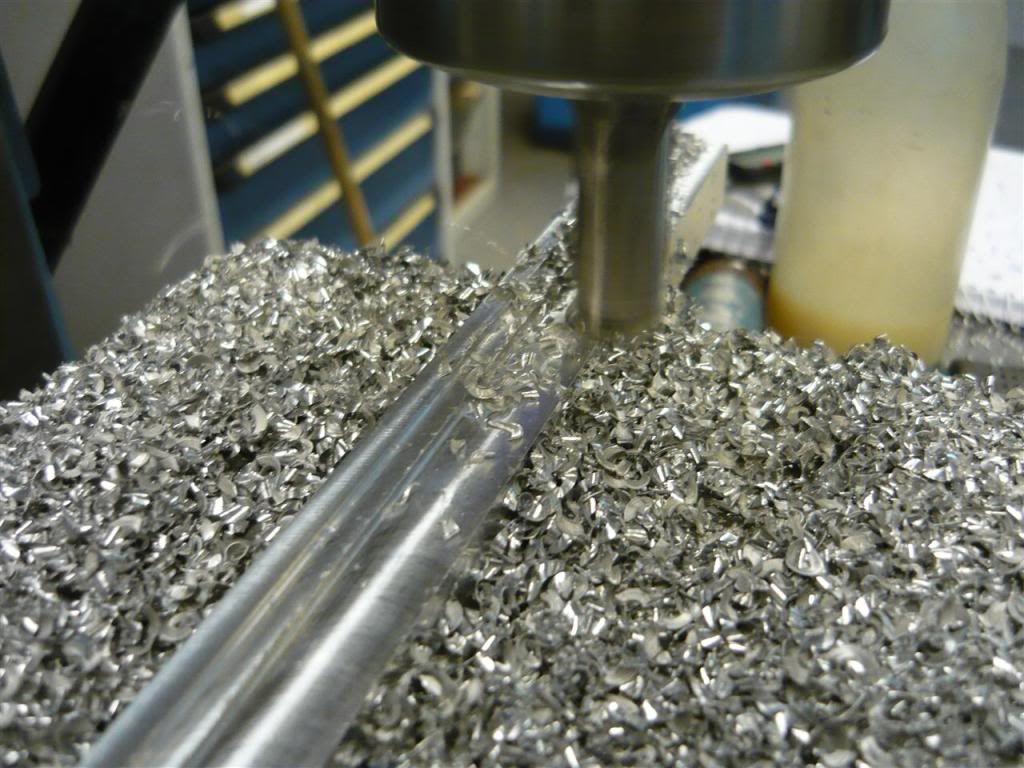
Yay.. almost done with the last one
(CLICK TO ZOOM)
(CLICK TO ZOOM)
(CLICK TO ZOOM)
(CLICK TO ZOOM)
(CLICK TO ZOOM)
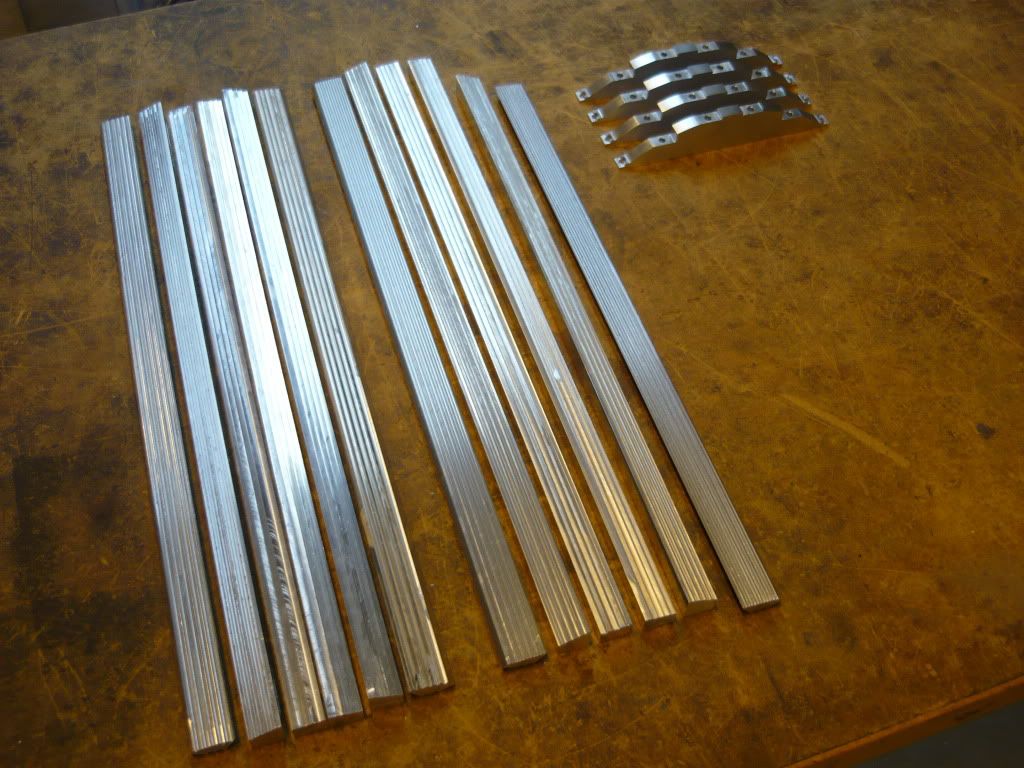
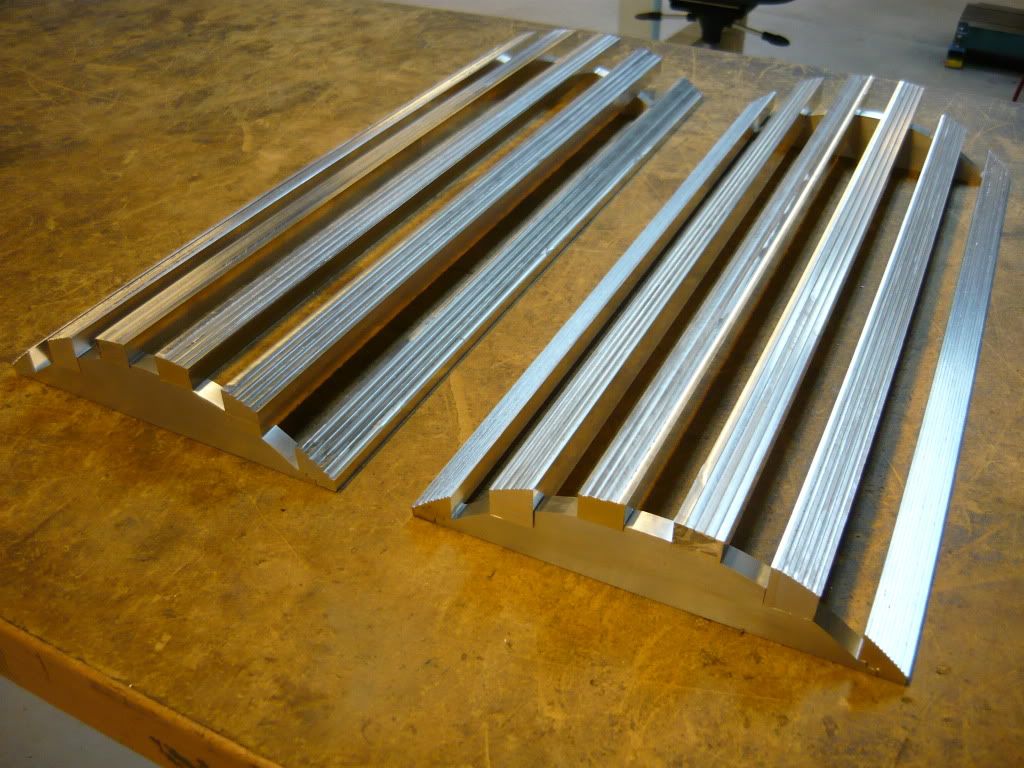
The shapemilling of all the pieces is finally done. Next up is cutting, drilling and taping holes for them to be mounted. And of course there is the sanding. Hope you liked this mini update.
See ya[/QUOTE]
The work continues.
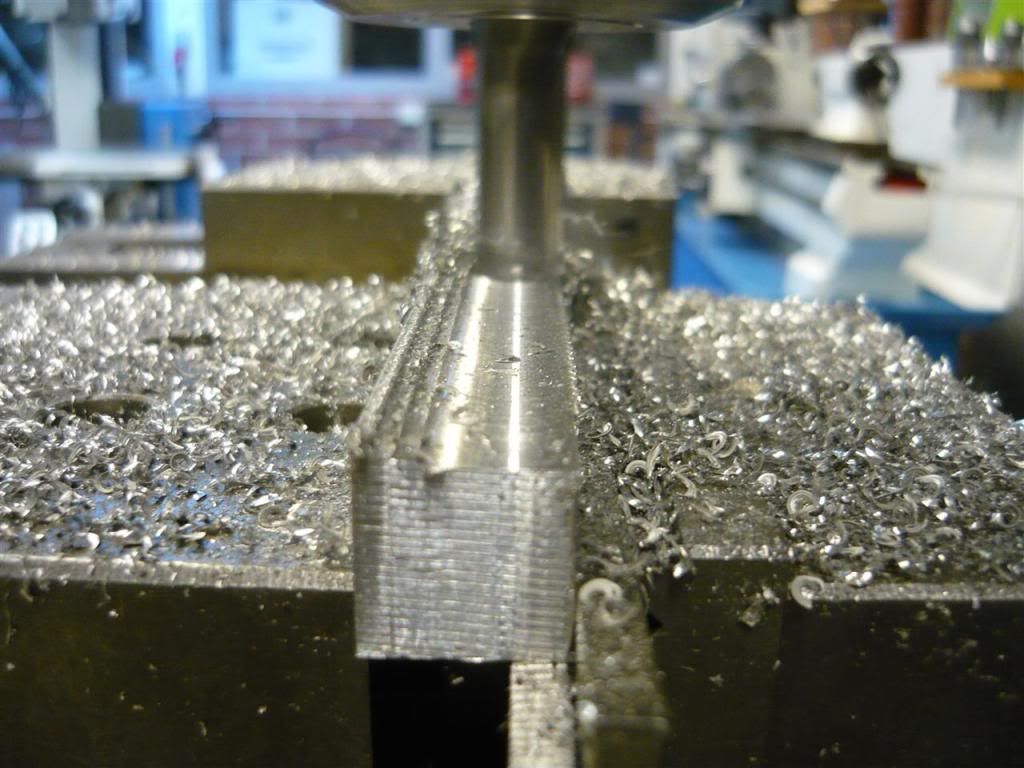
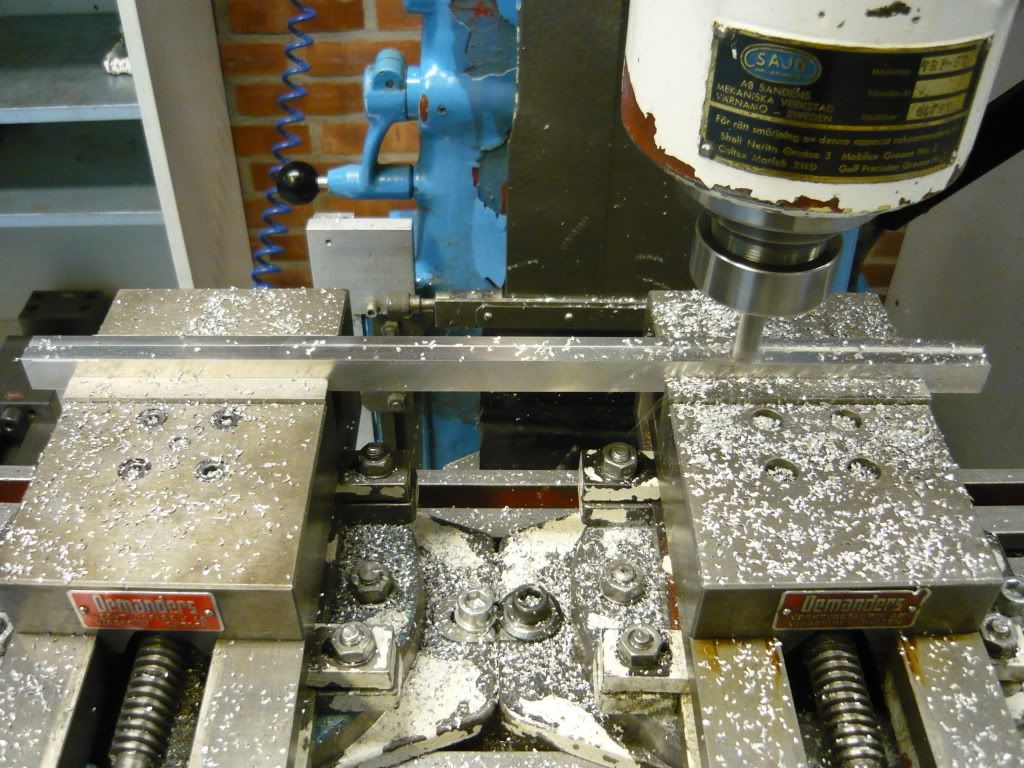
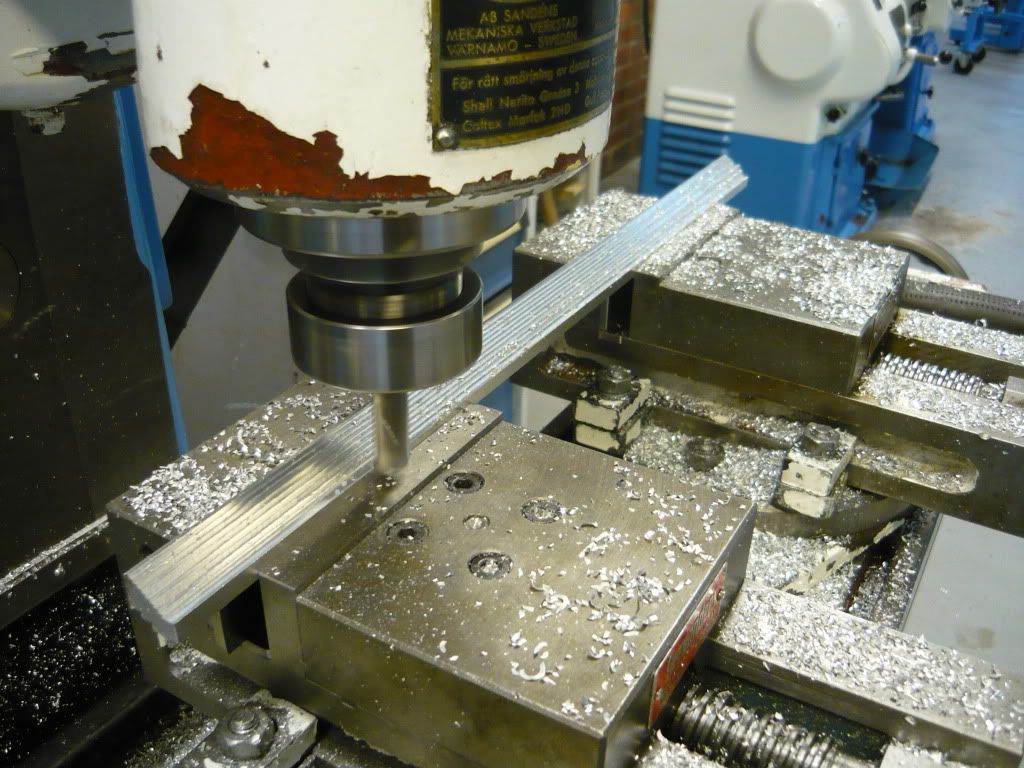
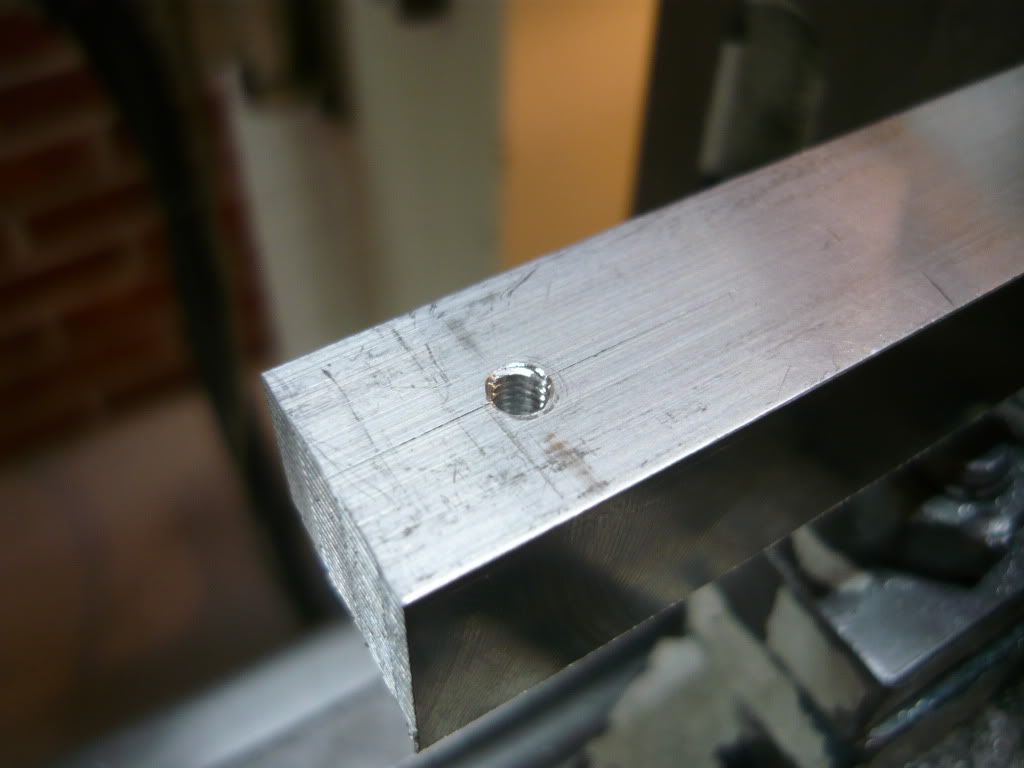
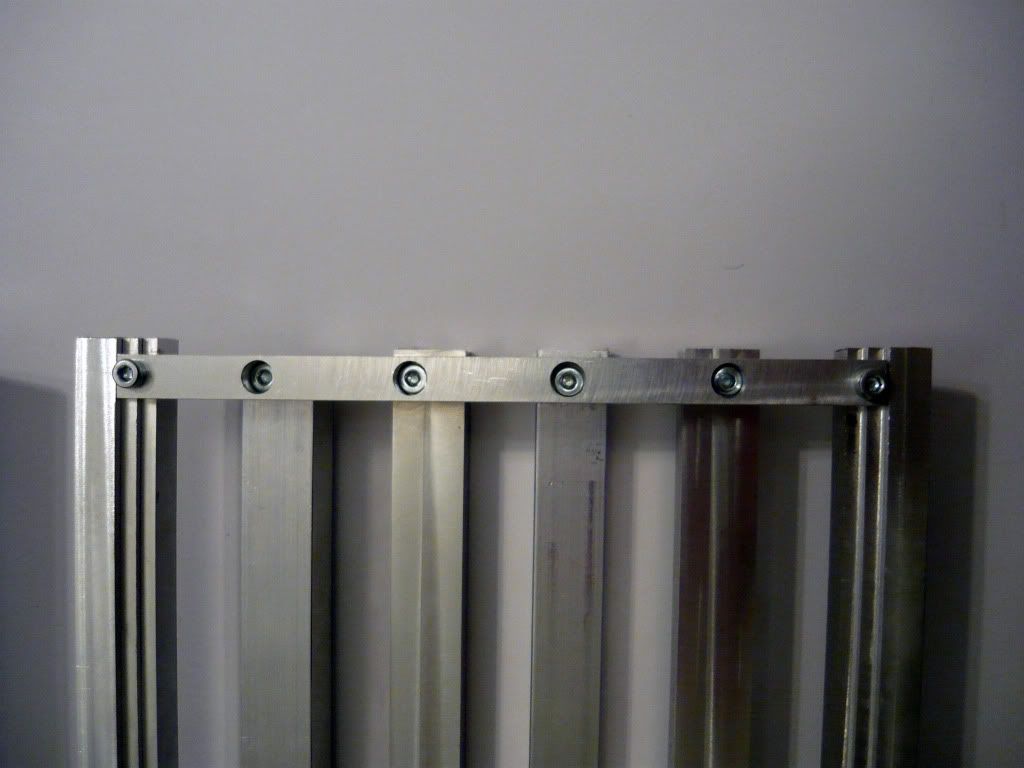
Next up was the mountingholes on the underside of the rods. Drilled and taped with M4.
(CLICK TO ZOOM)
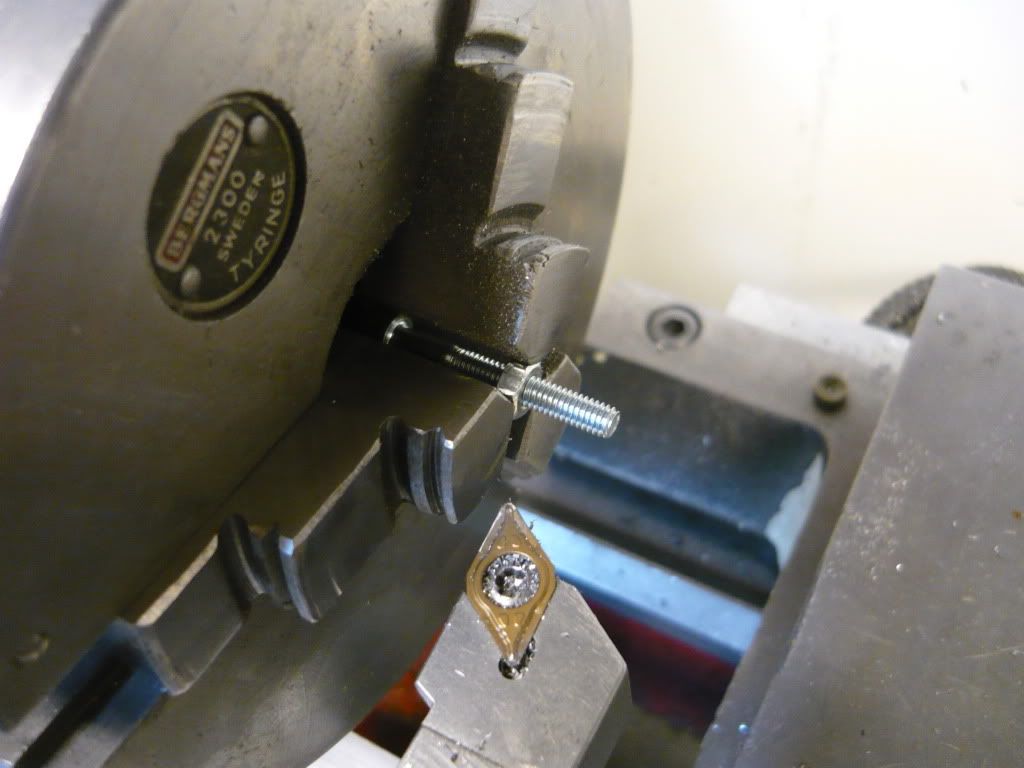
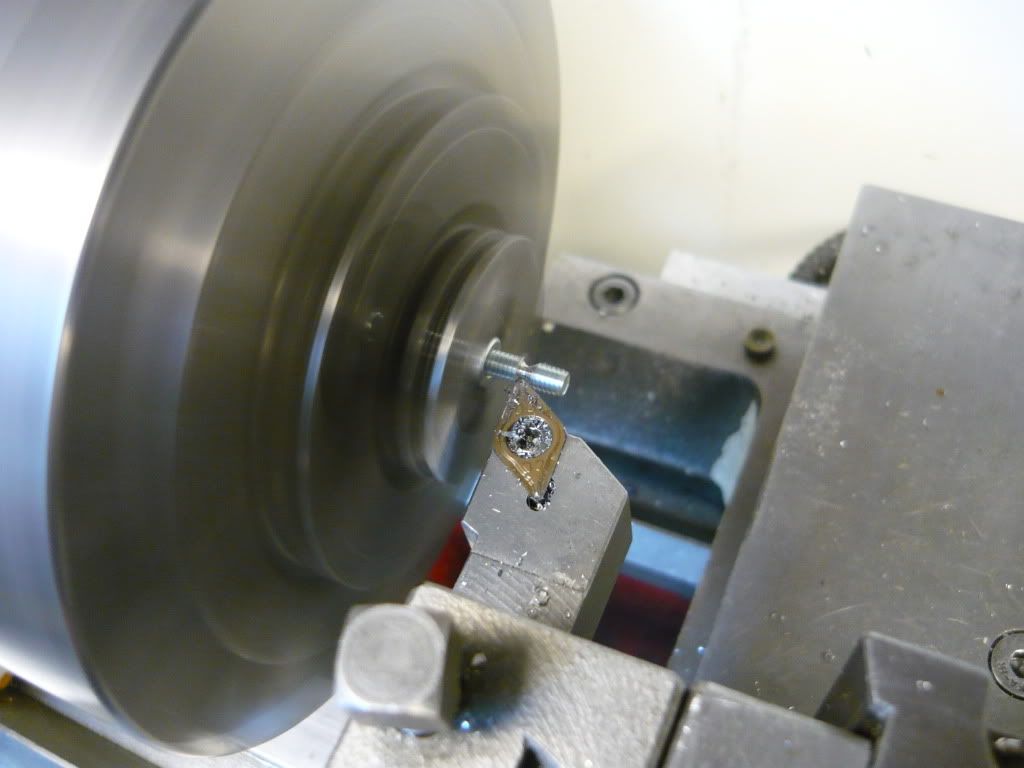
This is how i solved the issue with the mounting holes on the corner pieces ending up on an edge making it impossible to drill with a normal drill. Had to countersunk the hole (left)with a normal endmill before I could use the drill.
(CLICK TO ZOOM)
(CLICK TO ZOOM)
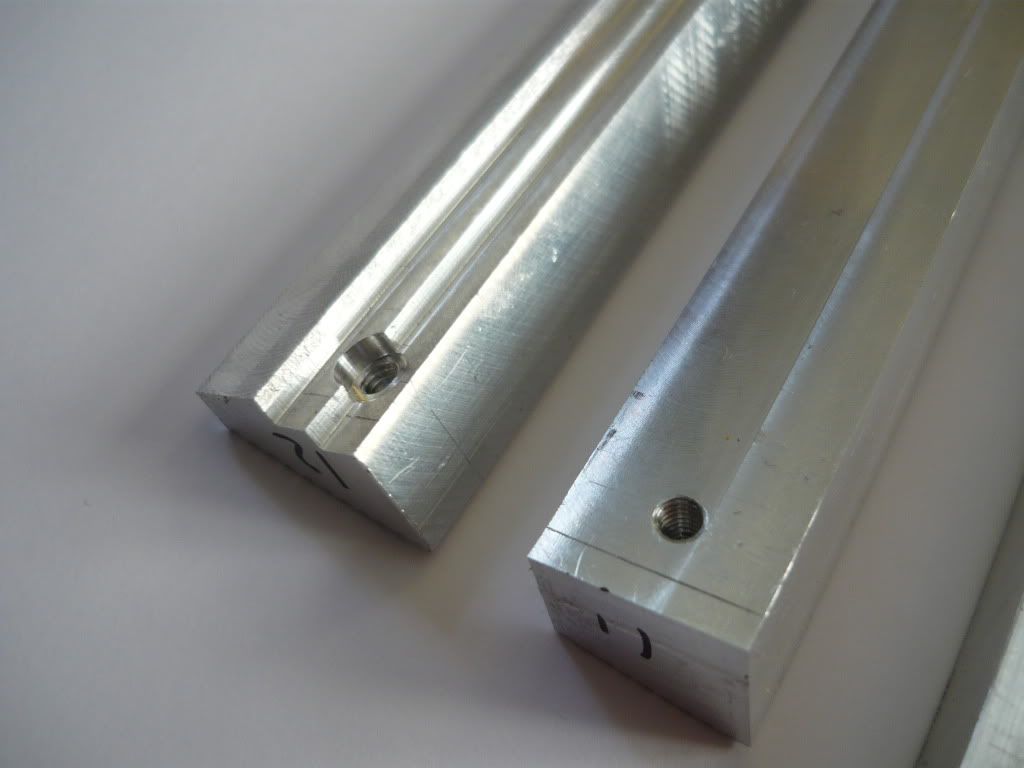
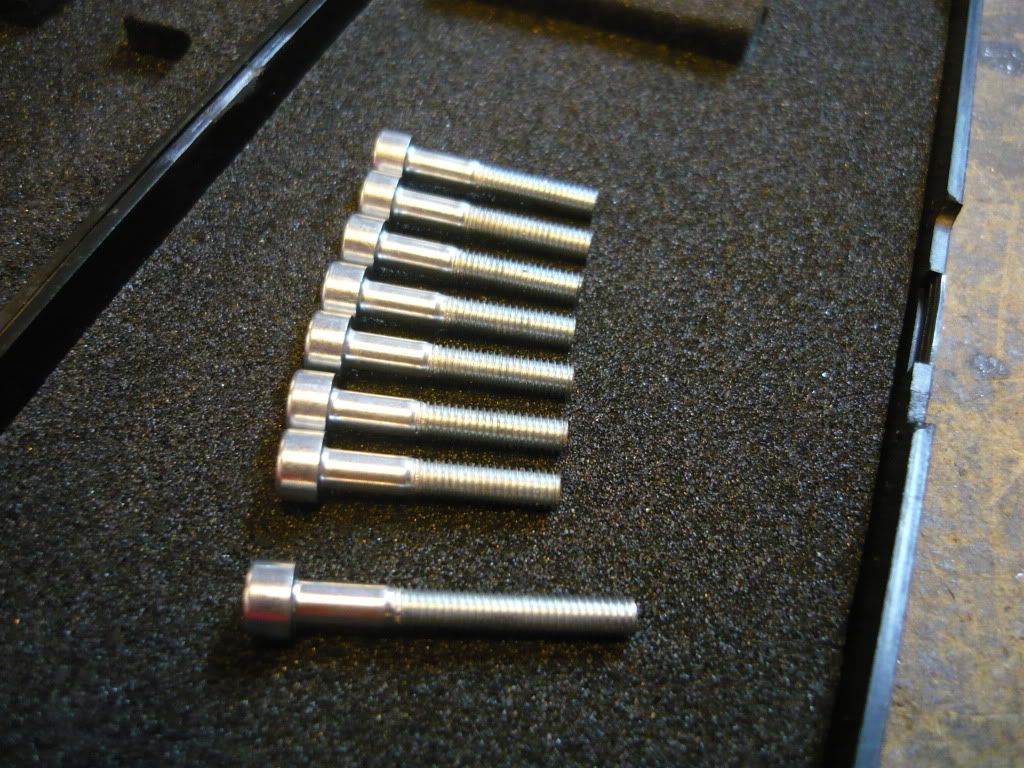
I had to moddify the screws a bit since they were a little bit to long and this was faster than hunting for new ones.
(CLICK TO ZOOM)
(CLICK TO ZOOM)
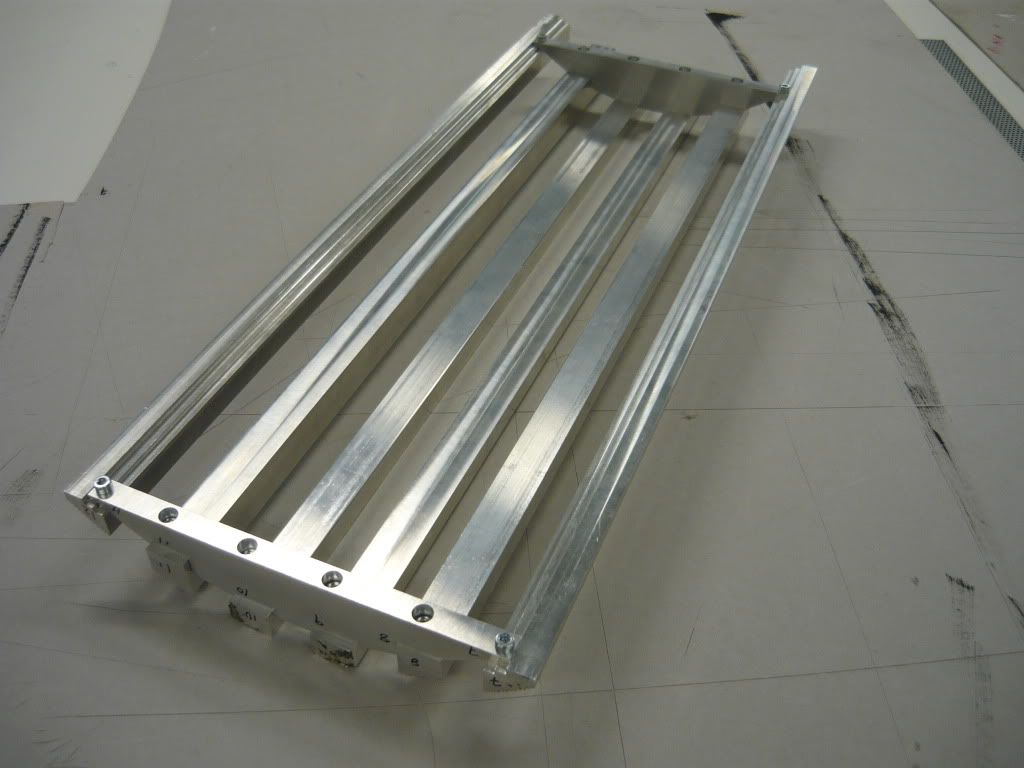
TADA
(CLICK TO ZOOM)
(CLICK TO ZOOM)
(CLICK TO ZOOM)
(CLICK TO ZOOM)
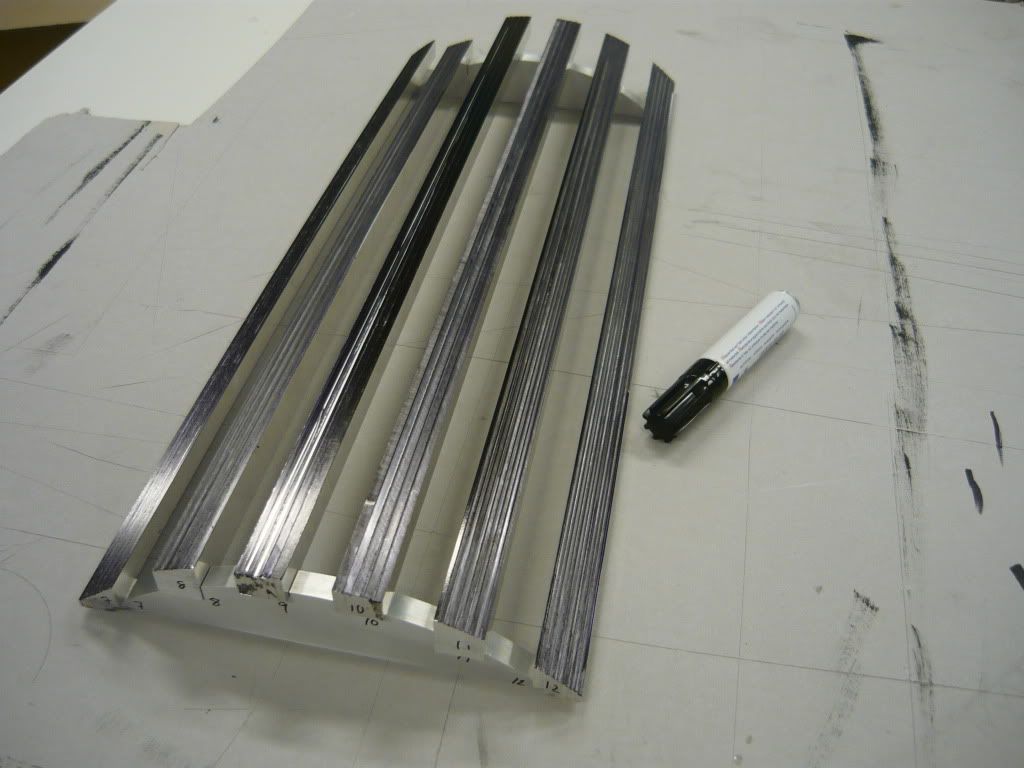
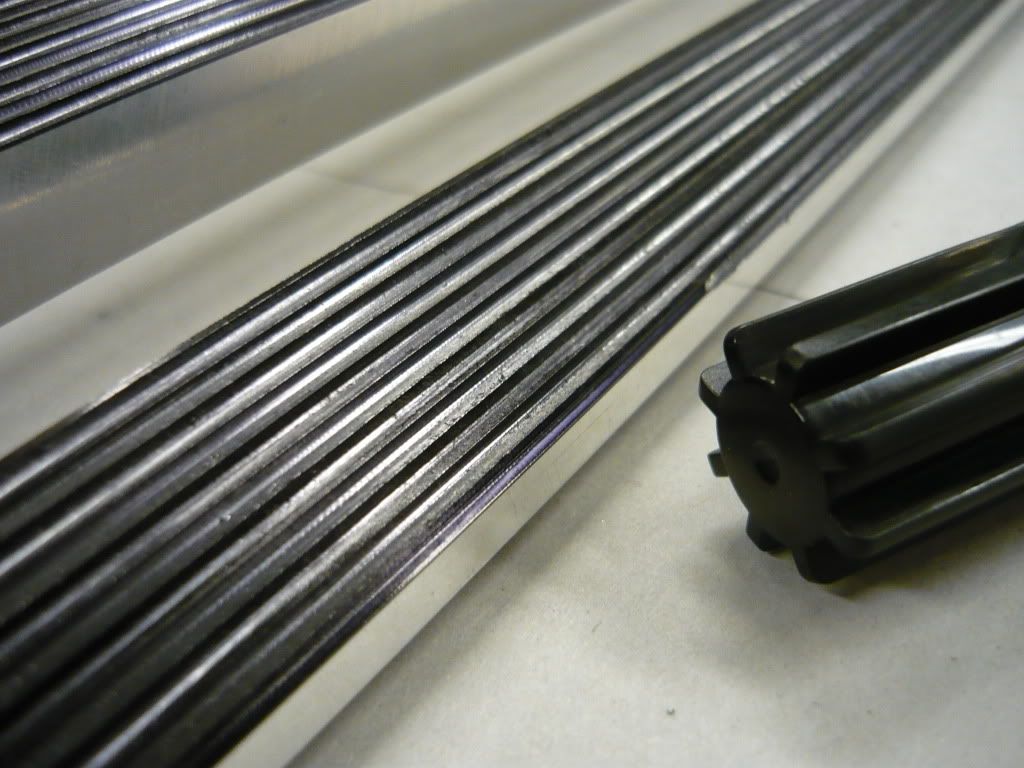
Next up is the sanding proceedure. To have some guidens while sanding I painted the whole piece with a black permanent marker pen. The desired radius is the smallest one, the one that is created by the inner/lowest corners in each step. When sanding, the black marker paint will stay in these corners and create black lines that get smaller and smaller the further you sand. When the lines dissapear, you have the correct radius. It's pretty hard to see from this angle with all the reflection but all the rods are pinted black
(CLICK TO ZOOM)
(CLICK TO ZOOM)
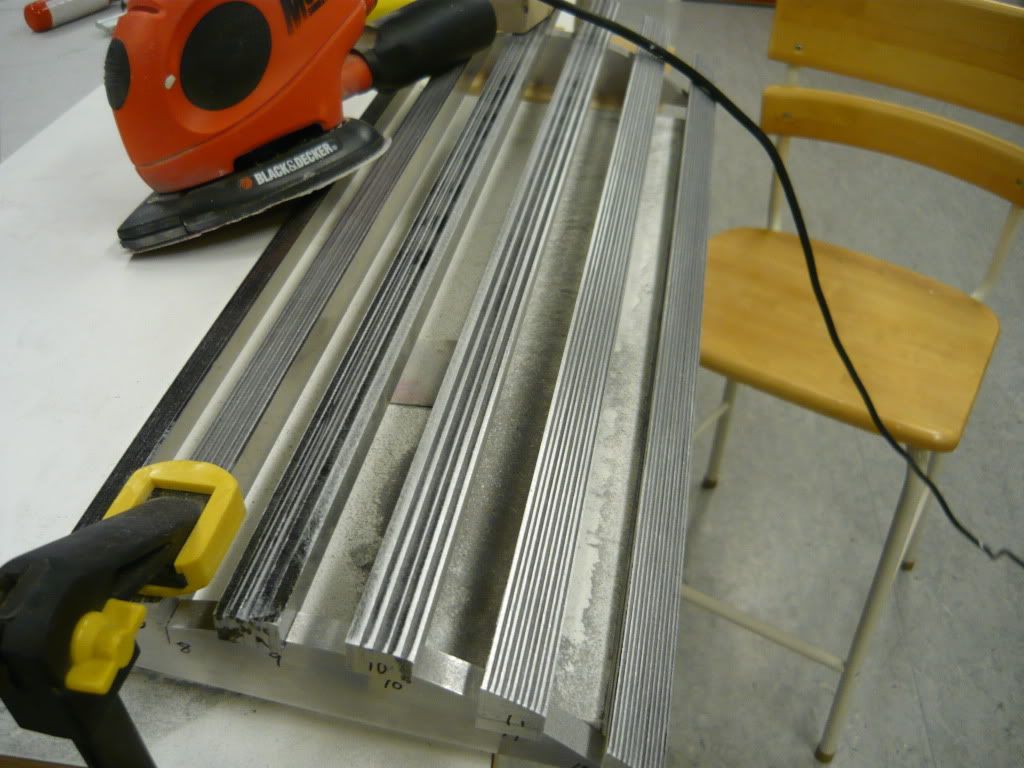
This is just a test sanding and I started sanding using a vibrating mous or whatever you wanna call them. The process is kind of slow and I suppose a file would have been a greate beginning, but I didn't have one at the moment. Will try that next time.
(CLICK TO ZOOM)
'
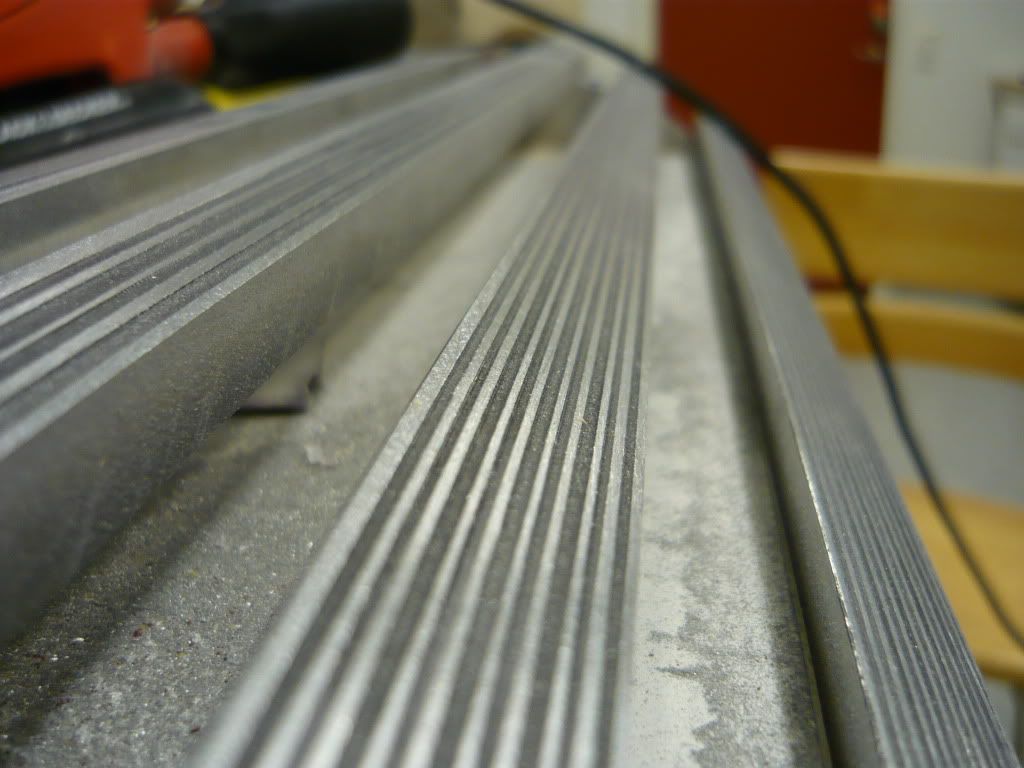
Here you can see the black lines are getting thinner and thinner the closer you get to the finished shape.
(CLICK TO ZOOM)
This last photo shows why I have waited to cut the rods to the exact length. You always get some kind of chamfer on the edges when sanding. By cutting the exact length after the sanding I will have straight edges aswell.
(CLICK TO ZOOM)
Still a lot of sanding to do but, I guess you get the idea.
Thanks for watching :thumb:
This looks like one to watch.
I really love the style of the concept renders (I'm a fan of this kind of look, which I would describe as a cross between steampunk and Half Life 2)
Hope things progress smoothly.
"Monolith" - [ Xeon W3540 (4.22) - Rampage 2 Extreme - 12 GB Ripjaws 1600 - GTX 570 - 120 GB OCZ Vertex - Antec TruePower 750W - Corsair 700D - Apogee XT CPU Block - XSPC 360 Rad ]
Old Box - [ E4600 2.4 @ 3.7ghz (11x335) - P5W-DH - 4gb Gskill @ 893mhz - Radeon 3850 ]
Thanks, HL2 and steampunk is actually something thats been in my mind during the project. The first plans for this project was only to do one big external steampunk watercooling unit. Then it evolved into a flat case supposed to lay down but ended as a normal tower style case with some inspiration by HL2
What happened to this awesome build?
UPDATES!!! UPDATES!!! UPDATES!!!
Thanks for missing me. This project is not dead I can asure you. However it is in a phase where I'm redesigning some of the parts to make it easier to fabricate and to make it look better. So at the moment the building process is only virtual. There is also other projects that have been occupying my time, but those are soon done and then this work will continue as usuall. Sorry for this but I think it will be woth it in the end.
 Posting Permissions


 Reply With Quote
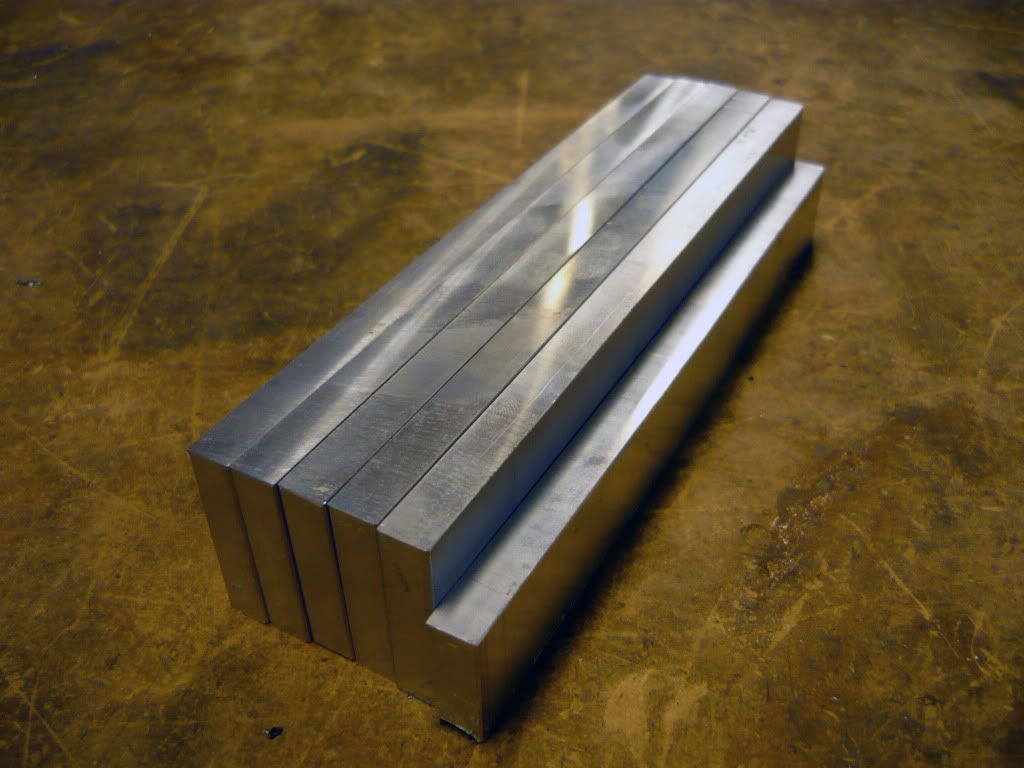


Bookmarks