Page 1 of 2 12 LastLast
Results 1 to 25 of 37

Thread: Guilty

  1. #1
    Xtreme Member
    Join Date
    Aug 2010
    Location
    netherlands
    Posts
    264

    Guilty

    Hi fellow modders,

    It was a matter of time but here it is... my first real scratch build
    Thanks to Nate from E22 for the design.

    Sometimes you see a design with a wow factor. This happend too me with this design. After some consultation we decided to try to build this design.
    Nate the design and I'm building.

    Sponsored by:


    And designed by:


    The design:


    The hardware that comes in is still a suprise...even for me , but anyway there will be an SLI set and some cool watercooling

    After buying aluminum strips and other stuff at the hardware store, it was time to start building. After some fitting and measuring the frame was created. I still had an old Mobo tray from a old TJ07.


    Cut some plates of acrylic and placed it.


    For measuring I have an old blown up Classified.


    Made the door/ cover for the PSU


    And cut to size the front plate


    Now it's a matter of drawing lines on the inside. The result after sawing and filing.


    Cut holes for the fans at the front and the lid on top covered with acrylic


    Covers closed


    Placed some nice 120mm NorthQ fans to see how it looks.


    More updates coming very soon
    Last edited by kier; 07-16-2013 at 01:00 AM.

  2. #2
    Banned
    Join Date
    Oct 2012
    Posts
    578
    Looks real nice. Nice design and craftsmanship. You might find chrome wire fan guards beneficial to your finger tips.

  3. #3
    Xtreme Member
    Join Date
    Aug 2010
    Location
    netherlands
    Posts
    264
    Quote Originally Posted by AMDforME View Post
    Looks real nice. Nice design and craftsmanship. You might find chrome wire fan guards beneficial to your finger tips.
    Thanks, there will be a custom E22 fangrill

    Update!!!

    Sponsored by:


    Designed by:


    Another update Need to catch up with my FB updates

    I have covered the acrylic panels with matte black vinyl and installed some fans to see how it looks


    And cut two acrylic plates. 1 for the controller (aquaero VF) and 1 for the lamptron switches
    Also blackened with vinyl


    I want to build this one without too much cost, so in this build if possible, all kind of stuff that I allready have.
    The first idea was to purchase a 480 rad, but also overhere a bit crisis. So it's becoming two 240 rads. That's why I made ​​the front panel again with the fanholes more apart.
    Side effect is that it looks better i think, left-center-right all the same sizes between them


    This also blackened and polished the edges.


    Placed the mobo with some EKWB blocks. And naturally straight tubes


    Almost straight


    Last edited by kier; 07-16-2013 at 01:00 AM.

  4. #4
    Xtreme Member
    Join Date
    Sep 2009
    Location
    Seattle WA
    Posts
    334
    Love the work so far. I will be following the rest.

  5. #5
    Xtreme Member
    Join Date
    May 2008
    Location
    Portugal
    Posts
    181

  6. #6
    Xtreme Member
    Join Date
    Aug 2010
    Location
    netherlands
    Posts
    264
    Update!!!

    Sponsored by:


    And designed by:


    This time a big update.
    To start with the rad brackets. Dont want this to be too complicated because I still want enough space behind.
    Just a plate with an aluminium edge.


    And have it rest on the horizontal bars


    Next job ... a PSU cover. Measured and cut a piece of acrylic and drawn the shape of the PSU grill.


    Cut the grill shape


    Made a bracket ​​to keep the PSU in place.


    And placed it


    Removed the tape


    Polished the edges


    Now a little bit time consuming work ... in other builds I've done this before. Ie. single wires true holes.
    A piece of acrylic, take some measurements on the PSU outputs, and drill some holes


    Done by hand so not all straight but this will not be visible later on.
    Pasted red vinyl and put sleeved extensions true the holes


    Placed and plugged in


    Did the same thing to the PCI-e cables


    Nice sleeve curtain


    All is finished, 24-pins, PCI-e, CPU and molex


    A lot of work, but then you have something


    Dismantled everything again because I had a nice idea. Placed a LED strip under the edge of the acrylic cover.
    red


    Once busy with LED strips, I came up with the idea of placing some more strips underneath the fans for more red edges.


    More to come!!!
    Last edited by kier; 07-16-2013 at 01:01 AM.

  7. #7
    Xtreme Addict
    Join Date
    Mar 2008
    Location
    Minnesota
    Posts
    1,653
    That plumbing is sexy.
    i5 2500K @ 4.9GHz+ 8GB G-Skill RipJaws DDR3-2000 @1600Mhz CAS 6 Asus P8P67 Pro CrossFire 6970's @ 950/1450
    Xeon X5677 @ 4.5Ghz 6GB G-Skill RipJaws DDR3-2000 @1600Mhz CAS 7 Gigabyte EX58-UD5 4870x2
    i7-880 @ 4.2Ghz+ (still playing) 4GB G-Skill RipJaws DDR3-2000 @2300Mhz CAS 9 Asus Maximus III Formula MSI Hawk 5770

  8. #8
    Xtreme Addict
    Join Date
    Apr 2011
    Location
    North Queensland Australia
    Posts
    1,445
    Hey kier, just out of interest, over what time frame have all these photos been taken?

    Does it usually take you weeks on a build like this or literally days?

    -PB
    -Project Sakura-
    Intel i7 860 @ 4.0Ghz, Asus Maximus III Formula, 8GB G-Skill Ripjaws X F3 (@ 1600Mhz), 2x GTX 295 Quad SLI
    2x 120GB OCZ Vertex 2 RAID 0, OCZ ZX 1000W, NZXT Phantom (Pink), Dell SX2210T Touch Screen, Windows 8.1 Pro

    Koolance RP-401X2 1.1 (w/ Swiftech MCP35X), XSPC EX420, XSPC X-Flow 240, DT Sniper, EK-FC 295s (w/ RAM Blocks), Enzotech M3F Mosfet+NB/SB

  9. #9
    Xtreme Member
    Join Date
    Aug 2010
    Location
    netherlands
    Posts
    264
    Quote Originally Posted by tool_462 View Post
    That plumbing is sexy.
    Thanks

    Quote Originally Posted by paulbagz View Post
    Hey kier, just out of interest, over what time frame have all these photos been taken?

    Does it usually take you weeks on a build like this or literally days?

    -PB
    this is the result of one month building, evenings and weekends.

  10. #10
    Xtreme Member
    Join Date
    Aug 2010
    Location
    netherlands
    Posts
    264
    Update!!!

    Sponsored by:


    And designed by:


    Last update to end the weekend.

    The first front plate I have made ​​new with different measurments for the fans, so first one was over.
    Cut the Fanholes.


    Some small changes


    Cleaned


    And made an opening for better reaching the aquaero and res


    Made it black again


    Placed 2 other GPUs for measurments. Still waiting for the hardware .... and I want to go on
    So no time for waiting


    Tubing time!!!

    Can't help it but I need to have everything straight ... think it's starting to get an obsession

    CPU going up


    And GPU's going up


    Nice and clean


    For now connected it with adapters, but soon with acrylic tubes. Still need to make nice plate for this.


    Some detail shots


    Last think I did is making ​​the midplate black. This is finished (I think) because I will run the PCI-e cables through the slanted plate.


    That's it for this weekend
    Last edited by kier; 07-16-2013 at 01:01 AM.

  11. #11
    Registered User
    Join Date
    Jan 2013
    Posts
    50
    Where do you get that uber sexy tubing from?!
    Of all the things I've lost in life, I miss my mind the most.


    System:

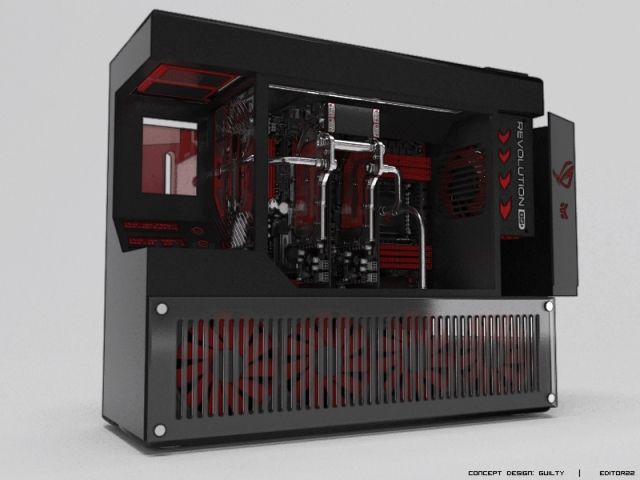
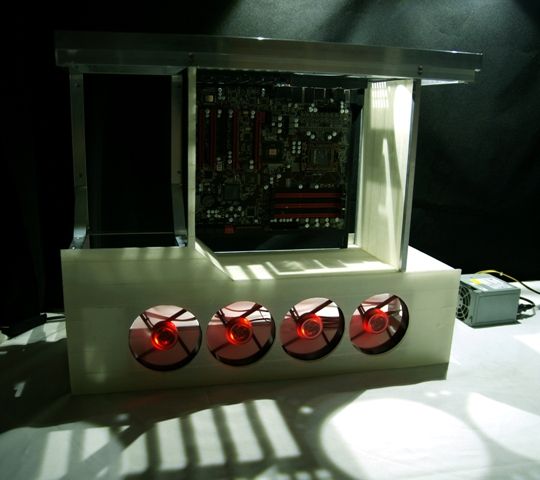
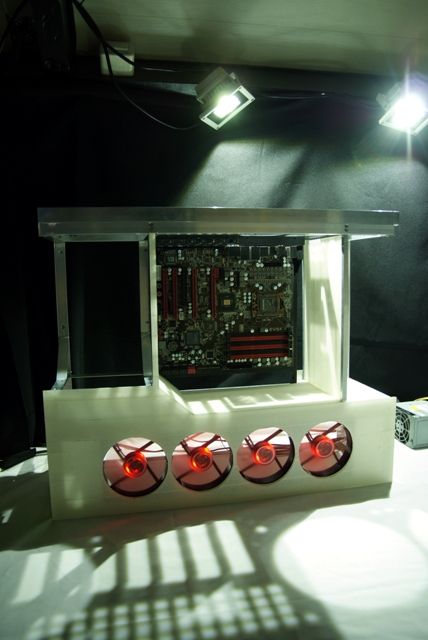
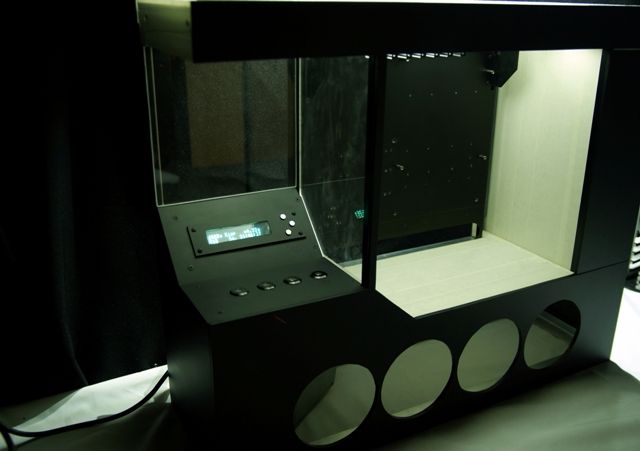
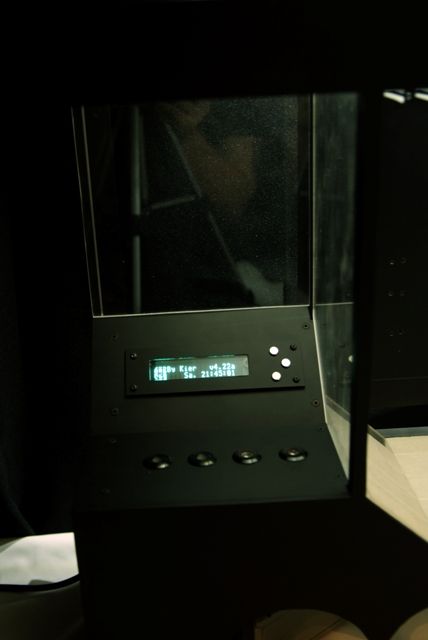
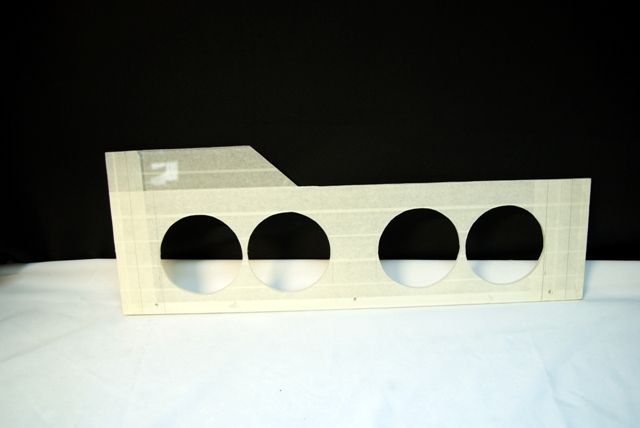
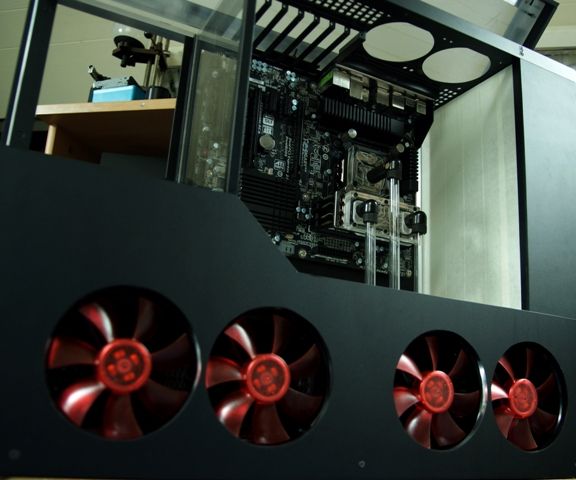
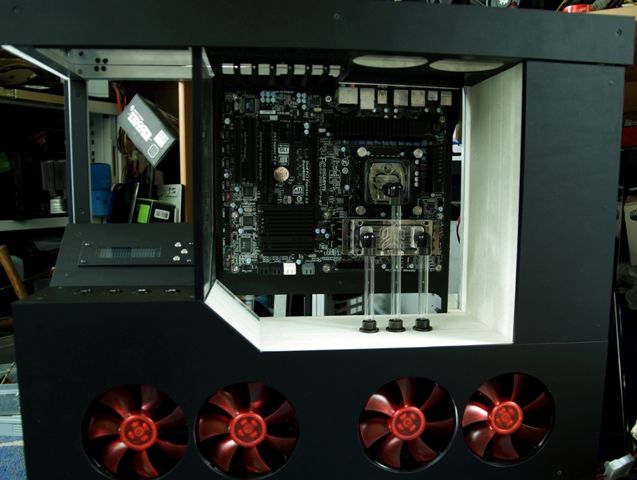
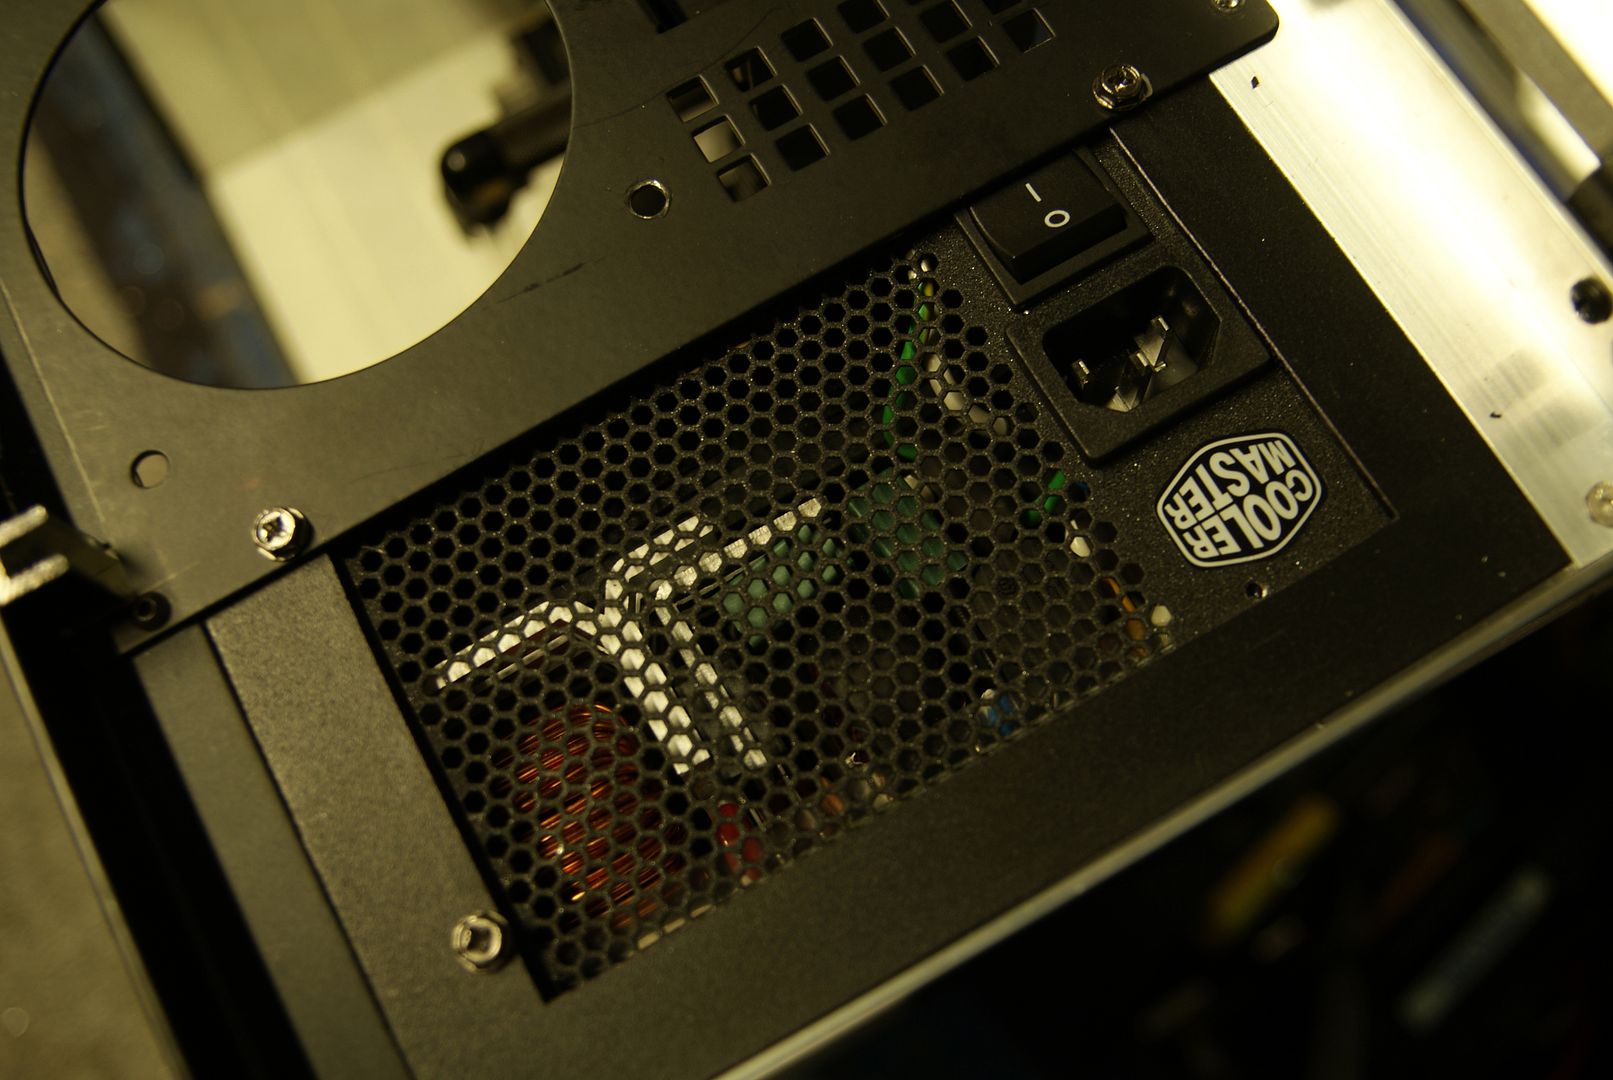
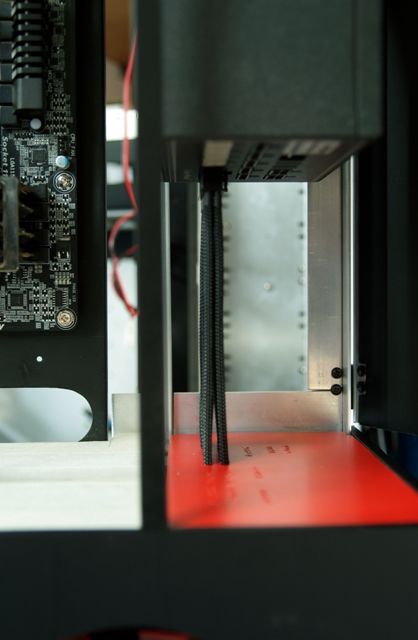
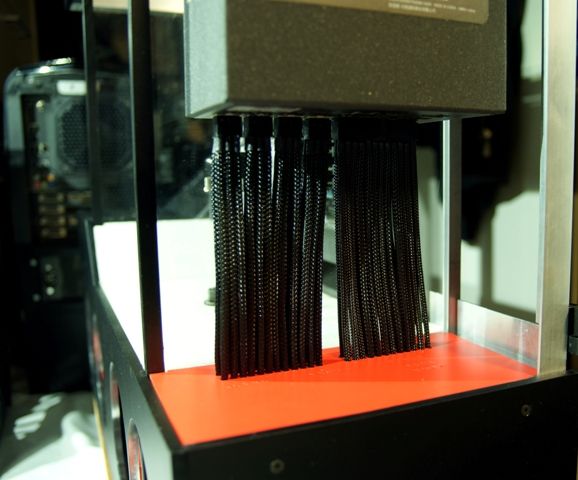
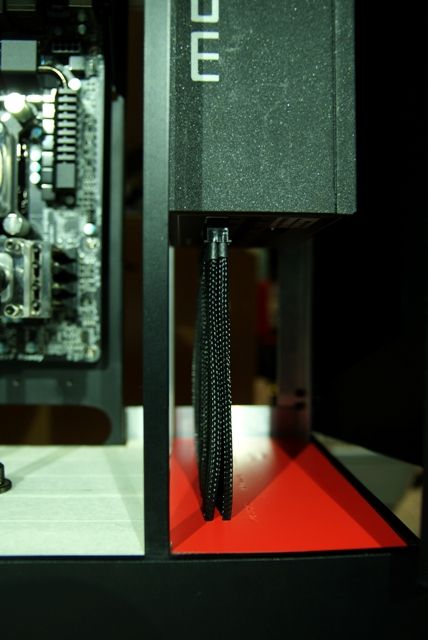
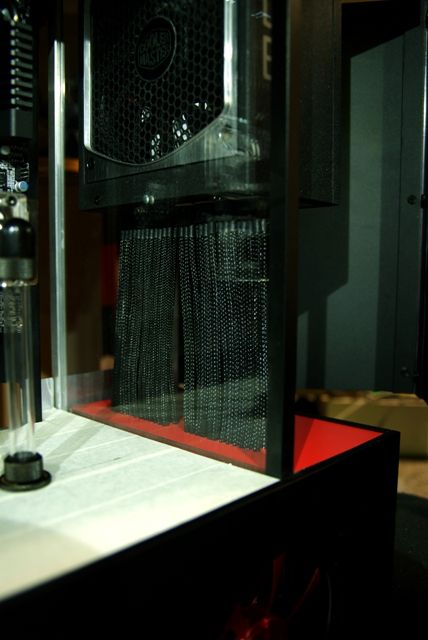
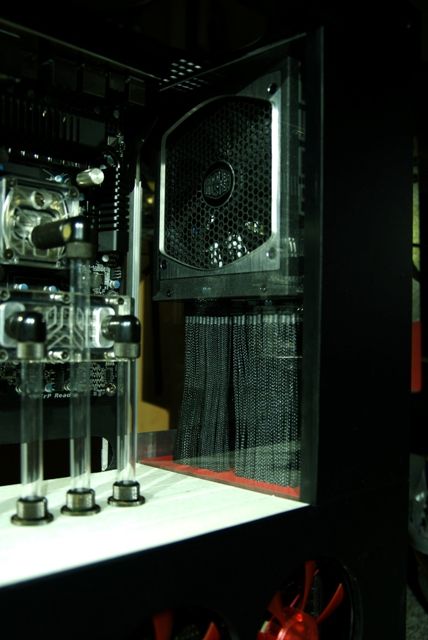
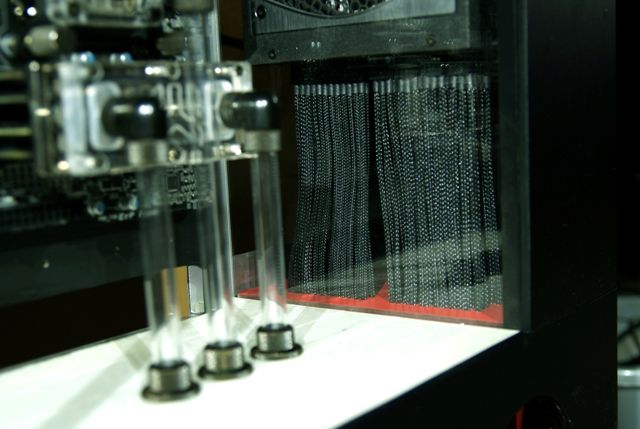
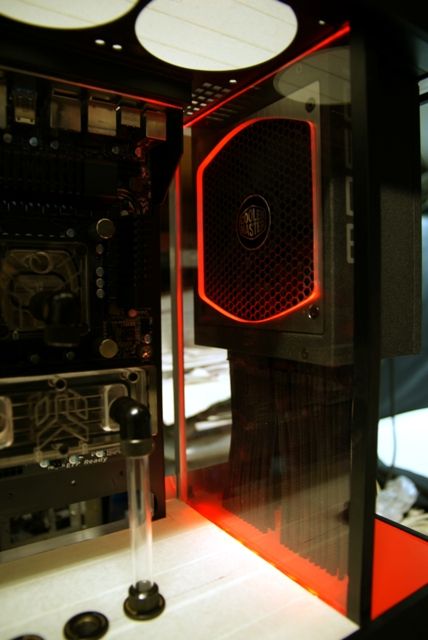
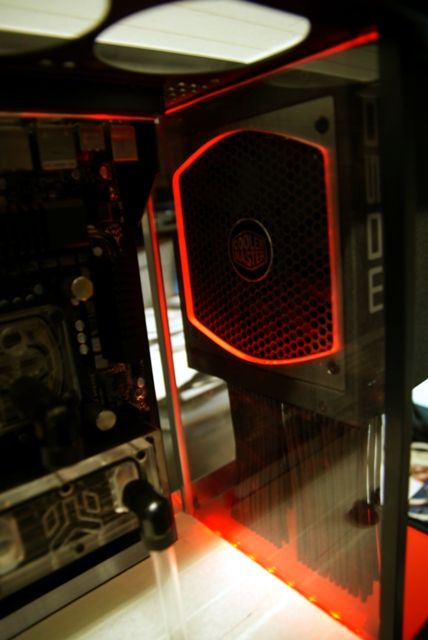
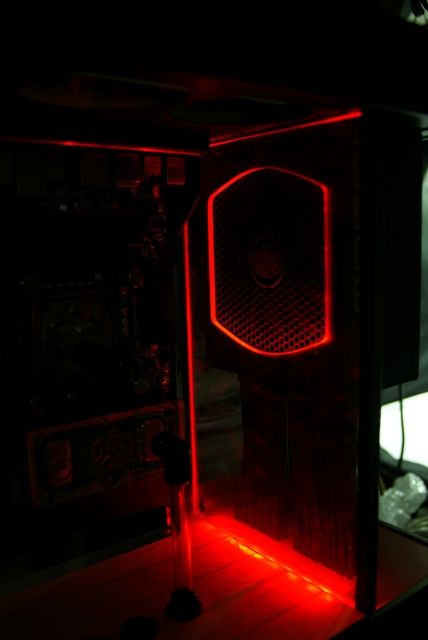
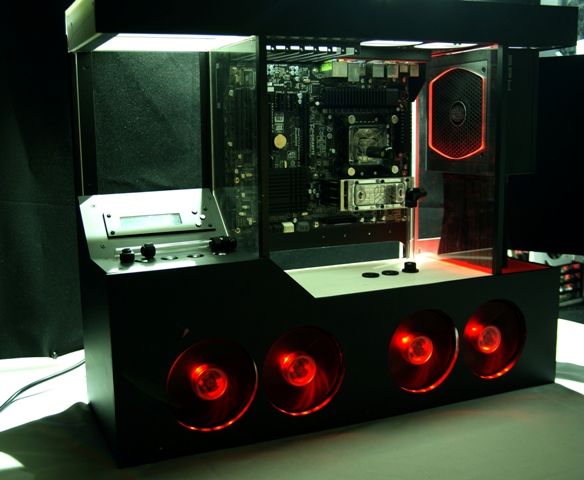
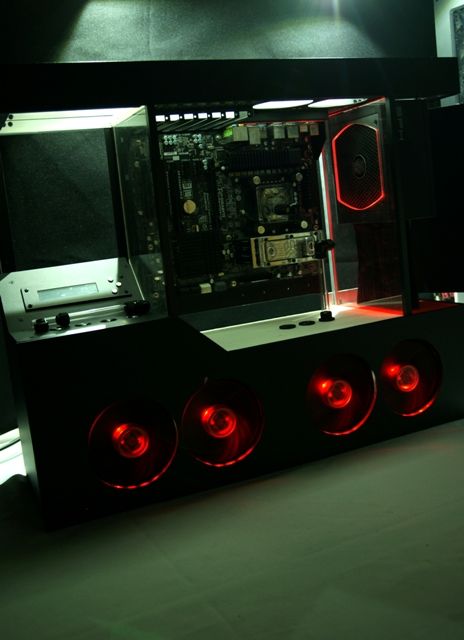
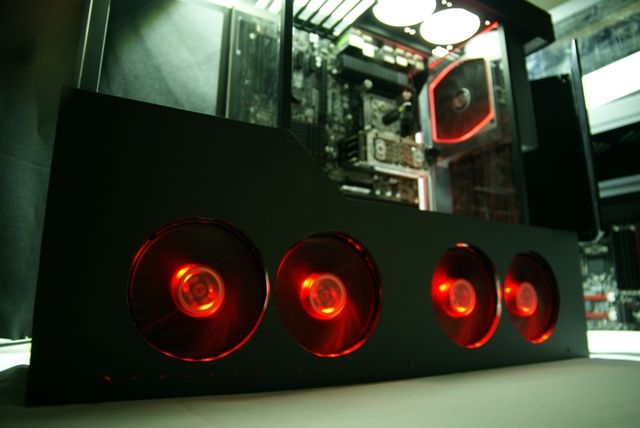
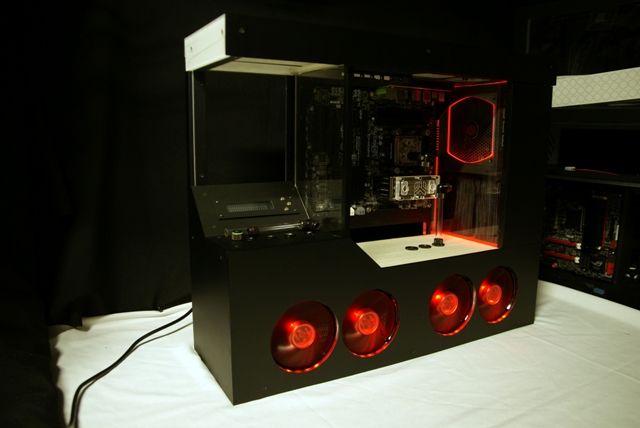
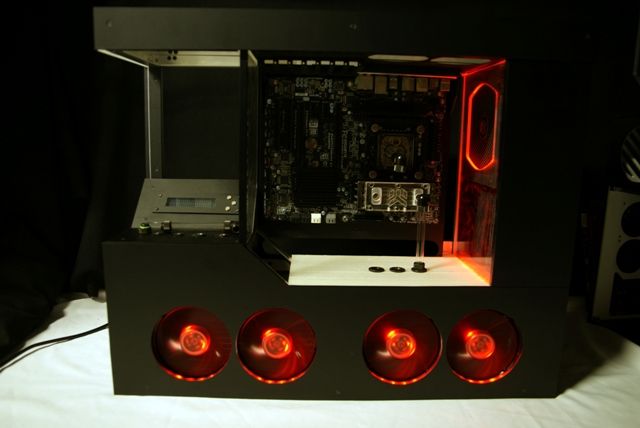
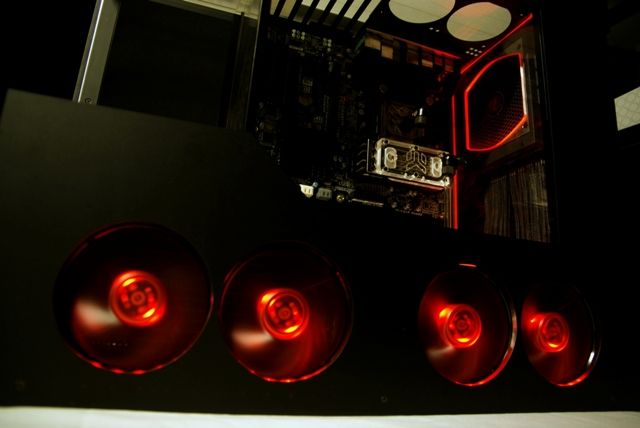
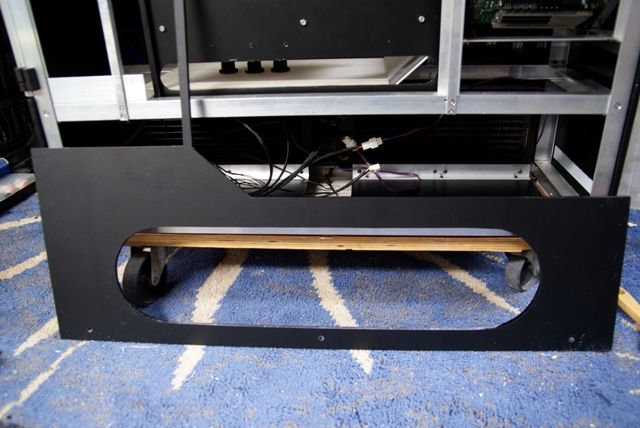
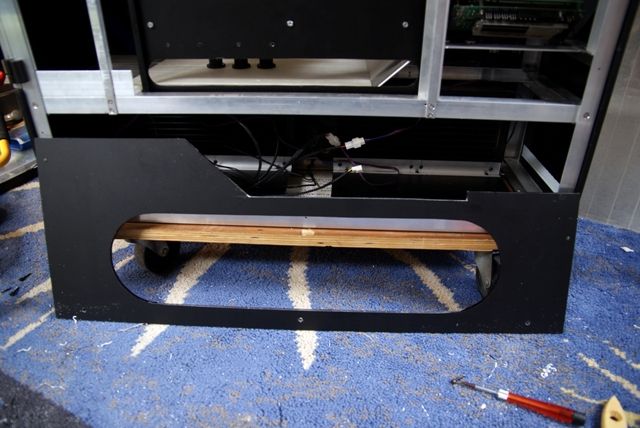
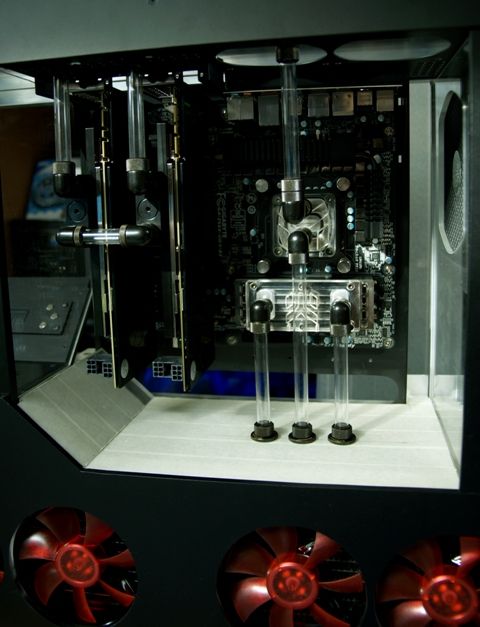
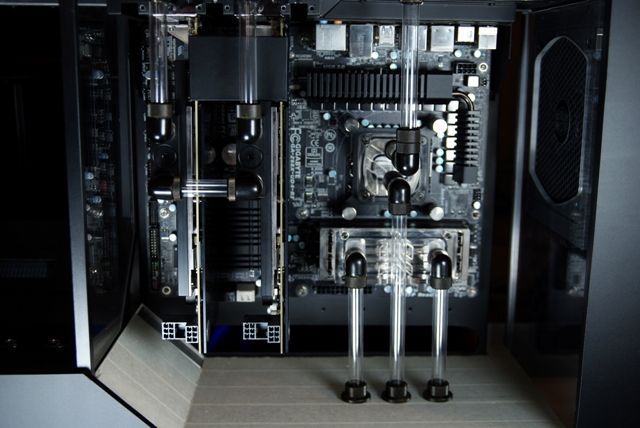
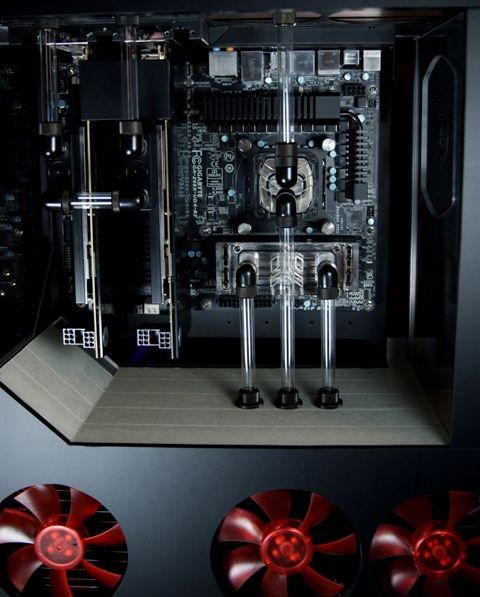
    CM 690 II Advanced case v.3 
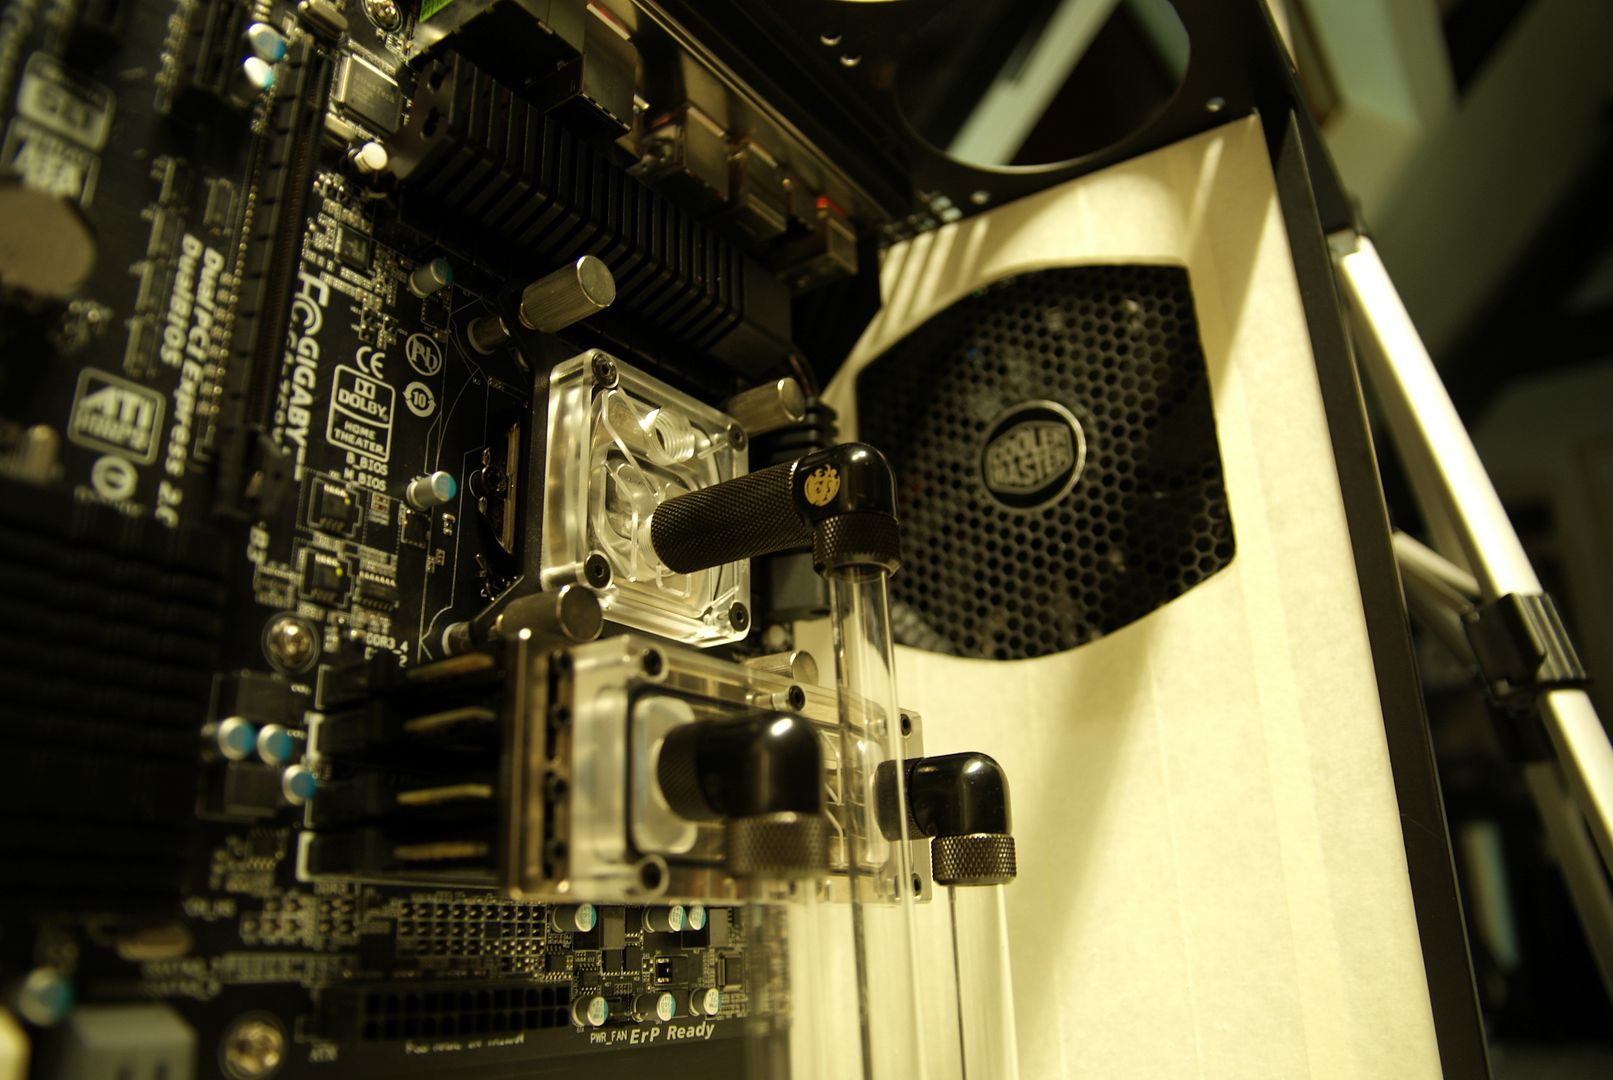
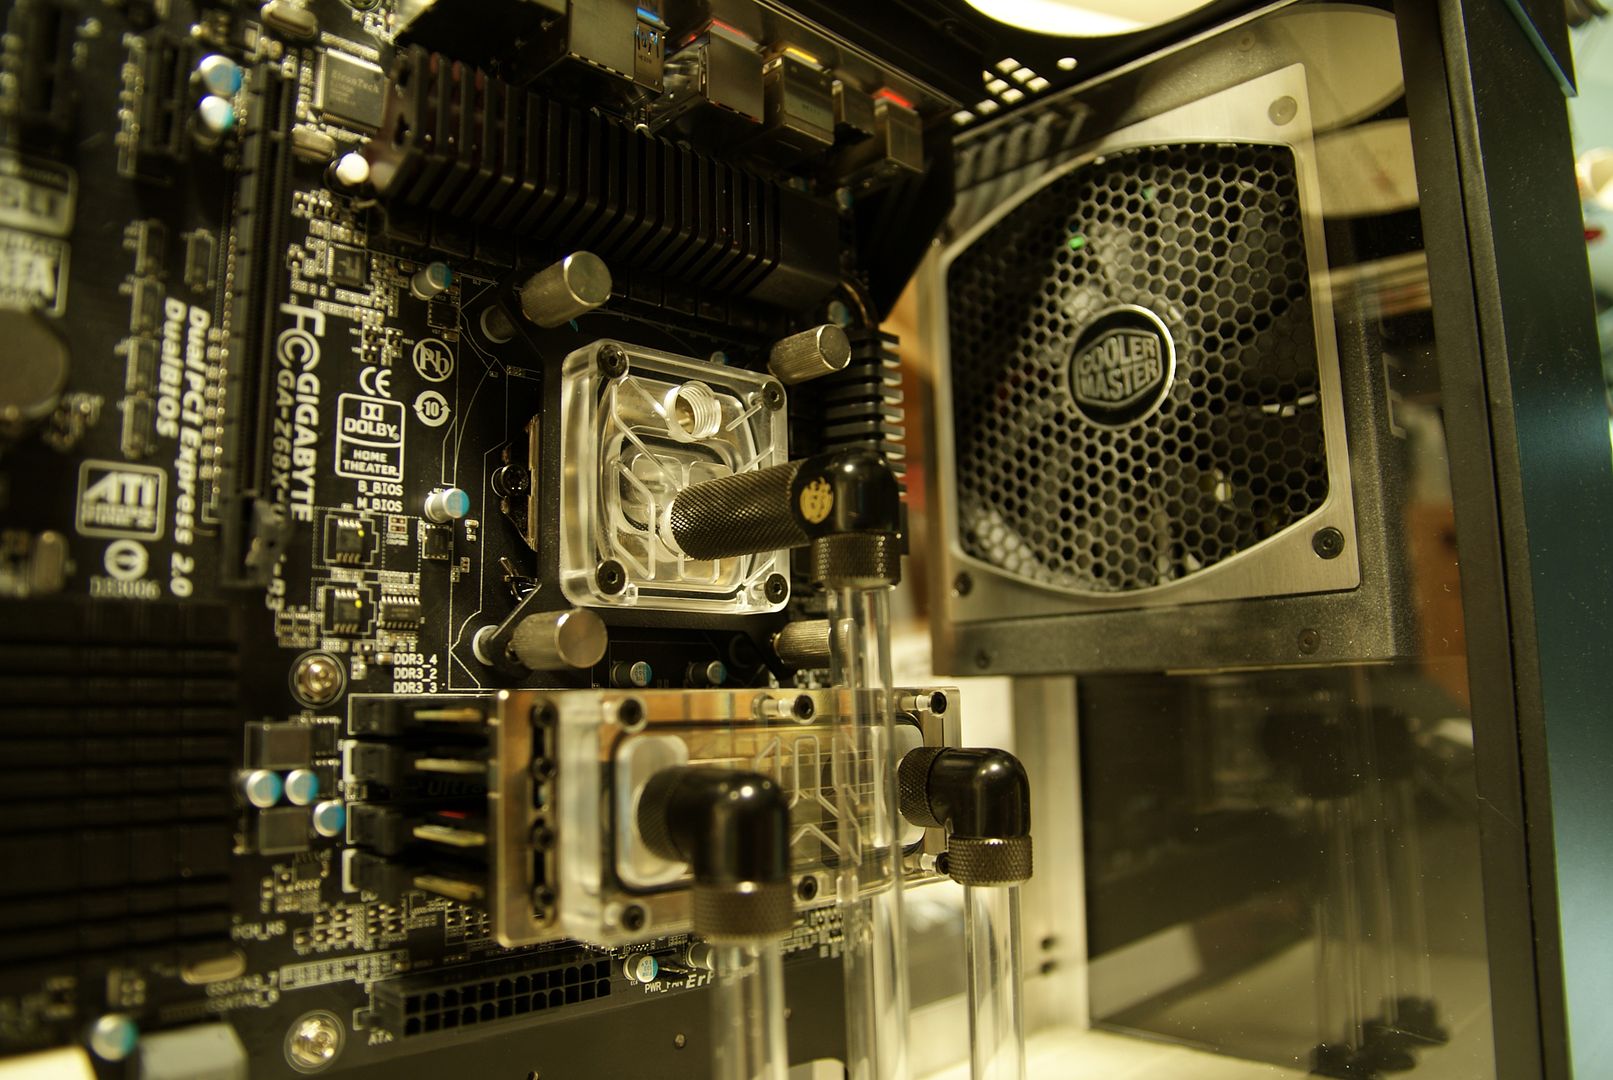
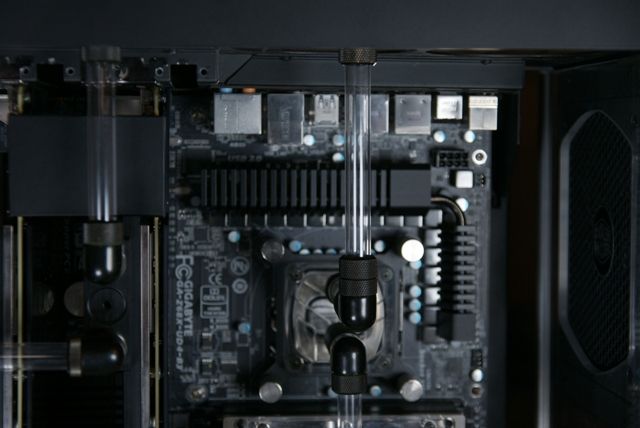
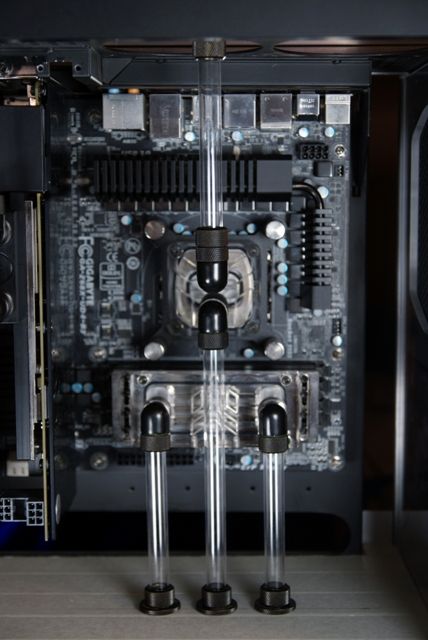
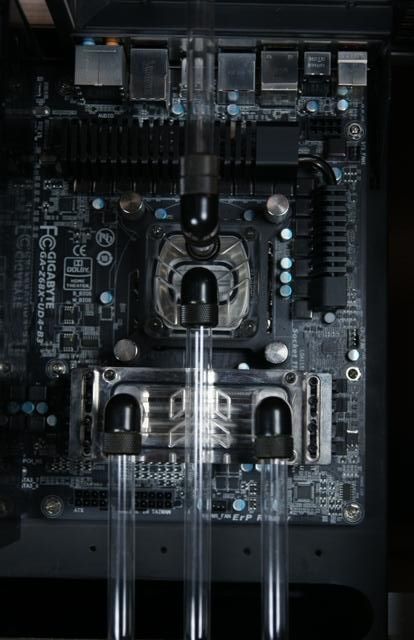
// ASUS Sabertooth Z77 Motherboard // Intel 15-3570K CPU // 32GB (4x8GB) DDR3, 1600 Kingston Hyper X Black memory // 2GB EVGA GTX 660Ti video card // ASUS BW-14D1XT 14X Internal Blu-Ray Burner - BDXL Format 
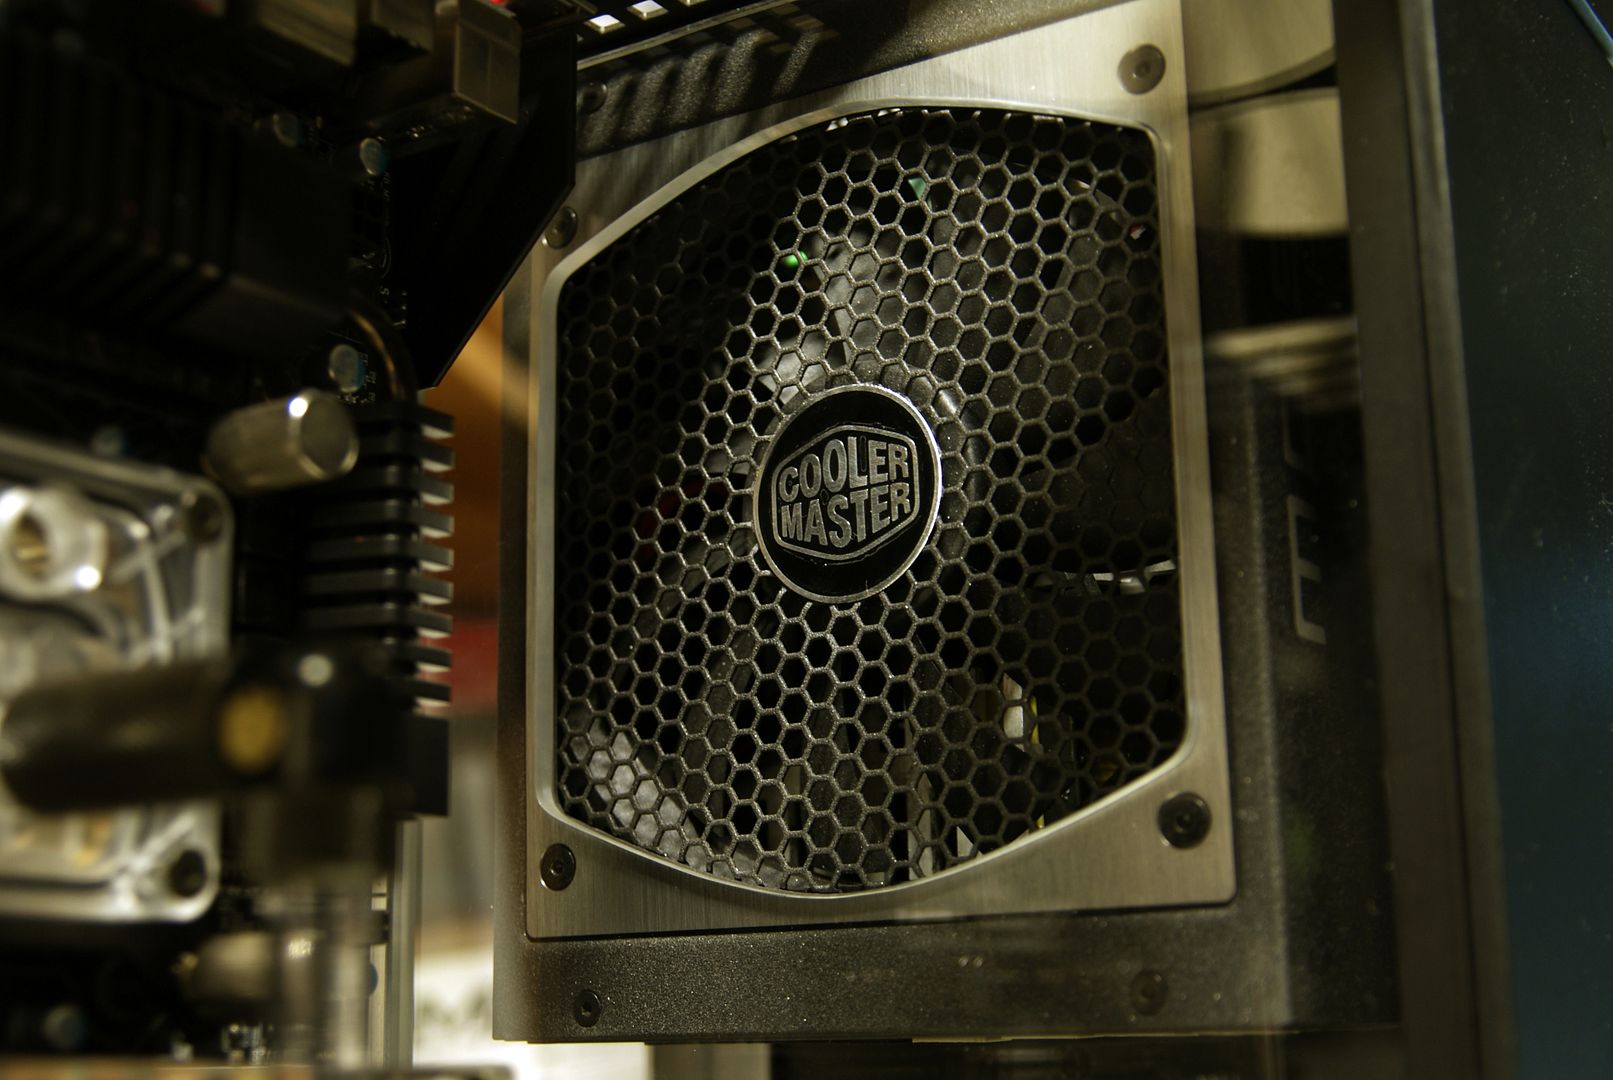
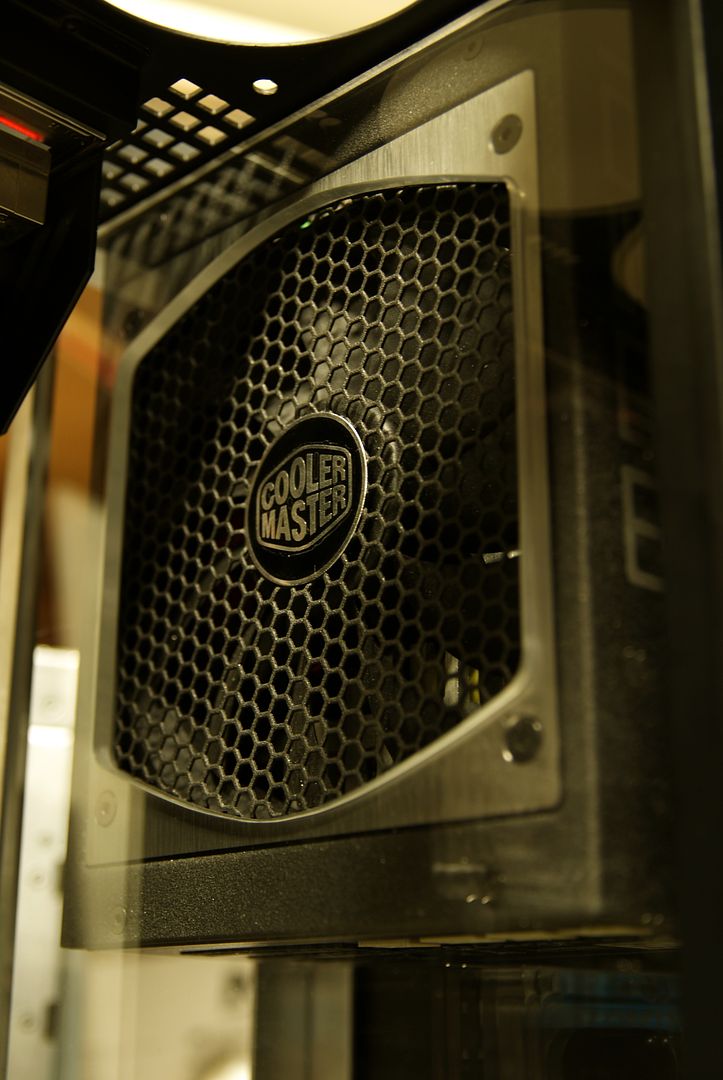
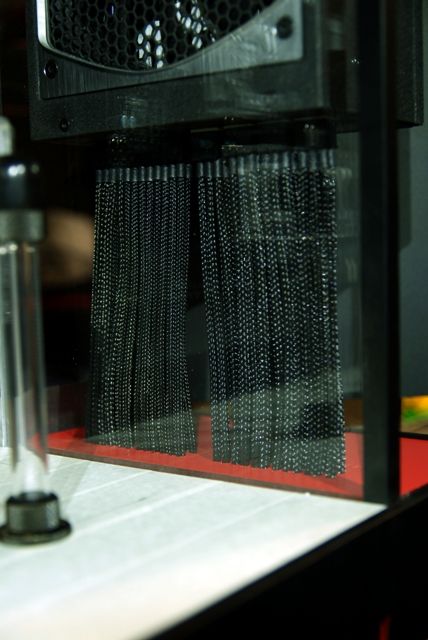
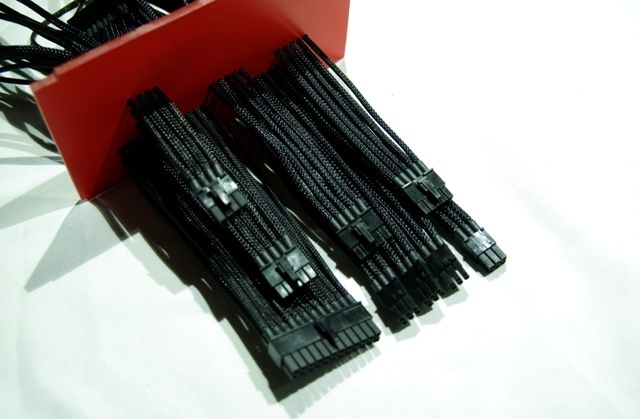
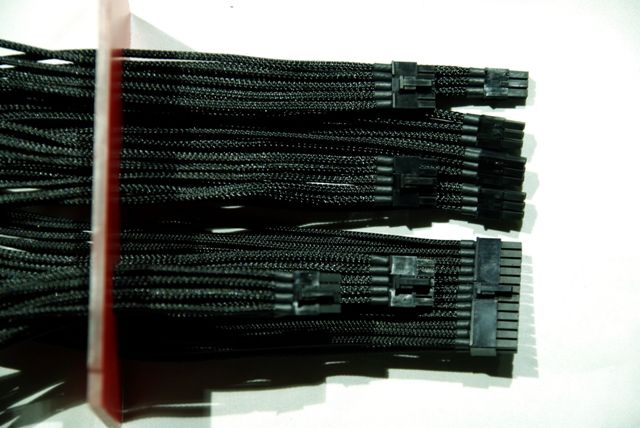
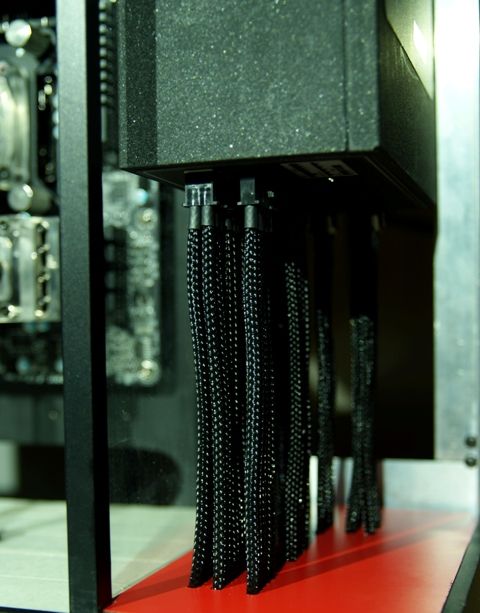
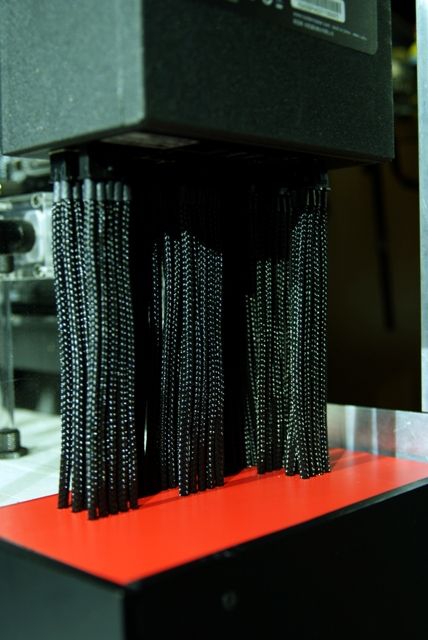
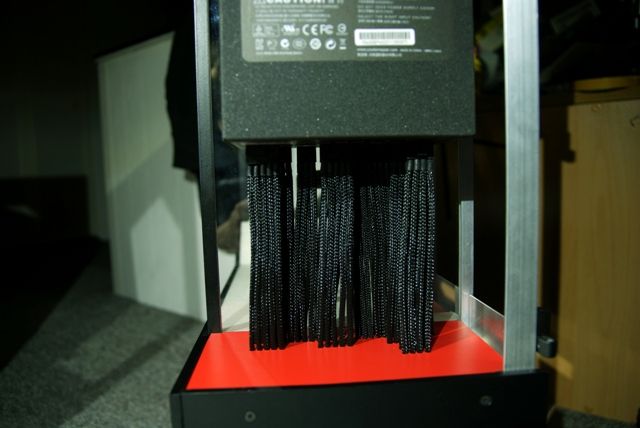
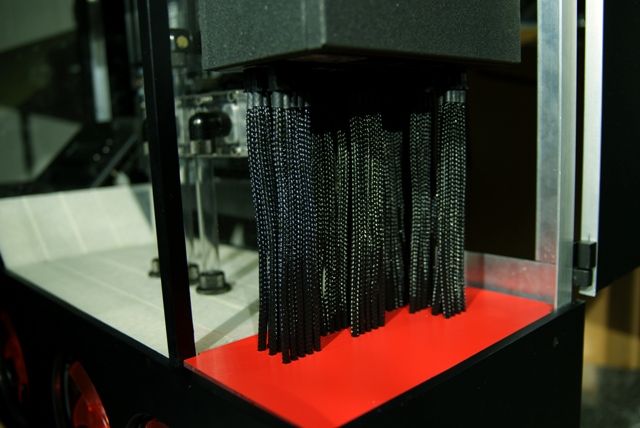
// Corsair AX750 PSU 
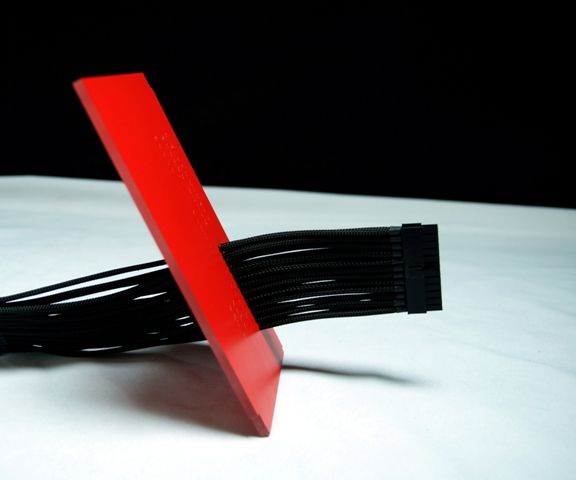
// Corsair AX750 individually sleeved cable set // 2x Samsung 840 128GB SSD // 2x Western Digital Caviar Black 1Tb 7200 RPM SATA drive // 24" Samsung HDTV Monitor
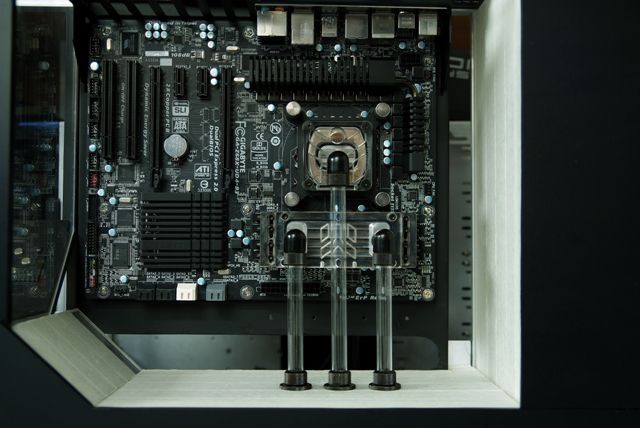
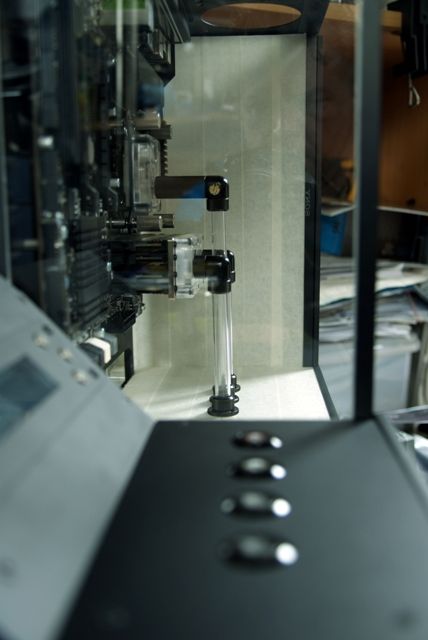
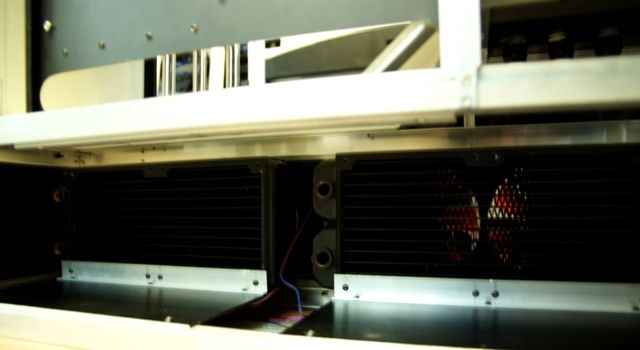
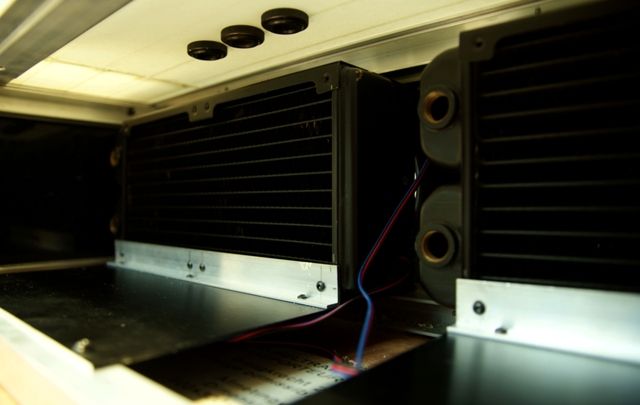
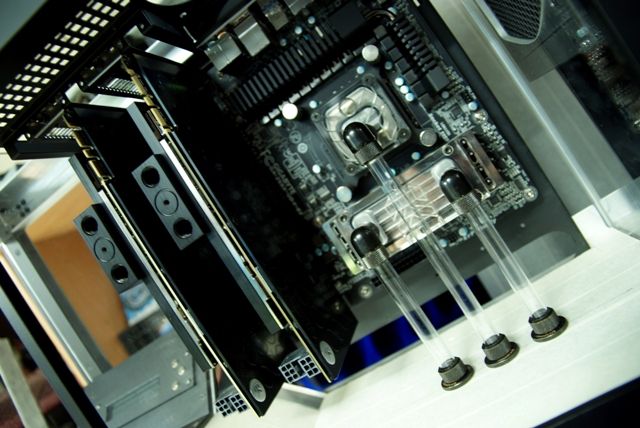
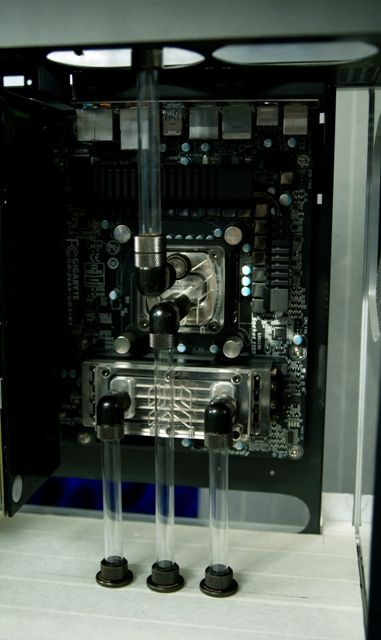
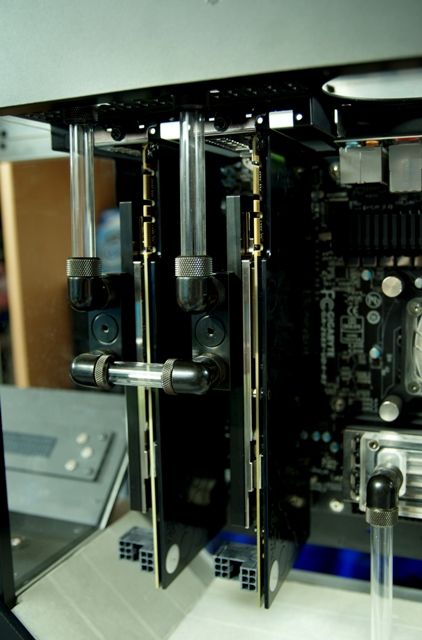
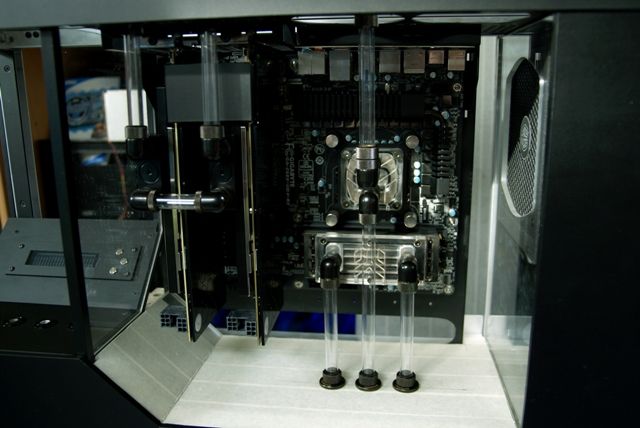
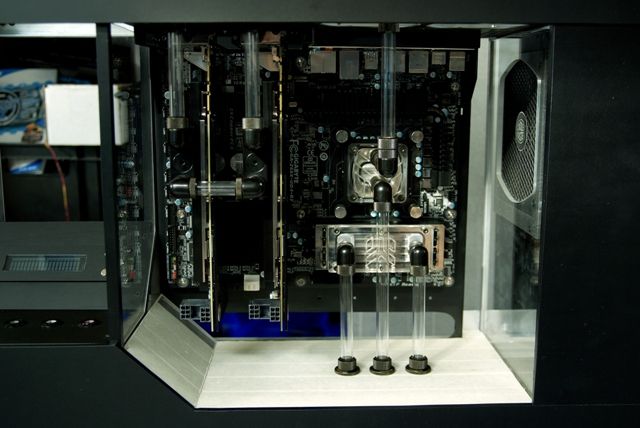
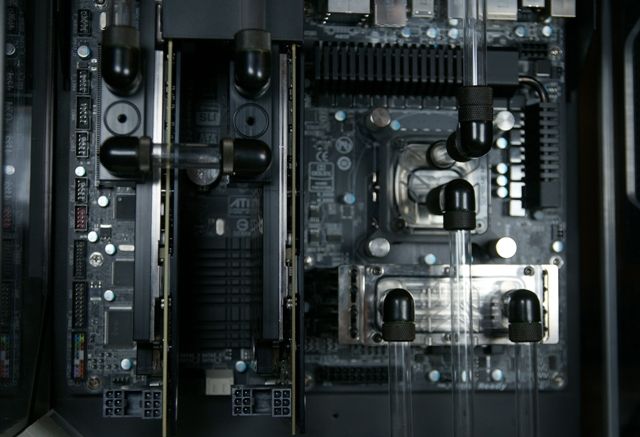
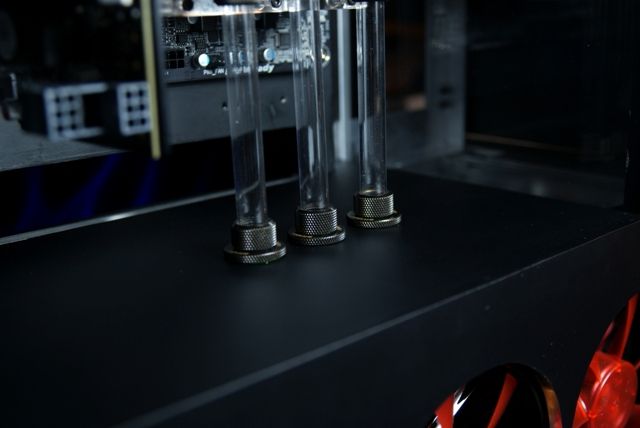
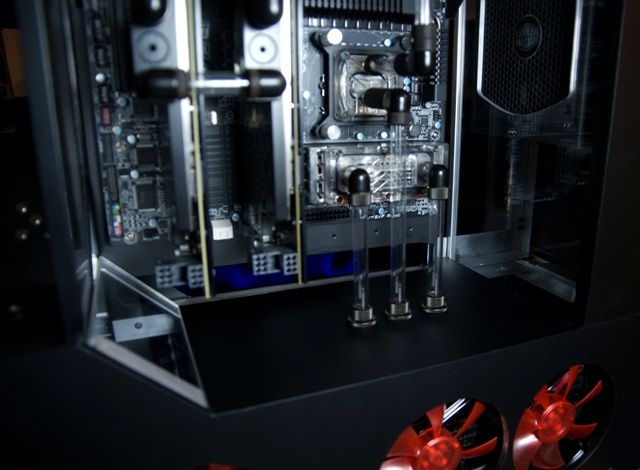
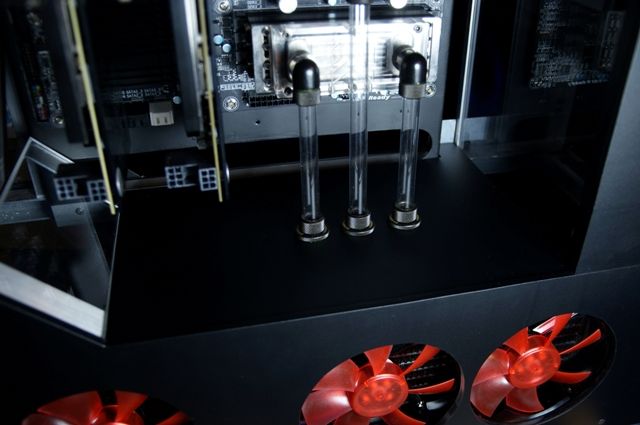
    Watercooling Loop:

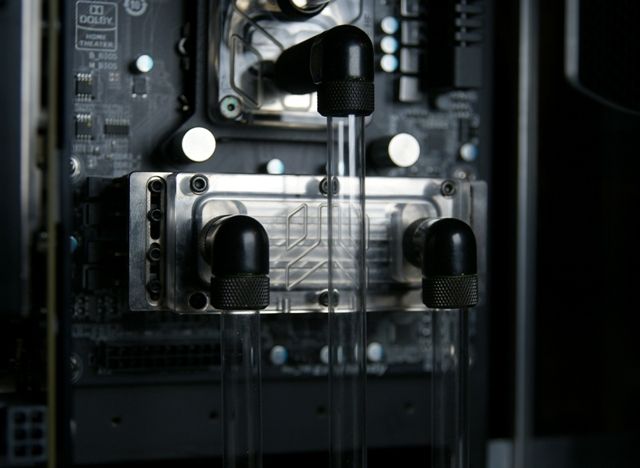
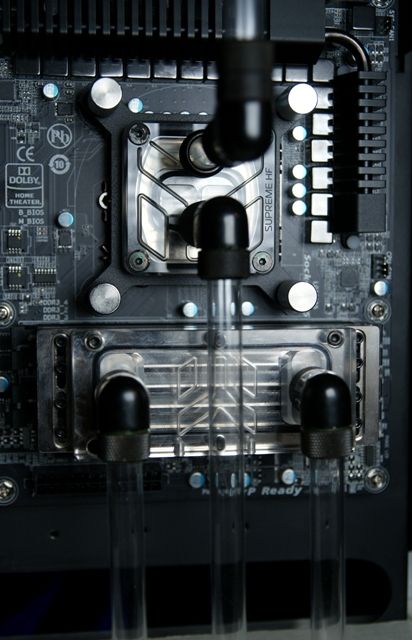
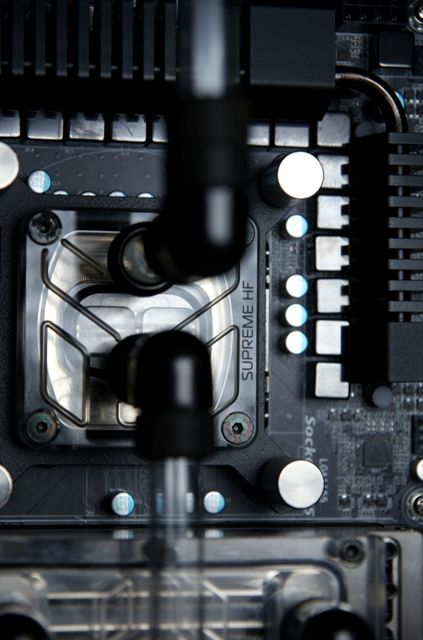
    XSPC Raystorm CPU waterblock // XSPC Razor GTX670 GPU waterblock // XSPC Razor GTX670 back plate // XSPC memory heat sinks 
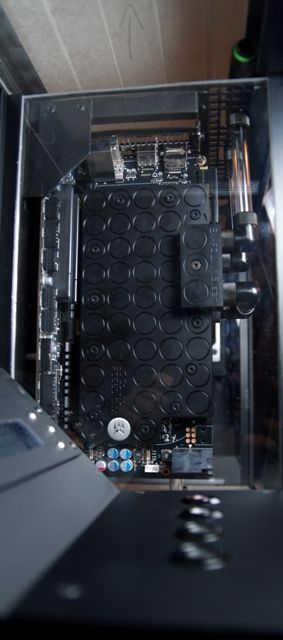
// XSPC Dual 5.25" Dual Bay Reservoir // Swiftech MCP655 Water Pump w/ Speed Control 
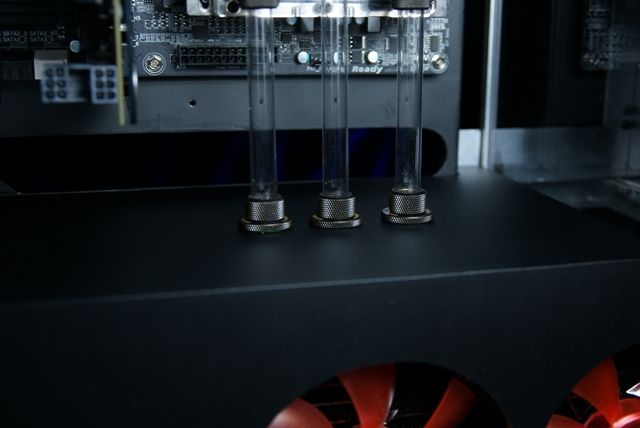
// Bitspower Ultimate 3/8 x 5/8 Compression Fittings 
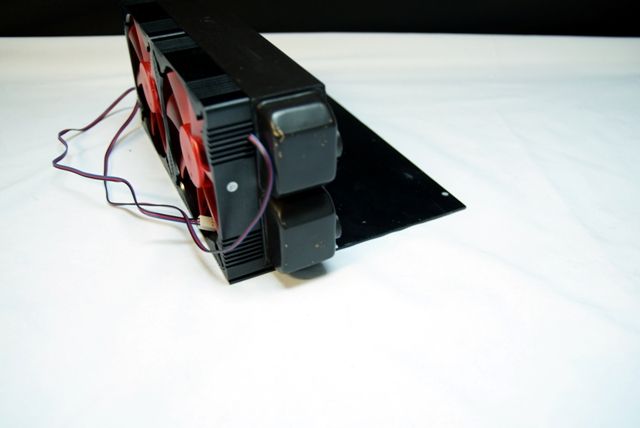
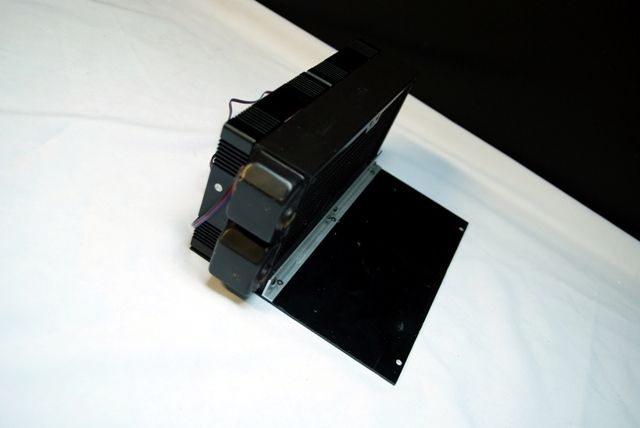
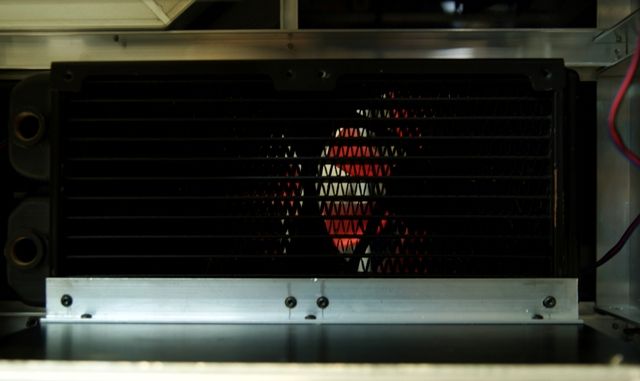
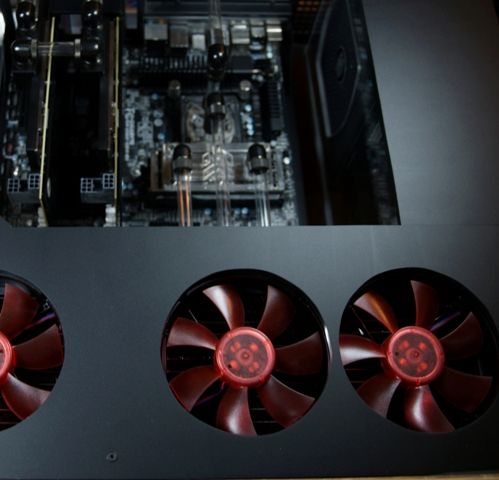
// 2x XSPC RS240 Dual 120mm Low Profile Radiator Rev 2. 
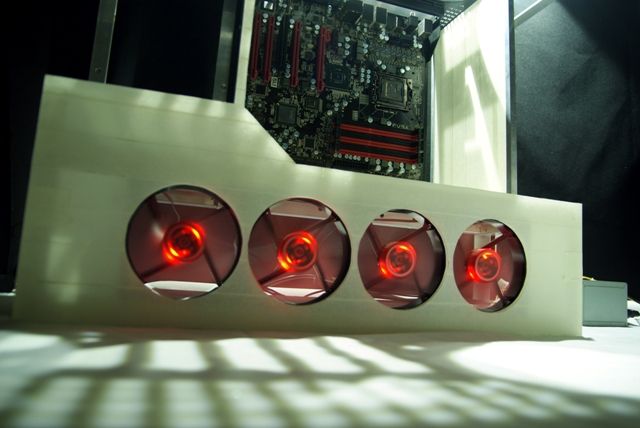
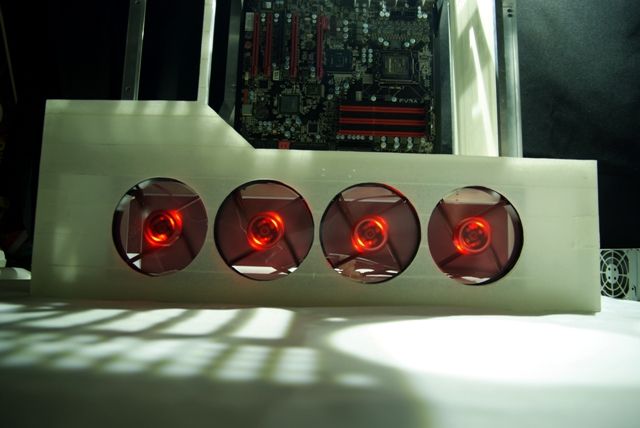
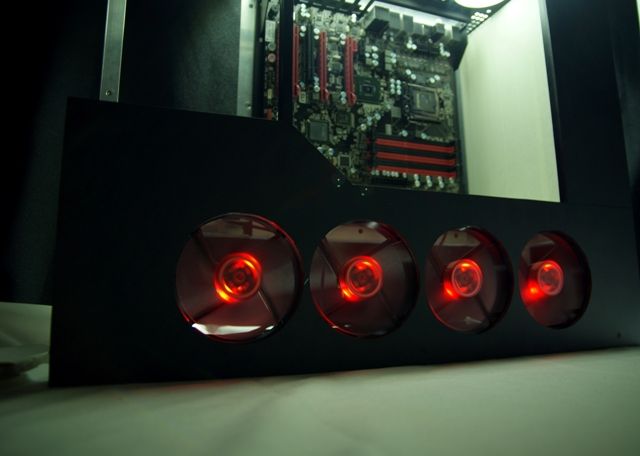
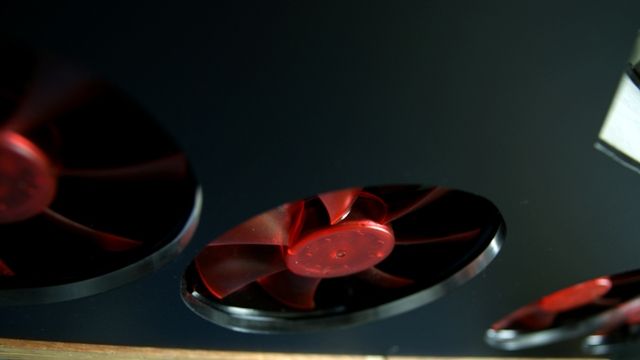
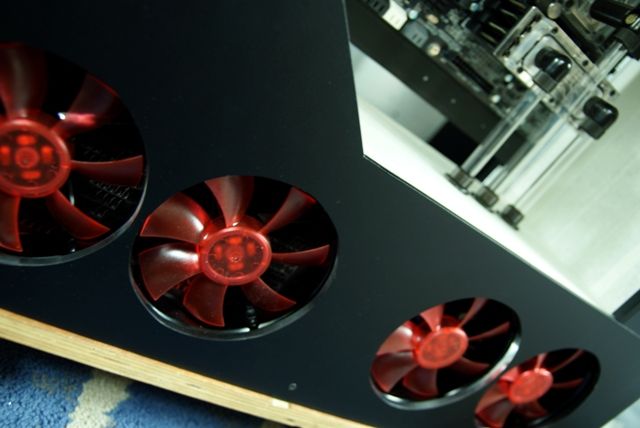
// 1x 120MM BitFenix Spectre Red LED fan // 5x 120mm Scythe Gentle Typhoon Fan[/SIZE][/SIZE]
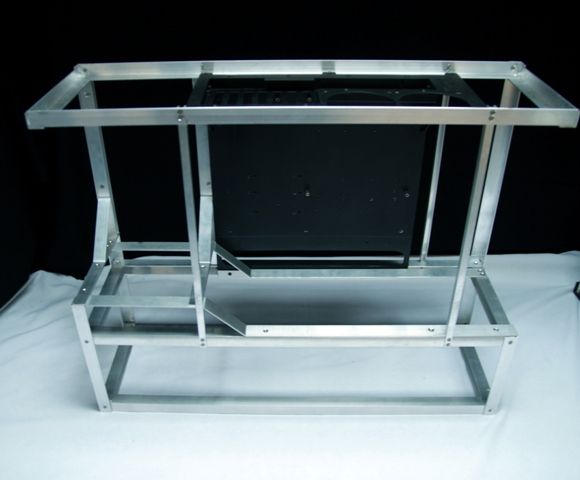
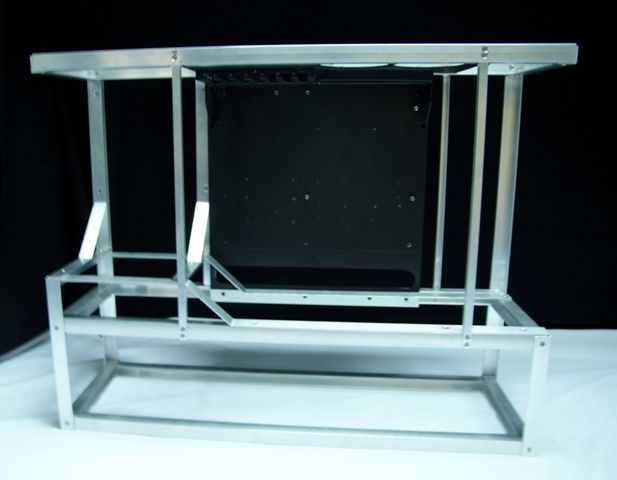
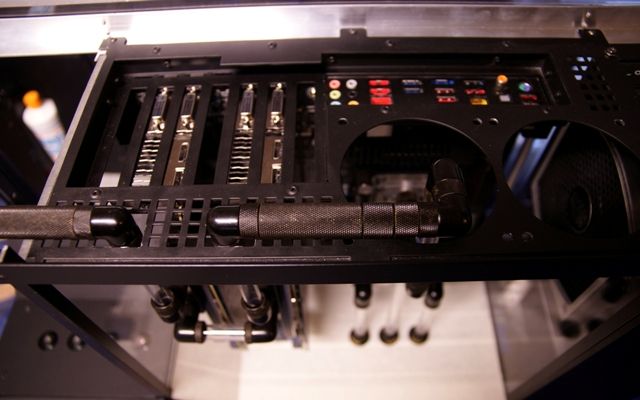
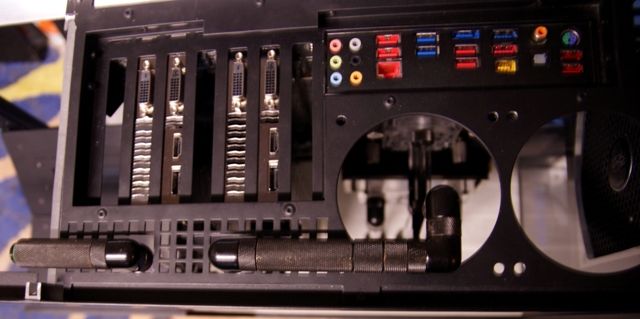
  12. #12
    Xtreme Enthusiast
    Join Date
    Jan 2007
    Location
    Santa Barbara, CA
    Posts
    794
    Amazing work.
    Computer: Intel i7-4770k | Asus Z87 Maximus VI Impact | 240GB Corsair Force GT | 240GB OCZ Vertex 3 | 16GB G.Skill Trident X 2400MHz | EVGA GTX690 Hydro Copper 4GB | Corsair AX850 | Steelseries 7G | Logitech G500 | 27" 2560x1440 Overlord Tempest X270OC 120Hz S-IPS
    Cooling: Koolance 380i CPU block | Swiftech Hydro Copper GPU block | EK X3 150 Reservoir | EK X-TOP D5 PWM drive | PrimoChill PrimoFlex PRO LRT Bloodshed red | Alphacool NexXxos 240mm XT45 | Alphacool NexXxos 280mm UT60 | Bitspower Fittings | 4x Bitfenix Spectre Pro 120mm | 2x Bitfenix Spectre Pro 140mm | Lamptron FC-5V2
    Case: Custom modded matte black Caselabs Mercury S3

  13. #13
    Xtreme Guru
    Join Date
    Dec 2009
    Location
    Latvia, Riga
    Posts
    3,972
    Beauty of old EK blocks <heavy sigh>

  14. #14
    Xtreme Member
    Join Date
    Oct 2010
    Location
    Canada
    Posts
    182

  15. #15
    Xtreme Member
    Join Date
    Aug 2010
    Location
    netherlands
    Posts
    264
    Thanks you guys btw the tubes are from the E22 shop

    Update!!!

    Sponsored by:


    It's been a while since I have updated but with a reason... waiting for stuff and never came.
    So needed to improvise, because the show must go on.

    Little change is that I'm going to use shiny adapters.


    Also, a change in terms of the reservoirs. The choice is now 2x EK 250-X3 reservoirs.
    Mounted behind a piece of clear acrylic.


    I also tried some different things about the color of the ASUS mobo, but eventually i've made an extra cover for the original mobo cover.

    Measured and cut a piece of acrylic.


    Installed the cover to see how it looks.


    Nice, but it's just not it. So next idea.

    Made ​​one side white


    And the other side also white


    I'm doing this to get an even color playing with the LED strips.
    Also pasted a piece of black mat on the front side, and placed some red LED strips at the back


    And installed everything again


    More to come!!!

  16. #16
    Xtreme Addict
    Join Date
    May 2007
    Location
    New York City
    Posts
    2,065
    damn that's sexy...
    "The ultimate measure of a man is not where he stands in moments of comfort and convenience, but where he stands in times challenge and controversy."
    Dr. Martin Luther King Jr.

    DIY: Self Clinching Nuts

    Canon EOS 7D | Tokina 12-24mm f/4 | Canon EF 24-105 f/4 L | Canon EF 70-200 f/2.8 L IS Mk II | Canon EF 35mm f/1.4 L | Canon EF 400mm f/5.6 L | Canon EF 100-400mm f/4-5.6 L

  17. #17
    Xtreme Member
    Join Date
    Aug 2010
    Location
    netherlands
    Posts
    264
    Thanks

    Some "How I do it" vids:

    Acrylic tubes:


    Acrylic fan cover:


  18. #18
    Xtreme Member
    Join Date
    Aug 2010
    Location
    netherlands
    Posts
    264
    Not a big update this time because I needed to make some vids, so not much time left this weekend.
    But I did play with some red LED strips and details


  19. #19
    Xtreme Addict Evantaur's Avatar
    Join Date
    Jul 2011
    Location
    Finland
    Posts
    1,043
    i love this design!

    I like large posteriors and I cannot prevaricate

  20. #20
    Xtreme Member
    Join Date
    Aug 2010
    Location
    netherlands
    Posts
    264
    Thanks!!!

    Update!!!

    Sponsored by:


    First I want to welcome a new sponsor:
    Lumenledverlichting
    This company sponsored my builds from the beginning and always with perfect quality LED strips and other accessories.

    So also for this build some beautiful LED strips


    But first the cables. Because I have used a lot sleeve for the PSU I chose for flat cables in the mid section. For the GPU I have made a slot as tight as possible. This is to get a nice tight line


    Beneath the midplate


    For the 24 pins I have to make a nice tight flat cable, but it will be placed like this


    I did some small changes regarding the placement of the LED strips
    The LEDs on the PSU cover I've placed down instead of up, because it seemed quite bright.

    Placed the PSU back and changed the color from the cover where the wires go through.


    So with enough LED strips in stock I had a nice idea. A cover with case feets.

    For this I cut out and filed the outline of the existing scratch.


    Cut out 12 plates and made ​​6 of them black. All this I have glued together with ACRIFIX.


    And placed 3 LED strips of 60cm strips... lights on please!!!


    In order to get a nice even glow I've placed sixth single LEDs in the case feets.


    And mounted.


    The plate and feet.


    Connected everything.


    And placed the components back.


    In the dark.


  21. #21
    Registered User
    Join Date
    Sep 2009
    Location
    Glasgow, Scotland
    Posts
    94
    Friggin Outstanding!!!!!!

  22. #22
    Xtreme Addict
    Join Date
    Mar 2008
    Location
    Minnesota
    Posts
    1,653
    Quote Originally Posted by Saltire View Post
    Friggin Outstanding!!!!!!
    :nod:

    Wonderful attention to detail! Inspiring me for my upcoming mini-ITX build
    i5 2500K @ 4.9GHz+ 8GB G-Skill RipJaws DDR3-2000 @1600Mhz CAS 6 Asus P8P67 Pro CrossFire 6970's @ 950/1450
    Xeon X5677 @ 4.5Ghz 6GB G-Skill RipJaws DDR3-2000 @1600Mhz CAS 7 Gigabyte EX58-UD5 4870x2
    i7-880 @ 4.2Ghz+ (still playing) 4GB G-Skill RipJaws DDR3-2000 @2300Mhz CAS 9 Asus Maximus III Formula MSI Hawk 5770

  23. #23
    Xtreme Enthusiast miptzi's Avatar
    Join Date
    Feb 2008
    Location
    Not sure if...
    Posts
    595
    damn, that's sexy as hellire
    Raidmax ATOMIC - Core i7 3770s + Corsair H70 // Gigabyte H77N WIFI // Corsair Vengeance 2x4GB 2133mhz // EVGA GTX1060 ACX2.0// Kingston SUV400 480Gb // Sharkoon SFX500L

  24. #24
    Xtreme Member
    Join Date
    Jul 2009
    Posts
    315
    Can you make another case like that and sell it to me?

    swoooooooon

    [Project] Lateralus
    ------------------
    Intel i7 920 DO @4.2gz /H20
    EVGA Classified 760 /H20
    EVGA GTX275 715/1600 /H20
    6gb Corsair Dominator CL7
    Auzentech X-fi Forte
    Intel X25-M G2 80gb
    WD Black 1TB
    Corsair 1000HX
    Custom Silverstone TJ07

  25. #25
    Xtreme Member
    Join Date
    Aug 2010
    Location
    netherlands
    Posts
    264
    Thanks y'all

    Quote Originally Posted by Armitage View Post
    Can you make another case like that and sell it to me?

    swoooooooon
    Gonna finish this one first mate, then....we will see

Page 1 of 2 12 LastLast

Tags for this Thread

Bookmarks

Bookmarks

Posting Permissions

  • You may not post new threads
  • You may not post replies
  • You may not post attachments
  • You may not edit your posts
  •