Page 1 of 2 12 LastLast
Results 1 to 25 of 50

Thread: Project Sestren Worklog - World's First Back/Outside Mounted Tri Loop Cube!

  1. #1
    Registered User
    Join Date
    May 2008
    Location
    Florida
    Posts
    99

    Project Sestren Worklog - World's First Back/Outside Mounted Tri Loop Cube!


    - a PC1X1 project -


    History:

    Computing in general has been a hobby ever since I was young. I started back in Dos/Windows95 era at the tender age of 8 years old. Since then I have always been trying to evolve and exceed my previous work. Computing to me is a journey, so I am not worried about the end result. This build has been in the making for a little while now. I figured it was about time to see how far I can currently go. The computer is named after Sestren, the main computer/entity in the Panzer Dragoon Universe.

    Theme:

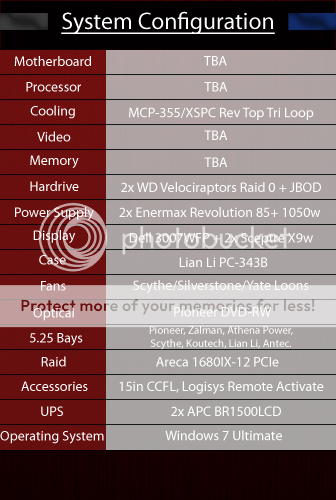
    Performance and Elegance, and Pioneering the World's First Outside Mounted Triple Radiator Cube!

    Phases:
    Phase 1: Computer Case Modifications, pre-planning, and 70% parts acquisition. [Complete]
    Phase 2: Computer Case painting and assembly, test run on previous hardware [In Progress]
    Phase 3: Rebuild with next generation hardware, ala i7 etc.
    Phase 4: Multi-monitor Display Expansion to Hex Monitors

    Parts List:

    -Sestren’s Core-

    • Optical Removable Media:

    [1] Pioneer DVD-RW
    • Solid State Removable Media:

    [1] Koutech Floppy/Media Reader
    • Processor:

    [1] TBA
    • Motherboard:

    [1] TBA
    • Solid State Drives:

    [4] TBA Raid 0
    [4] Icy Dock 2.5 to 3.5
    • Hardrives:

    [1] 1 TB External Hardrive
    [1] 250 GB External Hardrive
    [2] 300 GB Velociraptor Hardrives Raid 0
    [2] 640 GB Internal Hardrives Raid 0
    [1] 1 TB Internal Hardrive
    [1] 500 GB Internal Hardrive
    • Raid Controller:

    [1] Areca 1680IX Raid Controller
    • Hot Swappable 3.5 Drive Bays:

    [2] Athena Power Backplane
    • Memory:

    [2] TBA 12 gigs of DDR3 Ram
    • Monitors:

    [6] Dell 3007WFP-HC 30in Monitor
    • Monitor Stand:

    [1] Custom Hexa Monitor Stand
    • Video Cards:

    [2] Multi Card GPU X2 Series
    [1] Single Slot GPU
    • Power Supply:

    [2] Enermax Revolution85+ 1050w
    • Computer Case:

    [1] Lian Li PC-343B
    .......Removable Motherboard Tray
    .......Window
    .......Side Panel
    .......Top Panel
    .......Top Radiator Mounting
    .......Front Panel
    .......Lian Li Black Universal Bezel
    • Cooling:

    [3] Swiftech Pumps with Reservoir Tops
    [1] Hardware Labs 360mm GTX Radiator
    [1] Swiftech 360mm Radiator
    [1] Swiftech 240mm Radiator
    [2] Swiftech Rad Boxes
    [1] GTZ CPU Waterblock
    [2] TBA GPU Waterblocks
    [1] TBA Single Slot GPU Waterblock
    [60 Ft] Clear 7/16” ID (5/8” OD) Tubing
    [1] Kama Bay
    [X] Various Fittings, Rotaries, Clamps, Multi Card Water Links
    [X] Heatsinks
    -Accessories-

    • Fan Controllers:

    [4] Zalman Black Fan Controllers
    [1] Lian Li Black Fan Controller
    • Fans:

    [12] 120mm Yate-Loons Fans
    [6] 120mm Scythe Ultra-Kazes
    [3] 80mm Coolermaster Riffle Fans
    [2] 80mm Silverstone Fans
    • Fan Grills:

    • HTPC/Visual Display Units:

    [1] Antec Multi Station Premier Pro
    • Cables:

    [1] Rounded Red Floppy Cable
    [1] Sata Cable
    [3] 4x Sata Octopus Cables
    • Cable Organizers and Accessories:

    [X] Red/Black Male-Female Connectors
    [X] Red/Black 3 Pin Fan Connectors
    [X] Red/Black Various Wire Loops
    [X] Blue/Black Velcro Ties
    [X] Zip Ties
    • Lighting and Misc:

    [500 Ft] Sleeving/Heatshrink
    [1] Logisys 12v Relay
    [2] 15in White CCFL
    [1] Bubble Blue CCFL
    [X] Velcro Strips
    [2] 7-Port Hubs
    [2] UPS 850 Watts
    • Operating System:

    [1] Windows 7 Ultimate x64
    Notes:
    * Must keep HT
    * Target 4.0 ghz on all 4 cores
    * Temperatures under 50'C Idle
    * Ram @ 1600 mhz

    Front Bay Configuration:
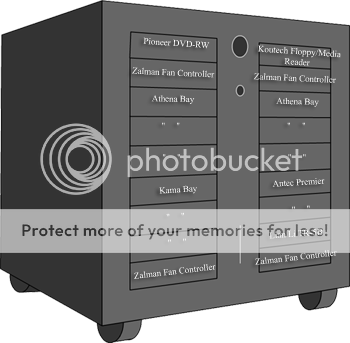


    1. Pioneer DVD-RW.................... 10. Koutech Floppy/Media Reader
    2. Zalman Fan Controller............. 11. Zalman Fan Controller
    3. Athena Bay........................... 12. Athena Bay
    4. "" ....................................... 13. ""
    5. "" ....................................... 14. ""
    6. Kama Bay ............................ 15. Antec Premier
    7. "" ....................................... 16. ""
    8. "" ....................................... 17. Lian Li TR-5B
    9. Zalman Fan Controller ............ 18. Zalman Fan Controller


    Slot Array: (Subject to change, due to motherboard availability)
    [1. PCIE 1x
    [2. PCIE 16x - Graphics Card
    [3. Blank
    [4. PCIE 16x Graphics Card
    [5. PCI
    [6. PCIE 16x Graphics Card
    [7. PCIE Areca Raid

    Sponsors:
    My Nuclear Family, Mom and Dad


    Petra's Tech Shop - www.petrastechshop.com/ Thanks to: Alex Venz, Quoc


    Enermax USA - www.enermaxusa.com Thanks to: Wei Yang, Tom


    MNPCTECH - www.mnpctech.com/ Thanks to: Bill Owen


    Thanks!

    Danny Bui [H]
    silent-circuit [H]
    enginurd [H]
    Zero82z [H]
    PradaG [H][XS]

    Special Thanks to!
    My Parents, for believing in me and helping fund this wonderful project.

    My Aunt Marly for driving me around to get the Cube painted.

    Built in the USA

    Copyright Information:
    I am not affiliated nor work with neither this forum, nor any on the sponsors directly in any way. I am an Enthusiast, and thus want to share my passion through this build log. Sponsored, and donated items are courtesy on the sponsors. Logo's and other copyrighted information belongs to each respective owners! My opinion and build is my own. Thanks!

    Please feel free to suggest changes, ideas, etc! Criticism welcomed, also feel free to help shape/change the layout etc.

    Sincerely,
    PC1X1
    Last edited by pc1x1; 11-27-2009 at 12:40 AM.
    Sestren - Q9550 || Swiftech GTZ || Tri H2O Loop || P5WDH Deluxe || Bios: 2801 || 4GB XMS2 Pro DDR2 PC2-6400 || 2x VR 600 Gig Raid 0 + 8x HDD || Areca 1680IX || Asus 3870x2 2 Gig, Quad DVI || Enermax Revolution85+ 1050w || Lian-Li PC-343B || Win XP Pro || Windows 7 64 bit || 5440x1600 @ 3 Monitors
    RIP P5WD2-E Premium

  2. #2
    Registered User
    Join Date
    May 2008
    Location
    Florida
    Posts
    99
    Evening everyone, and I am proud to bring you a glimpse today of whats to come for the Sestren build log.

    I been working around the clock to improve everything that I can, and in the next few days, weeks. Expect a multitude of updates, I took to heart all your comments, from private messages, emails, and sponsorship feedback, and I hope to bring you the best possible build log.

    So without further ado, I am bringing in a new section of the build log, for a few items, I will do a "parts review" showcasing" a special part of the build log, and expect all new updates on the normal build log, to be of the same quality. There will be less pictures per update, but the quality will be there. I will try to be as consistent as possible, and I will update as often as it makes sense to. I hope to bring a new standard of quality and will do my best. Mean while please continue all your feedback, as I really appreciate it.

    Onward!

    - PC1X1


    Enermax Magma Series: Twister Review


    The Enermax Magma Twister
    By: PC1X1

    Enermax Technology Corporation, est. 1990 in Taiwan is known as a worldwide leader in engineering solid and powerful computer power supplies. Enermax also specializes in computer cases, peripherals and other accessories. Enermax provides OEM “Original Equipment Manufacturing” services for various other companies, who use Enermax’s experience in the field to design and manufacture their own products. Enermax pools their vast Research and Development resources and ability to manufacture top components into their own line of products as well. With a reputation for quality Enermax is known throughout the enthusiast community as a reliable and solid company. Both in terms of their products as well as their outstanding customer support. With the same dedication that has made Enermax famous as power supply manufacturers, Enermax created the Magma line of computer fans.


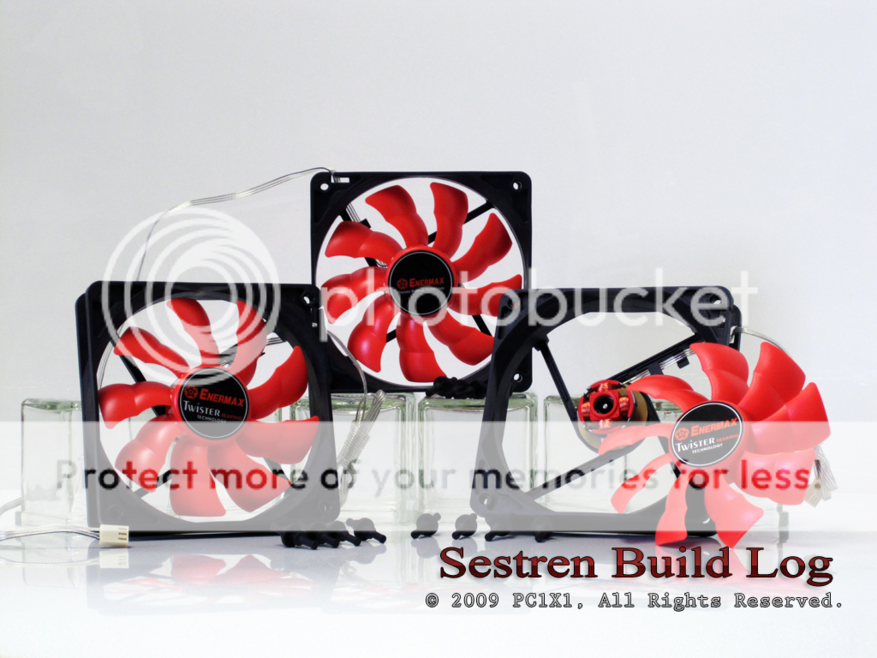
    Front

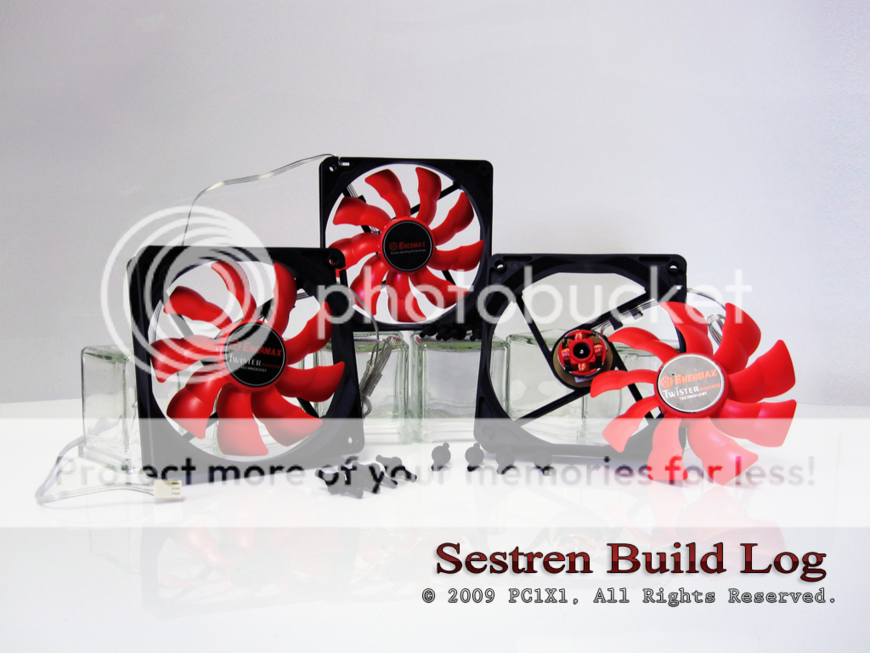
    Profile

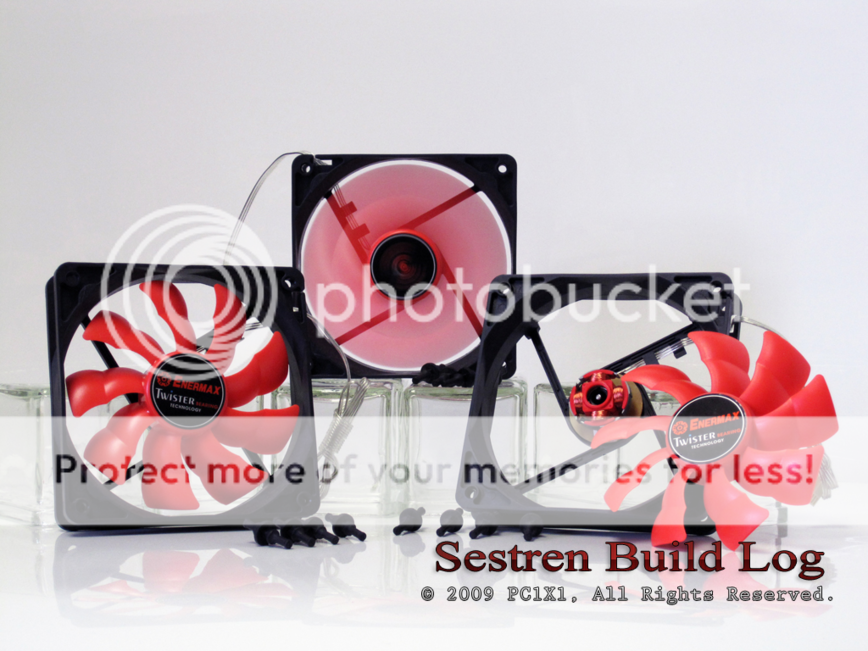
    In Motion
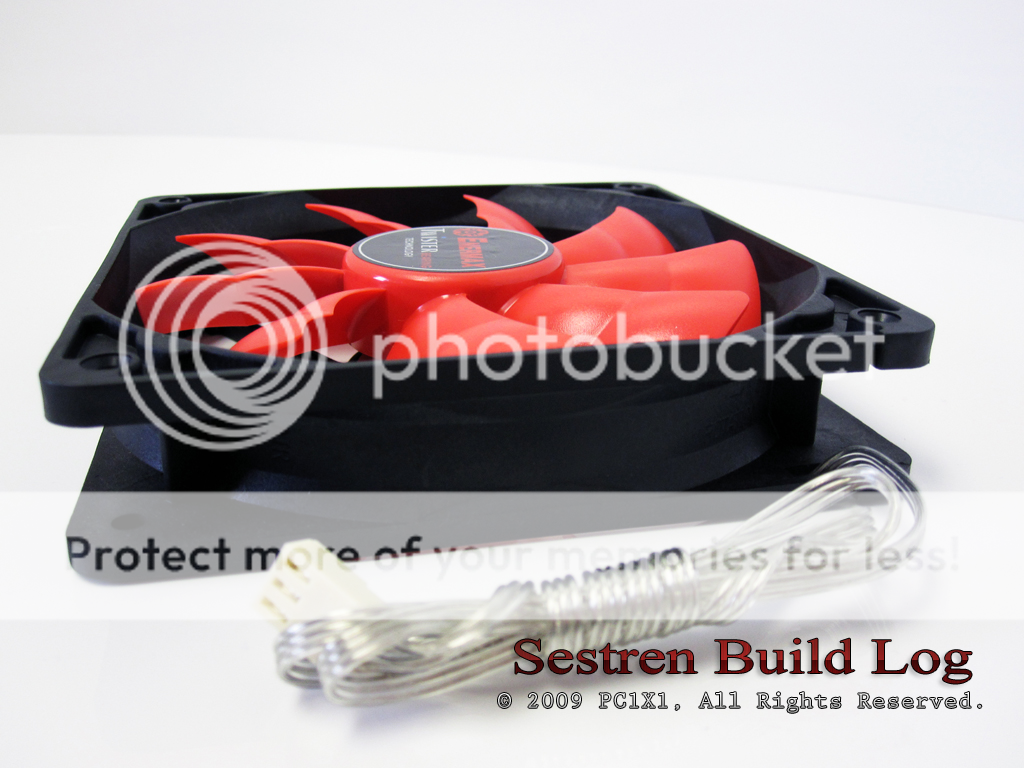
    The Magma line is Enermax’s answer to enthusiast cooling. Specifically the Magma UC-MA12, or Magma “Twister” fan is designed to be powerful; pushing close to 70 CFM at a top speed of 1500 RPM, yet still more importantly virtually silent. Pair the Twister with a fan controller, and you have a versatile, silent air mover. As most Enthusiasts have several fans in their computers, it’s a welcome sight or in this case noise, that the “Twister” is barely audible even in stock form. In a rare best of both worlds, the Magma “Twister” has the oomph of a powerful fan; its batwing fan blades boost a 20-30% CFM improvement over traditional fans. Yet the “Twister” produces as much noise as a low rpm silent fan. This is possible to due to the “Twister’s” unique and exclusive Twister Magnetic bearing technology, which makes the spinning bearing feel like it’s literally floating in air. There are absolutely no signs of friction or movement from the bearing to the blades itself. The only small discernable sound is of the wind moving through its blade. With an 18 decibel rating, the “Twister” is significantly quieter than a normal human whisper, which is rated at approximately 30 decibels. When inside a computer case, you won’t hear the Twisters at all.


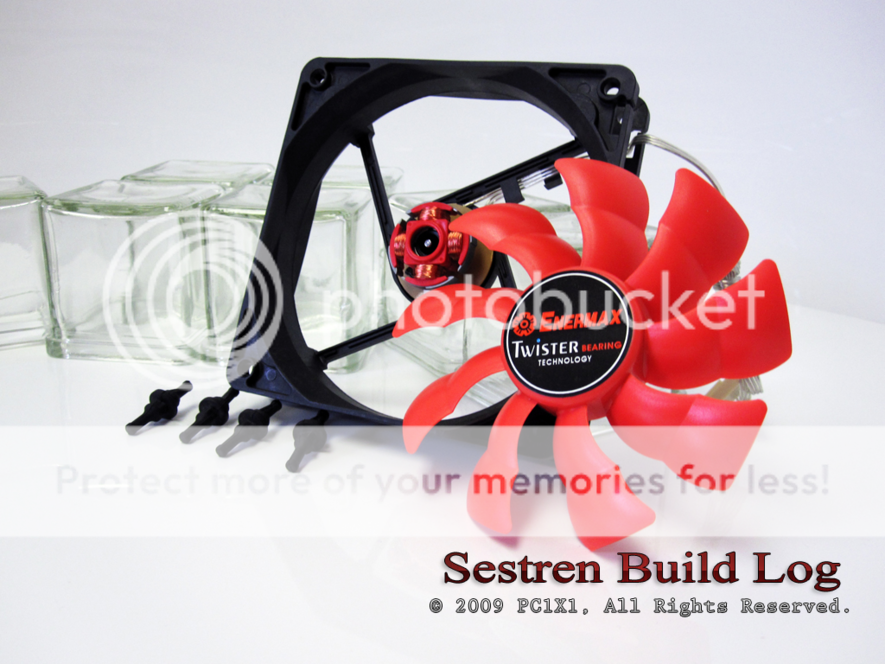
    Blade Showcase
    So not only is the Enermax Magma Twister powerful, and quiet. It is also very attractive. A beautifully sculpted red tornado like blade hovers over a very densely black housing stand the “Twister” apart from normal fans. No cheap materials here. The plastic housing feels solid, but smooth and strong enough to withstand a fall. Yet it is still soft enough for your fingers to touch and search for its voluptuous curves. The Twister follows standard 120mm form factor and measures, 120x120x26.5mm. The materials and finish is top notch, with black being actual black and not a grey cheap plastic and that’s only the fan housing itself. The “Twister” also boosts a removable striking red fan blade, which not only makes it a breeze to clean. Simply press outward from the back of the fan unit, unit the blade pops off for easy access. It is also a Modder’s dream because nothing stops one’s creative imagination on how to customize this fan. With ample access to its housing, and blade, feel free should you need to customize its color it to your heart’s desire.


    Angled View

    Angled View 2
    The Magma Twister comes with a long clear and attractive plastic sleeved cord that not only holds all the wires together as that make routing that much easier. It also feels very solid and of quality. Should you choose to customize the Twister further, its joined wiring makes it a breeze to sleeve with your own third party sleeving. Still even with such a repertoire the Twister keeps on giving, as the retail package comes with a 3 pin to 4 pin adapter, should you want to use the Twister as a CPU fan, as well as plastic anti vibration screws, that considerably drown out noise due to vibration. The Enermax Magma Twister is rated an impressive 100,000+ hours of operation, which will undoubtedly make the “Twister” outlast most of your other components. The Twister’s are perfect for computer case, and cpu heatsink usage. The Twister also has an impressive 1.4 pressure rating, and can be used in conjunction with water cooling in radiator trim, however in extreme conditions it is not intended for radiators, and one should look further in Enermax’s line up for that use.


    Top View

    Back View
    The Enermax Magma Twister is bar none the best case fan available today. It’s a solid build, which moves a lot of air but produces little to no noise. It’s very attractive, black on red design and smooth textured materials make it a looker. Its removable blade is perfect for cleaning, as well as customizing. And comes with all the necessary accessories one would expect a high tier fan would have, such as anti vibration screws, and a 3 to 4 pin adapter. Enermax has been famous for its outstanding power supplies for years so it comes as no surprise that its fans follow the same trend. The only quibble one can have with this fan is the fact it’s not free and being a premium fan, it carries a premium price. However the fact it’s a performer and a silent one at that, makes the Magma Twister a real solid investment. In a society where one spends hundreds of dollars in components that will be replaced in the next two years, the Enermax Magma Twister will lively churn along for years to come doing its job well and being barely audible. Paying itself with your ease of mind as it’s a solid product sold by a solid company.

    The Enermax Magma Twister is highly recommended.

    -PC1X1
    Sestren - Q9550 || Swiftech GTZ || Tri H2O Loop || P5WDH Deluxe || Bios: 2801 || 4GB XMS2 Pro DDR2 PC2-6400 || 2x VR 600 Gig Raid 0 + 8x HDD || Areca 1680IX || Asus 3870x2 2 Gig, Quad DVI || Enermax Revolution85+ 1050w || Lian-Li PC-343B || Win XP Pro || Windows 7 64 bit || 5440x1600 @ 3 Monitors
    RIP P5WD2-E Premium

  3. #3
    Registered User
    Join Date
    May 2008
    Location
    Florida
    Posts
    99
    Title: Parts Review, +Info!
    Date: October 03, 2009
    Status: Ongoing. Finish Parts Review, prepare for Red Cube

    Brief: Good Evening Everyone, lots to do today! Before you scream "Bloody Murder" this log is becoming a Review Log, and not a work log! I'd say Halt. As work on the worklog is ongoing, and as I mentioned previously I have had to pause for a bit due to getting the Cube painted. First I had to wait for my dremel to arrive to do the mods, the dremel was DOA, got replacement, did the mods, and dropped it off at Fusion Powder Coating here in Sunny Florida, and am picking it up early week of Oct 4th - Oct 9th. And I will resume operations and do all updates with the worklog in the same manner and production as the parts review.

    However so I am not standing idle, I decided to do some more Part's Review for you guys, this is where I show you a hands on impression of products I am using in my build. You will see it in the final product, when I actually get to the point in my build log that I use it, I will reference these, as my hands on impressions, and on the worklog it will be practical usage. So feel free to ask any questions as you may want to use these products yourself. Alot of things I use, I got ideas from other worklogs, so to make it easer for you, I have linked the products I am showcasing in these reviews in the Part's list. Big thanks for my partners in the build log, for providing, and helping obtain these items.

    The Cube ended up being Powder Coated Mettalic Red, and Black, so its not a normal powder coat, I asked for and paid extra for Show Quality paint. Fusion Powder Coating, normally works with Automobile and Motorcycle parts so you can start imaging the outcome! I am anxious as you problably are now, and I will post the picture of the painted cube ASAP.

    Expect another Part's Review tomorrow, and then I am done with reviews for a while, and then I will be working full time on the worklog, and hopefully, cross your fingers with me! I can obtain the rest of the parts and keep going. A factor that threw alot of things in the air, however is graphics cards. Right now its a race between 2x 295 GTX's and or 2x Radeon 5870x2s, and or 2x Fermi's. I am still evaluating all my options, and it will come down to performance and cost. As soon as I have a clearer decision, I will let you know. Also due to the recent price drops in SSD, they have now become viable options, and I will be using 4 solid state drives as my main OS drives, and I will send the Raid 0 Velociraptors into Programs/Data drives all powered by the 1680IX. Either way, its going to be very very fast.

    I have updated the first page, with all full parts list, and will make a few more edits here and there, when I either have the items, or have a clear decision on using that item. However 99% of the time, anything that goes in the parts list, I own, or have already made an arrangement for it to come. As some items are custom, I can't 100% confirm their existence yet. Anyhow that's pretty much it for now, expect more constant updates, and much more content in the coming weeks (honestly in a couple of days even!). I will push as far and as intensively as I can. I hope everyone joins me in the struggle that is this work log. It took me 12+ Hours straight for this update to occur from start to finish!

    I'd like to thank my producer, (Mom), and Logistics Director (Dad), as couldn't have gotten these pictures up without them. They also sign off layout changes, heh. Front page is officially done for now, go click on the first post again!

    Thanks alot for checking out Sestren! And make your voice heard, if you like it, make your voice heard, or type here, as the more support, the more influence and reach I can push for. And be back soon, as in a matter of days, a certain red metallic comes home..... I am ready.

    - PC1X1


    Petra's Tech Shop: Smart Coils 5/8 OD Review
    By: PC1X1


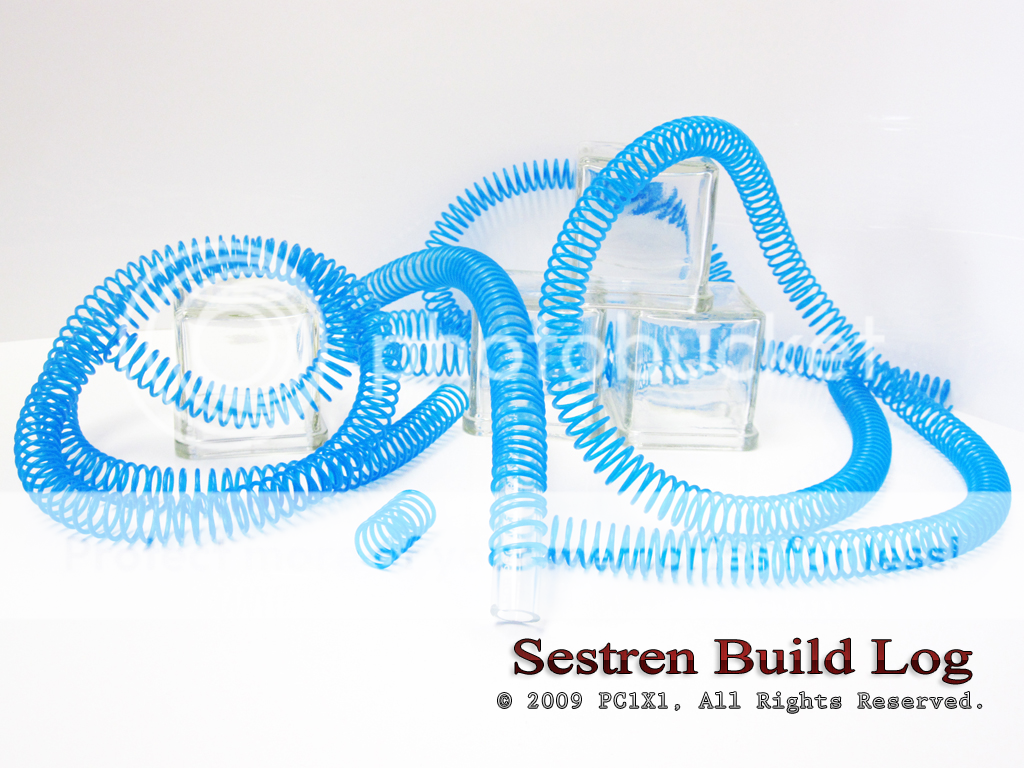
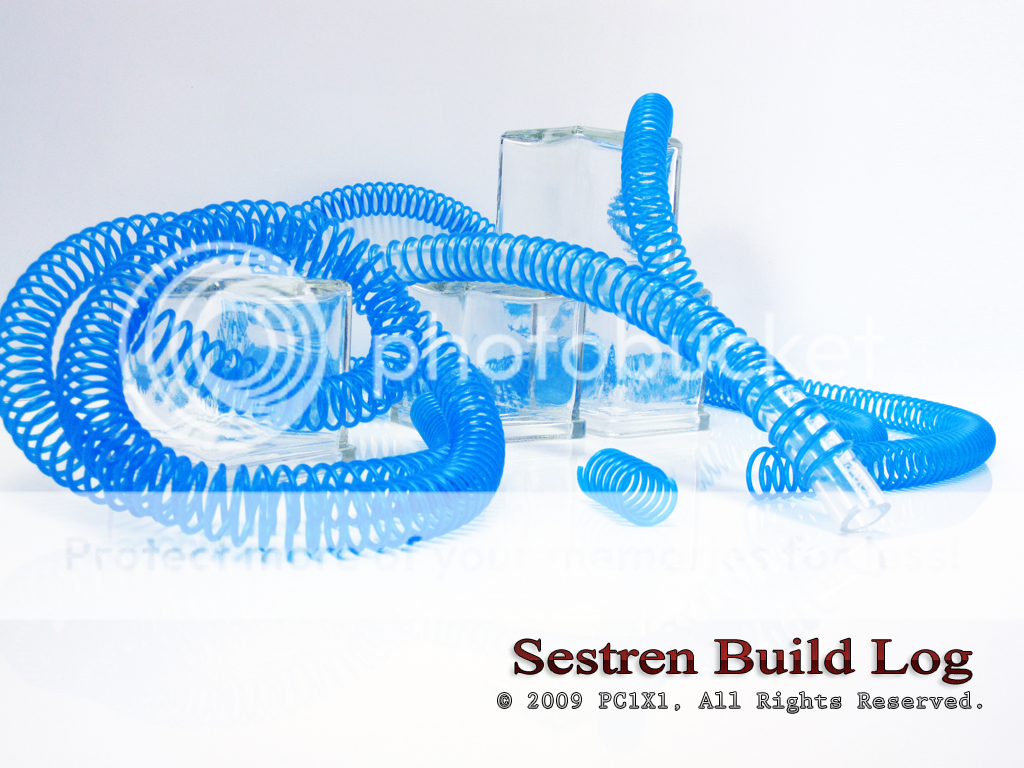
    Smart Coils are twisting plastic strips that are used to cover tubing so it doesn't kink or bend itself thus obstructing waterflow while the tubing is bent at awkward angles. This is important because a single kink can drastically reduce waterflow. Smart Coils are generally specifically made for certain o.d, or outer diameter tubing. Today we are taking a look at 5/8 O.D Smart Coils from Petra's Tech Shop. Because Sestren uses external radiators it is imperative to make sure all the angles from the external radiator to the inside pumps do not kink. So Smart Coils are applied at certain sections to prevent that from happening.

    You can apply smart coils by gently wrapping it around tubing that will be angled. It is interesting to note that alot of users use alot of Smart Coils to dress up their tubing, when it actually only needs to be applied to where the tubing is angled. Smart coils can be used sparingly. One doesn't need to use a large amount of Smart Coils. However since they denote a certain status quo and are generally attractive depending on the build, it is fun to put them all over the tubing. It won't hurt the computer in any way, just your wallet. Overall Smart Coils are pretty simple, put them where you want to prevent kinks and you are done, they are necessities in tight tubing bends, and generally inexpensive, so definitely pick up a few if you can and are water cooling.

    Do note however, that there is a small drawback to Smart Coils, and it isn't their application nor the functions, when coiled they work perfectly. Their only con is really their resistance. They can be pretty brittle sometimes. Personally I am only acquainted with this type of Smart Coils, which can be bought from Petra's Tech Shop, so this may or may not happen to all Smart Coils. However it seems to be the norm. If you apply the coils with tubing already filled with water, or even if its dry but its connected to something if you are not careful while coiling you may break the coils. While they can certainly be put on and put off, if you are gentle and careful, they are also prone to break. So I highly suggest you apply the coils prior to the build, and only after your tubing is coiled up, then put it inside your computer. Failure to do so, can result in losing a perfectly good pair of smart coils, which I personally lost. You can check out in the first stages of this worklog on that one.

    Overall I highly recommend Smart Coils, and pick up a few, just in case you break one. And specifically this one from Petra's Tech Shop, as it's inexpensive, does its job well, and when one of my coils was faulty, Petra's staff took care of it, and replaced it, and explained how to properly apply them. So it is highly recommend if you have areas in your water cooling set up that are prone to kinking, get yourself a pair of smart coils today.

    Petra's Tech Shop: 4-Pin Molex Extensions Review
    By: PC1X1


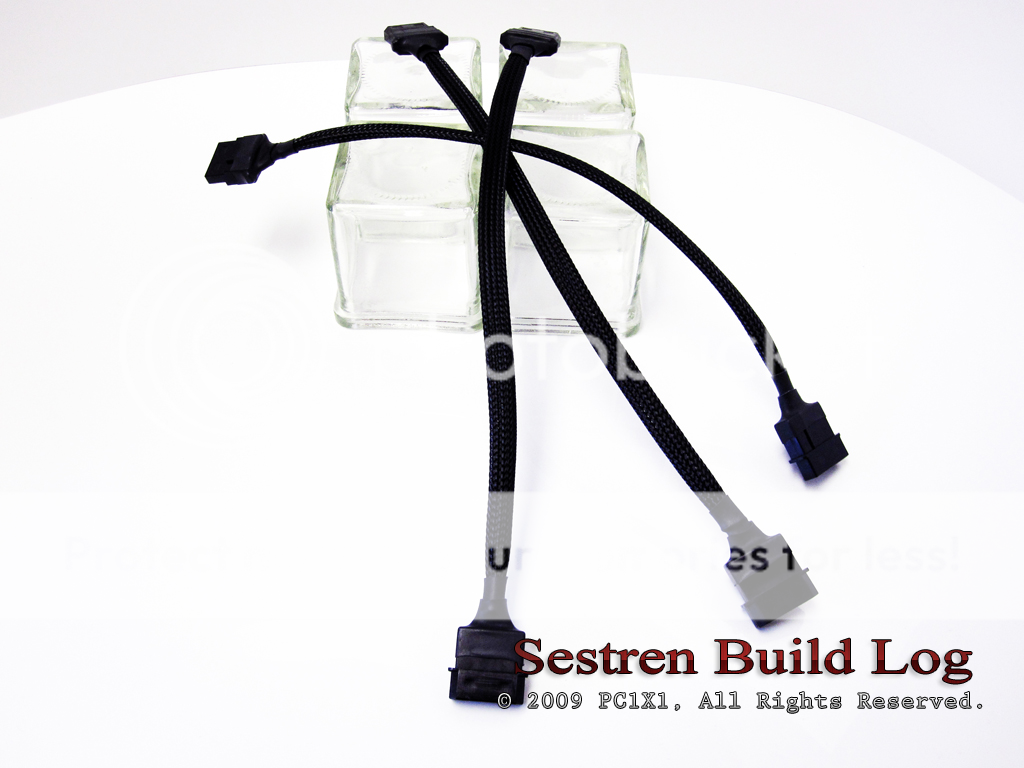
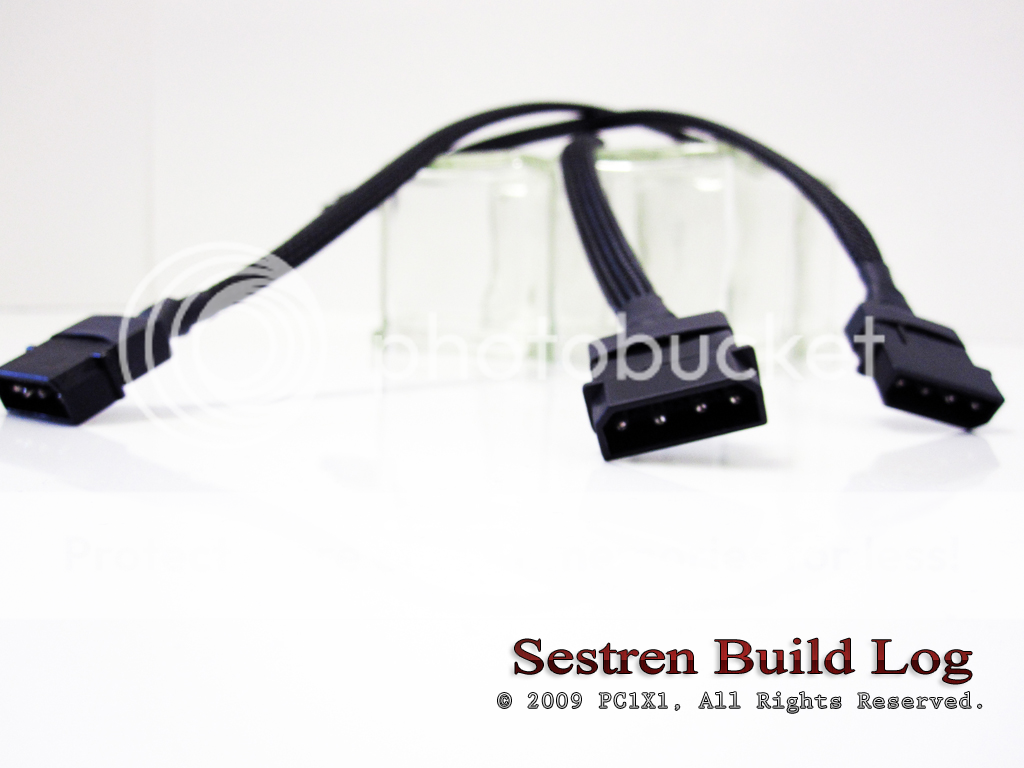
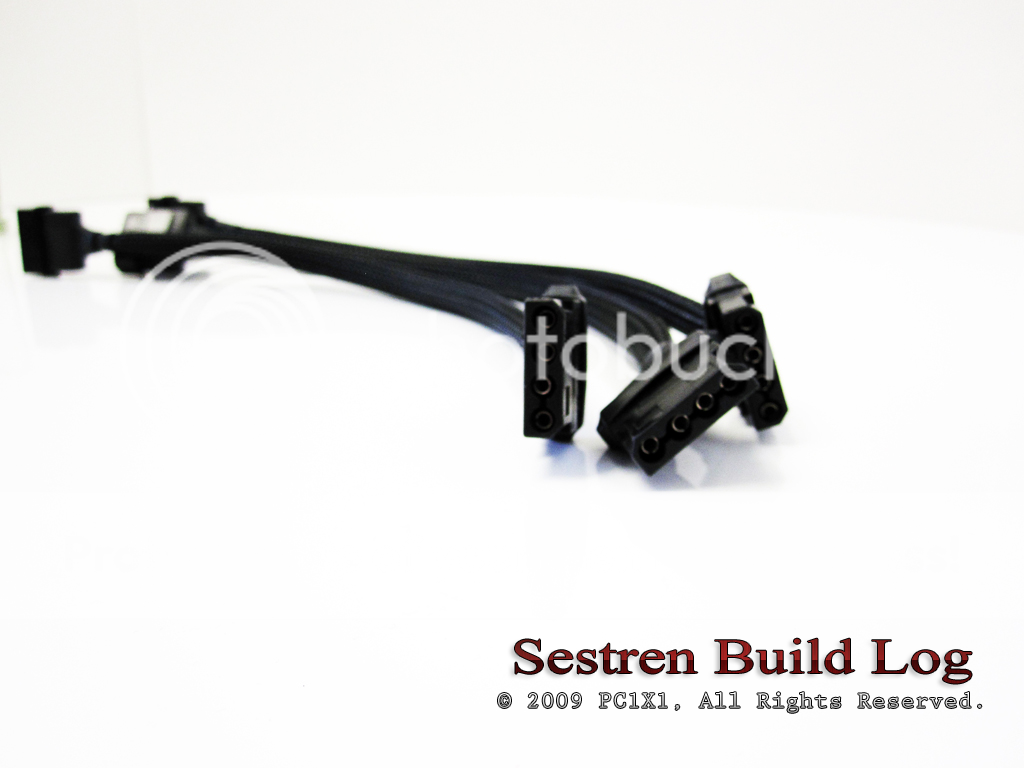
    Here we have ATX spec, the mother of all power connectors! The 4 Pin Molex. The 4 Pin Molex is an amazing combination of two grounded signals and a +5 Volts line and a +12 Volts line. They are the building blocks of computer and alot of hardware electricity. While the 4 pin molex has been superseded by the new and slim Sata Power Connectors, it still soldiers on as the quintessential computer power connector. And just because there are smaller and slimmer alternatives today, doesn't mean that there isn't alot of hardware that still uses the good old 4 Pin.

    Coincidently it seems that the Wizards that are Hardware Engineers, have mostly made the 4 Pin Molex become the computer accessory connector. The Molex can still be used to power Hardrives, and other core computer parts, however as I mentioned Sata Connectors are better at that task, and some hardrives are even phasing out the 4 pin females. So you may ask, What is the 4 Pin instead is perfect for? Well basically everything else. Every single computer accessories you can think of. From Cold Cathode Lights, to that cool little Bay thingie that glow and you have no idea what it does, to water pumps, and everything else, is based on the good old 4 Pin Molex. Because it still a very versatile connector. It is universally used and thus has a large market penetration, and is highly mod-able, or customizable. Not to mention, motherboard manufacturers have also been using the 4 Pin as a power supplant to high end motherboards.

    Basically the 4 Pin Molex isn't going anywhere. So we have the gear that needs it, but in the quest of organized wiring, it is a bit cumbersome. The main problem with a 4 Pin Molex, is the same as DVI to HDMI, it does the same thing as its alternative. However it is bulky, and unattractive. Worst yet you need to route distances in your case, that can't be reached by the cables that come with your motherboard! However don't be discouraged because again our friends at Petra's Tech Shop, have what we need.

    *Please note that the pictures above are of the product that is being reviewed, however that product as since been upgraded with a male and female black connector, and has been resleeved with a third party sleeving to achieve that look. You cannot purchase a Extension in that condition, you have to sleeve it yourself!

    Basically you have two choices, either buy a standard extension that does not come sleeved or buy one that is. Unfortunately I have already sleeved all my extensions, and thus do not have any recent photos on how they looked prior to be sleeved, you may check the beginning on this worklog to see all I went through to sleeve them! It was a alot of work, but I had a solid foundation with Petra's Tech Shop Extensions. Petra's offered various sizes, and all of high quality. After spending thousands of dollars in accessories for Sestren, I needed dependable extensions, and I am highly satisfied with what I got from Petra's, just be prepared to do alot of custom work yourself to reach this level of quality.

    However the original extensions that came pre-sleeved weren't bad at all. In fact, they were of much better quality then I imagined. The stock that I got was from OK Gear, and was basically that, OK looking. It wasn't a custom sleeved job, but it wasn't a hack job either, it worked, and seemed to be using a derivative of PET Sleeving. So if you want to sleeve your cables and do not want to do it yourself, I highly recommend these, and if you want to do it yourself, be sure to buy the bare extensions, and then do the custom work yourself. For references on how to actually sleeve it and for pictures of the tools needed to custom sleeve your wires, check the beginning of this worklog.

    Petra's Tech Shop: 3-Pin Fan Extensions Review
    By: PC1X1


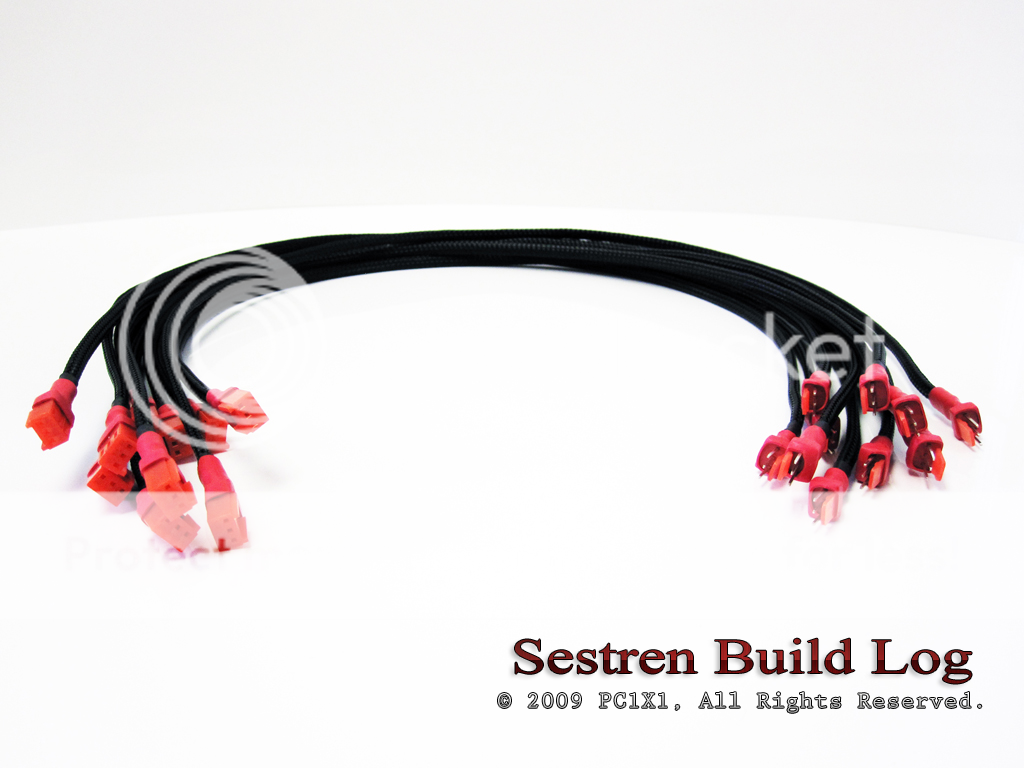
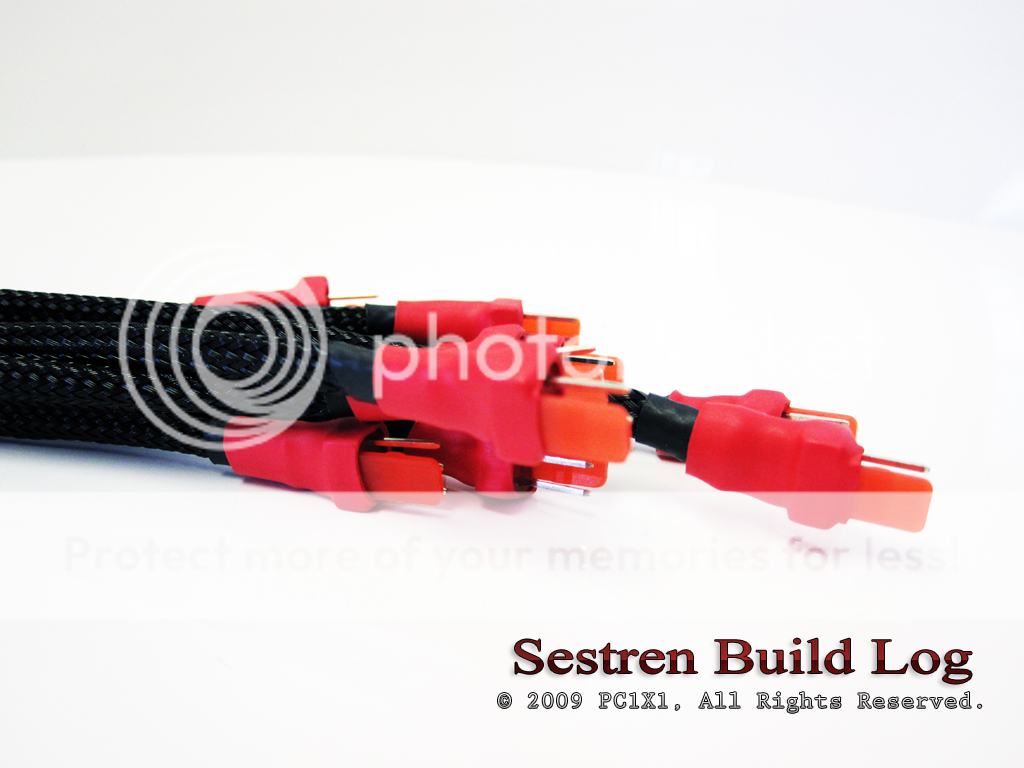
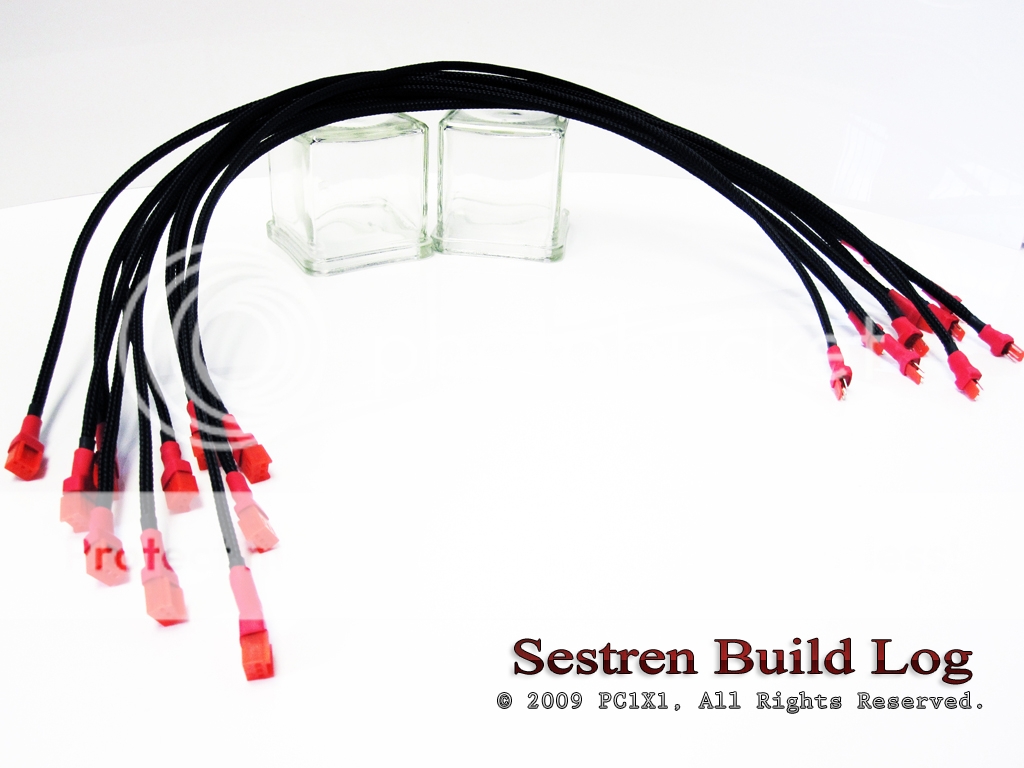
    Following the same principles as the 4-Pin Molex, albeit specifically tailored for 3 Pin fan, these extensions are made to route those ever growing fans from your case right to your power supply. Basically the same Review applies to these 3 Pin Extensions, they work as advertised come in various sizes, and when sleeved look great! You can purchase them at Petra's either sleeved or non sleeved, and they are very inexpensive. They carry all volts needed by your fans, and I checked each of my extensions with a volt meter to ensure consistency. Like I mentioned before, I highly recommend them as a way to route your computer cables so your computer is more aesthetically pleasing and as a way to increase space and airflow inside your case. Highly recommended, especially if you have 30+ fans like I do.
    Sestren - Q9550 || Swiftech GTZ || Tri H2O Loop || P5WDH Deluxe || Bios: 2801 || 4GB XMS2 Pro DDR2 PC2-6400 || 2x VR 600 Gig Raid 0 + 8x HDD || Areca 1680IX || Asus 3870x2 2 Gig, Quad DVI || Enermax Revolution85+ 1050w || Lian-Li PC-343B || Win XP Pro || Windows 7 64 bit || 5440x1600 @ 3 Monitors
    RIP P5WD2-E Premium

  4. #4
    Registered User
    Join Date
    May 2008
    Location
    Florida
    Posts
    99


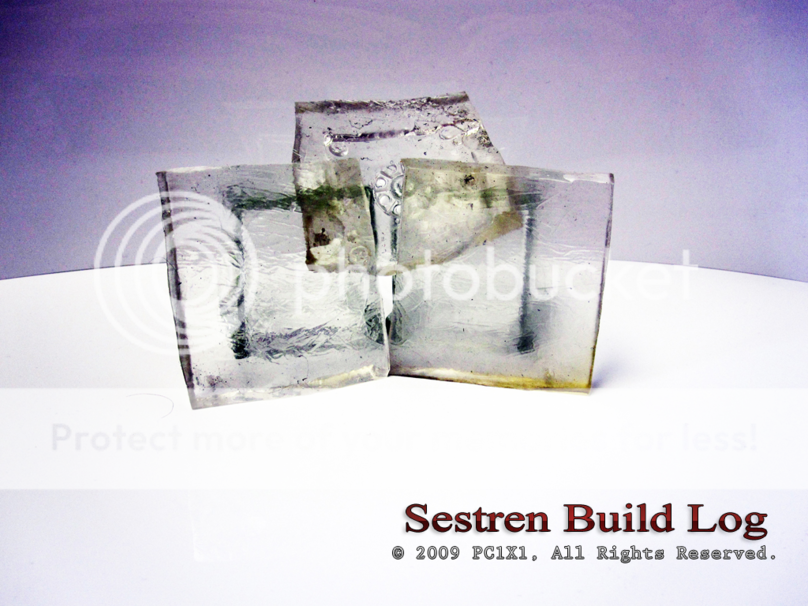
    Petra's Tech Shop: Petra's Gel Stuff! Review
    By: PC1X1


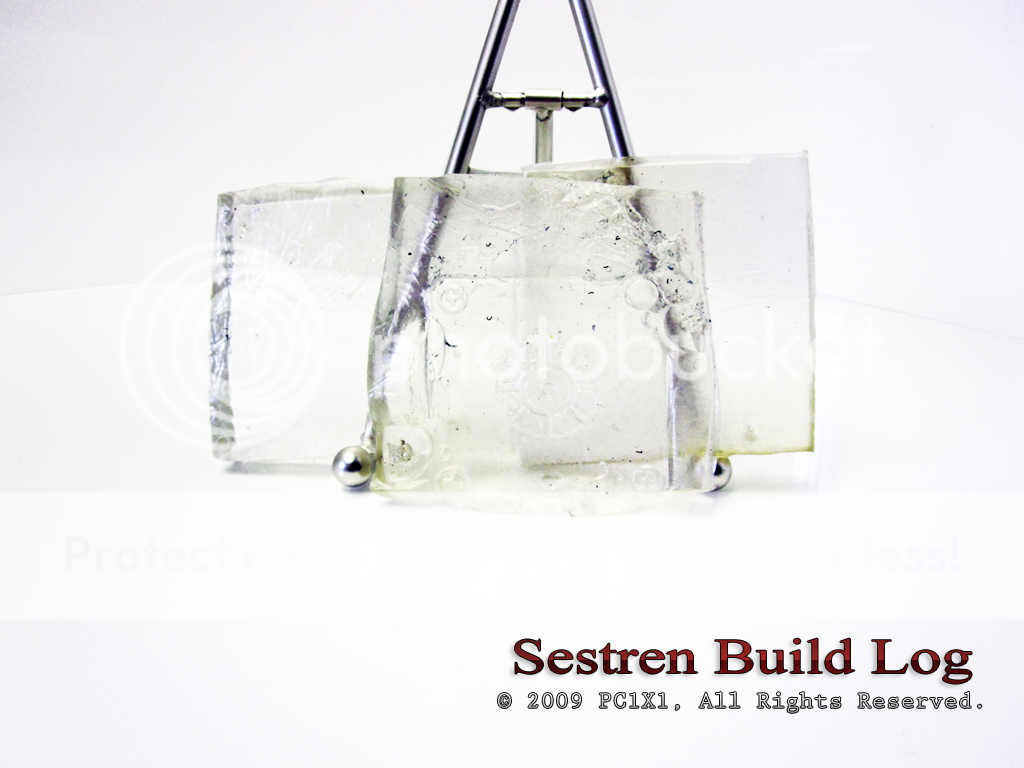
    Here is Petra's Gel Stuff. Some unknown squishy substance that is used to reduce pump vibration and thus reduce noise. And the question is does it work? And the short answer is yes it does. Did I mention it is squishy? Do not eat... So when you aren't playing with Petra's Gel Stuff, or wondering what heck is this thing made of? You may want to put it under your pumps, and then clamp them down to apply a small amount of pressure. The pump then sits on the Gel Stuff like a cradle as it forms itself around the pump. So motion and kinetic energy from the pump is dispersed through a large surface area. And since the Gel Stuff, is tangible, or in lame sense terms squishy, the vibration tends to echo less. This is specially important in Aluminum cases, that are more prone to noise from pump vibrations.

    So basically as the name implies, it some sort of gel, and reduces noise and works wonders. Sestren, is very large, so very prone to pump echoes, and the gel stuff takes care of that better than the standard sponge that came with the pumps. Gel stuff is inexpensive and easy to apply, so if your having some pump noise due to vibration (not pump whine) then definitely be sure to check out the Gel Stuff. Due note though, that the Gel stuff does turn greenish, and seems to be prone to breaking apart easily, so do not be surprised to change your Gel Stuff after a few uses in your water cooling system. There is a low light picture above deliberately showing the wear and tear of a lightly used Gel Stuff. Aside from turning green, it works great, and is highly recommended.

    Now just to figure out what this stuff is made from? Also did I mention Do not eat it!

    Petra's Tech Shop: Wire Management Clips Review
    By: PC1X1


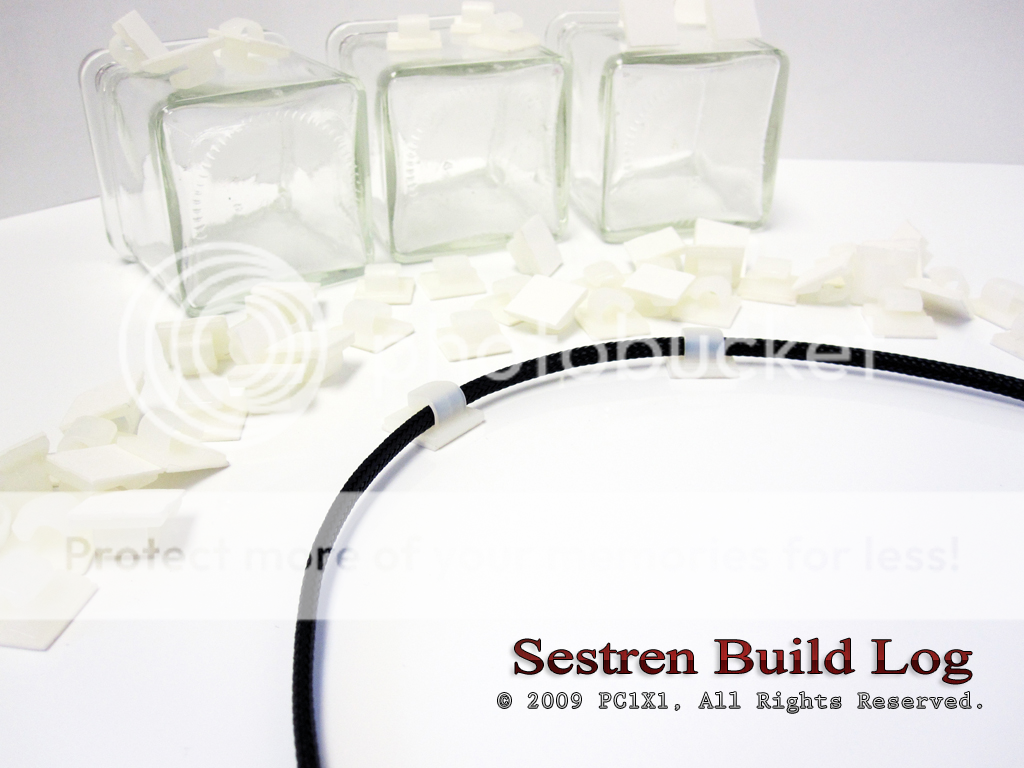
    Today's specimen is Wire Management clips or the building blocks of any organized and routed case. Aside from the original, aka. Zip ties, Wire management clips are your best friends, in routing your cables. By routing your cables, you are making you computer more aesthetically pleasing, increasing its airflow be decreasing the surface area of wires that can impede airflow. These are very small clips that can route wires around. They are strong and well built and feature a very strong adhesive base. Unless forcefully pulled, they will remain in place. A lesson learned when I stripped Sestren again for painting at the painful cost of 30 clips. Generally one would want to put the clips in angles that they are not seen, to give that illusion of no wires.

    Since these particular clips are small they are by far the best for routing 3 Pin Fan cables. I use them alot through Sestren, and they can be used for various applications. Pro Tip: Put one with the hook face up, and then the next one with the hook face down, and you have just created a physical lock for the wiring! So be sure to experiment with all the combinations. Personally I would recommend a mix between various Wire Management Clips, being these are the smallest and thus most versatile ones, a few bigger ones, and some usesage of Zip Ties. And you too can achieve that clean wiring look. While cable routing is tedious and mostly a painfully frustrating process, the end result is clear. It makes it easier to management and upgrade your components. Makes your computer more pleasing, and gives you that satisfaction of OCD organization.

    I have searched high and low for the best clips, I mean I have 30+ fans, Pumps, and 500 ft of sleeved wiring in there! And these were the only inexpensive ones I could find at this size. The glue sticks well, a little to well! Pro Tip #2: Use Goo Gone to remove the residue! And you have yourself the best foundation for an organized and clean build. Also feel free to color them, I will be painting them Black soon!

    MNPCTech: T-Shirts and Grill Cut Outs Review
    By: PC1X1


    Ever wanted to look stylish while modding? I mean you pay popular companies to wear and advertise their logos in your clothing! So while not pay for the hobby you love?! Enter the MNPCTech T-Shirt. The only T-Shirt that add Megahertz to your overclock. *Note: This claim is not verified by any credible source, and should not be taken seriously.... or should it? The shirt is standard Fruit of the Loom, silk screened t-shirt, and most likely will shrink a little after a wash. However it is very well done. The front sports the MNPCTech logo, while the back has a awesome cut out of a computer case being modded. More pictures of the back of the T-Shirt in the next installment. So whenever your feeling fly, and or need to be inspired by modding. Check out this great T-Shirt. It feels good, as its a standard good old Fruit of the Loom T-Shirt, but most importantly finally advertises something you love. So you can be different from everyone else, and become alienated in your own hobby. Also makes great PJ's. I may or may not pick up girls, not enough testing has been done on that segment yet. More research required.

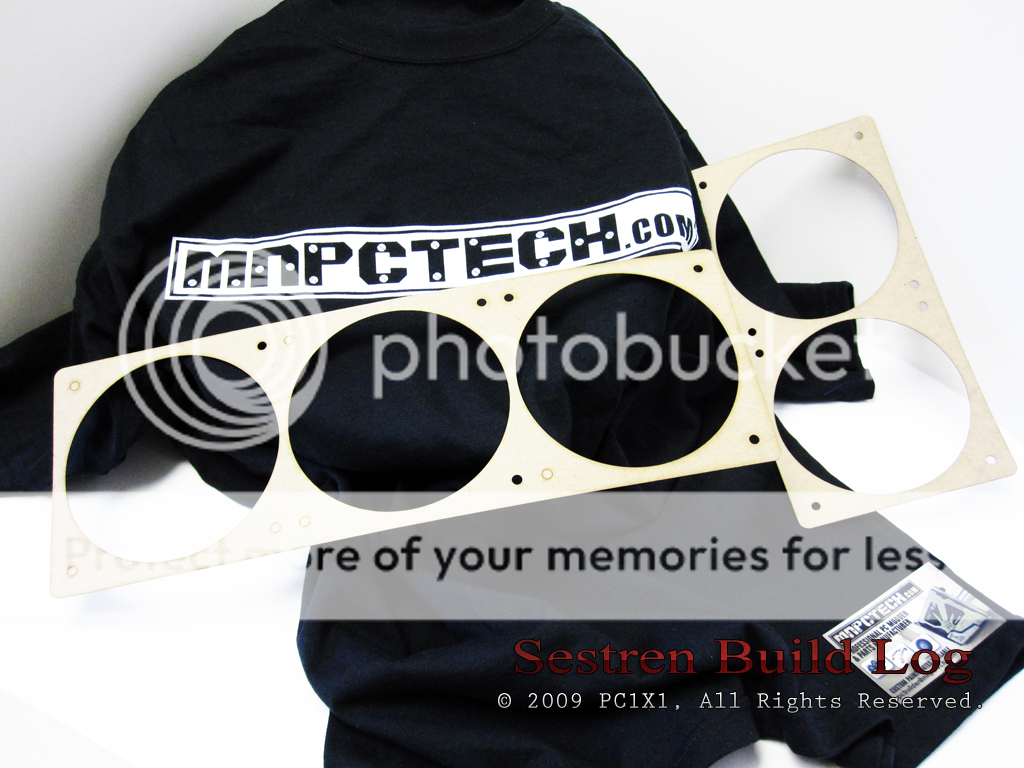
    Aside from the styling shirt, we have here radiator grill cut outs that can be used from testing fitting certain non existing custom grills for a certain build log. To actual modding of your case. Do you want to add holes to add a internal radiator to your case? Well look no further, as these are perfectly cut to simulatate actual Radiator size. So one can add a grill and or radiator with ease. Simply press these guys down and draw with the pencil an outline, or if you have the disposable income, buy several and simply use them as stencils for your projects. Either way they are great helpers to any modding project involving radiators. Highly recommend, and I would pick up a few, as their only drawback is that they are flimly, and easily belt, stepped on, or eaten by your family pet.

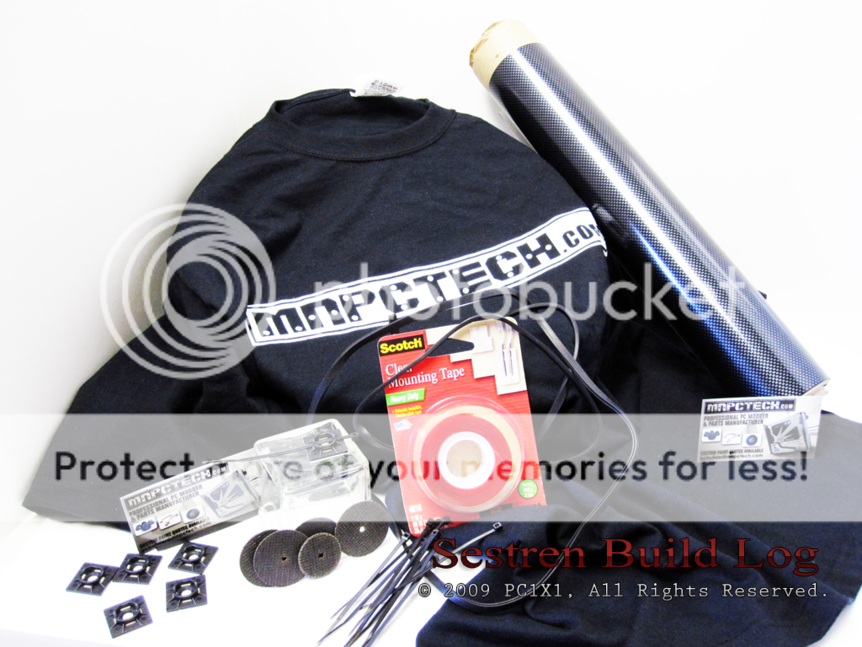
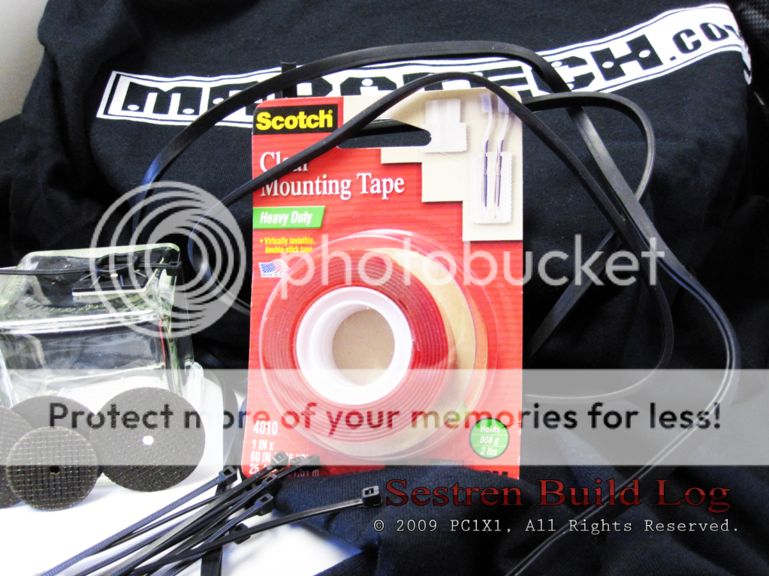
    MNPCTech: The Modder's Tool Box, Zip Ties, Mounting Tape, Dremel Discs, C-Molding, Carbor Fiber Film
    By: PC1X1


    So what happens when the mod your are building, has wheels, pseudo carbon fiber, is water cooled, has radiators, needs heat disapation, and has the capacity for 2000 kilowatts? And is not a car? Well then you have Sestren, or specifically a mod. And to actually implement these mods, I need my good old trusty tool box. Here's a short review of some items I will be using on Sestren. Since alot of these items are fit and finish trim pieces, obviously I cannot use them in their practical purpose, however I can provide a first hand review, on their form and functions, and I will expand this later when Sestren is in the Fit and Finish phase.

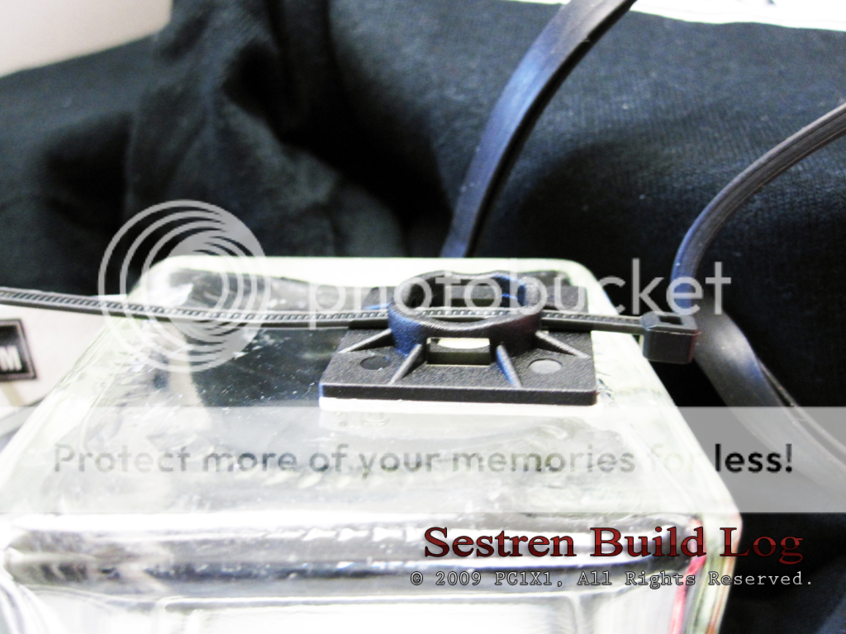
    First we have the Zip Ties, like the previous review on Wire Management Clips, Zips Ties provide the foundation or basis for your wiring. These Zip Ties are standard fair, strong, durable, easy to use, and come with very good adhesive bases, as you can see in the picture. These are perfect for large wires, that will not fit in a management clip, i.e. 24 Pin ATX Power Supply Cable. However the most astonish fact on these MNPCTech zip ties? The kit is extremely cheap, cheapest place I found for these particular ties by a long shot. They are very dense black, and attractive, while the base has a nice contour. Plastic is problably ABS plastic, but is sturdy. Overall when used properly they are your best wiring friends.

    Next up we have Mounting Tape, this is a Scotch brand, which you can also pick up inexpensively at MNPCTech. I tried to find a comparison in Home Depot/Lowes, but was unable to find one. Obviously this package is still shrink wrapped, so I have not put it in practical use, however 3M is basically the industry standard on adhesives, they invented quite a few of them. So I wouldn't expect any less than a great product. So for practical purposes, I turn to MNPCTech's own website owner, Bill Owen who claims this is the "Tape from the Gods". And since Bill Owen, is a pro modder, and owner of MNPCTech, I take his word very seriously. You can also check out a video on how to make a floating window, that gave me lots of ideas on doing a few things for Sestren. The tape can also be used to apply Wiring Management Clips, that have had their backtape ripped out. Anyhow 3M makes good stuff, couldn't find an alternative for comparison, and the price is pretty good. So if you need to mount something I would take a look at this tape. I will post more impressions when I am using it in Sestren at a later date.

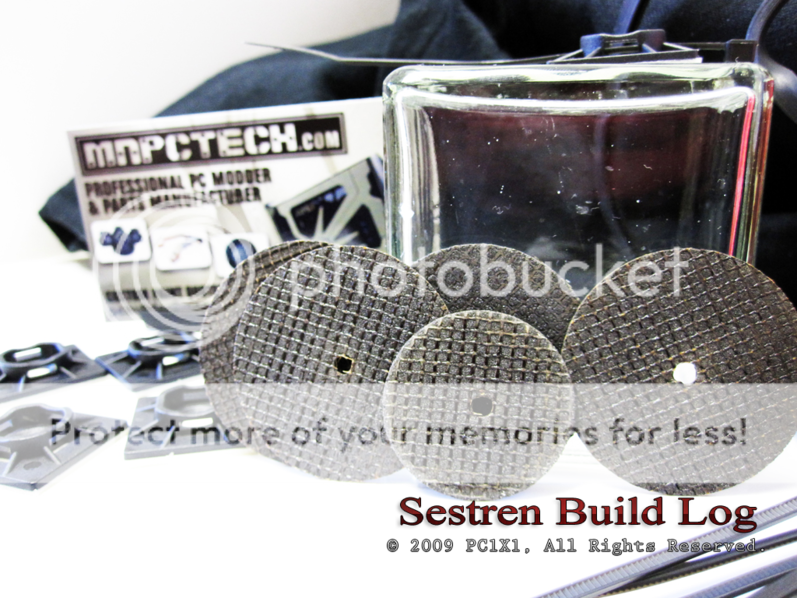
    Which leads us to Dremel Discs, or another Modder's foundation tool; the dremel. Since computer cases hold micro..etc components, cases aren't very big at all. Although Sestren would disagree with the norm, computer cases are generally small. So you need a small and precise tool. For cutting thin steel and aluminum, one would be hard pressed to find a better tool like a dremel. However just as you need the dremel to make the cut, the dremel needs its own accessory to actually implement the cut. And here is the Dremel Discs. These Discs are specifically made of Aluminium Oxide, and thus are more resistant and don't heat up. The best part, they are made specifically to cut metal, so with the right tools, anyone can do the job.

    It does take alot of patience and safety precautions, as one should always wear safety googles, work in a well lighted, and ventilated area, and read all pertaining manuals. You may be asking? Ok so its a circular disc, so what? It is a circular disc, but it is without a doubt the best disc I have used to cut aluminium with. The sweet spot I found is 25,000 or higher RPM on your dremel, and light touching the surface. Don't force your way as you will wear out the discs faster. However the best quality I found on this disc, is the fact it did not heat up or warp my Aluminum chassis. As you can imagine, I am cutting through the motherboard frame, completely anxious, because if I screw it up, I can't buy one at a store, as I modded the plate to be removable. I would basically have to buy another Lian Li 343B, so I was extremely happy, that the discs not only worked, but made my job easer, and clean. This was my first time using a dremel, and it was pretty simple, be sure to check out MNPCTech's videos on how to use a dremel as they were great intros on what I was getting into. My only complaint with the discs is that they wear out fast, however it could have been due to my inexperience. I did talk to Bill Owen, on tips and why the discs wore out so fast as its became almost half size from only one mod, (the smaller one in the pictures is the one used). And Bill basically told me, I applied to much pressure, and I don't doubt him, as I originally out of fear, started out at 5,000 RPM, and kept moving up. As I gained confidence on the discs, and noticed they were working exactly like they should, I upped, until I found 25,000+ rpm to be the best. Overall great discs and got the job done, you will be able to see the results from the mod, when the cube comes back from powder coating. Also save your smaller and used up dremel discs for more delicate cuts, so even used they can still be reused for greater value!

    So after cutting the motherboard tray, I wondered what could I use to make this finish more profesional, I had already sanded it down. And again MNPCTech had the answer, C-Molding. Or U Molding as they call it, but I call it C Molding. Pro Tip: If it bothers you that I call it C-Molding, while reading this tilt your head to the right and its now a U. So while my cuts onto the motherboard tray for routing are currently secret, the molding is not. I put it on there to test, and it worked perfectly. Its made of a good feeling plastic, i.e. doesn't feel uber cheap, and is very dense black colored. Overall it will fit with the theme and augment the finish on Sestren. It is great molding, and you will see the results when the cube is painted. If you need to make any dremel cuts and want to avoid cuts from where you modded with your dremel or other tools that leave the area a little sharp. C-Molding is the tool for the job.

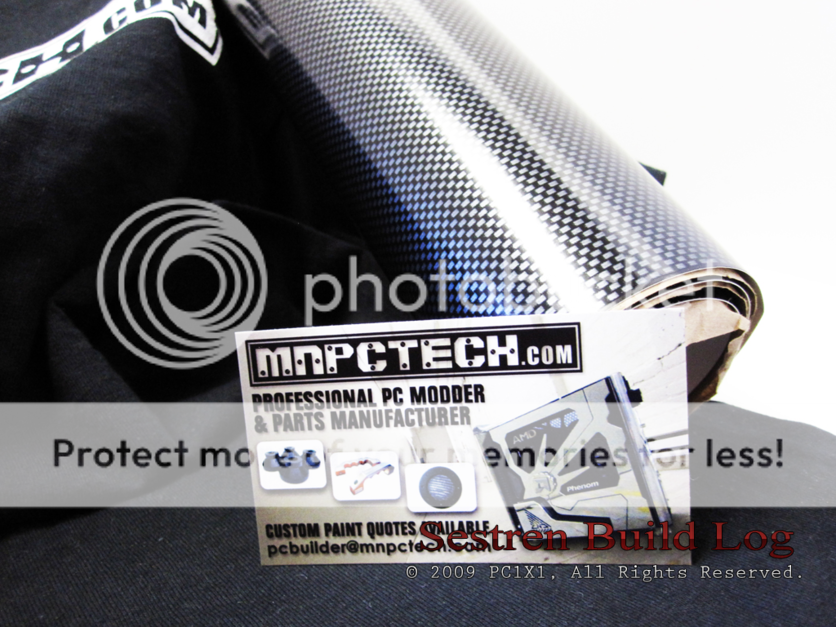
    So I have my mod done, everything is ready, I am building almost a car, I figured, what's left to get? Enter Carbon Fiber Film. This pseudo Carbon Fiber appplique can be used to augment your computers aesthetic looks. Because honestly, almost no one has real carbon fiber in their car, let alone their computer. And since our computers aren't going anywhere, at least not normally aside from Lan Parties, weight does not matter to much. At least not in small components, so real expensive carbon fiber would be of little to no use. However let's be honest, it still looks cool, and expensive. And adding lights to a computer is just aesthetics, so why not add some carbon fiber trim for that F1 look? The Carbon Fiber film looks great, infact its very close to real carbon fiber. So while using it alot may make people think your are "ricing" your computer, the same can be said for LEDs. So use it sparringly, and it can definitely give your computer a unique look. Its made of very high quality film, is again pretty affordable, and best of all, doesn't leave any gunk while applying it or removing it. So you can use it on your mouse, keyboard, or inside your computer. The possibilities are endless, and since Lian Li gave Sestren some pseudo carbon fiber on its top front, I will accent the insides sparingly and tastefully with it, stay tuned to see it in actual application!

    Hopefully these reviews gave you guys some insight on what I choose what I choose, and what I learned while building this computer. Be sure to ask any questions, and most of all, go out there and build your own worklog!

    Thanks for reading! No seriously it was pretty long!

    Until next time, stay tuned as actual parts are coming in through the magic that is MAIL! Talk to you later!

    Be sure to support great passionate stores, like Petra's Tech Shop and MNPCTech, they aren't gigantic major corporations, but enthusiasts like me and you, that share the same passion for computing. Give them a call, mention this worklog, mention your love for computing, as both Alex, Quoc, at Petra's, and Bill Owen at MNPCTech were super nice enough with me, in both making sure I got my orders right, and answering any questions about my project in their respective fields, and hence I want to repay their favors. Major thanks and kudos to them both, and its the sole reason I choose to work with them for Sestren, it's their customer service, and attention to our community.

    I am out!

    - PC1X1
    Sestren - Q9550 || Swiftech GTZ || Tri H2O Loop || P5WDH Deluxe || Bios: 2801 || 4GB XMS2 Pro DDR2 PC2-6400 || 2x VR 600 Gig Raid 0 + 8x HDD || Areca 1680IX || Asus 3870x2 2 Gig, Quad DVI || Enermax Revolution85+ 1050w || Lian-Li PC-343B || Win XP Pro || Windows 7 64 bit || 5440x1600 @ 3 Monitors
    RIP P5WD2-E Premium

  5. #5
    Registered User
    Join Date
    May 2008
    Location
    Florida
    Posts
    99
    Title: Worklog Update
    Date: October 07, 2009
    Status: The Red One Arrives!

    Brief: Good Evening everyone, after much anticipation, Sestren has returned home. I would like to first off, thank Patrick from Fusion Powder Coating for an absolutely fantastic job on the 343B. The Powder Coat came out great, and exactly how I wanted. It is now red hot with passion!

    I would like to again thank my sponsors, and you guys for the feedback on the reviews. Any and all feedback I listen to, and correct anything that you guys mention. As you can see how the updates are shaping up. Its thanks to the awesome feedback I receive and keep it coming!

    On to business, Sestren has finally returned home, so it means it's time to boogie. Expect many updates, as I am assembling it, so many "Worklog" Updates to come! Overall I am very satisfied with the outcome of the powder coat, its great to see a vision start to take shape. It wasn't without incident however, as if you recall originally it was supposed to be a metallic red. However after speaking with Patrick, the owner and the one who powdered the cube personally. He advised me to withhold on the metallic, because due to the cooling properties and how thin the Lian Li Aluminum is, there was a chance that it may not come out even. So of course I took his professional advice, and I am glad I did, as it came out awesome none-less. Looking at it, I wouldn't have it any other way.

    I am a big fan of a certain red F1 racing team, so I am sure you can see a little bit of the influence there, heh! So theres definitely some "Passione" in there. So stay tuned for some tasteful carbon fiber touches here and there. The cube is currently wrapped as its not ready to be worked on for now, I shall be working on it this weekend, so thats October 9th, 10th, and an update should follow a little bit afterwards.

    I am still securing some parts for Sestren, and depending on how some things go, it should be complete, around Q4 of this year, and or Q1 of next year. I am still waiting for some graphic card releases, as well as other parts that are coming. None-less I will still be working on whatever I can, so there will not be any droughts on updates, I expect to be pretty consistent, I have a schedule laid out. Overall I am pretty invigorated to work on it, as any who see a dream becoming reality would be. I hope to continuing to strive and bettering myself with each update. And I welcome you to join me in this pursuit. Thanks alot everyone, every time I see that little views counter go up, there's a smile in my face.

    Here's some of the parts featured on the reviews and where you can buy them. Especially check out these awesome Grills from MNPCTech. The pictures speak for themselves.

    Be sure to check out the first page for a complete part's list!

    Here's Petra's Tech Shop:

    And here's are the Stars from this update! The MNPCTech Accessories!

    Here's MNPCTech:

    Featured in this specific update are:

    Until next time!

    - PC1X1


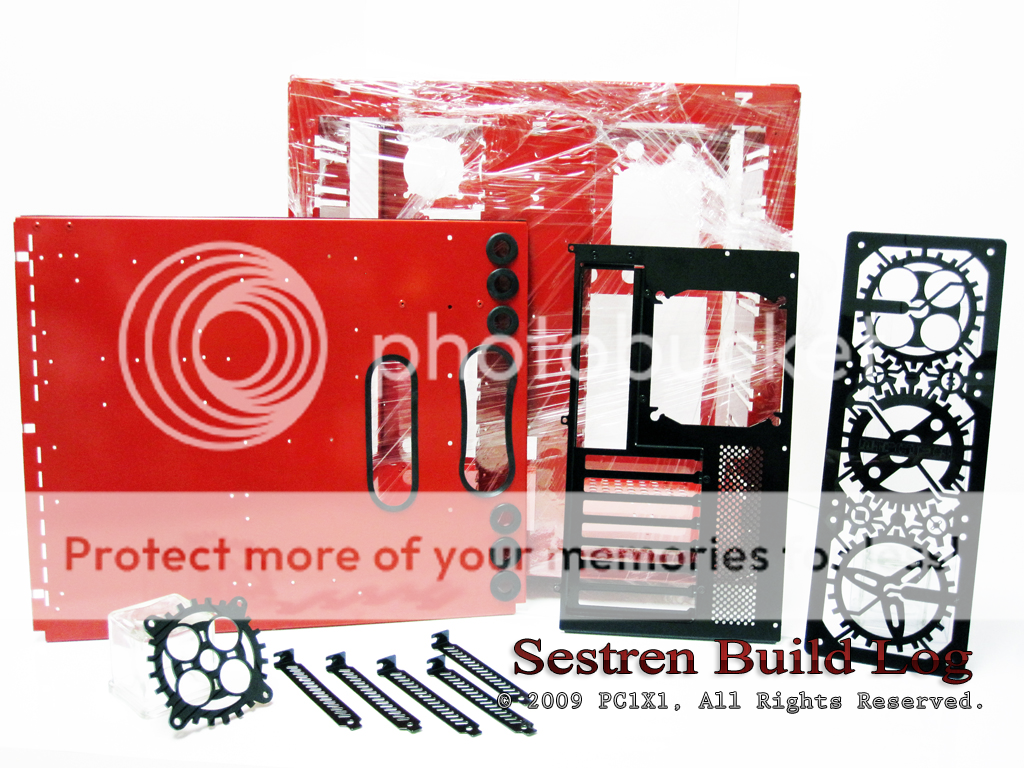
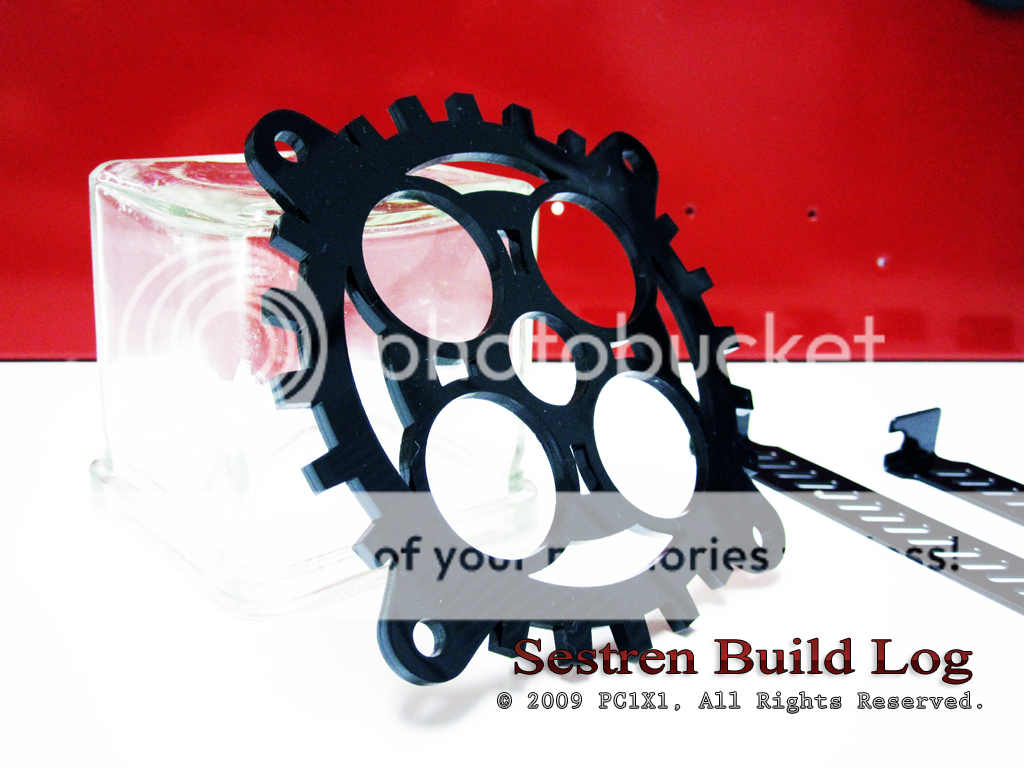
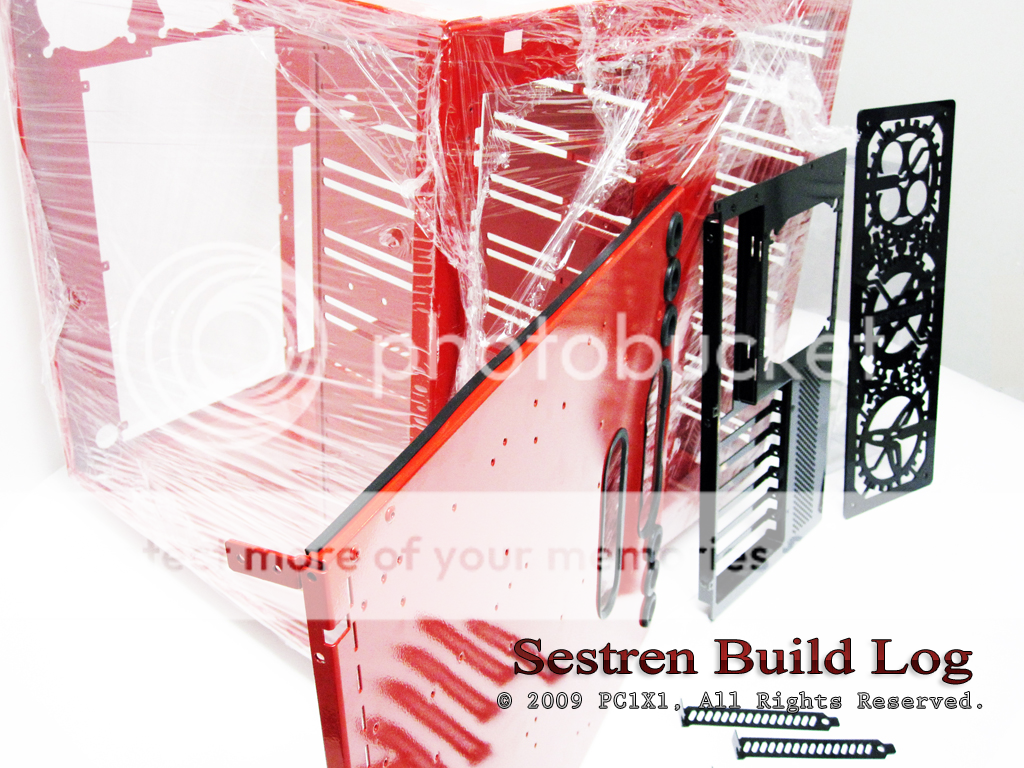
    Description: Sestren has returned, in this picture you can see 80mm Black Gears grill, the modded removable motherboard tray, the vented PCI case slots powder coated black, the back plate of the 343B also powder coated black, the 343B chassis, and lastly MNPCTech's 360mm Steampunk Grill also in black.


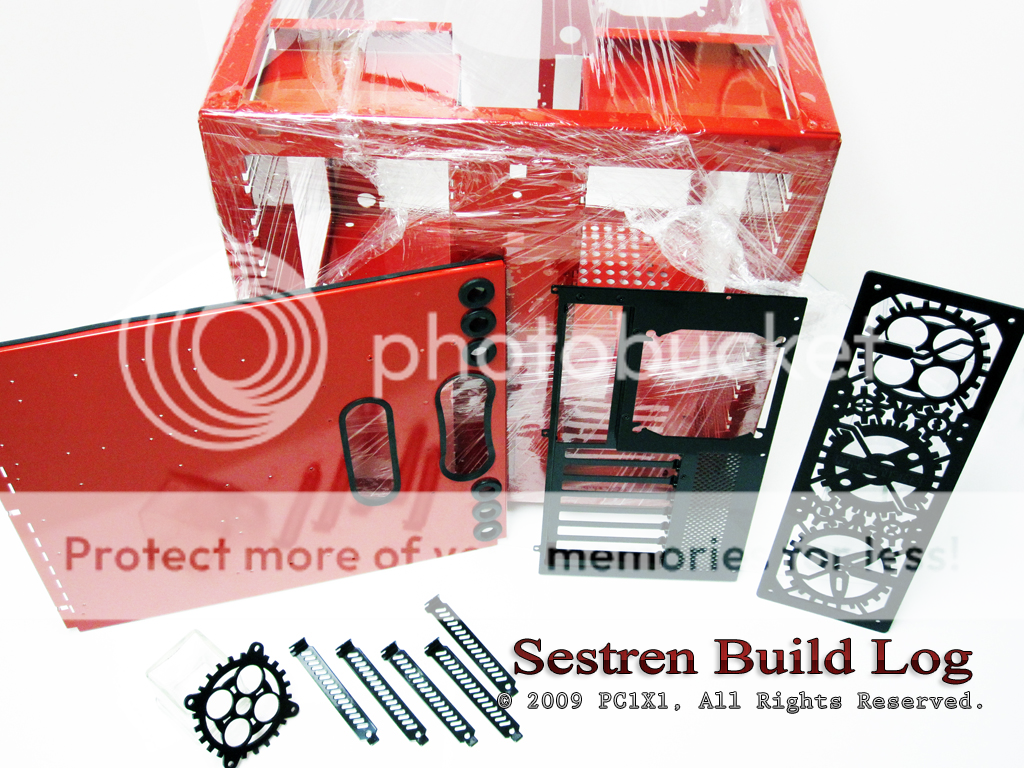
    Description: Here is an aerial view of the previous picture. Notice how glossy the red powder coat came out. One can see their own reflection. It is also very natural and smooth throughout. Great job from Fusion Powder Coating indeed. I will remove the plastic wrap from the actual chassis as soon as I am ready to work on it, so no worries. It will have its own feature.


    Description: Here's an up close shot of the 80mm Black Gears Grill. Notice how well made the cuts are. I was throughly impressed with the quality. At first I was hesitant since its acrylic, but its fit and finish are the best I have seen. Expect a full part's review at a later date.


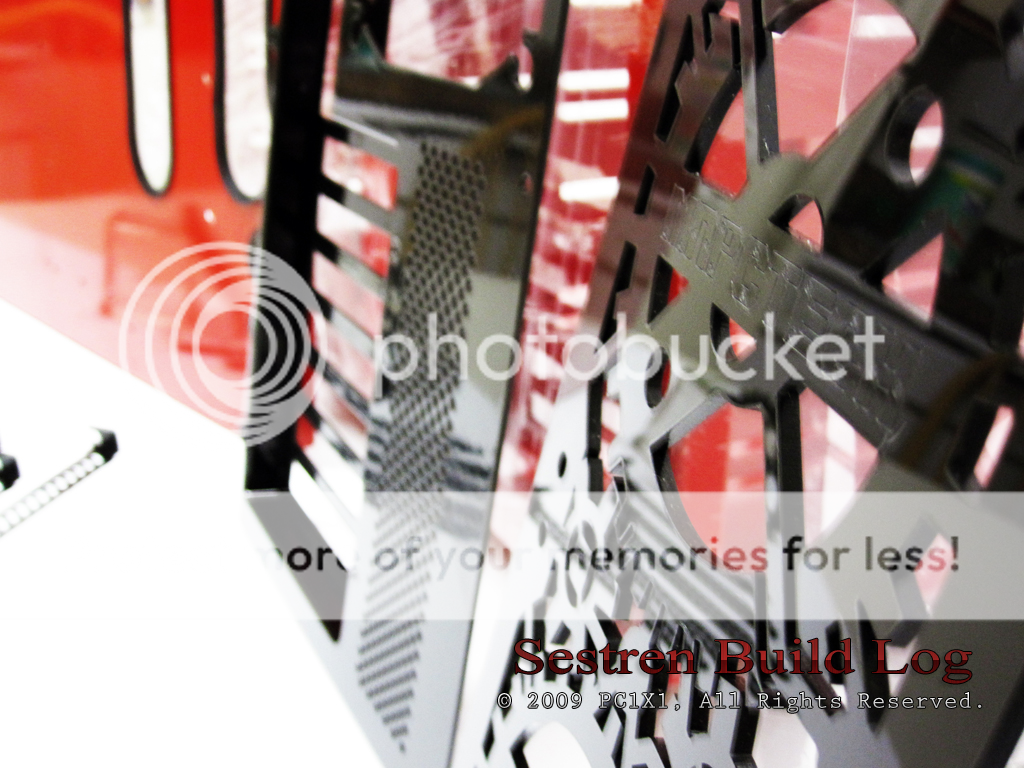
    Description: An upclose shot of the 360mm Steampunk Grill, notice how it reflects and matches the powder coated back plate. The details are amazing, right down to the MNPCTech logo, everything is very well made. Expect this part's review along with the other grills.


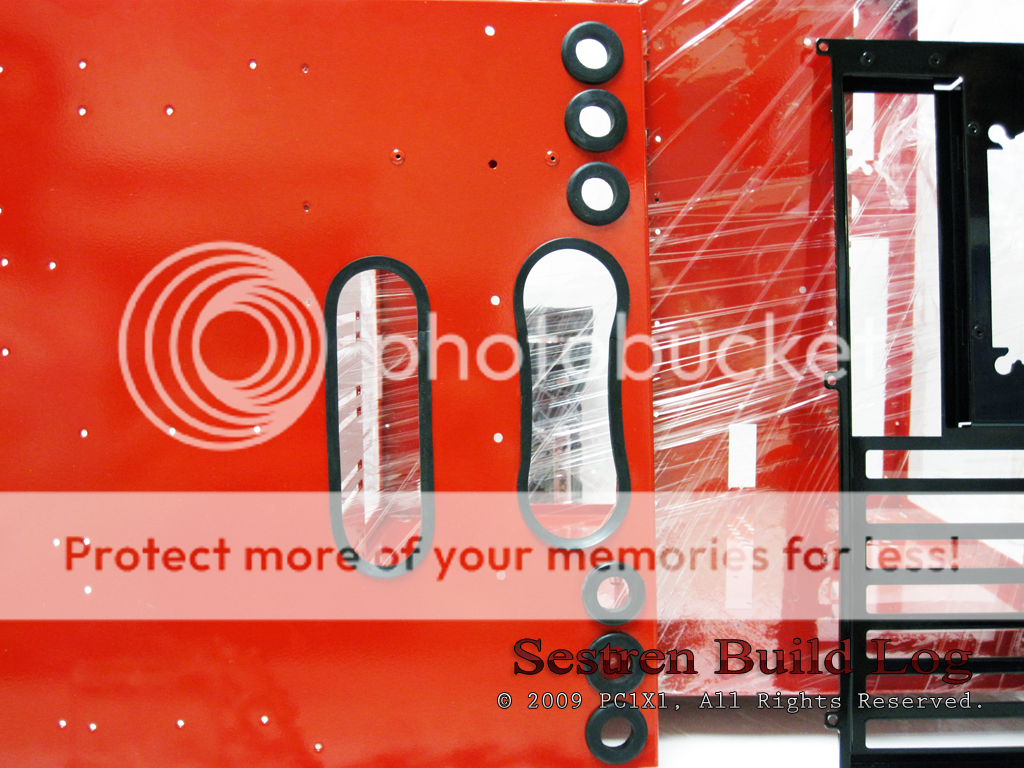
    Description: Here's a front shot of everything, and you can see the mods I did to the motherboard plate. First it wasn't removable, but since it was a nightmare to actually tighten things inside the Chassis, I decided to make it removable, by removing the rivets, and tapping, so it self holds itself with bolts. Expect a more throughly detailed explanation later. Also notice the contemporary designs on the right side of the motherboard plate. I did that consciously, as I was expecting the gear grills to arrive, and wanted something to match their designs. The openings will be used to route PSU ATX cables throughout the chassis, and the smaller holes are for all the 3 Pin fan cables. Notice how well the C Molding blended with the design.


    Description: Here's a side shot of the action, where you can see the reflections of the powder coating again. Also notice on the top side of the motherboard tray. There is more C Molding. This is crucial and a part that is largely ignored, that cuts alot of builders. While the Lian Li case is already wonderfully build, and thus seldom hurts me, the C molding is a great looking finish, that not only is functional, it is pretty.


    Description: Here's an upclose shot, so one can see the details. Again C Molding does a great job as a functional finish. And if you look to the right most motherboard tray opening, you can see that the opening undulates almost like a figure eight. This was intentional, as quite honestly I thought it looked cool and contemporary. It was quite a bit of dremel work, and I couldn't have done it without MNPCTech's Dremel Discs. See my review for more info.


    Description: Here's a side shot of the action, notice how glossy that black is. It almost drags you in. Couple that to contrast the passionate red, and you can start seeing the aesthetics of the build. Once its fully assembled, there is extensive use of color balance, and areas to draw your eyes in. I can't wait to put in the motherboard and the other equipment. I am very satisfied with how this came out. So stay tuned for more!

    Talk to you later!
    Sestren - Q9550 || Swiftech GTZ || Tri H2O Loop || P5WDH Deluxe || Bios: 2801 || 4GB XMS2 Pro DDR2 PC2-6400 || 2x VR 600 Gig Raid 0 + 8x HDD || Areca 1680IX || Asus 3870x2 2 Gig, Quad DVI || Enermax Revolution85+ 1050w || Lian-Li PC-343B || Win XP Pro || Windows 7 64 bit || 5440x1600 @ 3 Monitors
    RIP P5WD2-E Premium

  6. #6
    Registered User
    Join Date
    May 2008
    Location
    Florida
    Posts
    99
    Title: Worklog Update
    Date: November 01, 2009
    Status: The Cube returns to form!

    Brief: Good evening everyone, work resumes full steam ahead as of right now. As many of you are aware. I did push my time tables back a bit due to the following reasons; I am still in the process of securing parts for Sestren. I am currently waiting for MNPCTech's graciously sorting my last order. And in the meantime I set up my temporary computer, Tower. Which was quite a jump from my previous Pentium 805D. To be completely honest, this Q9550, 4 gigs of Ram, 3870x2, F1 Raid 0, is mostly sufficient for most of my needs. I also had to endure a complete OS change and migration from Windows XP Pro 32x, to Windows 7 Ultimate x64. Tower is much faster than the previous Sestren, as the jump from Pentium 805D to Core 2 Quad, is pretty significant. In some areas, it exceeded my expectations, in some it lacked. However in the lacking I believe that is due to hardrive limitations, even in Raid 0. I will further investigate once I move to four SSD drives Raid 0.

    However as humans, we need to progress. So one must push boundaries, test limits, and evolve, so with that said. Work resumes on Sestren at full speed ahead. The time tables still fall on this Month of November to December for Sestren to be ready. I may also possibly feature an article on my transition to Windows 7, its been mostly positive, and I can suggest everyone to upgrade should they need to, however it wasn't without its quirks, and there's still some software and compability issues, but overall It was one of my most pleasant OS transitions, and a fun ride. However that is for a later time, and possibly a different medium, right now the focus is on the worklog. So please enjoy this quadruple dose of updates, since I took a little while to format this one, and be prepared for alot of content coming your way. Especially if I can secure more parts soon. This is just getting the case ready, parts are already going in, and as soon as I have confirmation on more stuff coming. I will update. I am waiting to see how the Radeon 5890 stacks up vs. Fermi x2 to decide. More parts are coming in, so definitely check back these weeks as there are bound to be updates.

    Left to come!
    CPU
    Motherboard
    6x DDR3 Ram
    PSU
    4x 2.5 to 3.5 HDD converters
    4x SSD's
    2x Graphics Card x2
    Water Cooling Fittings
    Water Piping Cutter

    Take care,

    - PC1X1


    Description: The great assembly had begun! Here you can start seeing how the colors will match and accent one another. Also note how all plastic parts are painted black, and the new 3 screws on the facade of the cube, are part of the removable motherboard tray mod. So indeed the tray is removable and looks pretty good in my humble opinion.


    Description: Here's a profile shot that features the hardware side of the cube. The right side is where all the water cooling, and accessories, lights etc.. will reside. The top plate that holds pump #3, now has a carbon fiber trim. On the right side, left side of the bay you can see two silver screws, and some carbon fiber trim, that's part of the removable motherboard tray. It was quite difficult to counter sink the screws so they wouldn't scrape the actual bay hardware. However in the end it came out pretty good I think. The little carbon fiber guy in the bottom of the right side is there to help hold up the Power Supply Unit.


    Description: Another shot of the the cube's skeleton, here is a front shot that portrays the cube in all its towering glory. Again check out the details and screws from the removable motherboard tray, and the painted plastic hinges, that hold the front panel.


    Description: Here's an up shot of the cube. You can see its glossy red appearance, and its details. The black motherboard end plate contrasts really well.


    Description: Here's a frontal shot of the motherboard side for the cube's skeleton. As you may have noticed, the cube is divided into two main compartments. I took advantage of this fact, and divided all working hardware in the Motherboard side, and all accessories and support hardware in the right side. The paint is nice and glossy, and again the black trim, and intentional use of blacks to contrast the red looks pretty cool. Notice how the wheels also join the form now.


    Description: Here's a close shot of the back plate. The cube while not longer than a standard computer case, is indeed much wider. So you can see that while being a standard 7x End plate, the width from motherboard to actual computer window is pretty large. That gives me alot of room to play with the water cooling and cable routing. Again the end plate was made as a contrast, and looks pretty cool in my opinion, once hardware is installed, it should contrast and blend even better. It also serves as a focal point to draw your eyes.


    Description: Here's is the back of the cube in all its naked glory. Luckily this post is safe for work. Here you can see that the PSU end plate is also powder coated black. And contrasts with the red of the cube. While the red is the main color of the skeleton, once the cube is fully assembled, all the pieces will make sense.


    Description: Here's a close up shot of the 120mm Fan exhaust, and the opening for the tubing from the 2 main 360mm radiators. You can also see an upclose shot of the motherboard tray screws. I really like these screws. Also the metallic Lian Li screws also look very good, and when all the water cooling chrome fittings are in, everything will be themed and harmonious.
    Sestren - Q9550 || Swiftech GTZ || Tri H2O Loop || P5WDH Deluxe || Bios: 2801 || 4GB XMS2 Pro DDR2 PC2-6400 || 2x VR 600 Gig Raid 0 + 8x HDD || Areca 1680IX || Asus 3870x2 2 Gig, Quad DVI || Enermax Revolution85+ 1050w || Lian-Li PC-343B || Win XP Pro || Windows 7 64 bit || 5440x1600 @ 3 Monitors
    RIP P5WD2-E Premium

  7. #7
    Registered User
    Join Date
    May 2008
    Location
    Florida
    Posts
    99


    Description: Here's a towering view of the back side, and you can see how everything complements one another. Also the anti vibration grommets also worked and matched very well to the water cooling grommets.


    Description: Here's a front view of the right side bay. Here's where all the accessories will reside, and on top of the carbon fiber table, is where pump #3 will go. Under will be the two power supply units.


    Description: An up-close shot of the carbon fiber trim on the pump housing, this was a custom made mod, to gain upward space on the cube.


    Description: Aeriel view of the cube


    Description: Complete shot of the cube from above. Some say it was taken by a spy satellite.


    Description: aeriel view from another angle.


    Description: Here's a shot of the underside of Sestren. You can again view more screws from the removable motherboard tray, I made that tray removable, because it was a pain in the butt, to add and remove bay hardware. The ray is held in place by 9 screws, and 2 side screws, for a total of 11 screws. Notice that the cube is defying the laws of physics, and no I did not rotate that picture in post processing, Its actually being held up physically in that position.


    Description: Another artistic shot of the cube defying the laws of physics, so you can view it from yet another angle. It may be propped up somehow, or possibly it has magical powers.


    Description: Here's the back aerial view of the cube, and the final installment of the cube skeleton.
    Sestren - Q9550 || Swiftech GTZ || Tri H2O Loop || P5WDH Deluxe || Bios: 2801 || 4GB XMS2 Pro DDR2 PC2-6400 || 2x VR 600 Gig Raid 0 + 8x HDD || Areca 1680IX || Asus 3870x2 2 Gig, Quad DVI || Enermax Revolution85+ 1050w || Lian-Li PC-343B || Win XP Pro || Windows 7 64 bit || 5440x1600 @ 3 Monitors
    RIP P5WD2-E Premium

  8. #8
    Registered User
    Join Date
    May 2008
    Location
    Florida
    Posts
    99
    Title: Worklog Update
    Date: November 01, 2009
    Status: Let the great assembly begin!

    Brief: Continuing from my previous update, since I owe you guys for not updating for a little while . This is the beginning of putting all the parts together again, once this part is finished, which it is in this update. I will be working straight on putting all the parts back on. Which is most likely what the next update will feature. First all front bays come back in, then I go into water cooling, then hardware. So certainly stay tuned, things are heating up .

    Until next time,

    - PC1X1


    Description: Like the mighty Voltron, the cube has assembled itself, and now you can start fully visualization, my vision for the theme and motif of this project. Classy on the outside, fiery red hot on the inside.


    Description: Here's a profile shot of the cube fully assembled, keep in mind, this is case only. The parts are coming in the next update, however looks pretty hawt if I may just say so myself.


    Description: Another angle side view of the cube, you can see all the parts fitted pretty nicely. The main problem on painting something is that it adds a small extra later to the dimensions of the original object. While this is no exception, the powder coat and sand blasting etc, were well done, because the cube fitted basically perfectly.


    Description: This is a frontal shot of the cube, while simular to the first shot, its actually differs in angle and altitude. This shot is a great showcase for how the colors contrast one another, and how there's a HDR/Bloom effect on the paint due to colors and gloss. Once actual hardware also goes in, the effect will be complete.


    Description: This shot is an aerial frontal shot, that differs a view degrees from the rest. Its emphasizes the cube's outwardly proportions and just how big it is. Again the colors and lighting make it appealing to look at it. All these front bays will be filled up quite soon.


    Description: Here's yet another frontal shot, because it came out pretty cool . However on this shot, lighting inside is heightened, just like it will be when all the CCFL or cold cathodes light up the cube from the inside .


    Description: Another frontal..... just kidding, here's a cool side view the cube. This is a good representation of how and what I will see when it is finished. Of course hardware will be in there, but one can start seeing and imaging how it will look fully integrated.


    Description: Side aerial view of the motherboard side of Sestren. You can also see now how the back blends in and works the entire theme throughout. Also looks artsy and avant garde.


    Description: This shot is similar to the previous one, however instead of looking at it in a micro scale for the details, you can see the whole picture.
    Sestren - Q9550 || Swiftech GTZ || Tri H2O Loop || P5WDH Deluxe || Bios: 2801 || 4GB XMS2 Pro DDR2 PC2-6400 || 2x VR 600 Gig Raid 0 + 8x HDD || Areca 1680IX || Asus 3870x2 2 Gig, Quad DVI || Enermax Revolution85+ 1050w || Lian-Li PC-343B || Win XP Pro || Windows 7 64 bit || 5440x1600 @ 3 Monitors
    RIP P5WD2-E Premium

  9. #9
    Registered User
    Join Date
    May 2008
    Location
    Florida
    Posts
    99


    Description: Now flipping to the front, you can get an idea how the entire project meshes together.


    Description: Considering we covered almost every shot and angle known to man, the only way we haven't gone on this update is up. Well now we did! Recall this is where the 240mm radiator will be mounted.


    Description: Aerial view of the cube


    Description: This is a cool shot of the back, because now with the roof, and sides, all the blacks are fully represented, and now join each other in contrasting the Red interior. When designer this project, this is what I envisioned, and it came out pretty close to how I wanted. So I am pretty happy with the results. Can't wait to add the hardware in there, to complete the cycle.


    Description: Here's an upclose shot of the back, while similar to the skeleton shot of the back, when we add the roof, and the sides, the lighting and aesthetics of the cube change. And that's important, because I have to preplan each step as a finished product and not a phase. However this part came out just like I wanted, as the lighting is good, and not overwhelming, the red and black stick the classy, yet ret hot motif exactly.


    Description: Here's the back from another angle. Keep in mind there will also be radiators eventually attached, so that will further balance the color proportions.


    Description: And finally but surely not least, the last picture of this particular update. Another picture of the front of the cube, however in its towering form. This picture is the perfect example of what I wanted from this color scheme. The angle, the contrasts, where the shadows hit, everything flows, and that's for now, the biggest accomplishment of this build. Going further I hope to improve and expand this concept. So stay tuned!!!
    Sestren - Q9550 || Swiftech GTZ || Tri H2O Loop || P5WDH Deluxe || Bios: 2801 || 4GB XMS2 Pro DDR2 PC2-6400 || 2x VR 600 Gig Raid 0 + 8x HDD || Areca 1680IX || Asus 3870x2 2 Gig, Quad DVI || Enermax Revolution85+ 1050w || Lian-Li PC-343B || Win XP Pro || Windows 7 64 bit || 5440x1600 @ 3 Monitors
    RIP P5WD2-E Premium

  10. #10
    Xtreme Member
    Join Date
    Mar 2008
    Location
    Jakarta, Indonesia
    Posts
    363
    wow, this look a BIG project

    great looking photo's btw..

    looking forward to this..

  11. #11
    Xtreme Enthusiast
    Join Date
    Feb 2009
    Posts
    723
    um wow!
    sigh

  12. #12
    Xtreme Member
    Join Date
    Mar 2009
    Location
    Indonesia
    Posts
    182
    darn long and bandwidth killer for me, but darn good too.
    keep up the good work

  13. #13
    Xtreme Enthusiast
    Join Date
    Feb 2009
    Location
    Cambridge, UK
    Posts
    739
    Subscribed! Lot's of good information here, keep it coming
    [Project] : Altair | A Lian-Li PC-P80, dual loop, all internal build. Written as a tutorial for any newcomers

    Hardware
    Core i7 920 D0 | 12GB Corsair Dominator 1600MHz CL8 RAM | 2x EVGA GTX 285 SLI | ASUS P6T Deluxe V2 | ASUS Xonar D2X
    2x Intel X-25M SSD | Corsair HX-1000W | Lian-Li PC-P80 | Dell 3008WFP 30"

    Watercooling Gear (Dual Loop)
    Koolance 350AT (CPU Loop) | 2x Koolance VID-NX285 (GPU Loop) | 2x Laing DDC 3.2 / XSPC Acrylic top Rev. 3 | 2x EK Multioption 150 Res Ver. 2 | 2x Thermochill PA 120.3 |
    6x Scythe S-Flex 1200 RPM Fans | 7/16" Primochill Pro Green LRT | 7/16" Primochill Pro Blue LRT | B.P. Silver Shiny 1\2" Barbs | Alphacool Ball Valve / B.P. M-M Rotary fill-port / drain | Bitspower Black Freezer AIX58NS NB/SB (GPU Loop)| Black Freezer MOS AMOSII POM Version (GPU Loop)| Bitspower Black Freezer MOS AMOSIII POM Version (GPU Loop)

  14. #14
    Registered User
    Join Date
    Sep 2009
    Location
    Athens,Greece
    Posts
    17
    just AMAZING!

    it's gonna be a super mod!

    Keep going!
    Runnin on nVidia and Intel

    GG - GREEK GAMER

  15. #15
    Registered User
    Join Date
    May 2008
    Location
    Florida
    Posts
    99
    Quote Originally Posted by anubis_is_evil View Post
    wow, this look a BIG project

    great looking photo's btw..

    looking forward to this..
    Thanks and indeed, alot of stuff going in the cube! still need to jam all 29 fans, 400 ft of sleeving and a party in there.
    Quote Originally Posted by dreamaxx View Post

    um wow!
    Quote Originally Posted by nyeah View Post
    darn long and bandwidth killer for me, but darn good too.
    keep up the good work
    Sorry about that, we need more pipes! But thanks, looking forward to bringing some more .

    Quote Originally Posted by eponymous View Post
    Subscribed! Lot's of good information here, keep it coming
    Thanks and will do! Feel free to comment, criticize, do you like the way I set up the pictures and quotes etc?

    Quote Originally Posted by Anubis13 View Post
    just AMAZING!

    it's gonna be a super mod!

    Keep going!
    Will do, and thanks! Now just got to keep making it better heh!
    Sestren - Q9550 || Swiftech GTZ || Tri H2O Loop || P5WDH Deluxe || Bios: 2801 || 4GB XMS2 Pro DDR2 PC2-6400 || 2x VR 600 Gig Raid 0 + 8x HDD || Areca 1680IX || Asus 3870x2 2 Gig, Quad DVI || Enermax Revolution85+ 1050w || Lian-Li PC-343B || Win XP Pro || Windows 7 64 bit || 5440x1600 @ 3 Monitors
    RIP P5WD2-E Premium

  16. #16
    Xtreme Member
    Join Date
    Oct 2008
    Location
    Land of Intel CPU's
    Posts
    214
    Kid this is one helluva build
    Please let me know if your parents are willing to adopt me

  17. #17
    Xtreme Member
    Join Date
    Oct 2008
    Posts
    263
    I love it, im a big fan of the carbon fiber stuff
    Whats up?

  18. #18
    Registered User
    Join Date
    May 2008
    Location
    Florida
    Posts
    99
    Quote Originally Posted by dro View Post
    Kid this is one helluva build
    Please let me know if your parents are willing to adopt me
    Haha, thanks, I indeed asked them, and while they were seemingly willing, they said that unfortunately they don't have a budget that can support us both. As apparently I am already a liability, heh, and not tax deductible.

    Quote Originally Posted by shoopdawoopa View Post
    I love it, im a big fan of the carbon fiber stuff
    Thanks me too
    Sestren - Q9550 || Swiftech GTZ || Tri H2O Loop || P5WDH Deluxe || Bios: 2801 || 4GB XMS2 Pro DDR2 PC2-6400 || 2x VR 600 Gig Raid 0 + 8x HDD || Areca 1680IX || Asus 3870x2 2 Gig, Quad DVI || Enermax Revolution85+ 1050w || Lian-Li PC-343B || Win XP Pro || Windows 7 64 bit || 5440x1600 @ 3 Monitors
    RIP P5WD2-E Premium

  19. #19
    Moderator
    Join Date
    Aug 2007
    Location
    Back and forth between Florida and Maine
    Posts
    4,097
    Nice job, pc1x1. You've obviously put a lot of time and effort into this build and organizing your worklog.

    Your photography is much improved!

  20. #20
    Registered User
    Join Date
    May 2008
    Location
    Florida
    Posts
    99
    Quote Originally Posted by shazza View Post
    Nice job, pc1x1. You've obviously put a lot of time and effort into this build and organizing your worklog.

    Your photography is much improved!
    Thanks, I hope to continue improving.

    Whenever your down here in Florida, we need to get some benching and records broken, need to liven up the scene down south .
    Sestren - Q9550 || Swiftech GTZ || Tri H2O Loop || P5WDH Deluxe || Bios: 2801 || 4GB XMS2 Pro DDR2 PC2-6400 || 2x VR 600 Gig Raid 0 + 8x HDD || Areca 1680IX || Asus 3870x2 2 Gig, Quad DVI || Enermax Revolution85+ 1050w || Lian-Li PC-343B || Win XP Pro || Windows 7 64 bit || 5440x1600 @ 3 Monitors
    RIP P5WD2-E Premium

  21. #21
    Xtreme Addict
    Join Date
    Sep 2009
    Location
    Santa Cruz, Ca
    Posts
    1,108
    Subscribed!

  22. #22
    _
    Join Date
    Apr 2008
    Location
    Wisconsin, United States
    Posts
    1,235
    The red and black color scheme is hot!

  23. #23
    Xtreme Enthusiast
    Join Date
    Feb 2009
    Location
    Cambridge, UK
    Posts
    739
    Quote Originally Posted by pc1x1 View Post
    Thanks and will do! Feel free to comment, criticize, do you like the way I set up the pictures and quotes etc?
    Yeah it looks great Well organized and it reads nicely too.
    [Project] : Altair | A Lian-Li PC-P80, dual loop, all internal build. Written as a tutorial for any newcomers

    Hardware
    Core i7 920 D0 | 12GB Corsair Dominator 1600MHz CL8 RAM | 2x EVGA GTX 285 SLI | ASUS P6T Deluxe V2 | ASUS Xonar D2X
    2x Intel X-25M SSD | Corsair HX-1000W | Lian-Li PC-P80 | Dell 3008WFP 30"

    Watercooling Gear (Dual Loop)
    Koolance 350AT (CPU Loop) | 2x Koolance VID-NX285 (GPU Loop) | 2x Laing DDC 3.2 / XSPC Acrylic top Rev. 3 | 2x EK Multioption 150 Res Ver. 2 | 2x Thermochill PA 120.3 |
    6x Scythe S-Flex 1200 RPM Fans | 7/16" Primochill Pro Green LRT | 7/16" Primochill Pro Blue LRT | B.P. Silver Shiny 1\2" Barbs | Alphacool Ball Valve / B.P. M-M Rotary fill-port / drain | Bitspower Black Freezer AIX58NS NB/SB (GPU Loop)| Black Freezer MOS AMOSII POM Version (GPU Loop)| Bitspower Black Freezer MOS AMOSIII POM Version (GPU Loop)

  24. #24
    Xtreme Member
    Join Date
    Jun 2009
    Location
    Parker, CO
    Posts
    104
    Subscribed. Great pictures. Looking forward to viewing the completed build.
    Project Turambar: Corsair Obsidian 800D Liquid Cooled Dual Loop System

    Corsair 800D ~ EVGA X58 Classified W/C EK-FB EVGA X58 Full Board Block ~ Intel i7 Core 970 @ 4.2Ghz W/C Swiftech APOGEE-XT Extreme
    12GB Corsair Dominator @ 1600MHz ~ Corsiar HX1000 ~ EVGA GTX 580 Hydro Copper (x2) SLI ~ EVGA 9800GT (PhysX)
    SSD(OS) Intel X-25m 160GB ~ HDD(User Files) Segate 500GB ~ HDD(Game Installs) Samsung Spinpoint F4 1TB ~ HDD(Storage) Seagate 2TB
    Creative X-Fi Titanium Fatal1ty ~ Windows 7 Ultimate x64 ~ Dell Ultrasharp [ 20"][ 24"][ 20" ]

  25. #25
    Xtreme Member
    Join Date
    Jul 2009
    Location
    Mnpctech.com
    Posts
    451
    I agree, this worklog is awesome

Page 1 of 2 12 LastLast

Bookmarks

Bookmarks

Posting Permissions

  • You may not post new threads
  • You may not post replies
  • You may not post attachments
  • You may not edit your posts
  •