


NZXT Lexa S reviewed by Praxum, co-founder of The Xtreme Gaming Clubhouse
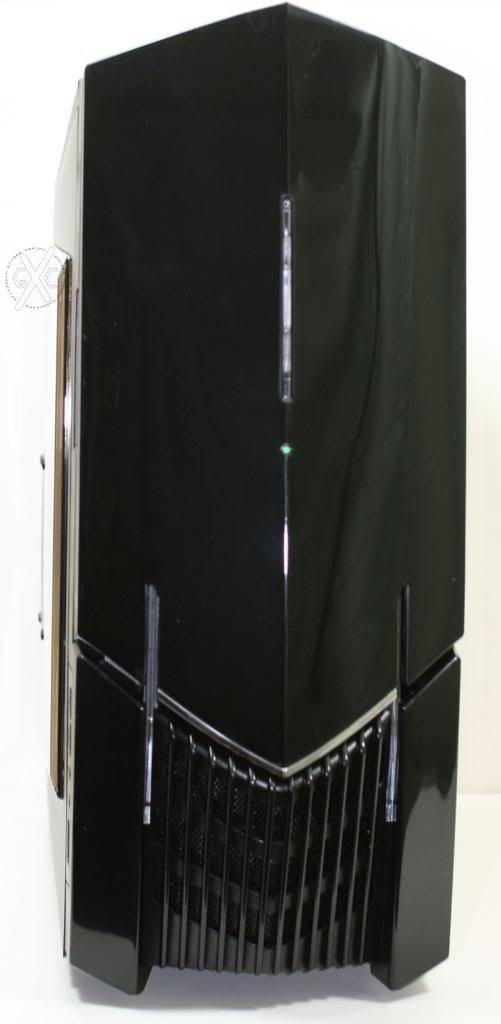
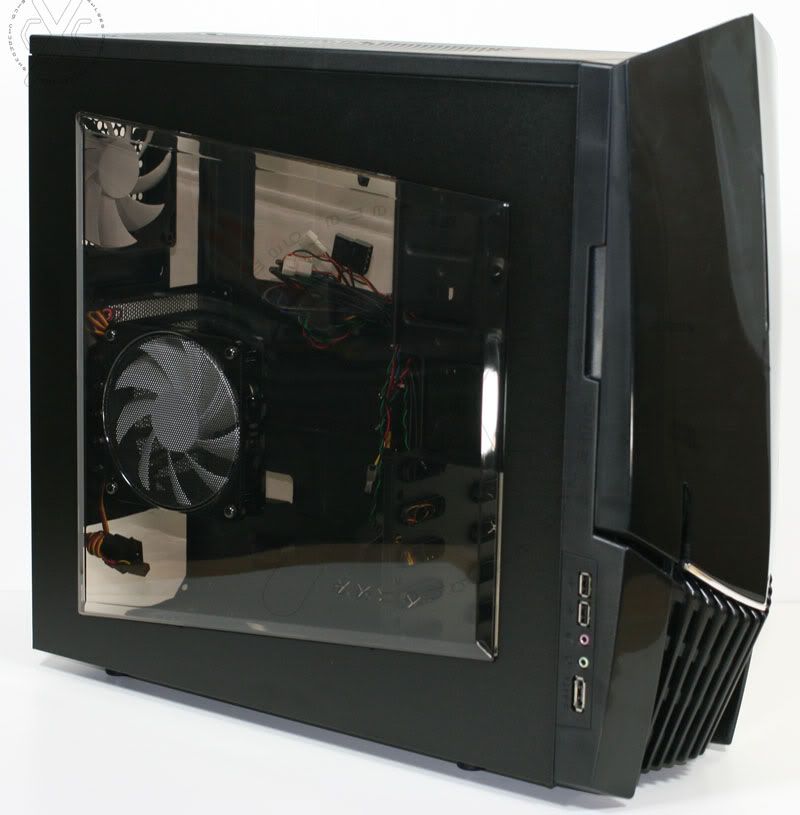
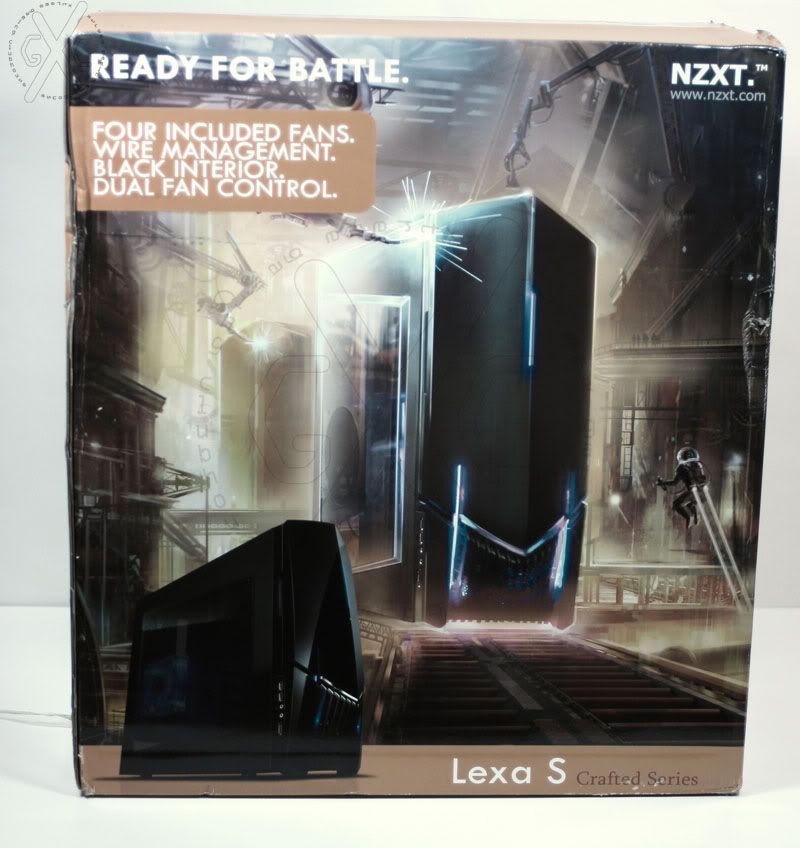
This review is for the Lexa S part of the NZXT Crafted series. The Lexa S is focused at gamers and enthusiasts and is priced well for the for the features included. This steel system case has an aggressive front bezel and a quality black paint finish on a nice case design with a large window provided.
Packaging
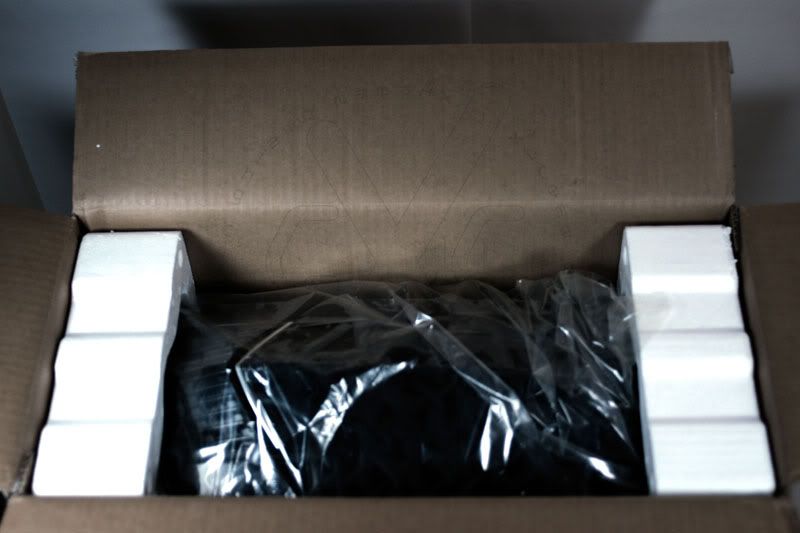
The package was delivered in a full print colored box, unlike many cases which come in basic cardboard containers. The main body of the box is in English text with a side panel providing details in other languages. There was a small amount of corner damage the box received in shipping. The case came inserted in the box with the back end down and front bezel facing the top. There was a small packing foam break matching the cardboard case damage but the packaging engineers did their jobs well and the case was perfect out of the box.
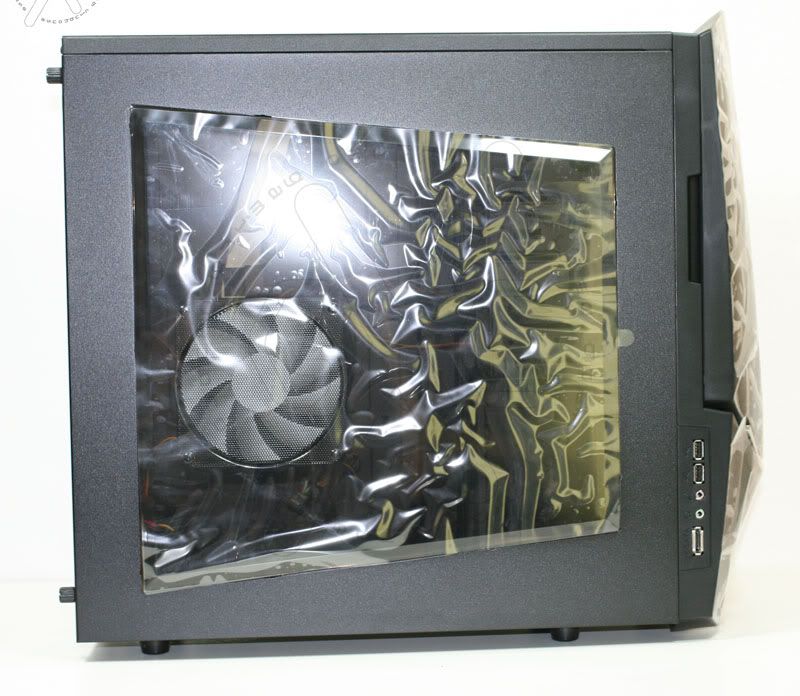
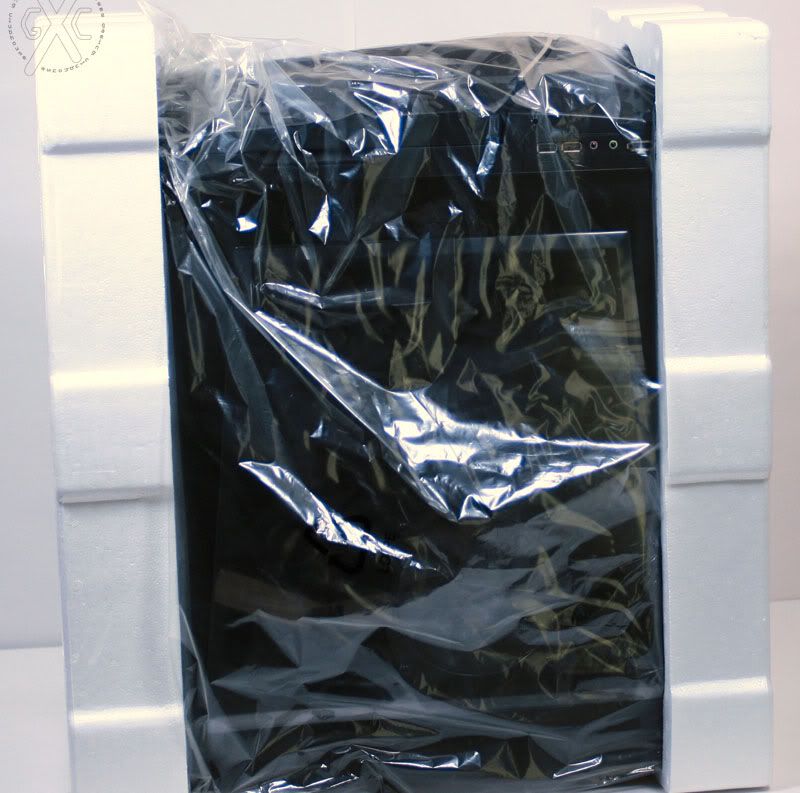
To remove this case from the box I ended up flipping the box upside down to extract the case. I had mixed feelings about this at first, but the case was light enough and there were no issues. The case itself came in a plastic bag with foam ends like many other electronics. Additionally the front bezel and side windows had clear protective coverings held on by a light adhesive. After removing these the products finish really showed nicely under the lights for the photos.

Weights and Measures
This cases falls in the mid-tower category.
- Dimension 480mm (High) x 190mm (Wide) x 528mm (Deep)
- Weight 6.5Kg
- Dimension 18.90" (High) x 7.48" (Wide) x 20.79" (Deep)
- Weight 14.33 Lbs
Features
The case is designed in Los Angeles and made in China. This list of features is from the NZXT marketing details on the web and box.[quote] Highlights of the Lexa S:
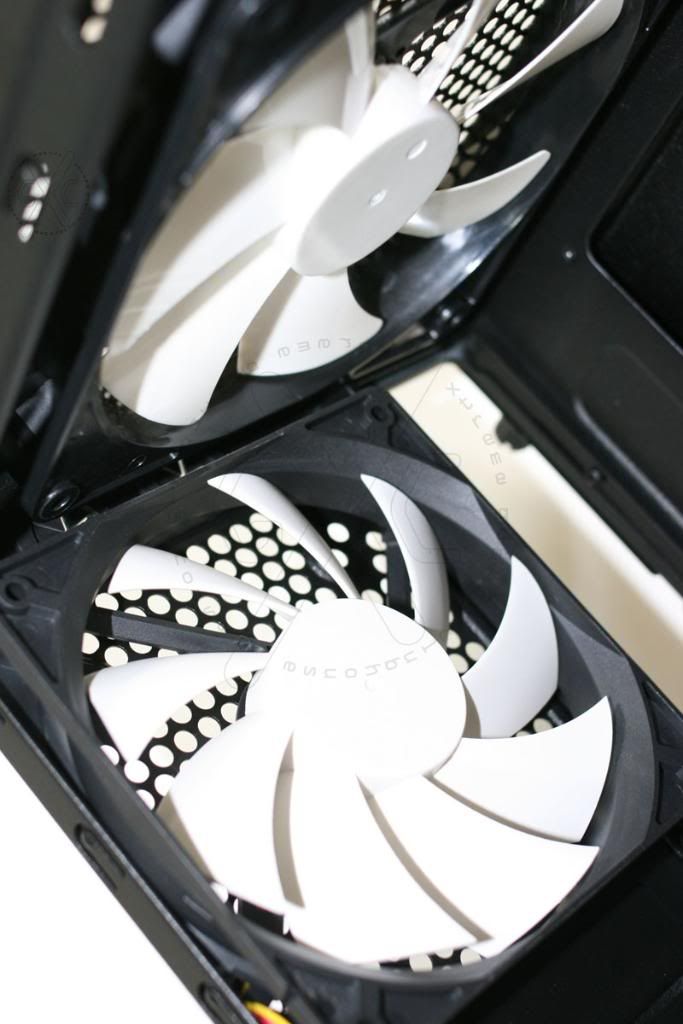
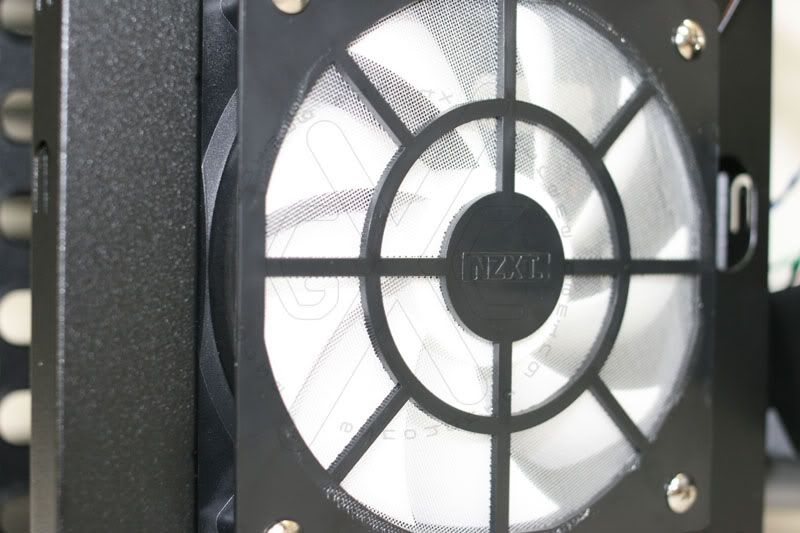
- Immense Performance: 5 fan capability ( Front fan, Top 140mm fan, Side 120MM LED fan rear 120mm exhaust included ), fans rated at 43CFM, 23dB(A)
- Fan control: Determine noise and airflow based on your needs, dual intakes and dual exhausts are controlled independently
- Night light: A ambient light over the 5.25" drives give visibility in dark rooms and at LAN parties
- Black on Black: Smoked clear window and a black interior gives the best combination of black on black.
- Meshed front panel allows for more airflow
- 5.25" Stealth bay to keep a clean look
- NZXT Solid State bracket allows for two SSD drives to be installed
- Wire Routing: Motherboard punched holes allows for quick CPU bracket removable and optimal wire routing.
- Turned HDD also helps with providing a cleaner look.
- Pre-drilled water cooling holes on the backplate
- High end graphics card support, extra space is especially designed to fit longer 10.5" cards
- Side mounted USB, Audio, and E-SATA ports
- Mounting holes for dual radiator at the top
- Removable filter at the bottom PSU
- Four included Fans
- Wire Management
- Black Interior
- Dual Fan Control
- Superior Cable Management: turned hard drives, punched out routing areas
- Dual 140mm top exhaust with support for external dual radiator
- All black finish
- Included dual SSD support (hard drives not included)
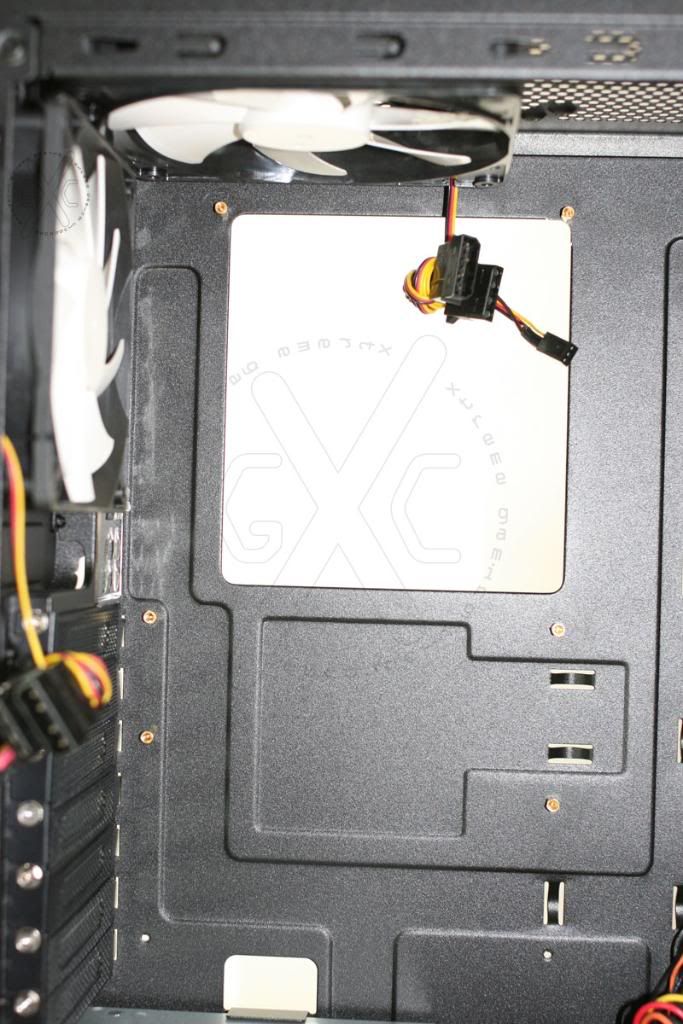
There are dual locations for either 120mm or 140mm fans in the top, but the system comes with only one 140mm fan mounted in the top location.
Construction
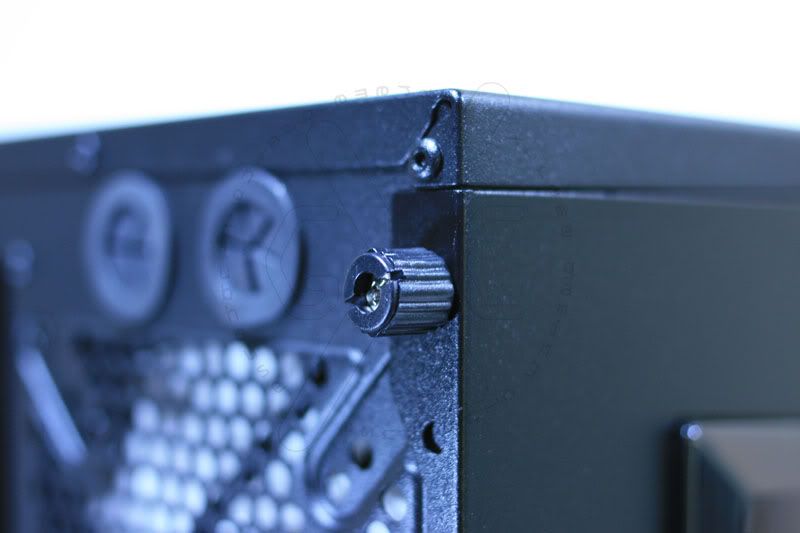
Four thumbscrews two on each side are used to hold the two side panels of this case. Unlike other cases you will want and need access to both sides for installation and fine tuning of your system. The thumbscrews are a great idea but the plastic screws lower the perception of this being a quality case. They are plastic covered standard thread system screws, and since there are only 4 they could have been a better quality. As with most enthusiasts these will be replaced with a higher quality set probably color matched to a case theme.
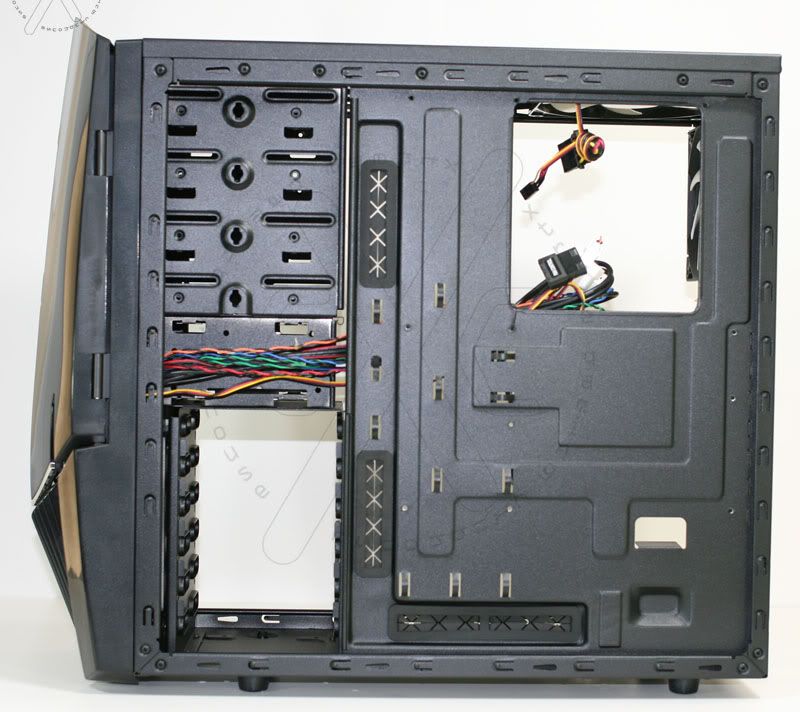
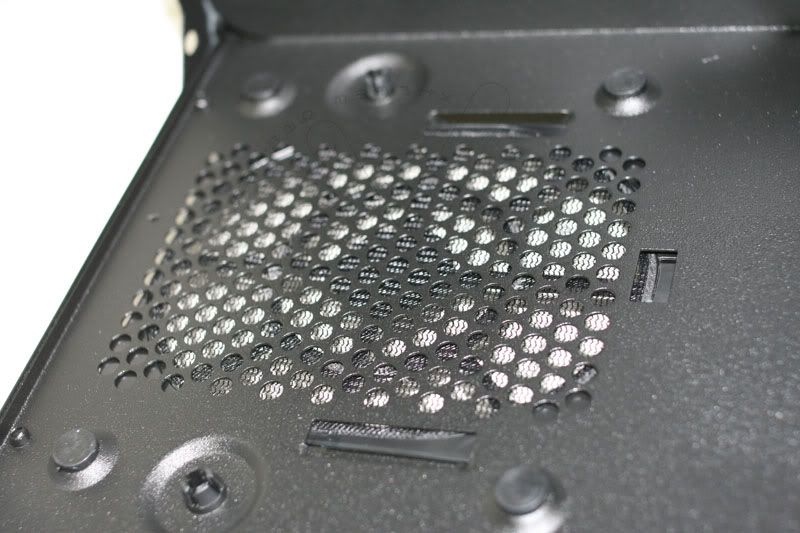
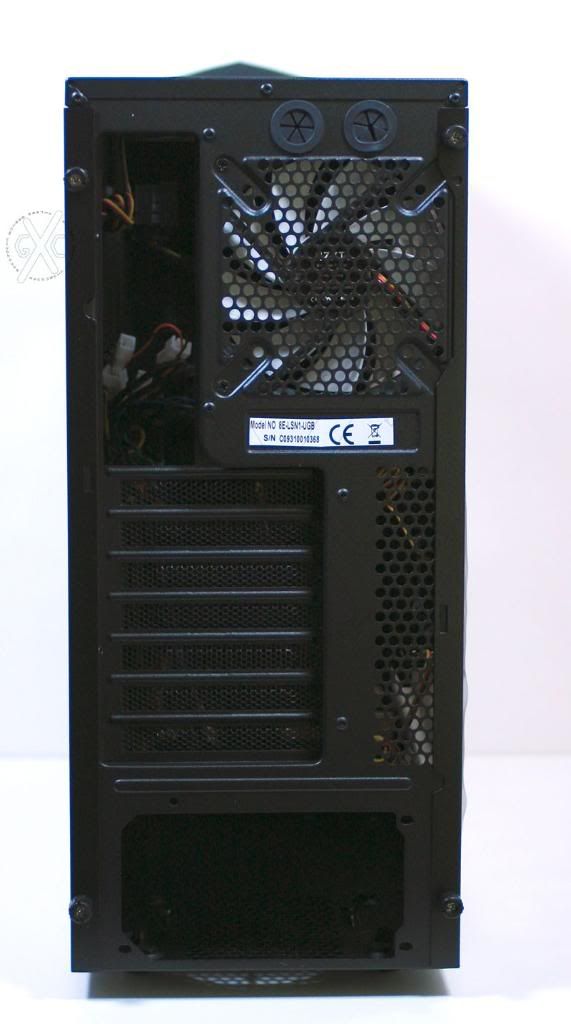
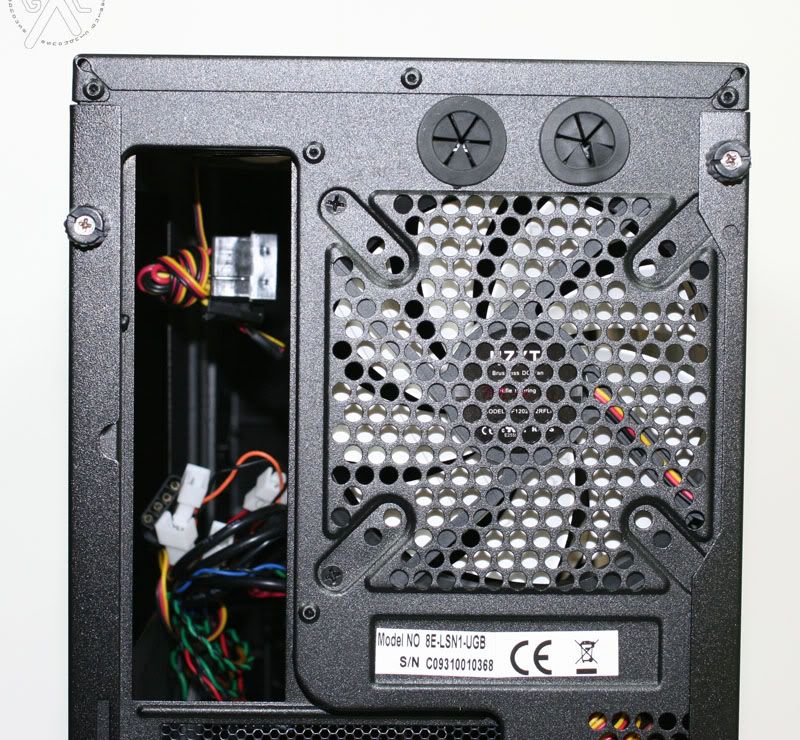
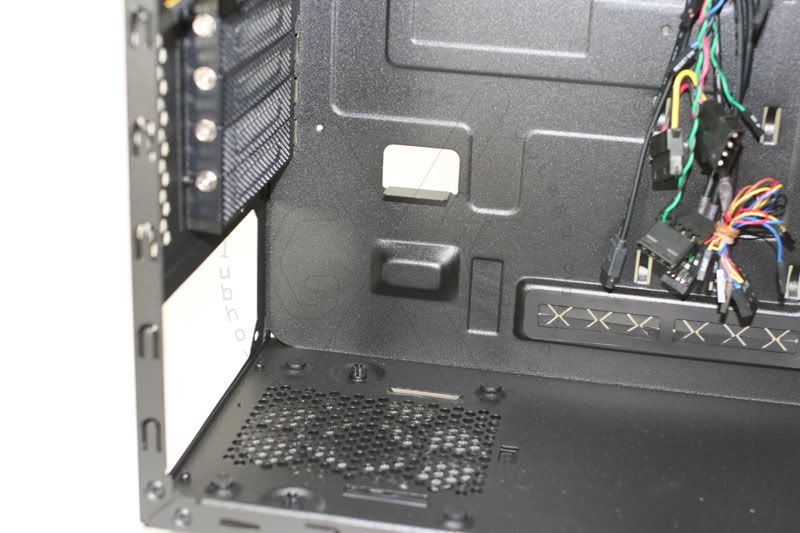
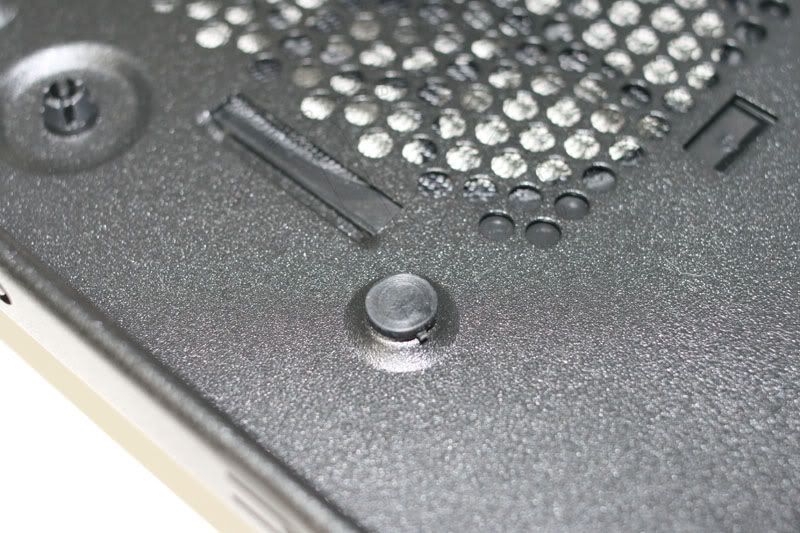
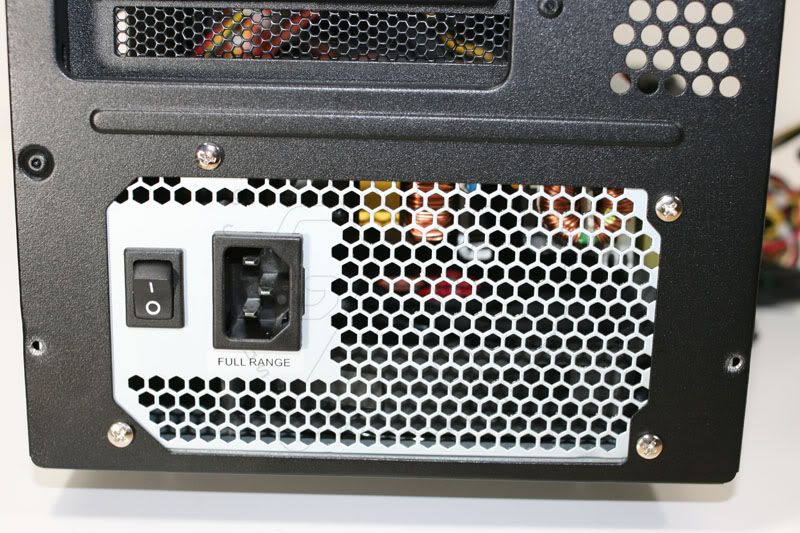
This case is configured to mount the power supply unit (PSU) on the the bottom. With a PSU mount on the bottom air is pulled into the system from that area by the PSU fan. When a case is on the floor or computer hutch you will be glad to have the Lexa S dust filter provided for the PSU. The filter can be removed with a thumb clip mechanism for cleaning and I know for my house this is a must because of pets, however the case will have to be tipped to access the filter. The documentation claims that 4 screws need to be removed for this, but there must have been some changes between production and documentation.
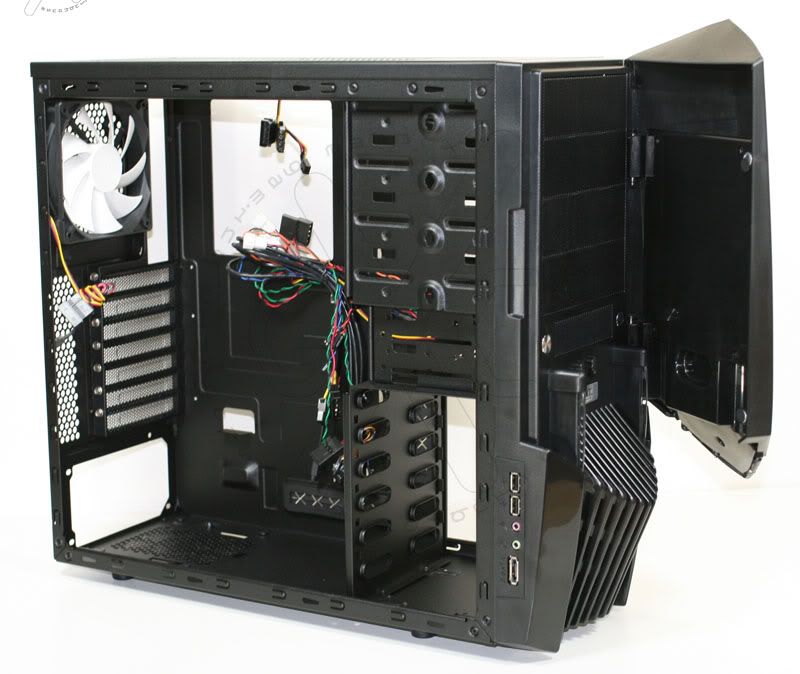
Overall system ventilation is provided with four fans.The system comes with three 120 mm fans. One on the top, rear, and on the removable panel. The single top mounted fan is 140 mm.
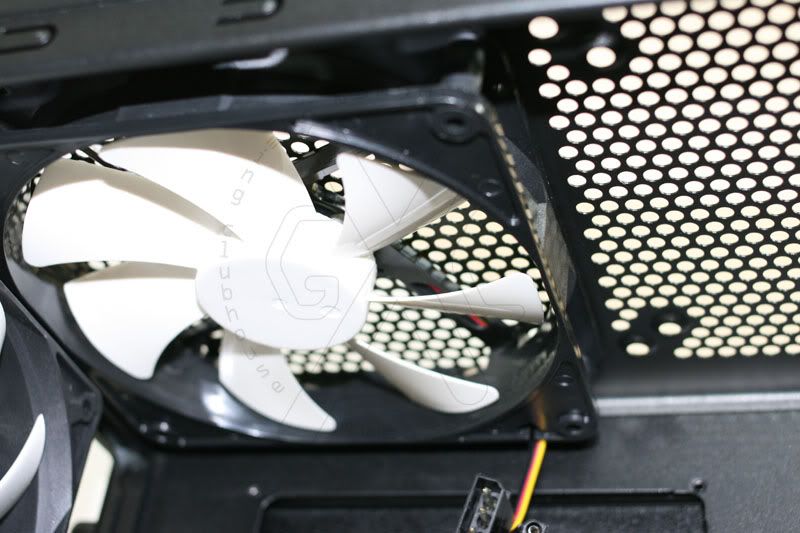
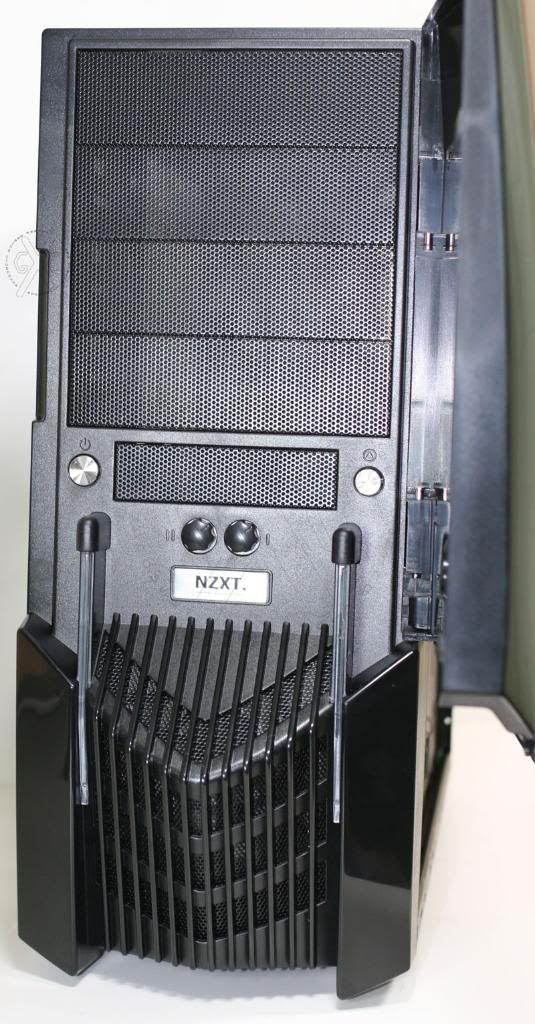
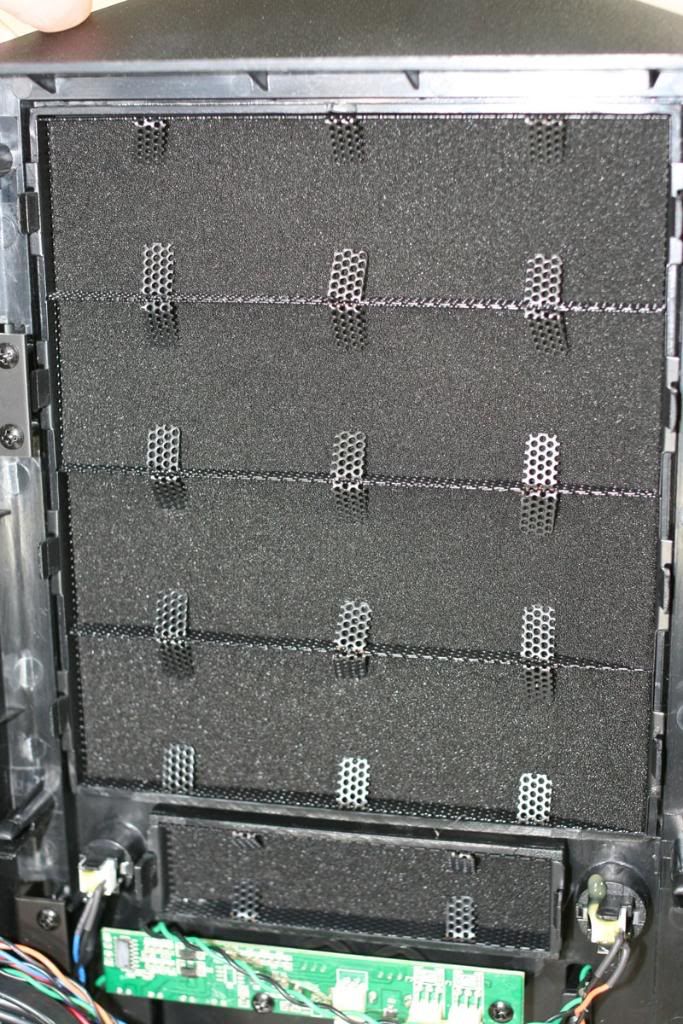
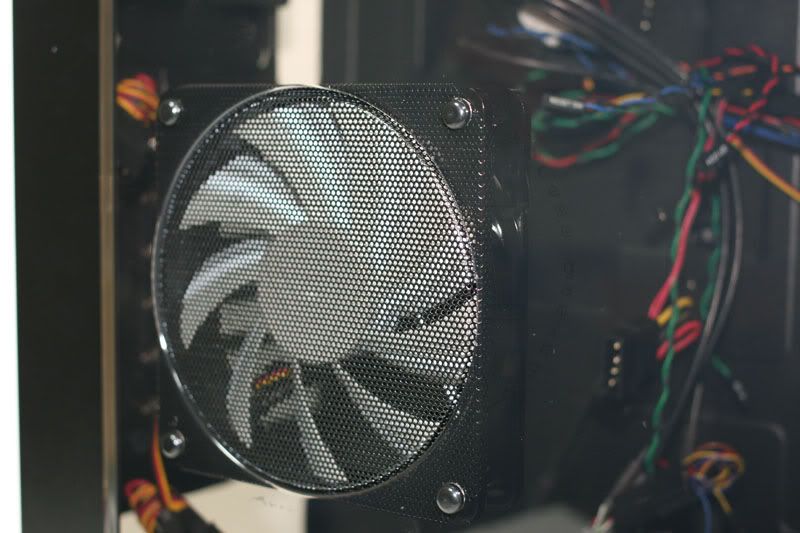
The front bezel can be removed as it is held in with 4 pressure point mounts to access the drive bays and fan. Be aware that it is fairly top heavy and wants to flip down. The lower grill of the front bezel also has a fine screen inside of the bezel but you will need to use canned air to clean this area. Unlike many cases that use melted plastic mounts this is attached with philips head screws and could be removed for cleaning if needed. A nice touch was to add a fine screen mesh on the front mount 120 mm fan.
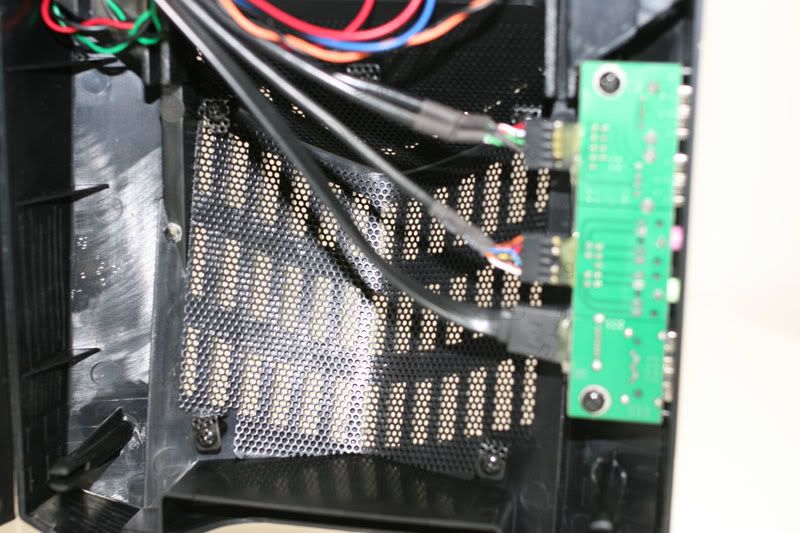
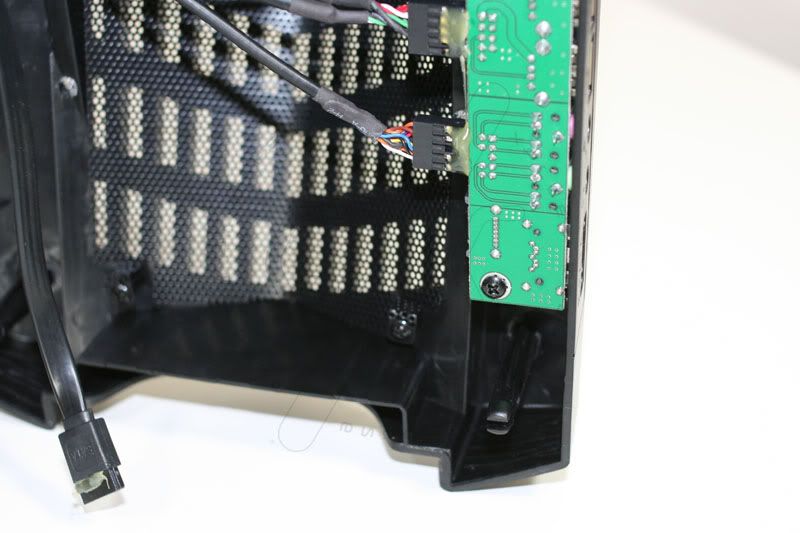
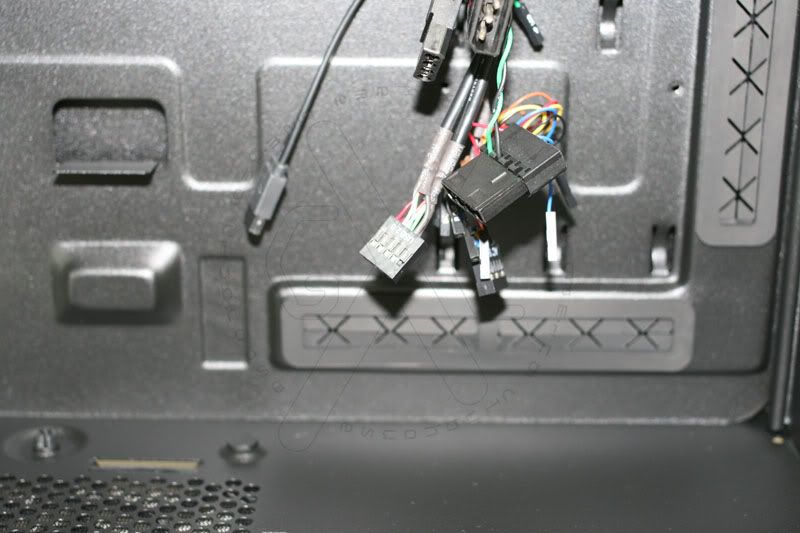
The center of the front bezel route wires from two circuit boards. The first is the fan control and the second is the front mount ports. I have been a fan of front mount ports since the industry moved to include these for ease of use, the Lexa S has USB, audio and external SATA connectors. The circuit boards that provide the connections have cables attached with hot melt glue which is a nice touch, but in removing the case I found the SATA cable was no longer glued in. For any enthusiast this is not a big concern but make sure you check these connections when you are installing 5.25" device to prevent having connectivity issues. If I can find my hot glue gun I am going to re-attach that SATA cable.
The styling of the 5.25" and 3.5" covers is a fine steel mesh as you see in the picture. This will allow additional air draw locations but could also be dust catches. The team designing the Lexa S did a nice job of putting a fine foam mesh behind these in what I am guessing is a practical purpose. It will have to be seen how well this functions.
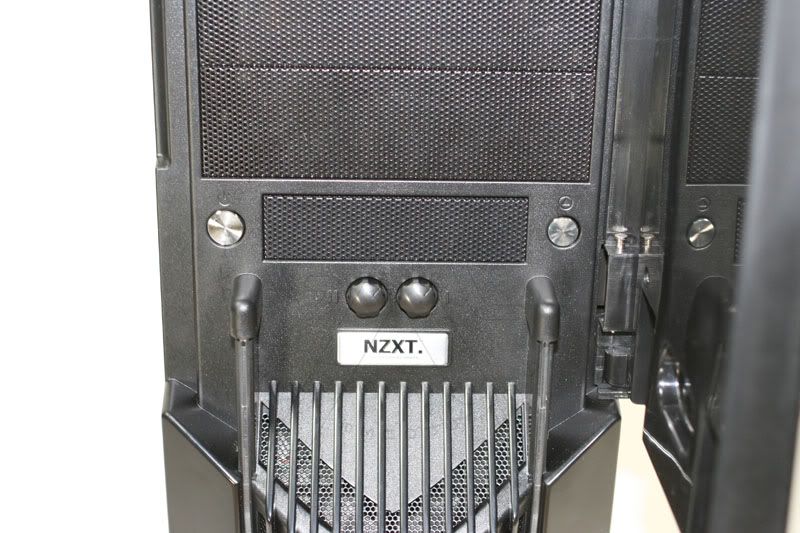
With the bezel you have the typical cables of power, reset, and lights. The Lexa S also adds two fan controls, LED bars and the convenience ports. The cables running from the front bezel to the case body are nice and long. The cables have a nice routing path built in from the front to the main board body area. The fan control provides fan speed control knobs located on the front bezel behind the door. However there is no indication of case temperature or fan speed.
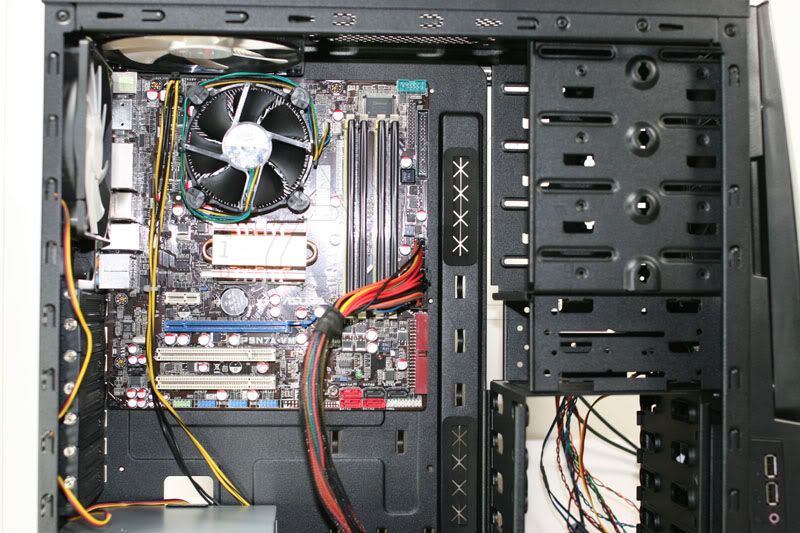
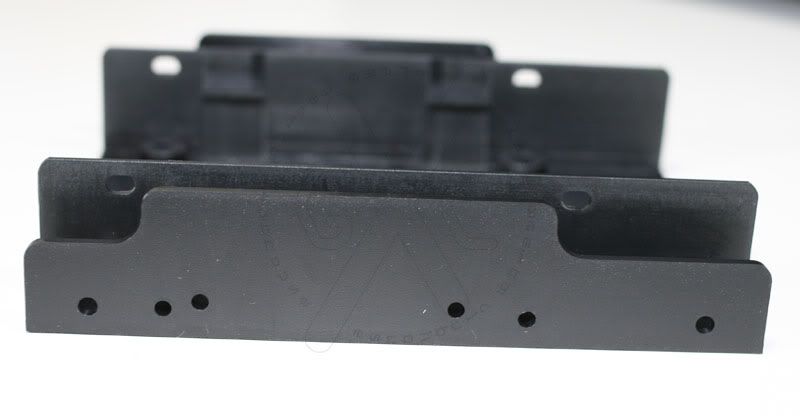
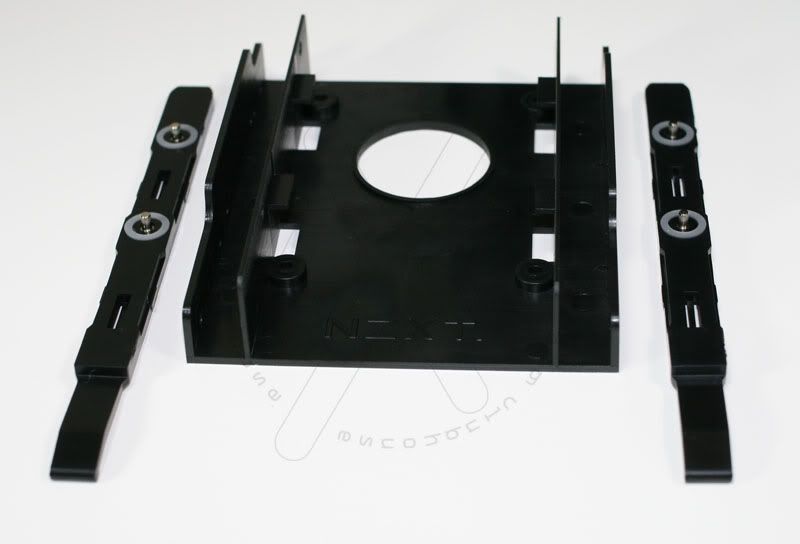
The drive bays are plentiful on the Lexa S. Four 5.25" front mount bays with a separate section for 2 3.5" front mount bays. The internal five drive bays have provided mounting clips for traditional disk drives mounted 90 degrees off from cases you may be accustomed with. Additionally for enthusiasts NZXT has provided a nice 3.5" to 2.5" double drive adapter. I have recently moved one of my machines to the Intel X-25 generation 2 Solid State drives (SSD) and will show and describe that below.
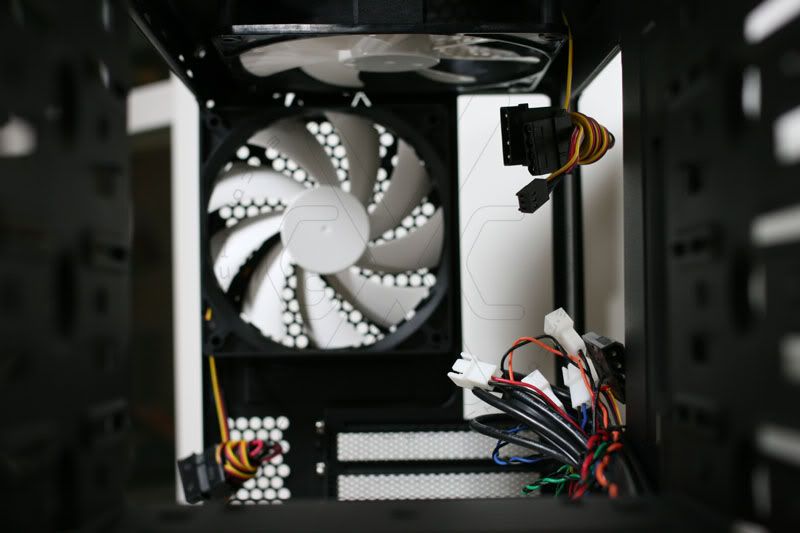
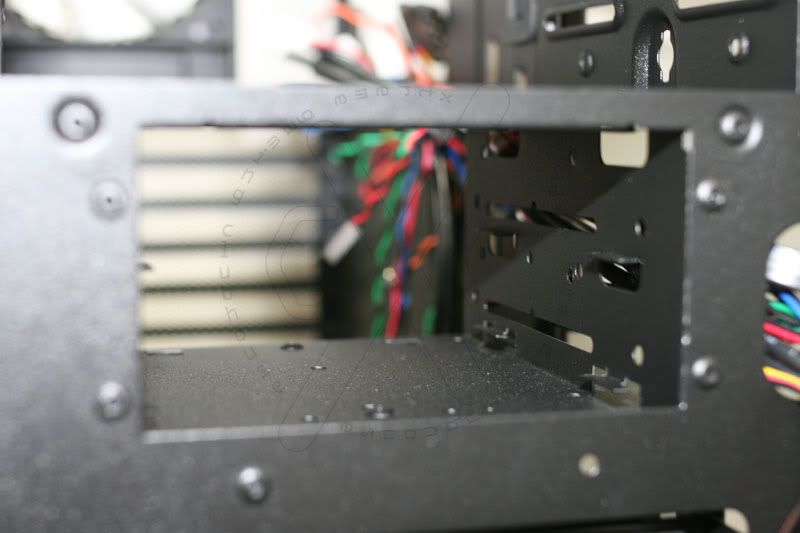
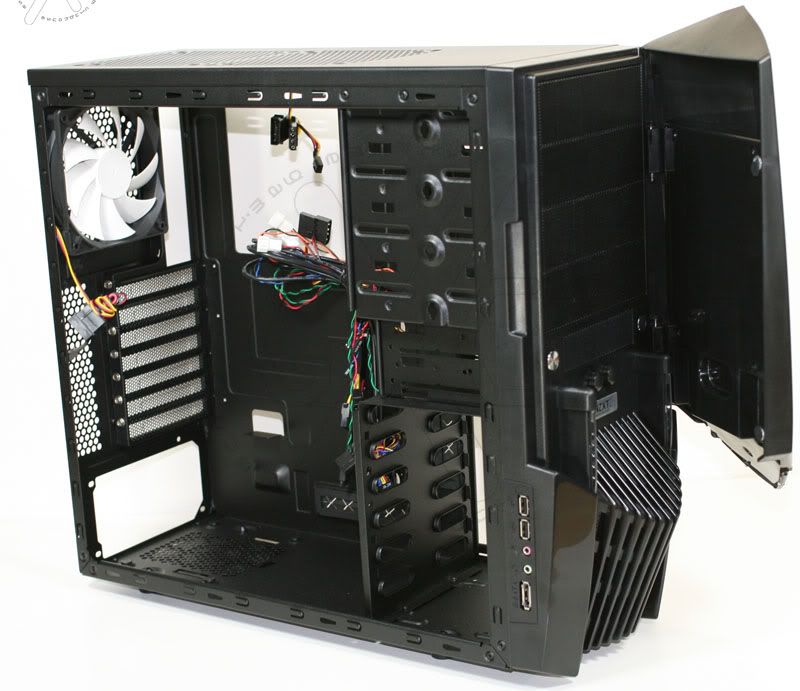
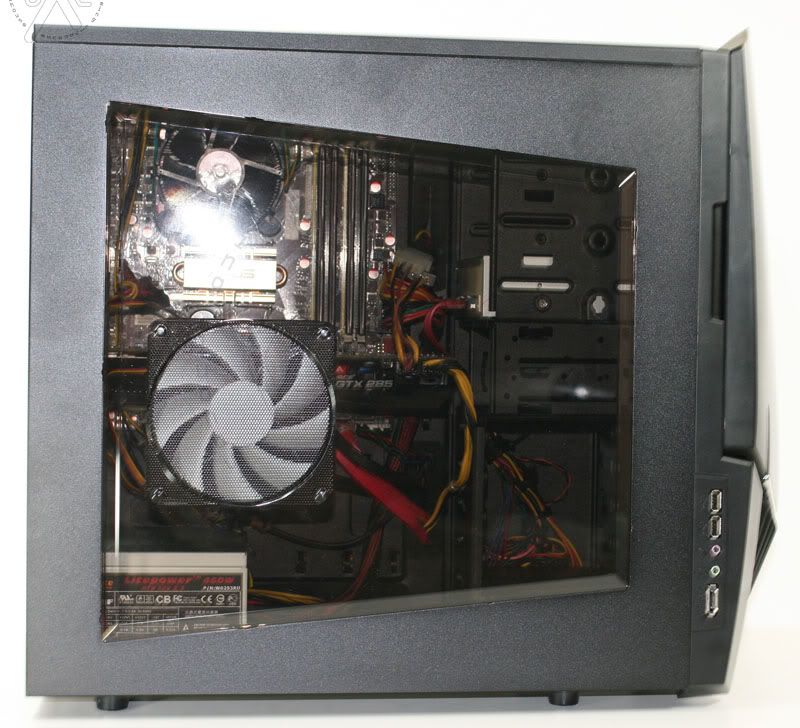
The case has a very nice texture to the paint job. I personally like this type of texture compared to "gloss" finishes. The metal edges are finished nicely with rounded corners, extra sheet metal bends providing a cut free system building is a bonus for any system builder. I found nice locations for wire routing and grommets to push cable management on the back side of the motherboard area for a clean look and to improve airflow. Additionally there is a large access hole to help enthusiast change or modify the CPU cooling devices they may be working with. For those of you doing liquid cooling there are tube ports on the rear of the unit. Additionally the top 140 mm fan area can be used for a radiator area instead of mounting traditional 120mm or 140mm fans.
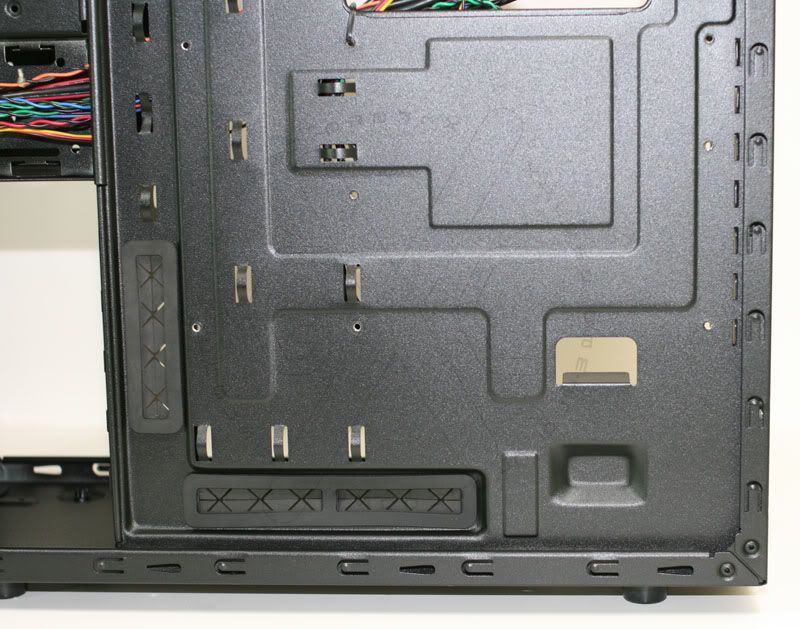
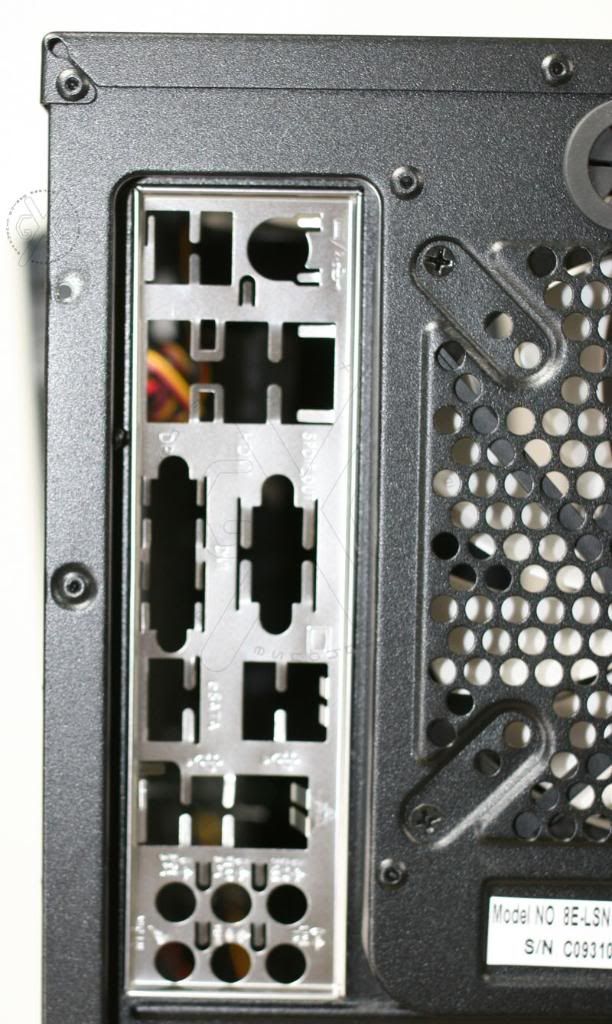
The case has a standard PSU opening at the bottom with filter as mentioned earlier. A nice feature provided for noise reduction are 4 rubber fan grommets mounted to reduce PSU vibration noise. Above the PSU opening you have seven mesh back plate covers that come with the case. Above the slot covers there is an open mesh area with approximately 4mm diameter holes. The same 4mm mesh covers are used for the single 120mm rear fan area and the double 140mm top fan area.
Documentation
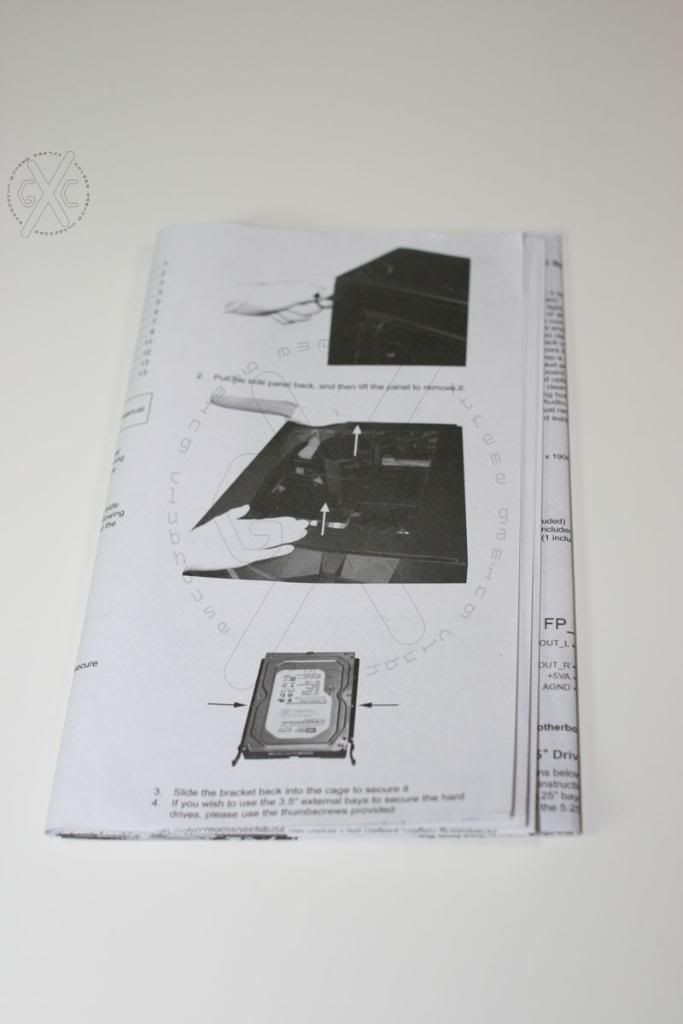
This introduction to the case made me laugh. I don't know about you but I don't have the dexterity with gloves on to do the intricate work inside a case. I don't think I could do much system assembly even with fine cotton gloves on. If anything you could ware cotton gloves when handling the case to not leave fingerprints all over the window or bezel."Before Beginning for safety issues, it is highly recommended that all users wear gloves during installation."
A nicely printed manual is provided on 11.5" X 13.75" paper. The complete documentation is on one side of the paper. Four languages are covered one per side with two total sheets. The included languages are English, German, French and Spanish. While reading the document it became clear that this was meant to be a booklet and not on a single page. The order and layout of the information was confusing. For most builders you don't or won't read the manual. But when a critical piece of information is needed it is invaluable to have it well documented. The Lexa S graphics design team should have been reformatted to fit the single page provided. There were specific sections of the document that was lacking or completely missing. The documentation and internal labels for the fan control cabling was poor. The cables themselves are color coded, but there are no labels on the cables and the documentation did not cover which cable colors were controlled by which fan knob. It was easy enough to figure out, but these are the little quality touches that help all enthusiasts and system builders.
Additionally the document did not match the product as in the PSU filter example given earlier. Some of the technical call-outs for pin locations were difficult to read. I downloaded the product PDF and the PDF was better but could have been provided in a higher image quality to decode some of that missing detail in the printed copy. A missing essential in my view is a adhesive label with the system pin outs. As a builder I want to attached a label like that somewhere inside the case for future reference.
Installation
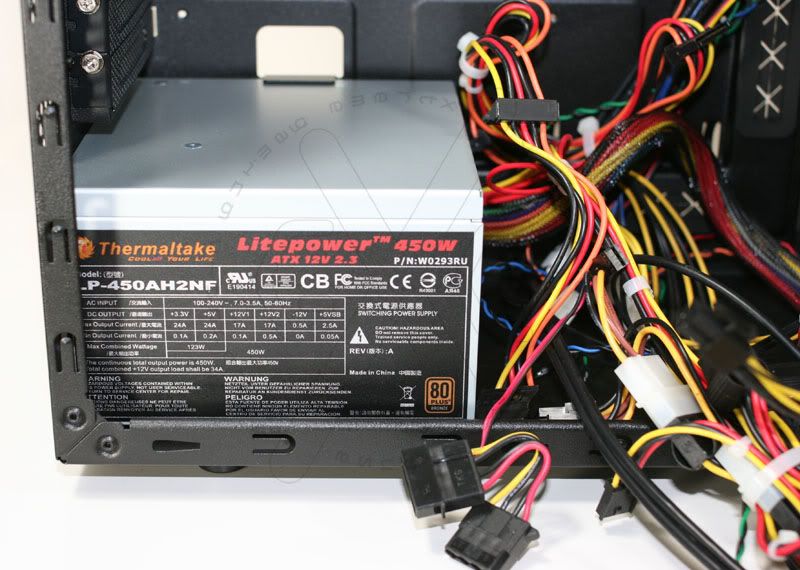
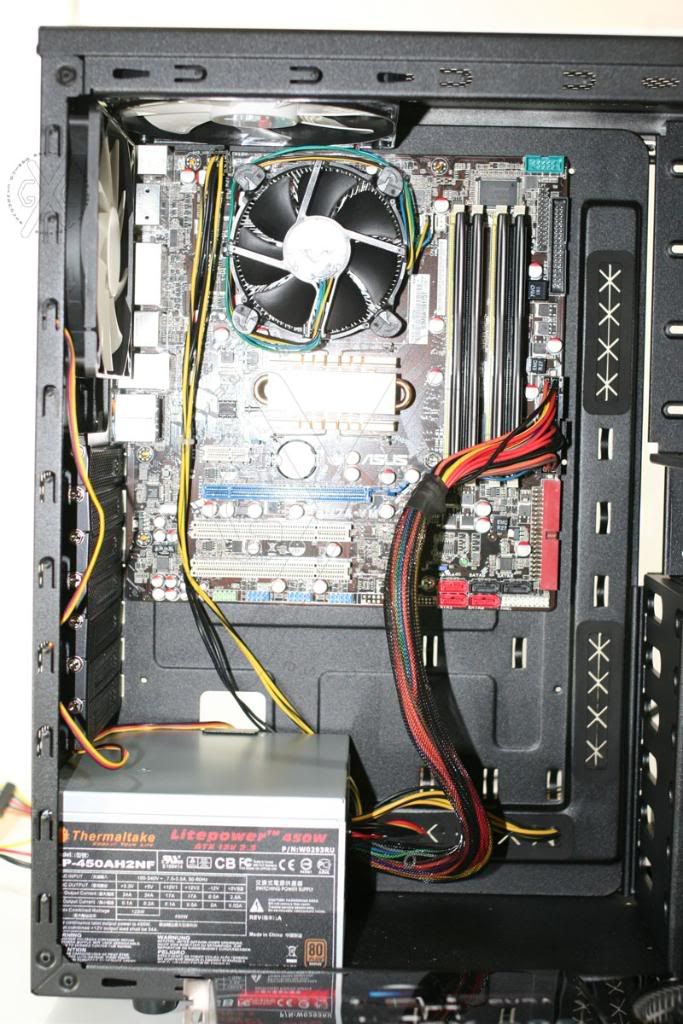
The Lexa S is being tested with a Core 2 Duo 2.93ghz in an ASUS P5N7A-VM with 4 GB of Corsair XMS2 2GB modules and an Intel X-25 SSD. This will be powered by a Thermaltake Litepower 450W ATX12V power supply. These are all fairly new components just a couple months old.
The build started with the all important main board back plate, it snapped easily into place and aligned very well.
Next I mounted the power supply on the bottom of the case. At first the cables were loose and then I and routed some of the cables through the grommets to get them out of the way.
After the PSU I installed the metal stand off points to match my main board in the case. It is important to use a tool to get this metal stand-offs completely screwed in to create a level attachment plane for the main board. I then mounted the main board using the screws that matched the stand off threading both of which were provided.
Powering the main board with two plugs, the main multi-pin plug and the 12V 4 pin line for the CPU. I was surprised but I was just able to plug in the 4 pin line for the CPU and route the cable without any slack. It is not optimal but will do the job until I can get a extension for this. The documents describe running both PSU cables through grommets but this is just not feasible for me or most builders without extra long cables. Since this is a fairly common CPU position it would have been a nice to have power supply extensions included from NZXT.
I mounted the the SSD drive in both the provided sled and then back into an ICY dock 2.5" to 3.5" bay adapter. It is nice that the Lexa S comes with a SSD sled. After trying both adapters I went back to the 3rd party adapter. If I was building a system from scratch I think it is great that NZXT provides the dual SSD 2.5" to 3.5" adapter in the box.
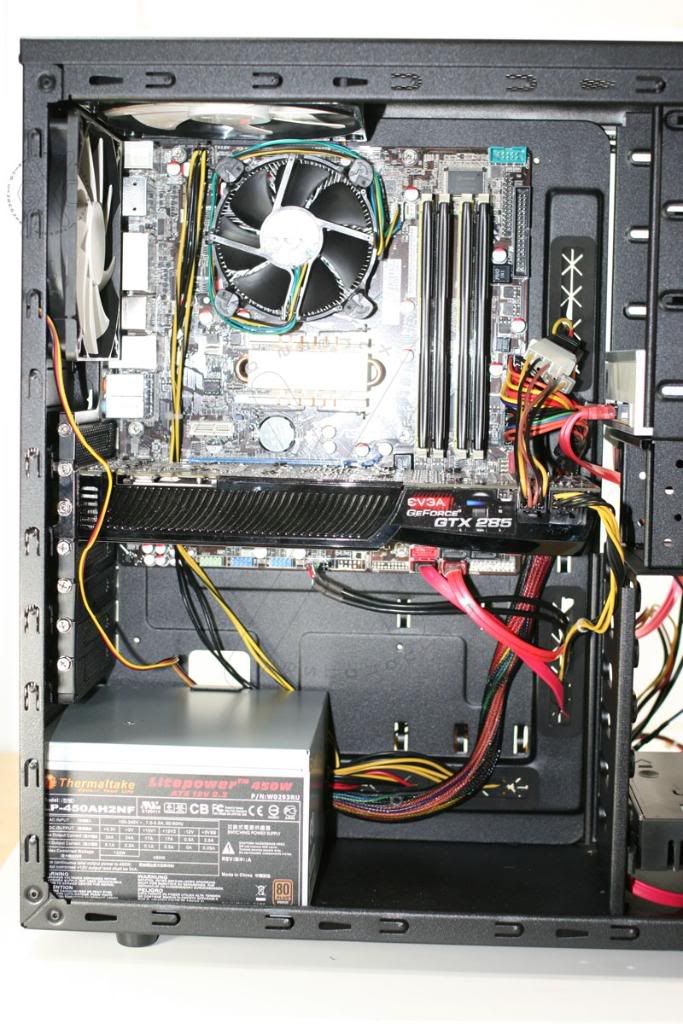
After the disk was installed I moved to the graphics card. I removed two rear vented slot covers and mounted the video card. The fit was great since the Nvidia 285 I have is on the long side of video cards. I was able to route the main power under the video card to get it out of the way.
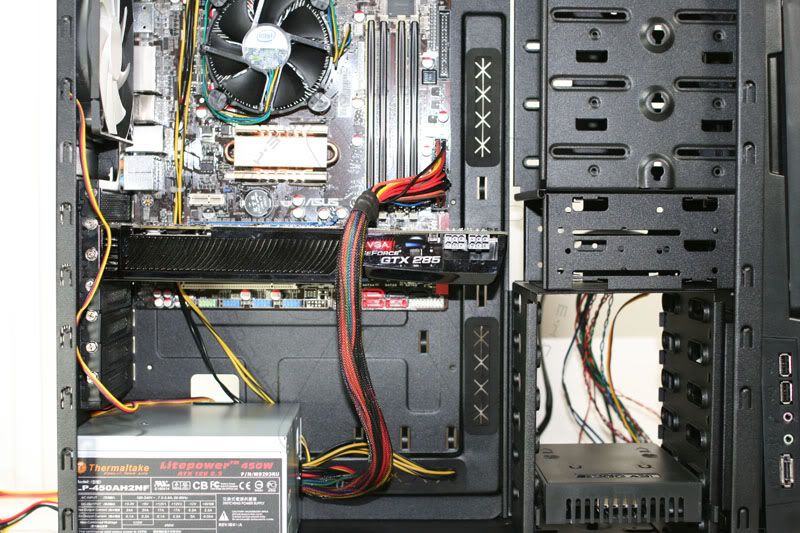
I mounted the DVD writer and ran power and SATA cables where appropriate. I also ran dual PCI-E power cords to the video card. One 6 pin from the PSU and the other by combining two molex connectors with a 6 pin PCI-E power adapter.
Then came the dread of most builders and modders; cable management. This is where my excitement about the Lexa S features were dampened. I found that the case failed to provide cable ties to tie down the cables to the provided mount points. Luckily being a geek, I pulled out a favorite type of tie down that can be reusued and proceeded to manage cables.
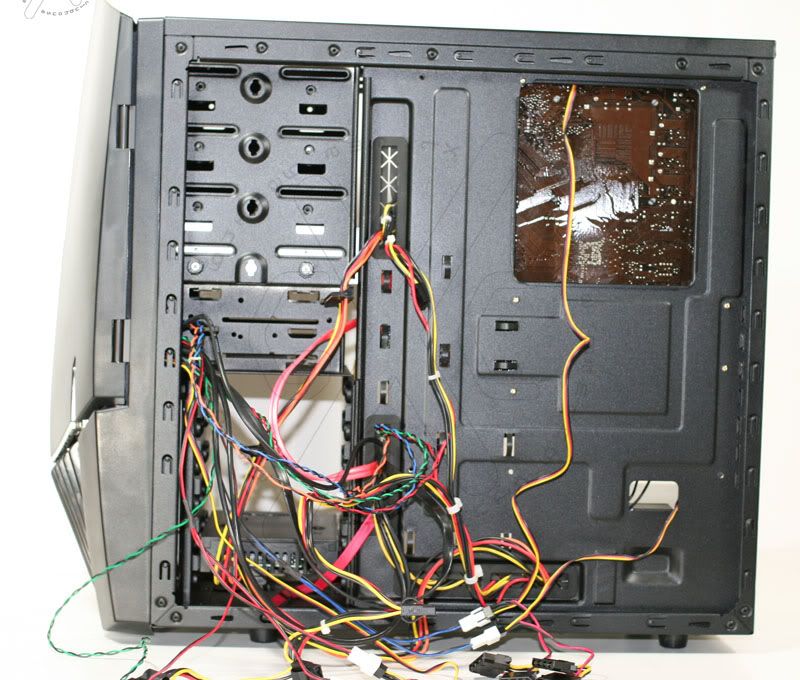
I quickly found that the case does not provide enough space to hide all the cables you need to do a simple build. This would become even more of a challange if you had multple drives installed and need to route more power and SATA cables around. After thinking about this challenge I did realize I could get shorter SATA cables and route them directly. I could then focus on routing only power cords together in a zig-zag pattern to the tie downs. Finally I could bundle the other cables and shorten their lengths with zip ties.
I may return to the drawing board on this when I have small zip ties and try some new ideas. As a simple fix would be more space on the backside of the main board tray between the side panel would have let me hide the cables with out so much complexity. The solution to this would be an additional. 5" of depth on the back side of the case to hide those power molex ends and other cable bulk.
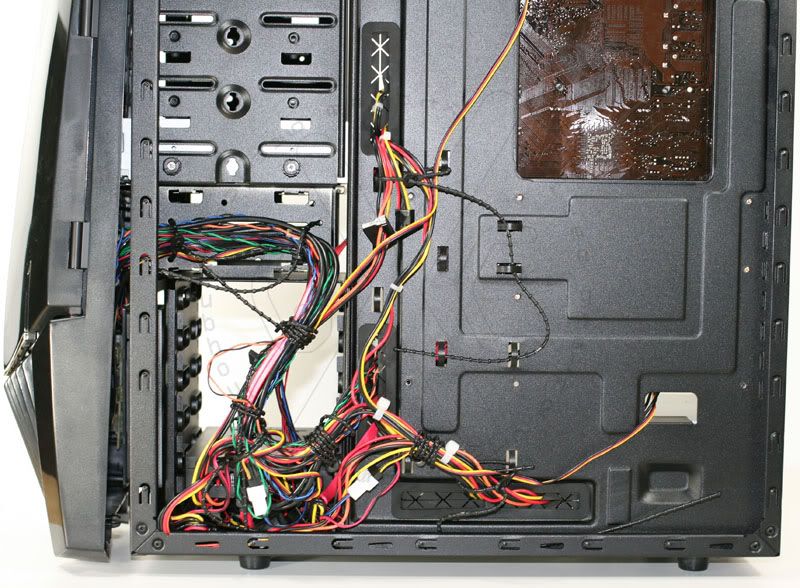
After using about 10 black cable ties I had the cables into a respectable bundle. I choose to hide the extra cable ends (bulk) under the SSD location. When it came to closing the back side of the case I turned the case over and laid it flat to be able to gently push down the cable bundle between the case skeleton and the cover plate.
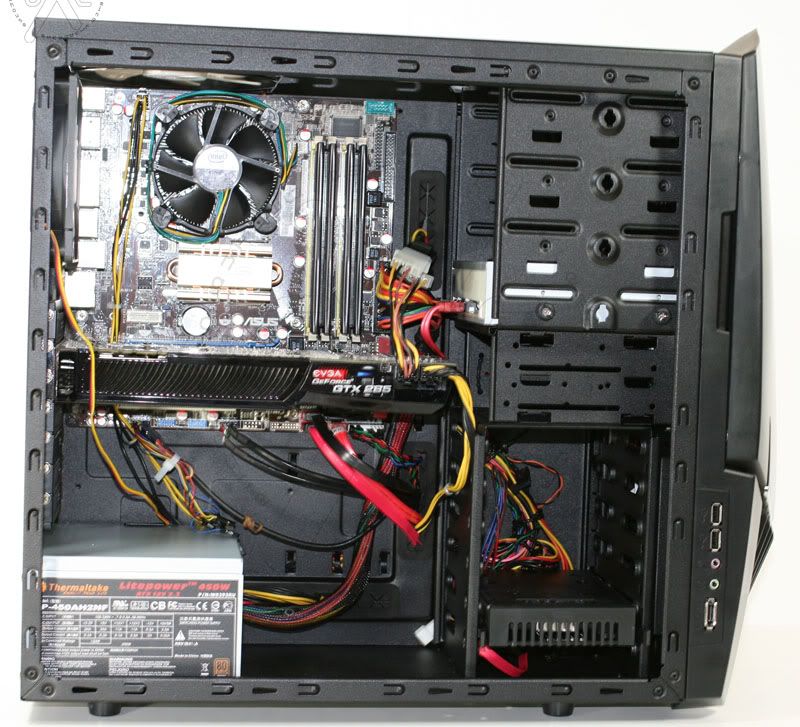
While the picture looks like the cables are still impeding airflow they are not. This is the best cable management I have seen for a case in this price range and size. The final two cables that needed some attention are the back and window fan cables. Right now they are the only cables that just dangle through the system. Luckily these are thin cables and do not restrict airflow, but for a nice finish it would be great to have some tie down points for these.
At the end of the build I realized I had not paid attention to how the front door closed. I found a nice touch in the front of the case where the door that access the power and reset buttons, and drive bays use magnets to keep the doors latched shut.
Performance
Maybe it was luck or skill or a bit of both but the system turned on the first time with everything running fine. The four included fans connected to the two fan controllers cooled the system well even on the lowest setting. You can just start to tell how the blue nightlights show in this running photo.

The system I have is not particularily taxing on the CPU, front side bus (FSB) or random access memory (RAM) heat but the 285 video card heat output can bring a poorly cooled case to its knees. I found that I was able to maintain very good GPU (low) temperatures even on the lowest fan speed. My load testing was to play COD4 at the highest settings for my system.
Pricing
NZXT has said that the Lexa S will be available in September [2009] at an MSRP of $69.99. Doing a quick check I found pricing from $69.99 to $82.99 on the web [Sept 2009].
Modification
This case has some great low barrier to entry modification points for new modding enthusiasts. There are tons of possibilities but here are some I thought of right away.
- Replace all the plastic thumbscrews with nice aluminum thumb screws.
- Put some time into cable management and get sleeving mesh on all of the visible cables.
- Consider a paint job on the screen grills covering the 5.25", 3.5", lower bezel grill and rear slot covers. Consider a color match to thumb screws and cables.
- With the big clear panel you could do nice things with colored lights and or UV light and reactive cables and sleeving.
Final Thoughts

The NZXT Lexa S is a great case for the money. This mid size case is a fantastic buy for a modder or enthusiast with many features only found in bigger and more expensive cases. The case needs some fine tuning in the area of cable management, and the included cable management supplies. I think a PSU with modular power cable may have helped but not enough to overcome what a many users of this case will find that they have cables that are too short. The finished look externally is fantastic, the blue night lights do not have a piercing blue color that some cases use. The light level is great and does not overwhelm your eyes even in a dark room. The overall case inside and out has a great finish and no sharp edges that I was able to find. I don't know how long the case is going to be together because I a ready to start with some of those mods already!
Overview
Packaging 9/10 -- Very good, considering the shipping damage.
Features 9/10 -- Very good, this is a great case for the money
Construction 10/10 -- Excellent for a steel case
Installation 8/10 -- Good but cable managmenet needs improvement
Performance 9/10 -- Very good cooling and quiet

The NZXT Lexa S case earns a 8.8 /10, and gets the Xtreme Clubhouse Gold Award!!
Reviewed by Praxum, co-founder of The Xtreme Gaming Clubhouse


 Reply With Quote

Bookmarks