Results 1 to 18 of 18

Thread: Project: Azul {..Obsidian 800D..} Worklog

Hybrid View

  1. #1
    Registered User
    Join Date
    Aug 2009
    Location
    Columbus, OH
    Posts
    39

    Thumbs up Project: Azul {..Obsidian 800D..} Worklog

    Hey guys, i'm working on my first water cooling project. I purchased my PC from cyberpowerpc, After using the PC for over an year now and doing quite some research on water cooling...i have finally decided to get my hands dirty and water cool my rig .

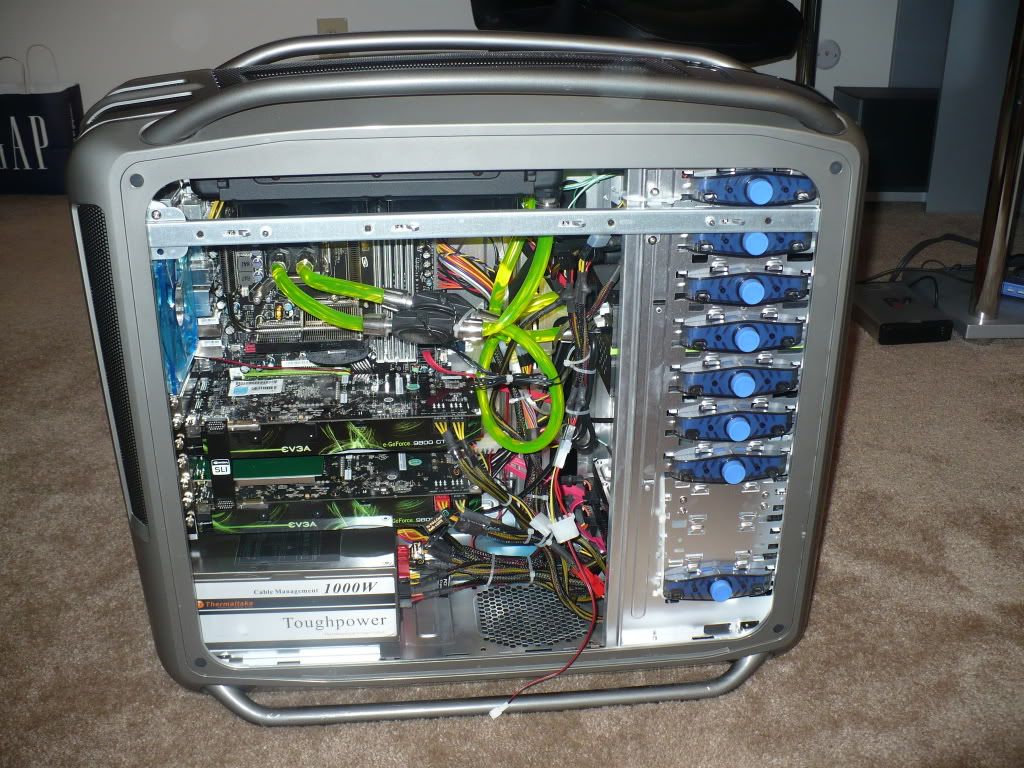
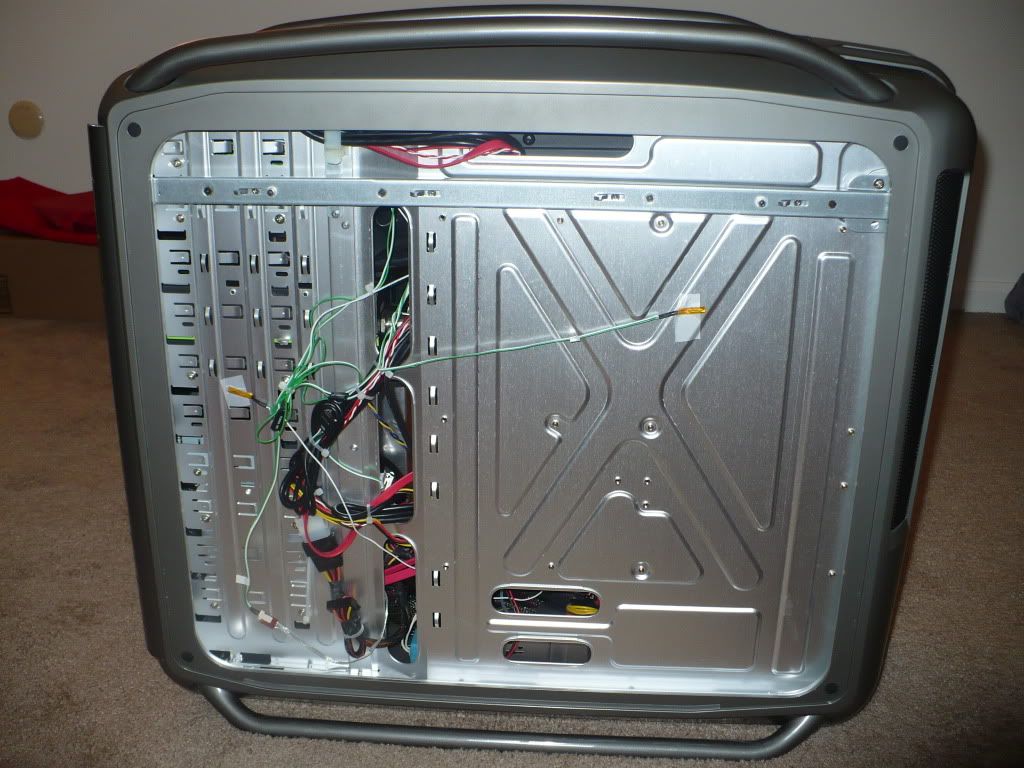
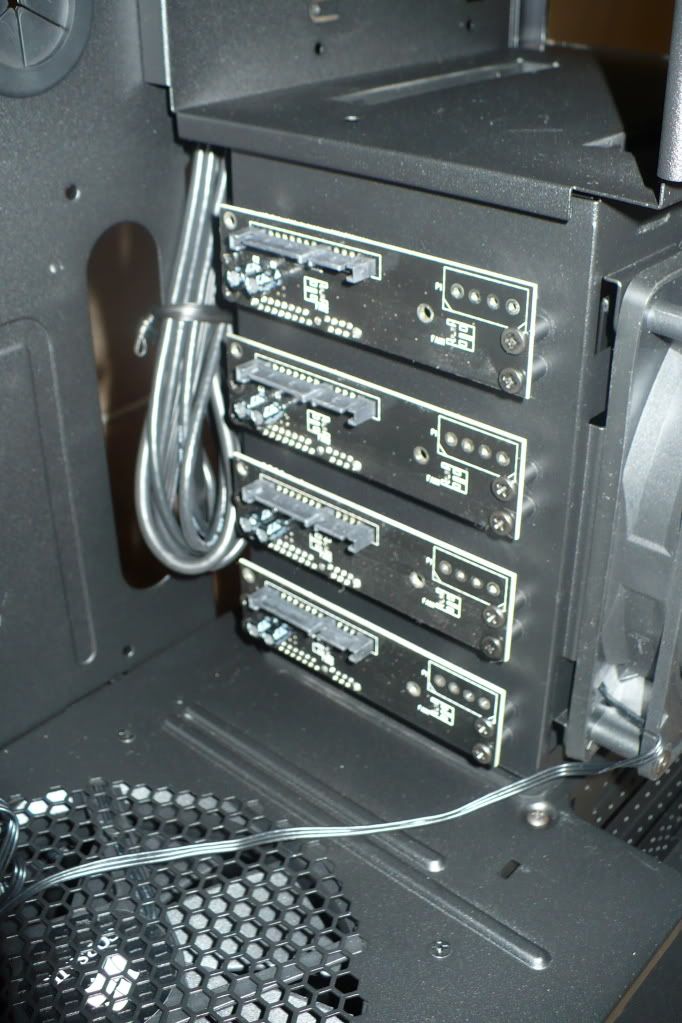
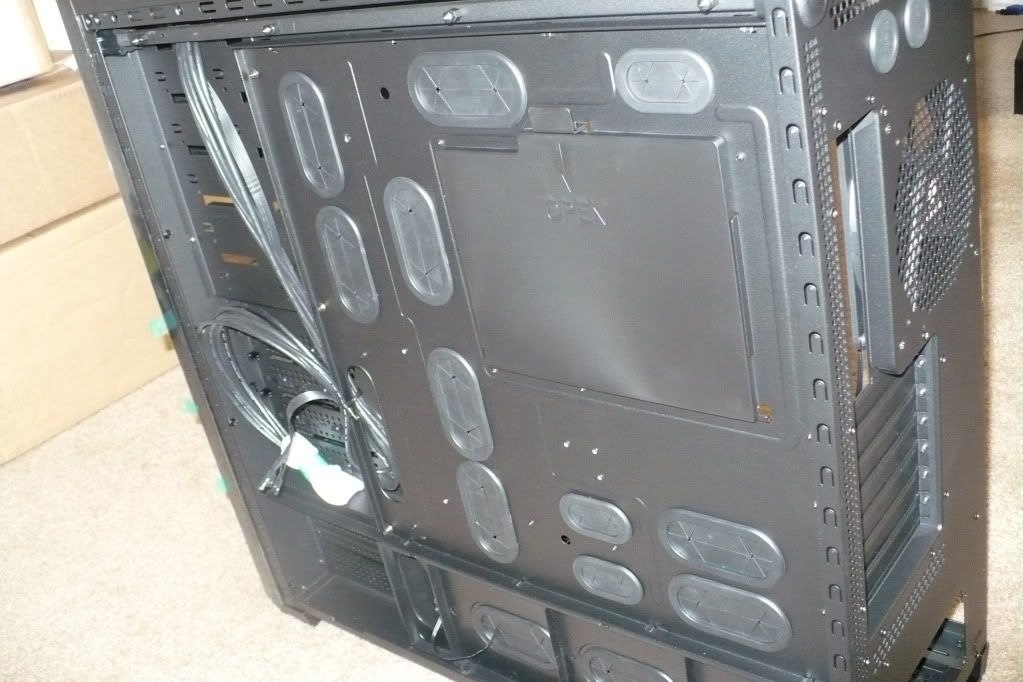
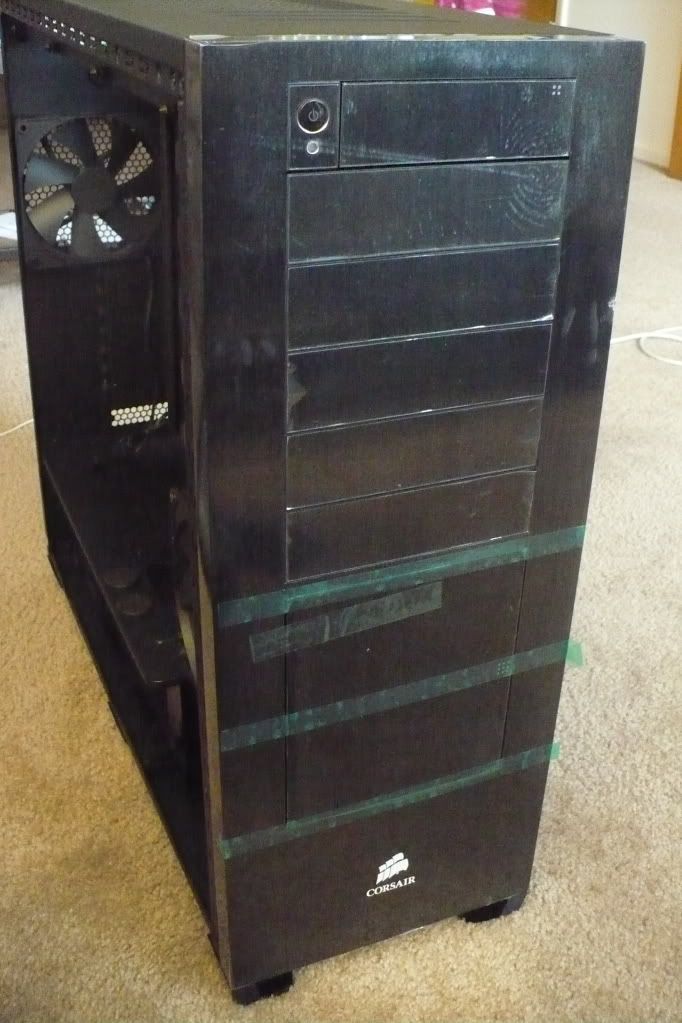
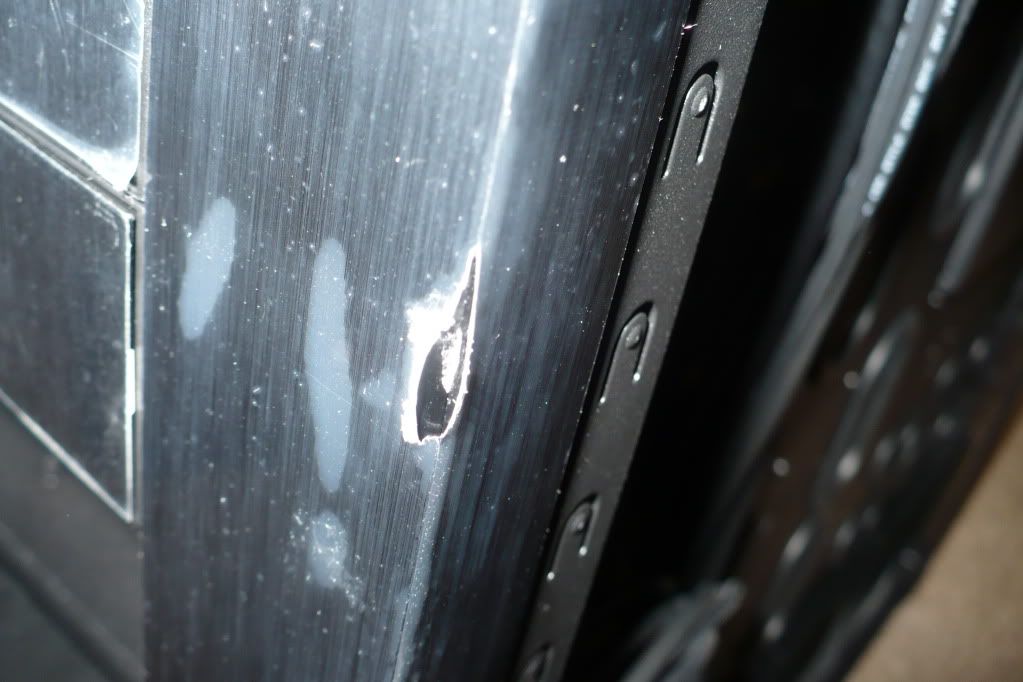
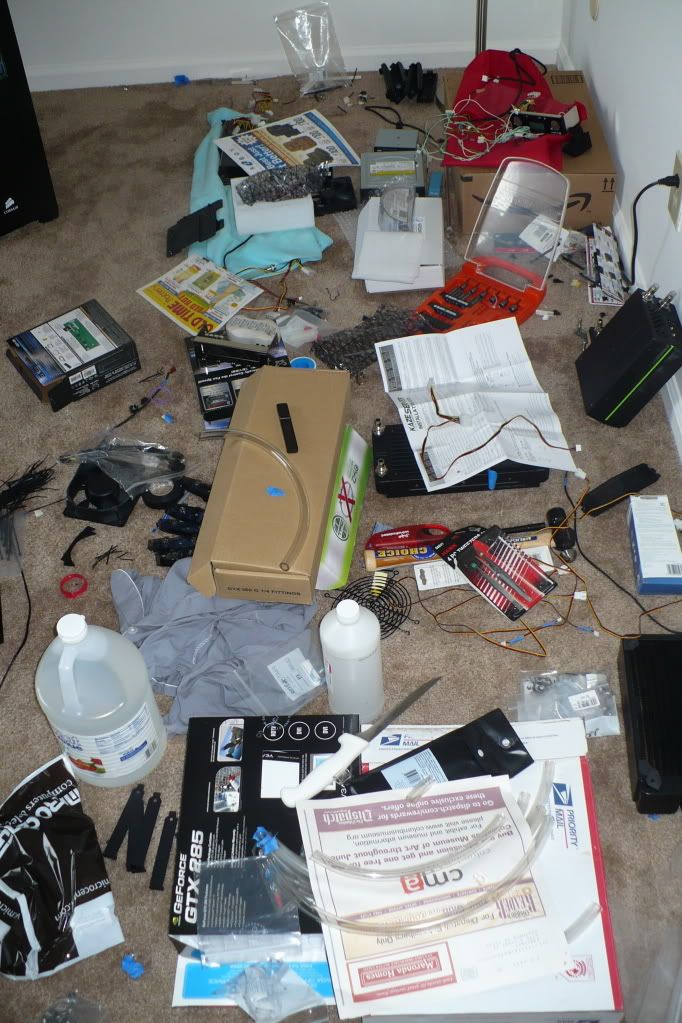
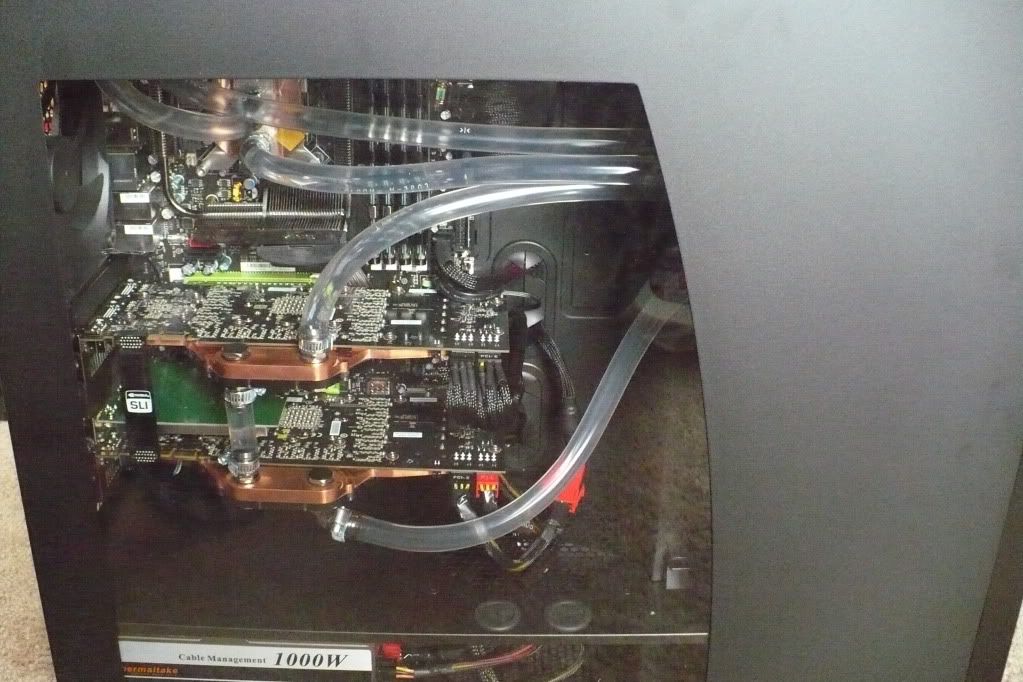
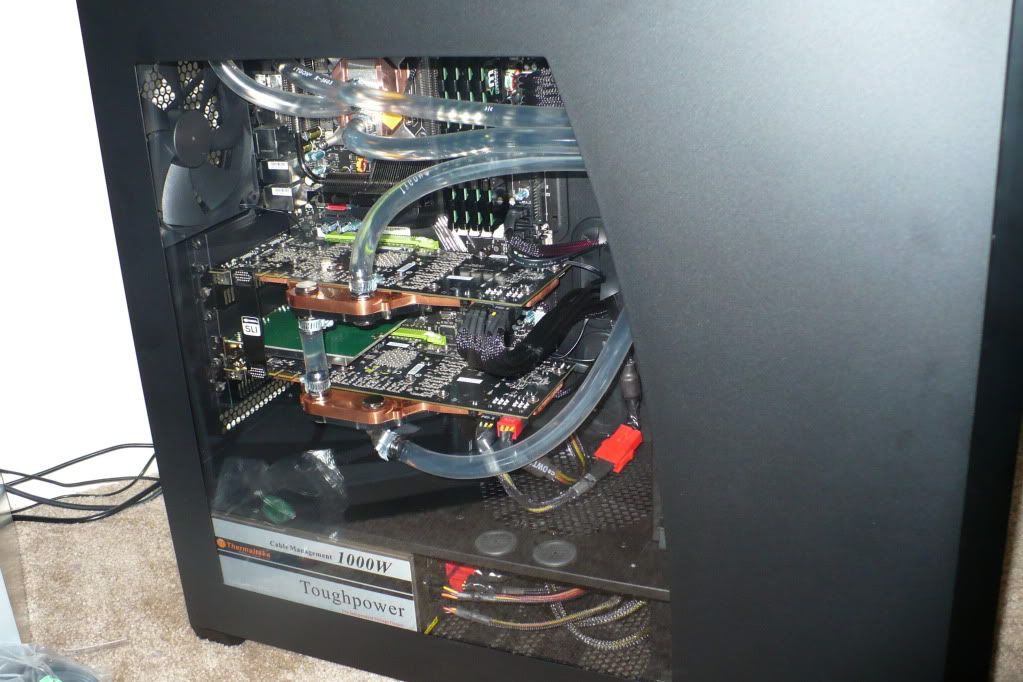
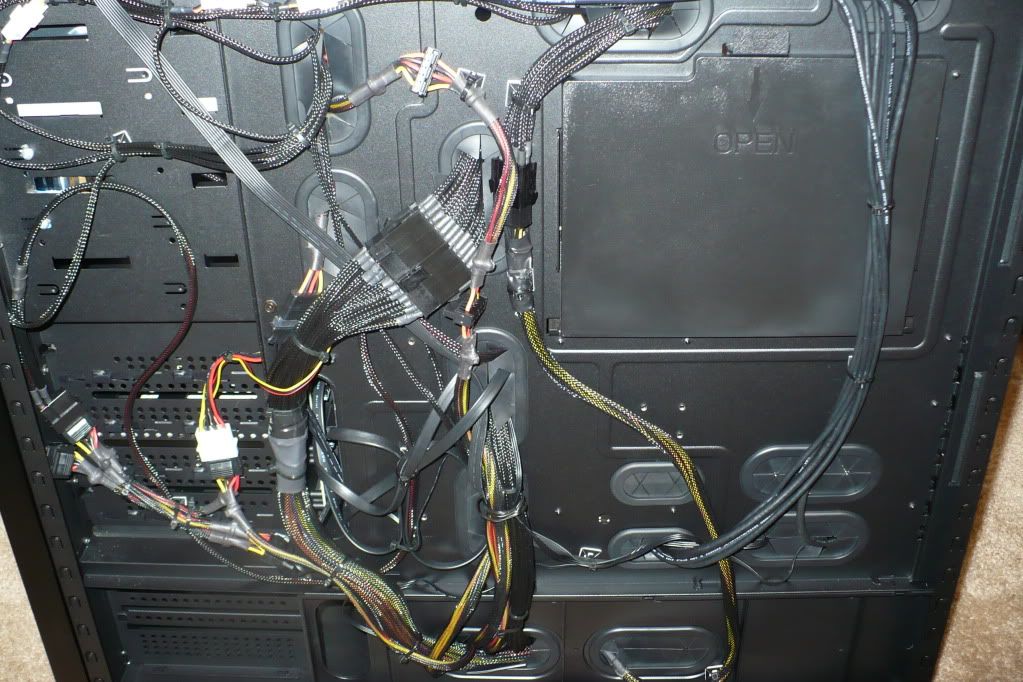
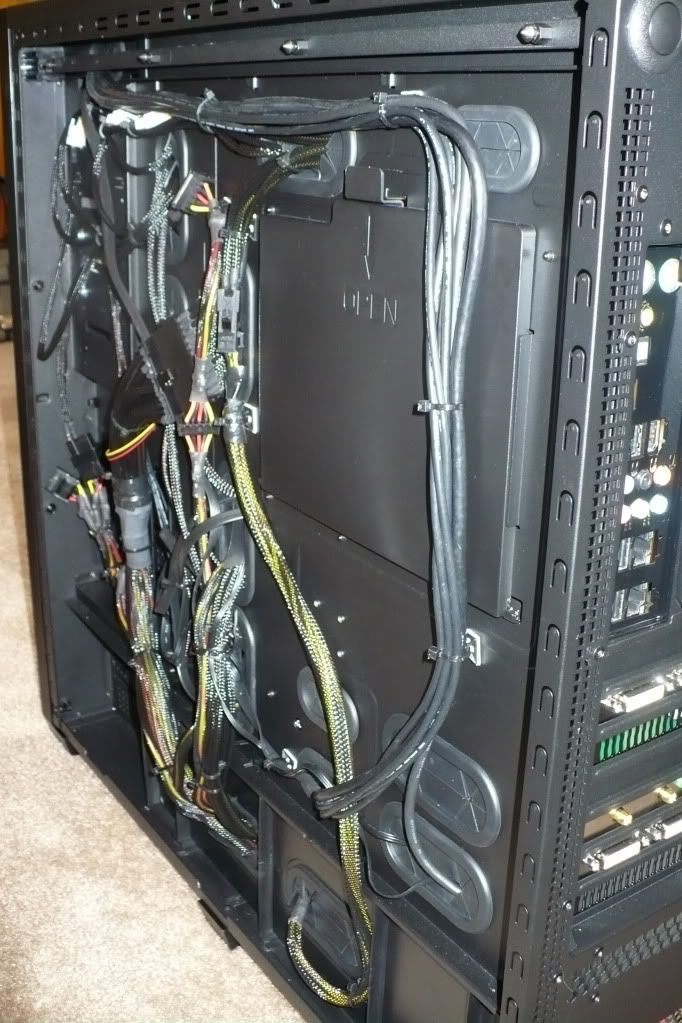
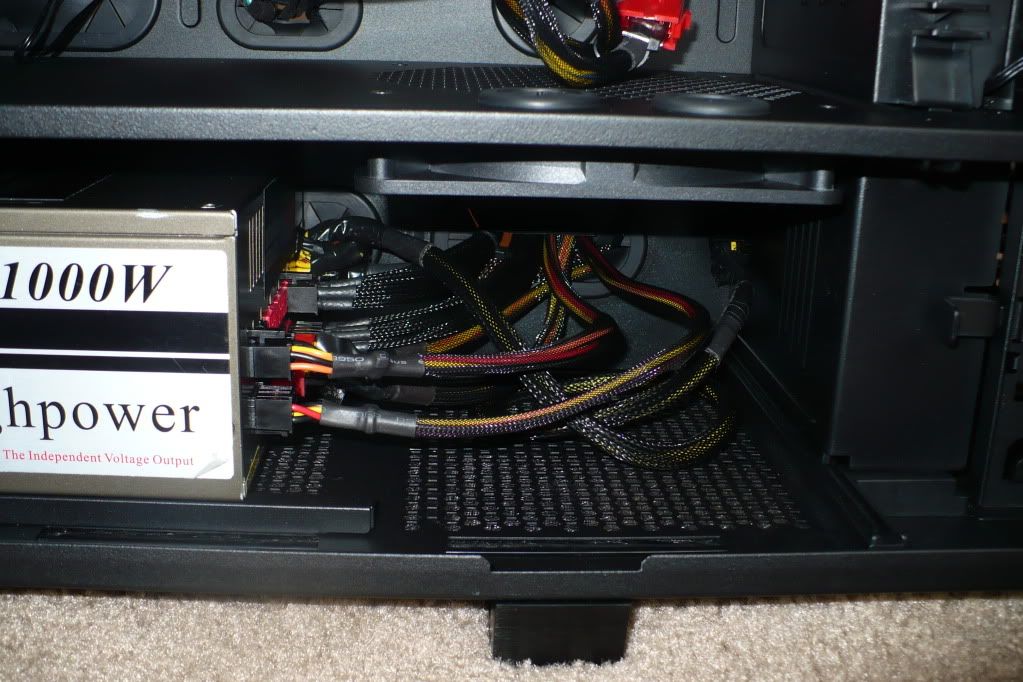
    First of all have a look at my current setup.. ( It sucks !! )
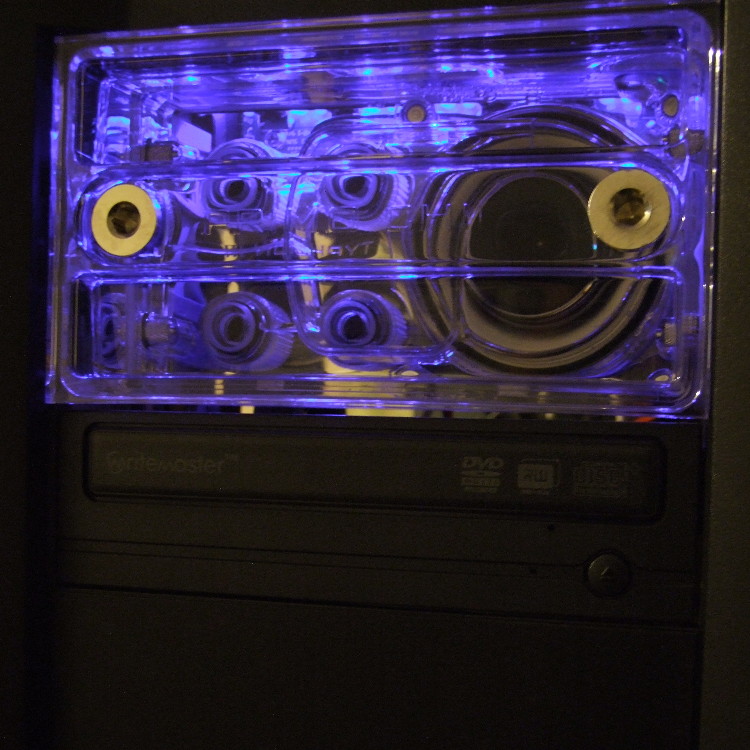
    Forgive me if the pics quality ain't that good(i dont have a SLR yet ) ..i'm noob guys so i will need help from you guys..


    I'm going to upgrade some hardware and also liquid cool my CPU + GPUs

    Here's the hardware list:

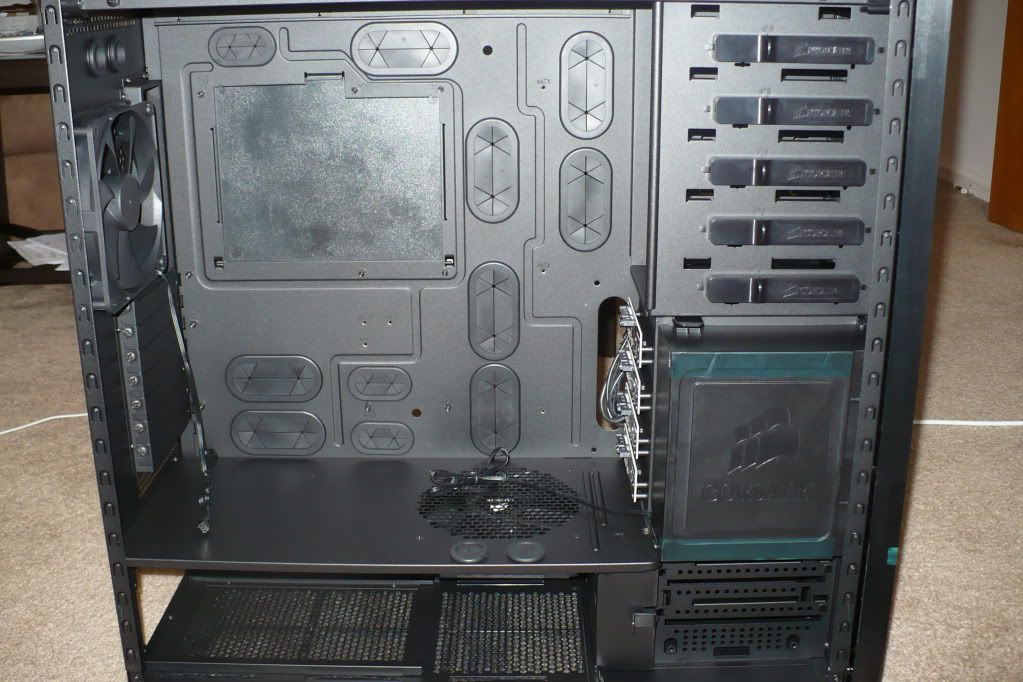
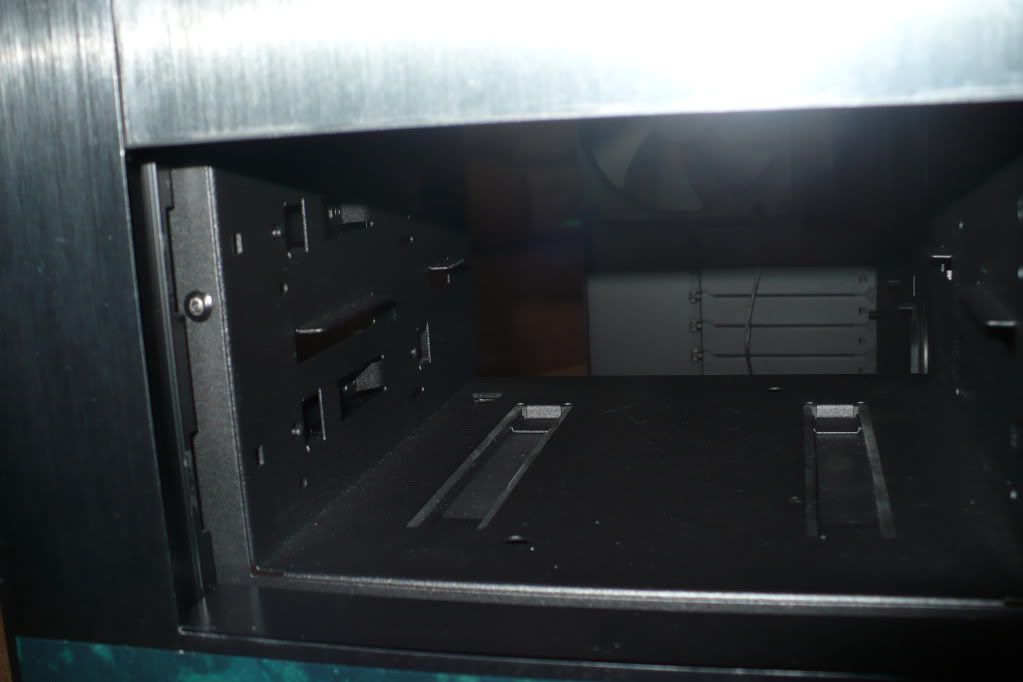
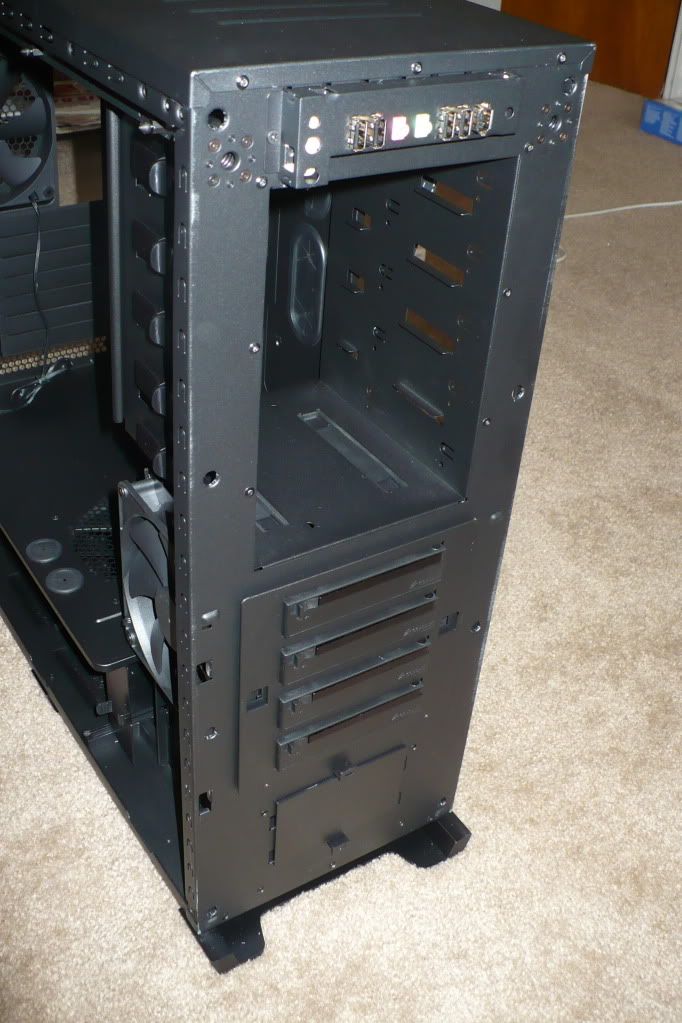
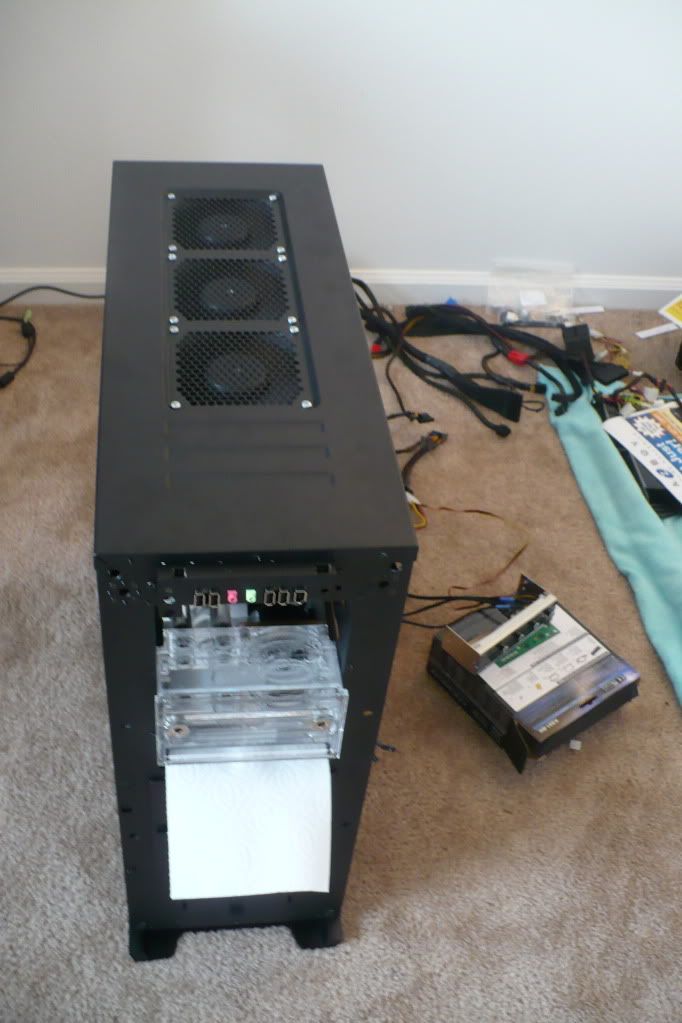
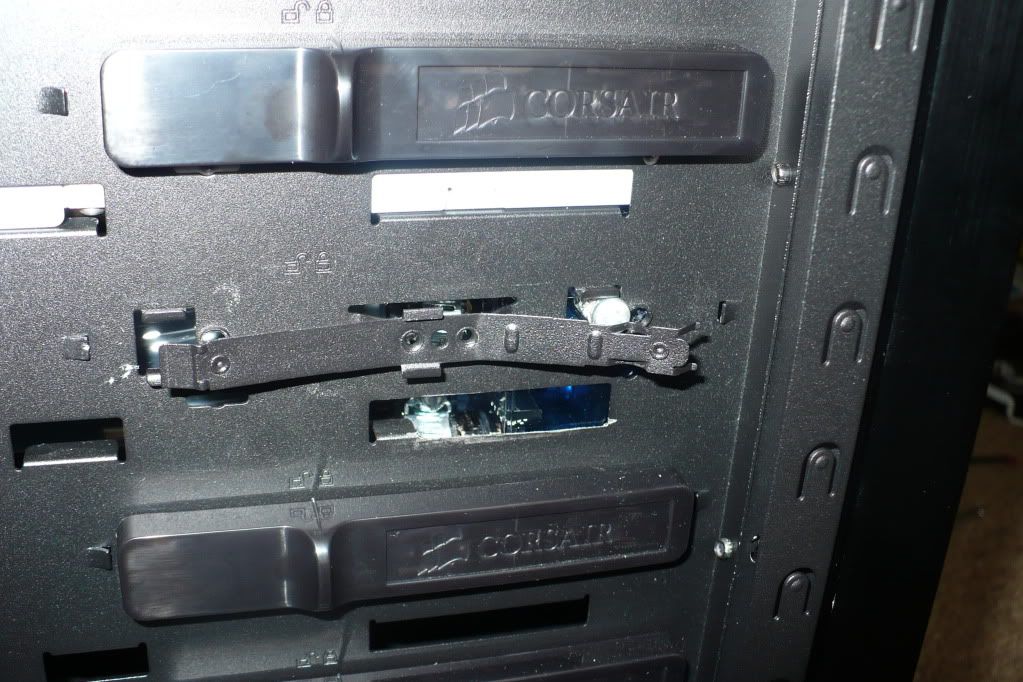
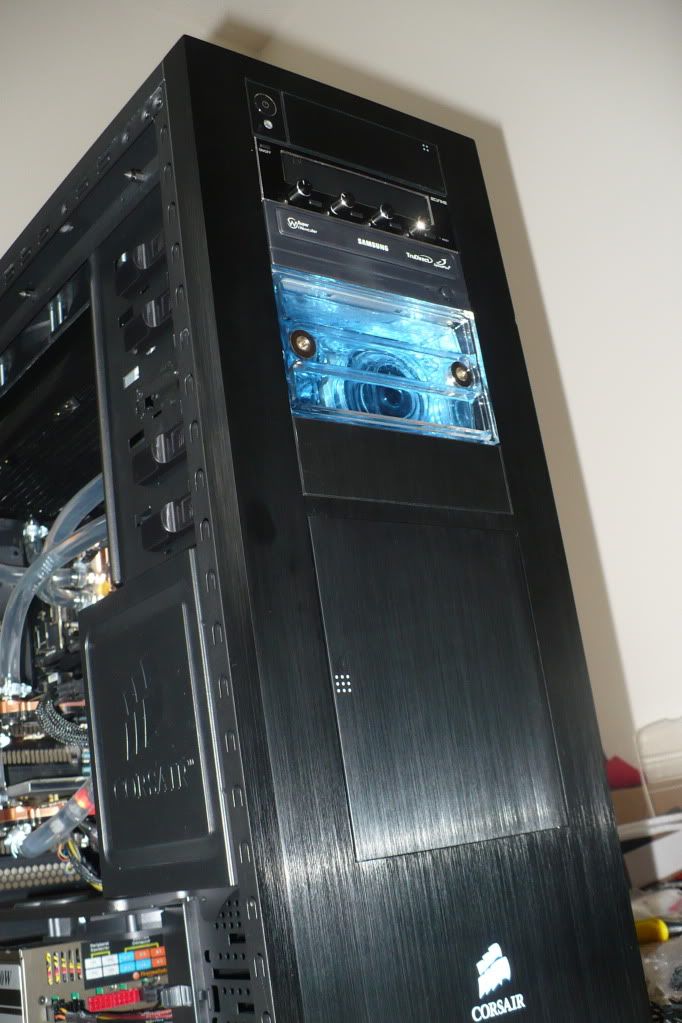
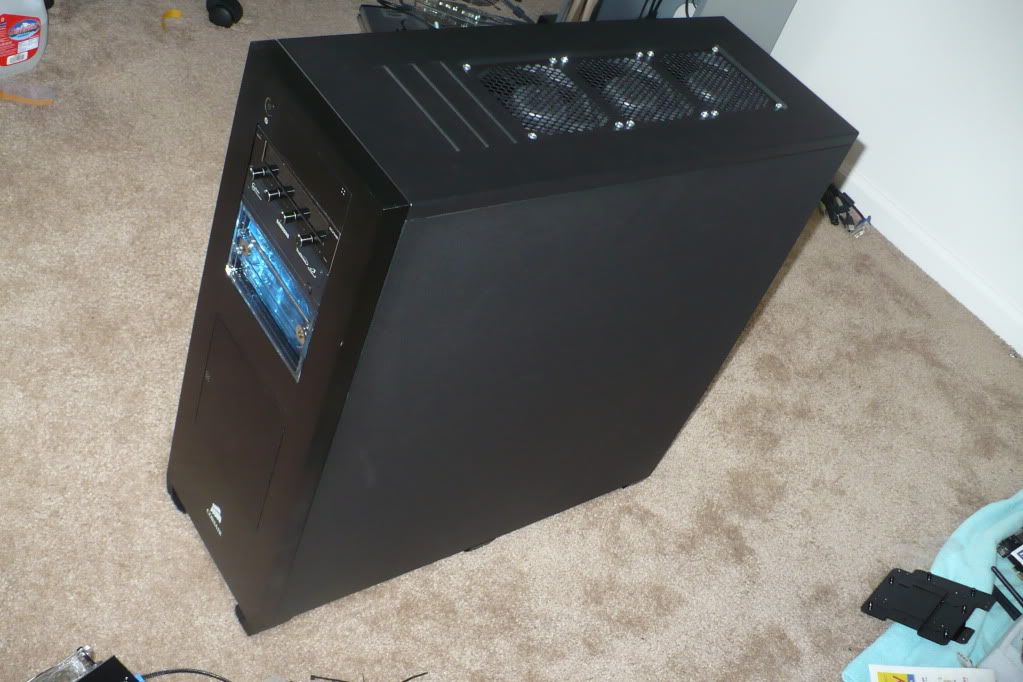
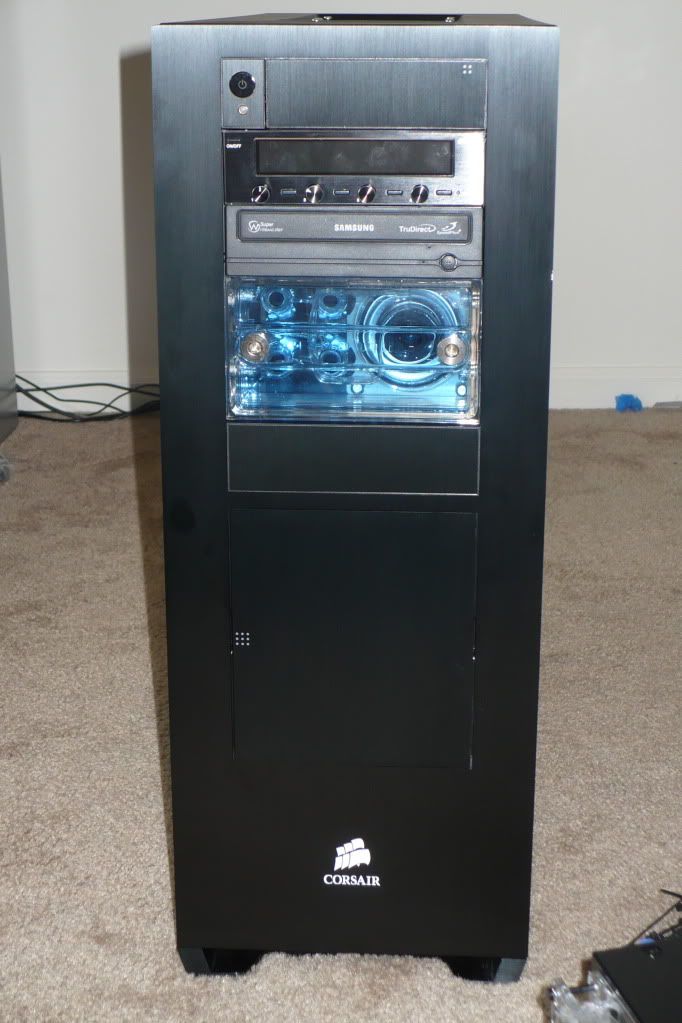
    Case: Corsair Obsidian 800D
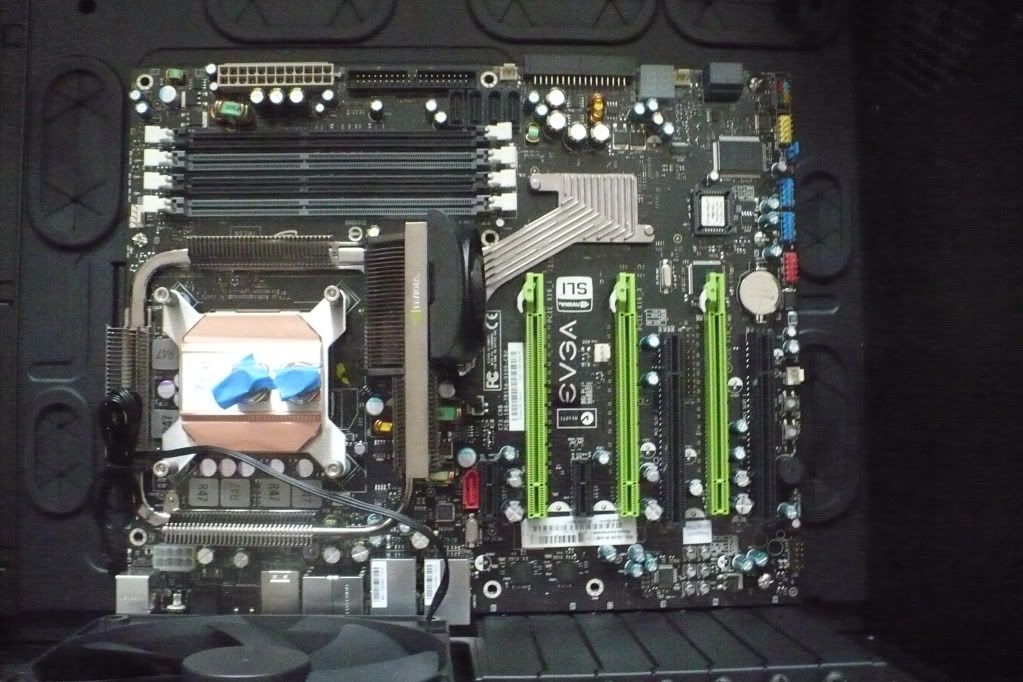
    MB: EVGA 790i SLI ultra
    CPU: Intel Core 2 Extreme QX9650 Yorkfield 3.0GHz
    Memory: CORSAIR XMS3 4GB (4 x 1GB) 240-Pin DDR3 SDRAM DDR3 1333MHz
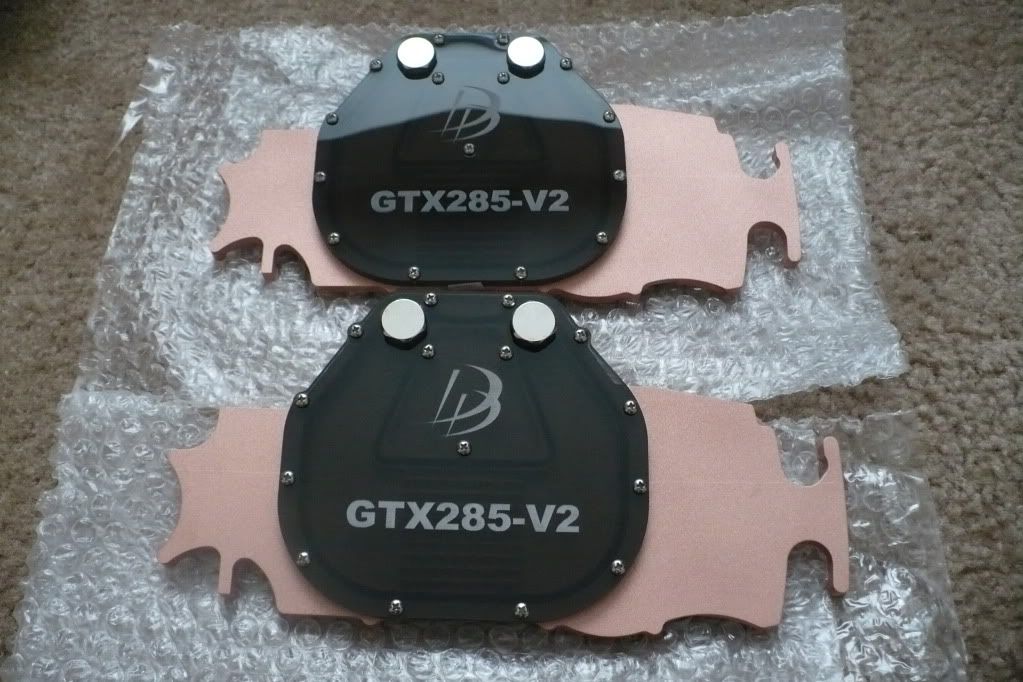
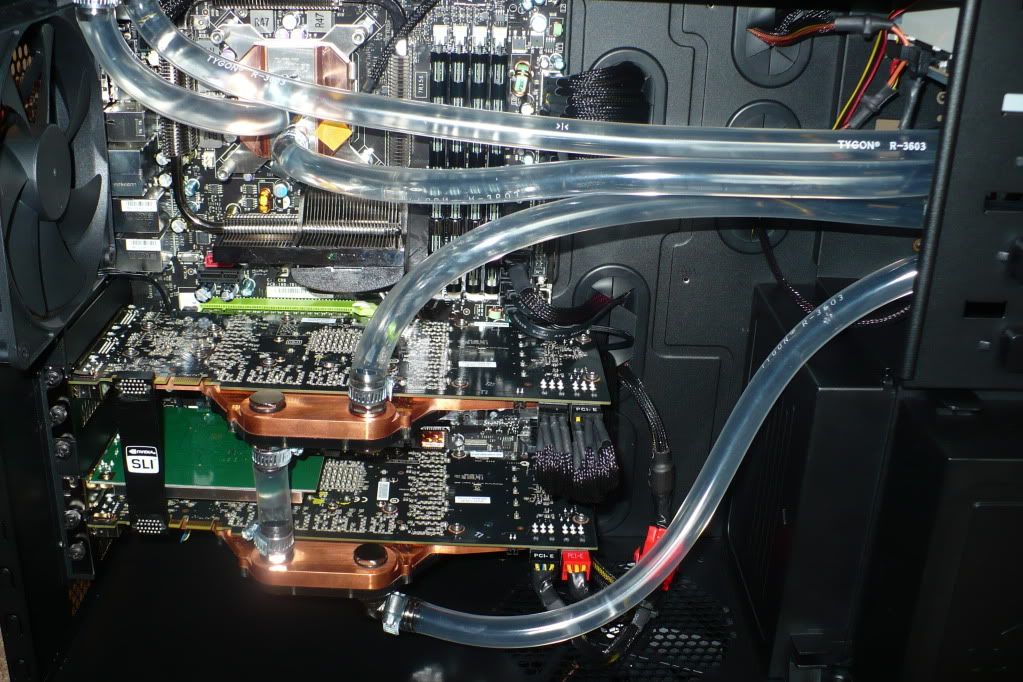
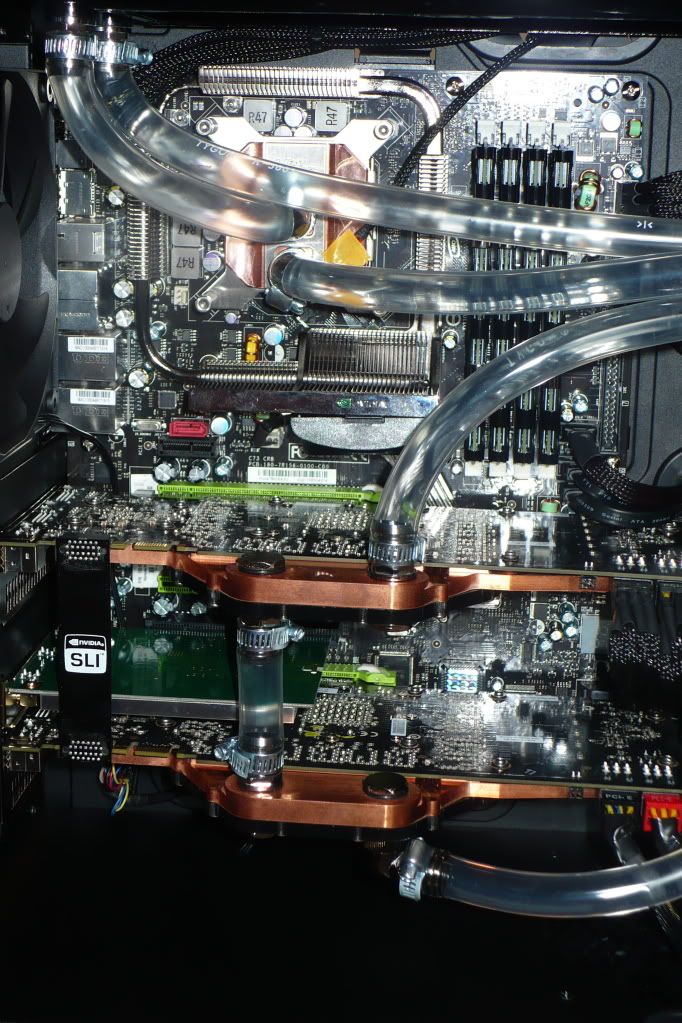
    GPU: eVGA Geforce 285 GTX FTW edition (1GB) SLI
    PSU: Thermaltake toughpower 1000W
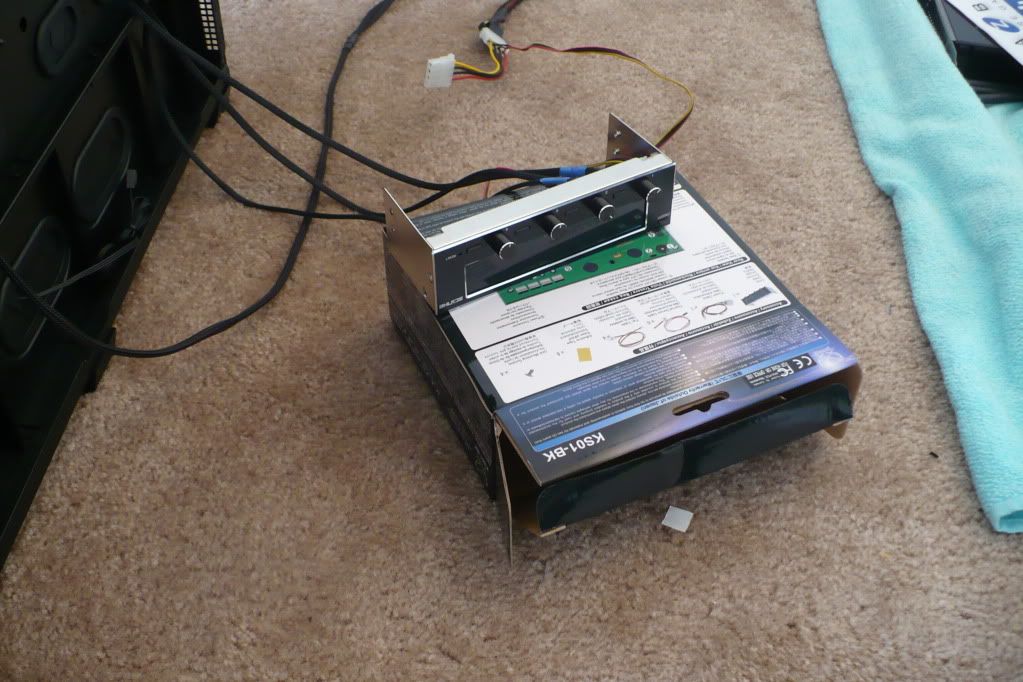
    Fan controller: Scythe Kaze server

    Water cooling parts:
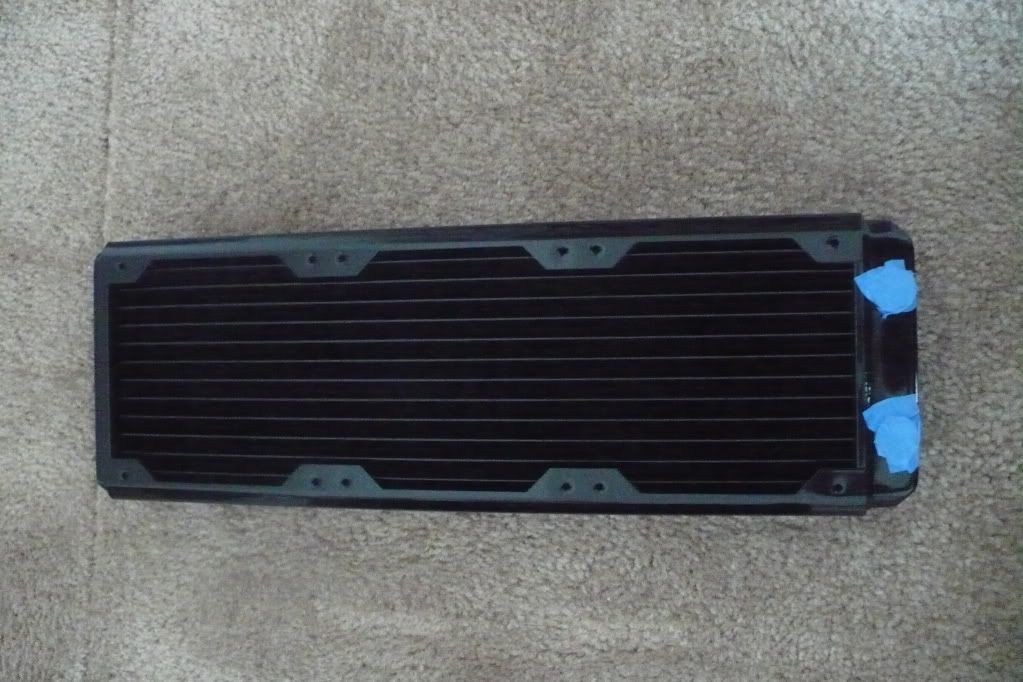
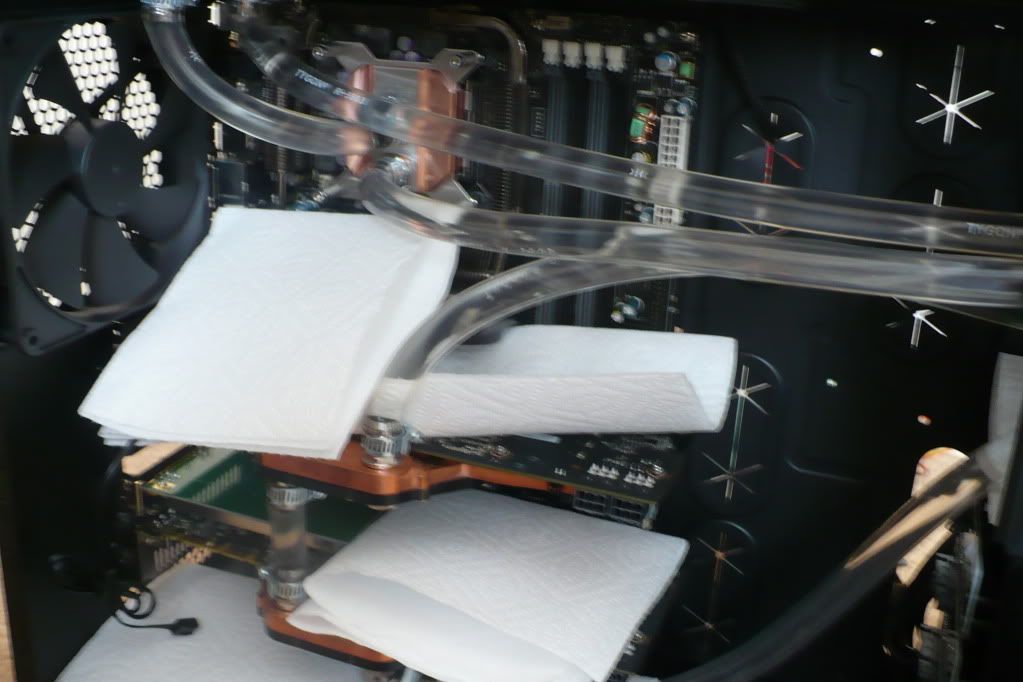
    Radiator: HWLabs Blackice GTX 360
    Fans: Panaflo 120x38mm ultra high speed (3) in push
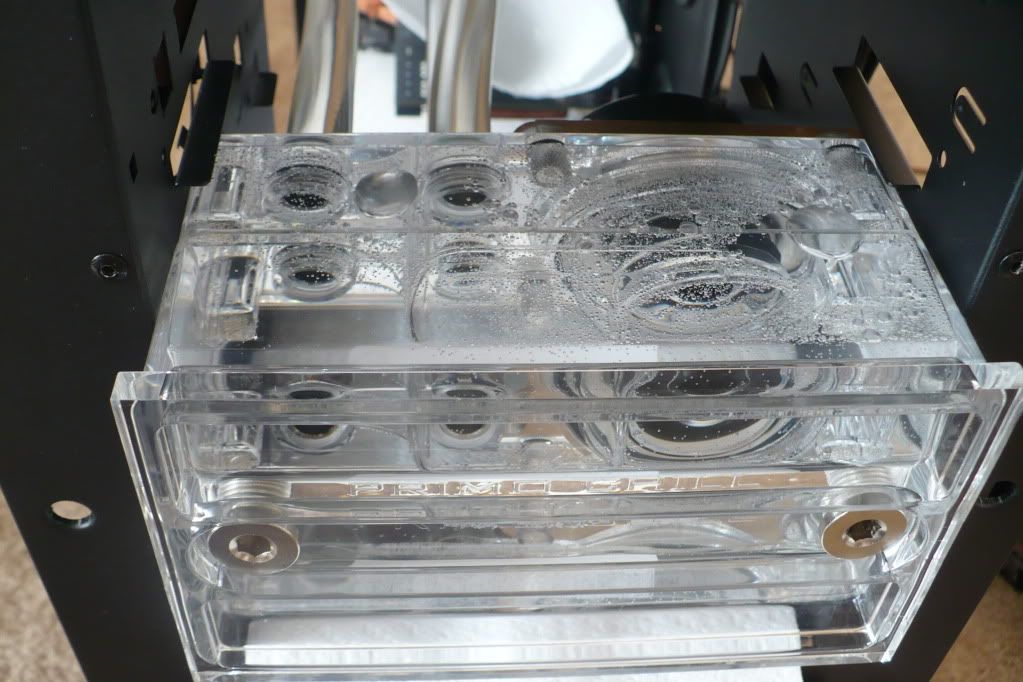
    Reservoir: Primochill typhoon III(decided to use this after reading big thread right here on XS )
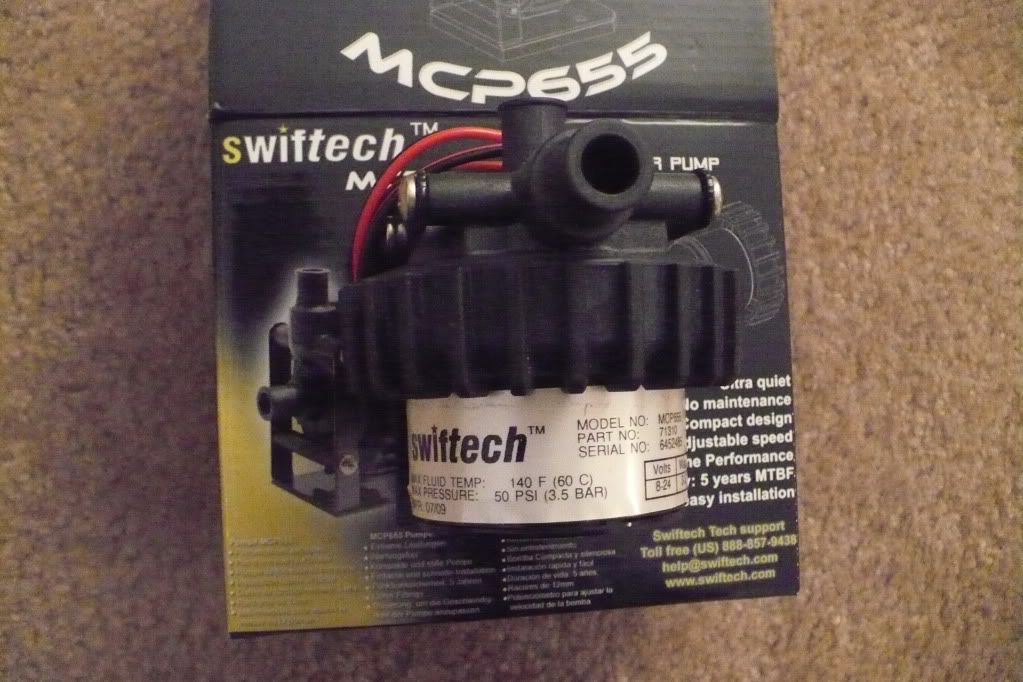
    Pump: Swiftech D5 vario(that wasn't hard to guess with T3)
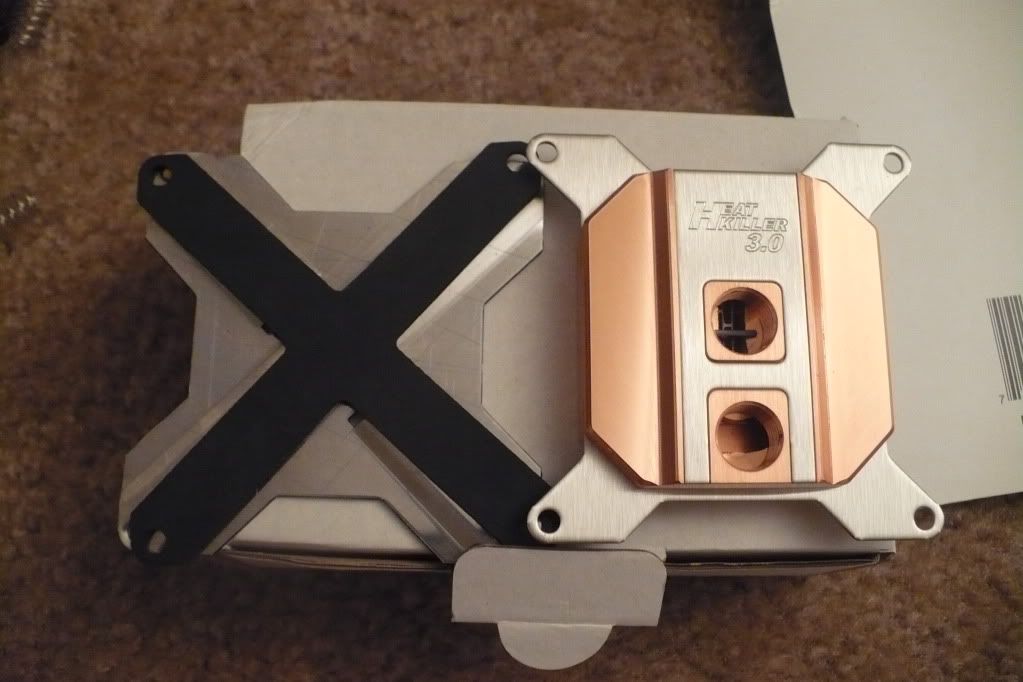
    CPU block: HK 3.0 LGA 775
    GPU block: DD GTX 285 v2
    coolant: distilled water + PT Nuke + Primochill dye bomb (UV blue)
    Tubing: Tygon R3603 3/8 ID 5/8 OD

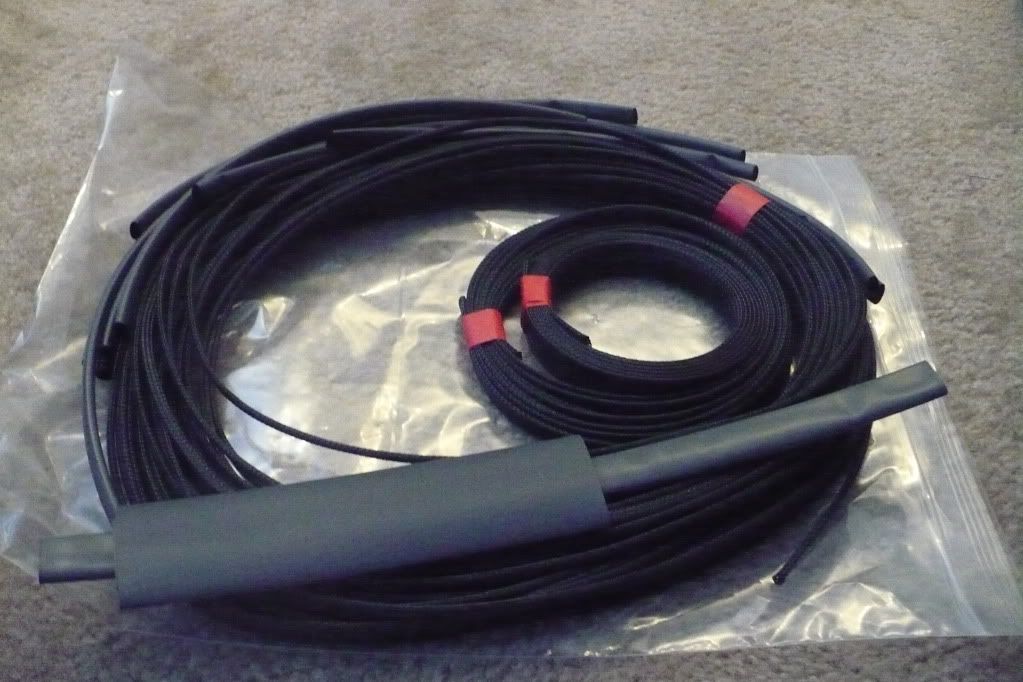
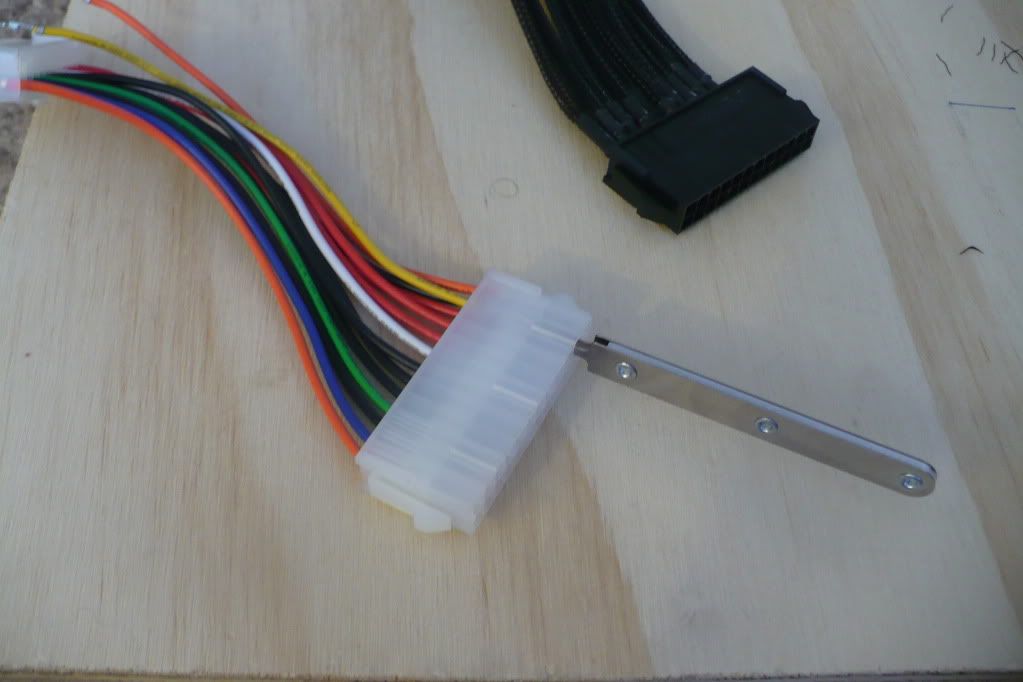
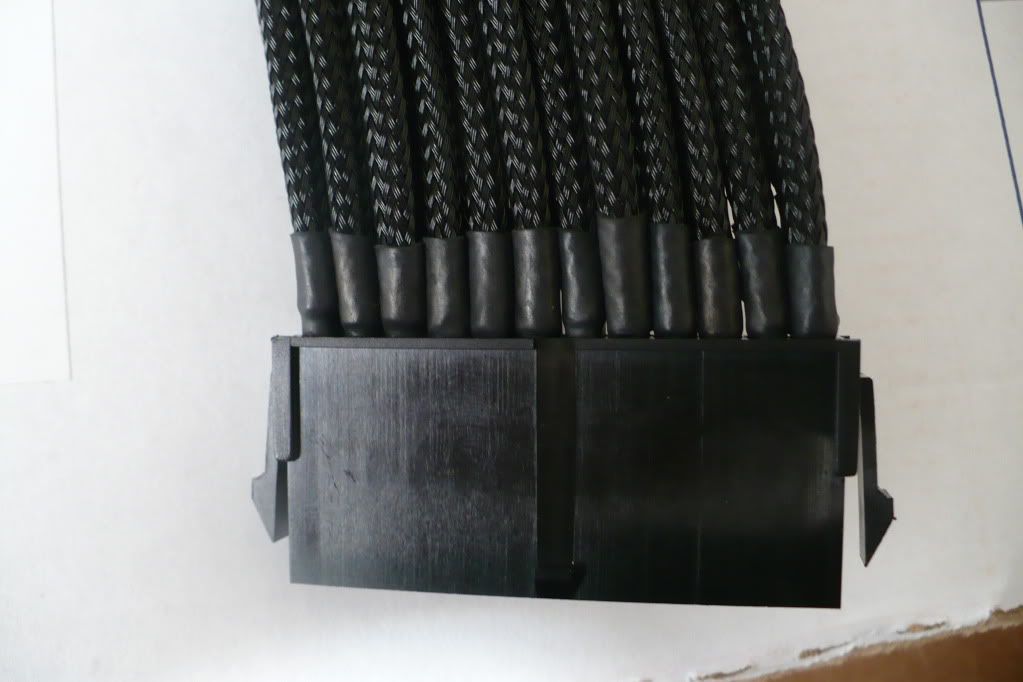
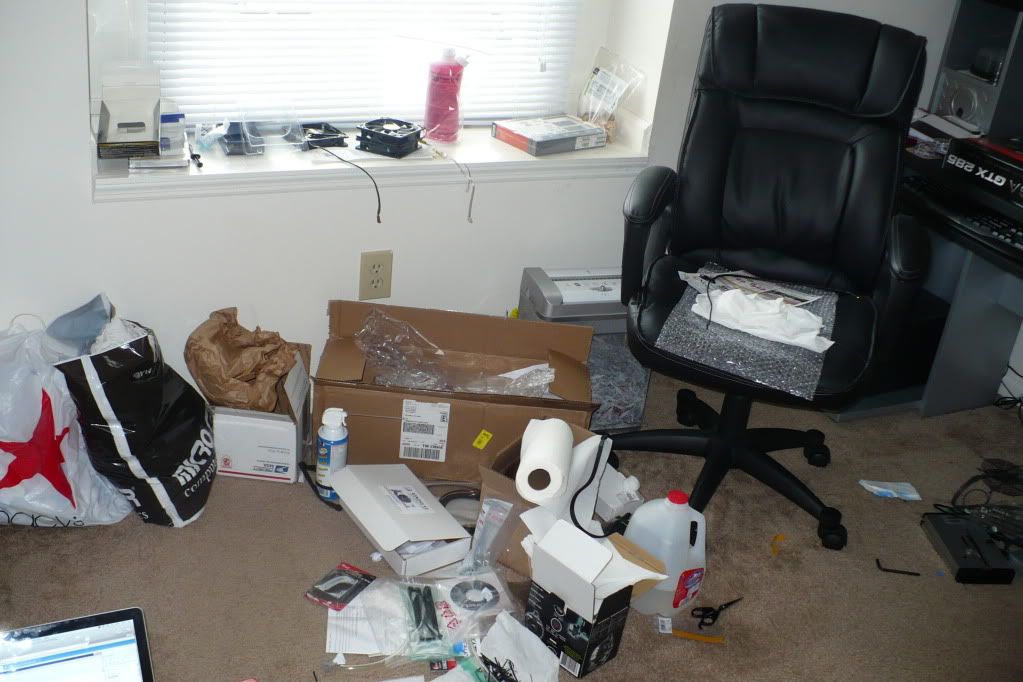
    Everything is ready except the case and fans, I'm expecting the case to be here tomorrow, i'll post pics from case soon.. I'll also be sleeving most of my cables


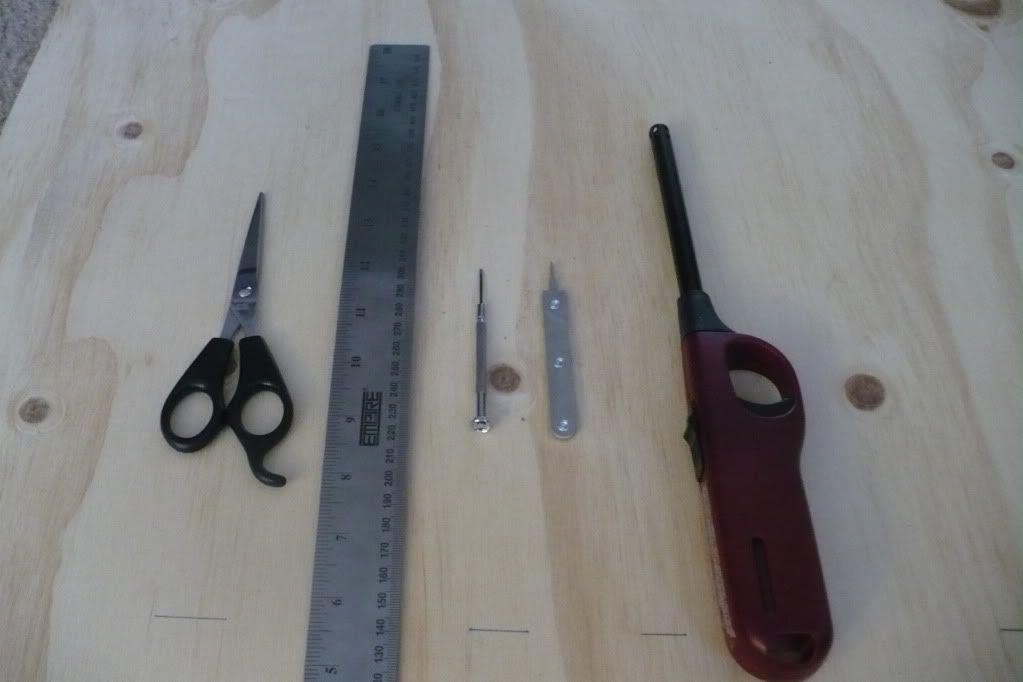
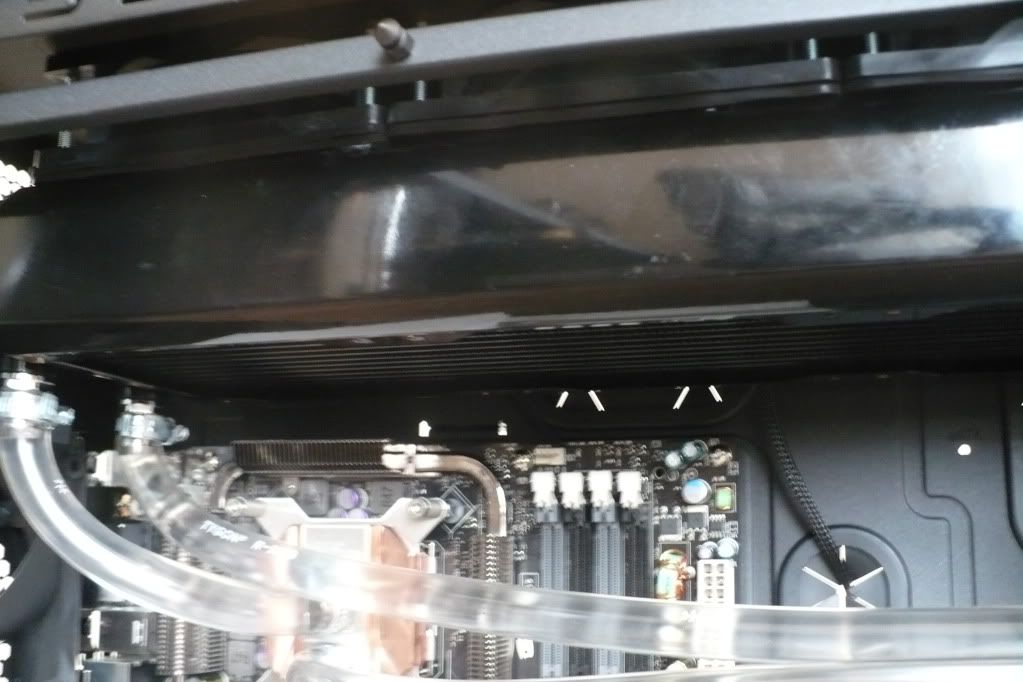
    Here are the pics from above hardware:
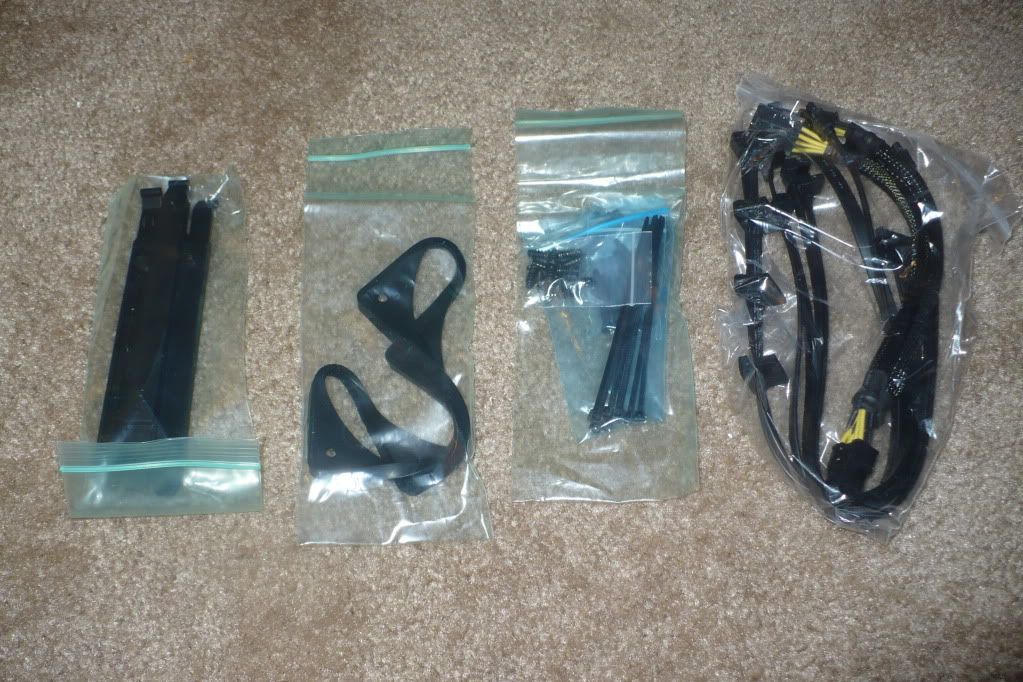
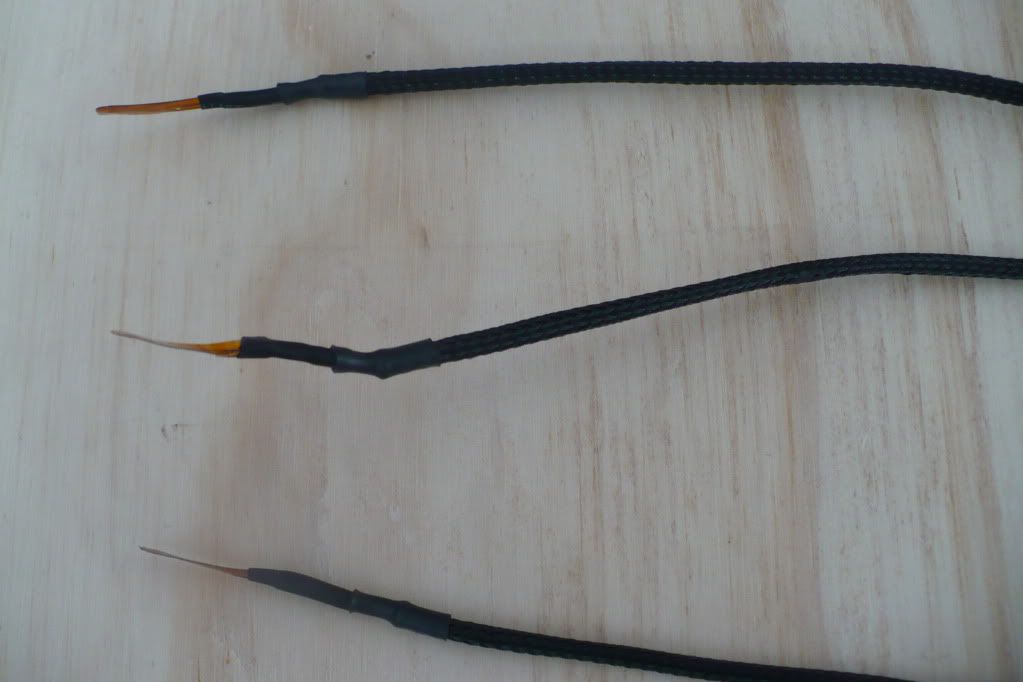
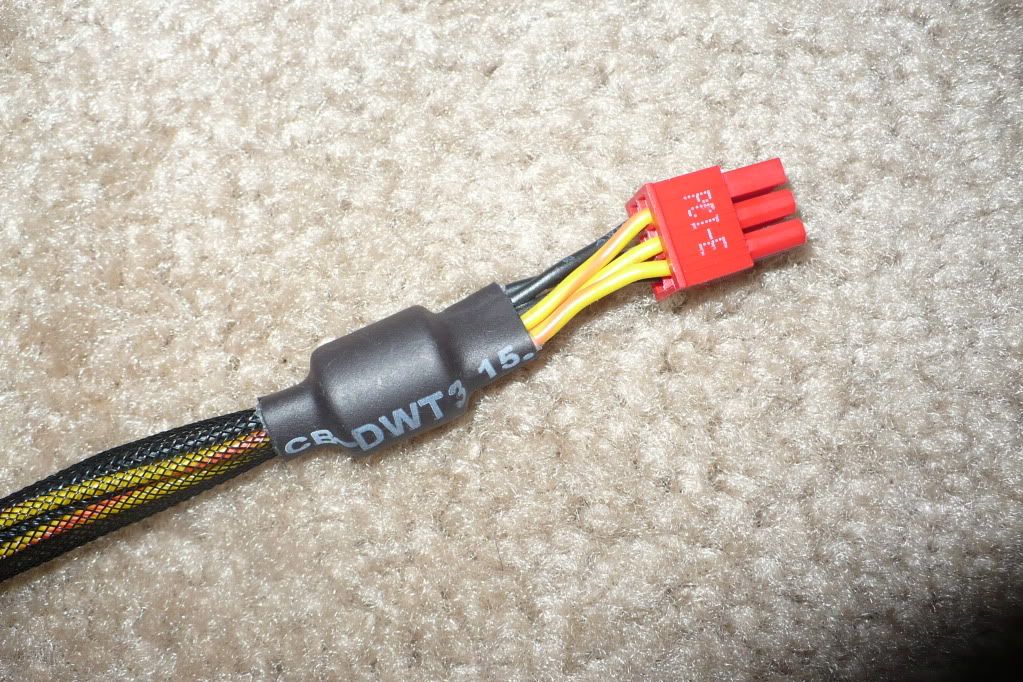
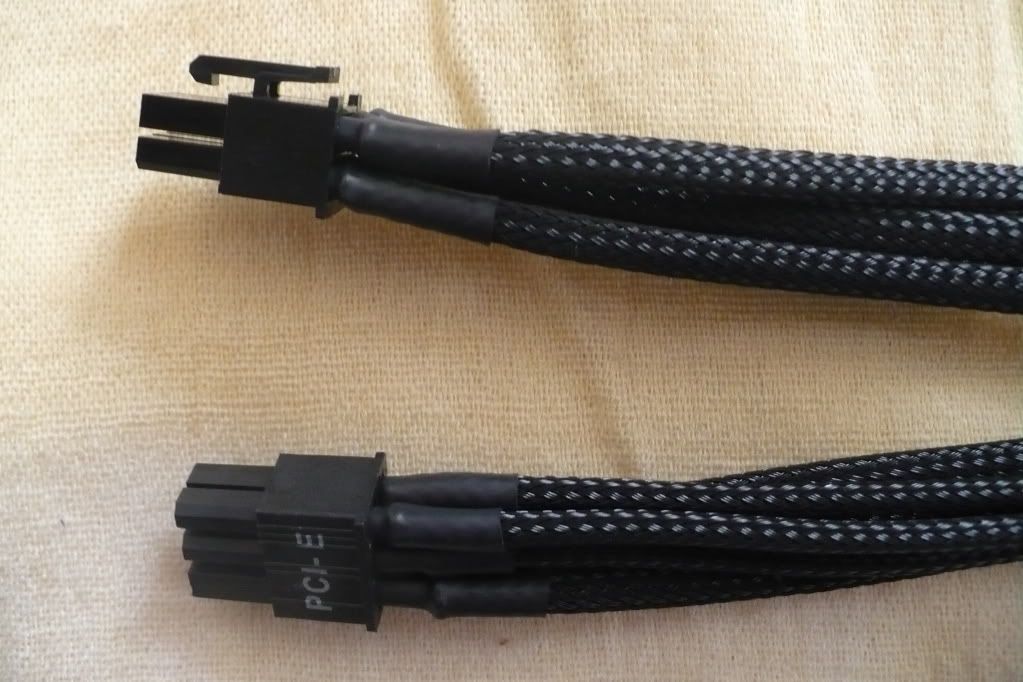


    cable sleeving gear


    Thats its for today, guys let me know if something doesn't look right

  2. #2
    I am Xtreme
    Join Date
    Dec 2008
    Location
    France
    Posts
    9,060
    Quote Originally Posted by badboyze View Post
    Thats its for today, guys let me know if something doesn't look right
    Your cable management sure as hell doesn't!
    But doesn't matter, lets see how your new project turns out, good luck!
    Donate to XS forums
    Quote Originally Posted by jayhall0315 View Post
    If you are really extreme, you never let informed facts or the scientific method hold you back from your journey to the wrong answer.

  3. #3
    Registered User
    Join Date
    Aug 2009
    Location
    Columbus, OH
    Posts
    39
    Quote Originally Posted by zalbard View Post
    Your cable management sure as hell doesn't!
    But doesn't matter, lets see how your new project turns out, good luck!
    Yup, cosmos s is a great case but.. cable management is not easy
    It looks like a bird's nest eh

  4. #4
    Registered User
    Join Date
    Aug 2009
    Location
    Columbus, OH
    Posts
    39

    Thumbs up Got some updates

    Yay! got my case today, believe me guys its huge
    everything looked good except a small paint chip/scratch on the front aluminum panel.


    paint chip/scratch .. damn you UPS


    obsidian goodies


    5-1/4" drive rails need to dremel'd to get T3 in, also have to figure out screw positions on this.. T3 has very weird screw socket locations


    Front bezel removed ..


    Hot swap drive bays also safe


    Radiator prep'd with vinegar and then distilled water


    Some cable sleeving in progress..
    This is the first time i have ever tried cable sleeving, final result looks fantastic and definitely take lots of time and you need tons of patience
    But hey its worth it


    i'm not sleeving two pci-e cables because i don't want to disturb the ferrite ring


    HK3.0 mounted and did some quick test for pci hole alignment..
    gtx 285's holes aligned with little effort but my wifi card never did


    Mounted T3 .. its wasn't easy to figure out screw holes and i did some drilling .. I think primochill did a ver bad job while designing this part of the res.. other than that its a really good res and bleeds air really fast

    Leak testing in progress..

    Loop1 : T3->Gtx 360 (rad) -> HK 3.0 (cpu blk) -> T3
    Loop2 : T3->Gtx 285 SLI -> T3


    Got some more air to bleed


    GTX 360 rad was easy to mount, just needed the right screws which are almost impossible to find in US because it uses M4 screws(metric)
    luckily sears hardware came in handy


    scythe kaze server in action


    More updates soon..

  5. #5
    Registered User
    Join Date
    Aug 2009
    Location
    Columbus, OH
    Posts
    39

    Quick update on leak testing..

    T3 barbs started leaking in no time it was just dripping ..
    Replaced all 4 with bitspower barbs and it looks good for now..
    If it happens again i'll replace the stock o-rings with #9 O-rings (Thanks to vapor and millertime for sharing all the secrets of T3 )
    Last edited by badboyze; 09-27-2009 at 08:32 AM.

  6. #6
    Moderator
    Join Date
    Aug 2007
    Location
    Back and forth between Florida and Maine
    Posts
    4,097
    Looking forward to seeing what you do with the Obsidian case.

  7. #7
    Xtreme Member
    Join Date
    Sep 2008
    Location
    Belguim
    Posts
    344
    sweet
    going to follow this
    proud to be from Belguim ^^

    Lightpainting and hardware are my life!

  8. #8
    Xtreme Guru
    Join Date
    May 2009
    Location
    Southfield, MI
    Posts
    4,128
    Yea, the T3 is a bit of a pain to install on those tool less drive bays. Are you getting a faceplate for it? The black one would look really sweet with that case.

    The more i see it, the more I like this case. Show some photos of the backside. I am curios how good the cable management really is.
    Project Millertime: The Core I5 build

    Crunching/folding box on air: AMD Athlon X2 7750 Black Edition; Sapphire Radeon HD 4830; Gigabyte MA78GM-US2H; Lian Li PC-V351; Windows 7 RC

  9. #9
    Xtreme Member
    Join Date
    May 2009
    Location
    Ireland
    Posts
    145
    looking good man!

    but why not have mounted the radiator the other way i,e the inlet/outlet at the front (near to reservoir)..would have looked neater imo

    also, you stated for loop2 ''T3->Gtx 285 SLI -> T3'' ...no rad?
    CPU:Q6600 @ 3.6Ghz (4.05GHz for bench)
    CASE: Corsair Obsidian 800D
    RAM:4GB OCZ SLi RAM @ 800 Mhz 5-4-4-15
    MOBO:EVGA 780i SLi MB
    GPU:Sapphire 5870
    PSU:Corsair HX850
    RAM COOLING: Dominator Airflow RAM Cooler
    HDD1:WD raptor 150 Gb 10,000 RPM
    HDD2:Samsung 500GB 7,200 RPM
    Monitor:LG 24" Flatron W2452T
    OS:Windows 7 Ultimate 64bit
    RAD:Thermochill Pa120.3
    CPU BLOCK:Swiftech GTZ
    PUMP:Laing DDC 12V 18w Pump With XSPC Top
    RES: EK 150 Res

  10. #10
    Xtreme Member
    Join Date
    Oct 2008
    Location
    London, England
    Posts
    110
    looking good.
    one question. the mdpc-x tool for removing cables. How well does it work? I just am unsure about spending the money on it, when it might be rubbish.


    Quote Originally Posted by nikhsub1 View Post
    Unfortunately some think that having uber high flow rates will increase the size of their penis.

  11. #11
    Xtreme Member
    Join Date
    Jul 2009
    Posts
    315
    Looking great. I can't wait to see more with the case. I was originally planning on that case

    [Project] Lateralus
    ------------------
    Intel i7 920 DO @4.2gz /H20
    EVGA Classified 760 /H20
    EVGA GTX275 715/1600 /H20
    6gb Corsair Dominator CL7
    Auzentech X-fi Forte
    Intel X25-M G2 80gb
    WD Black 1TB
    Corsair 1000HX
    Custom Silverstone TJ07

  12. #12
    Registered User
    Join Date
    Aug 2009
    Location
    Columbus, OH
    Posts
    39

    Thumbs up

    Quote Originally Posted by shazza View Post
    Looking forward to seeing what you do with the Obsidian case.
    This will be a dual loop (technically single) coz i will be using the T3, i'm noob to watercooling so please tell me if i'm doing something wrong

    Quote Originally Posted by nigelke View Post
    sweet
    going to follow this
    Thanks following nigelke .. updates soon

    Quote Originally Posted by millertime359 View Post
    Yea, the T3 is a bit of a pain to install on those tool less drive bays. Are you getting a faceplate for it? The black one would look really sweet with that case.
    The more i see it, the more I like this case. Show some photos of the backside. I am curios how good the cable management really is.
    Yes I spent almost 2-3hrs to get this thing mounted but it looks awesome!! at the end .. Yes i'm definitely going to get the face plate but right now running kinda low on vitamin M so may be next month.. I have a question about the face plate though, when i mount it we have to make sure it is flush with the front panel right ? if yes i'll have to redo all over the hole drill alignment thing .. i'll include backside pics, cable management is easy in this case and we have enough room to hide the cables but i'm not a pro so the backside of my build doesn't look that good..

    Quote Originally Posted by Welshman666 View Post
    looking good man!

    but why not have mounted the radiator the other way i,e the inlet/outlet at the front (near to reservoir)..would have looked neater imo

    also, you stated for loop2 ''T3->Gtx 285 SLI -> T3'' ...no rad?
    welshman thanks for all your kind comments, i thought about mounting the rad the other way but i liked it the way i mounted imo..
    yes i'm using only one rad in this setup because it is single loop technically ( because its the same coolant that flows between all the components)

    Quote Originally Posted by slamz View Post
    looking good.
    one question. the mdpc-x tool for removing cables. How well does it work? I just am unsure about spending the money on it, when it might be rubbish.
    slamz - I purchased ATX pin removal tool from PPCs http://www.performance-pcs.com/catal...roducts_id=894
    This tool works like a dream dude, as i said before this is the first time i sleeved my cables and i never thought that removing ATX cable pins is soo easy but you need to be very careful otherwise you will break the tips of this tool, YOU DONT HAVE TO APPLY too much pressure if you do you will break the pins of this tool.. and yes stay away from the sunbeam tool kit it is piece of @#$% just get this tool, molex(male+female) extractor (if you are planning on sleeving molex cables) and a precision screw driver..
    Good luck


    Quote Originally Posted by Armitage View Post
    Looking great. I can't wait to see more with the case. I was originally planning on that case
    Armitage - Thanks for your comments, I'm going to post updates soon.. Hope you like my build and convince yourself to buy the obsidian
    Last edited by badboyze; 09-28-2009 at 02:24 PM.

  13. #13
    Xtreme Guru
    Join Date
    May 2009
    Location
    Southfield, MI
    Posts
    4,128
    Quote Originally Posted by badboyze View Post
    Yes I spent almost 2-3hrs to get this thing mounted but it looks awesome!! at the end .. Yes i'm definitely going to get the face plate but right now running kinda low on vitamin M so may be next month.. I have a question about the face plate though, when i mount it we have to make sure it is flush with the front panel right ? if yes i'll have to redo all over the hole drill alignment thing .. i'll include backside pics, cable management is easy in this case and we have enough room to hide the cables but i'm not a pro so the backside of my build doesn't look that good..
    Yea, I had to get rid of those toolless locks on my Cosmos and drill the hole back slightly to fix. BoxGods didn't have any of these types of cases to play with when designing the T3. He does now though and will take it into account when he plans to take them into account on new designs.

    The faceplate does stick out slightly, so you will have to push it in a little further. Its worth it though. If you like the way the T3 looks now, get that faceplate on it. It really does set off the T3.

    I am really impressed with this case. I just got my Cosmos 1000 like 6 months ago. I'm in the same boat as you with money also, so will have to wait awhile, but it looks like an outstanding case. I was just wanting to see how well they setup the cable management. If there was plenty of space or not.

    Quote Originally Posted by slamz View Post
    looking good.
    one question. the mdpc-x tool for removing cables. How well does it work? I just am unsure about spending the money on it, when it might be rubbish.
    I got it and it is a great tool. You have to remember, Nils wouldn't sell trash. At least I hope not.
    Project Millertime: The Core I5 build

    Crunching/folding box on air: AMD Athlon X2 7750 Black Edition; Sapphire Radeon HD 4830; Gigabyte MA78GM-US2H; Lian Li PC-V351; Windows 7 RC

  14. #14
    Registered User
    Join Date
    Aug 2009
    Location
    Columbus, OH
    Posts
    39

    Thumbs up

    Been working on the build all over the weekend and busy but the good news is my build is almost done, just few things left..so here are the pics

    The mess that is covered all over my room
    i was so lazy in keeping this clean


    Ruined one of the tool less clip to mount T3, have to figure out if i can put the plastic clip over back again


    now for some hardcore stuff

    My loop is going to be blue(thats from the name azul)


    with the side cover on - Money shots


    Now look at back of the case..my cable management is not that good, but this case is really easy to deal with the CM..thanks to corsair


    and yes the side panel does close .. i know i cant remove cpu backplate now but hey i just bought HK 3.0 not for replacing

    beside the PSU


    wanna see how huge this case is ?


    thats it guys, i just love this case, only down side is weight it is very very heavy..

    Now questions ..

    1. How much blue dye do i have to mix, water in the tubes isn't getting the blue color but my res looks blue..

    2. I have mounted the panaflo's so that they push air in from out side.. problem is whenever i increase the speed more that 2200rpm the bottom intake fan stops literally .. i don't know how to fix this is it because of negative pressure ?

    3. CPU idle temps are around 39C and GPU idle temps are around 37C are these temps okay ? i have yet to run some performance tests and then i can determine the load temps

    Thats it guys..hope you guys liked it

  15. #15
    Registered User
    Join Date
    Jul 2009
    Location
    The Netherlands
    Posts
    93
    Quote Originally Posted by badboyze View Post
    3. CPU idle temps are around 39C and GPU idle temps are around 37C are these temps okay ? i have yet to run some performance tests and then i can determine the load temps
    Got an update on those load temps?
    Dutch techies visit www.geekswarm.nl

    Hardware: Antec P180b | Corsair HX850W | MSI P55-GD65 | Core i7 860 | 2*2GB Corsair Dominator PC12800 CL7 | Sapphire HD5870 + XFX HD5870 | OCZ Vertex 2 120GB|WD Caviar Black 1TB
    Cooling: Swiftech MCP355 + XSPC ResTop | ThermoChill Pa120.2 & TFC X-changer 120 | Swiftech Apogee XT | EK-FC5870 Acetal+Nickel | Tygon 3603 |Feser Ultra Pure + Corrosion blocker | 6*Scythe S-Flex F @ Scythe Kaze Master Ace

    Bench: DimasTech Easy 2.5 | MSI-P67A-GD65 | Intel Core i7 2600K | 2*4GB Corsair Vengeance PC12800 CL8 | 2* MSI R6950 CFX

  16. #16
    Registered User
    Join Date
    Aug 2009
    Location
    Columbus, OH
    Posts
    39
    Quote Originally Posted by millertime359 View Post
    Yea, I had to get rid of those toolless locks on my Cosmos and drill the hole back slightly to fix. BoxGods didn't have any of these types of cases to play with when designing the T3. He does now though and will take it into account when he plans to take them into account on new designs.

    The faceplate does stick out slightly, so you will have to push it in a little further. Its worth it though. If you like the way the T3 looks now, get that faceplate on it. It really does set off the T3.

    I am really impressed with this case. I just got my Cosmos 1000 like 6 months ago. I'm in the same boat as you with money also, so will have to wait awhile, but it looks like an outstanding case. I was just wanting to see how well they setup the cable management. If there was plenty of space or not.


    I got it and it is a great tool. You have to remember, Nils wouldn't sell trash. At least I hope not.
    Thanks millertime, i'll get the faceplate sometime next month .. excited to see how my T3 will look all pimped up

  17. #17
    Moderator
    Join Date
    Aug 2007
    Location
    Back and forth between Florida and Maine
    Posts
    4,097
    Great job on your first water cooling build, badboyze

    Not sure on the blue dye why you aren't getting the color in the tubing - guess you'll have to add a bit more dye. I assume it's not the kind that needs UV to appear darker ?


    For those interested in the Obsidian case, there's another build in progress here.

  18. #18
    Xtreme Guru
    Join Date
    May 2009
    Location
    Southfield, MI
    Posts
    4,128
    Nice, they give you a ton of room back there here. That does suck about the toolless drive. You might be able to cut that metal tab off and then use some double stick tape to put the piece of plastic back.

    I would honestly drop the coolant next drain and get some blue primochill tubing. Then install the blue LEDs on the T3. Check this:


    I tested it with one LED and it is sweet looking. I have to break mine back down to install this vario pump. Once I do, the LEDs are going in.
    Project Millertime: The Core I5 build

    Crunching/folding box on air: AMD Athlon X2 7750 Black Edition; Sapphire Radeon HD 4830; Gigabyte MA78GM-US2H; Lian Li PC-V351; Windows 7 RC

Tags for this Thread

Bookmarks

Bookmarks

Posting Permissions

  • You may not post new threads
  • You may not post replies
  • You may not post attachments
  • You may not edit your posts
  •