-
Xtreme Phase Change Insulation Guide
Prepping a motherboard for Phase Change Cooling.
What I will show here is what I do basically for bench and 24/7 use. There are as many different ways to do this as there are benchers tho.
The main thing I like to keep in consideration is ease of clean up in case you need to do a RMA, so I prefer to keep things as clean as possible. I no longer use nail polish or grease anymore. Some might prefer the added security of grease and nail polish tho. Now depending on where you live and what types of condensation you get you very well might want to add grease and nail polish to your setup, so that is up to you. You will see that I use Blue Shop Towel in several places to help wick up any moisture that may form.
When I am using a bench setup I use the F1 mountings to mount the Evaps with, this gives me flexibility to switch out to LN2 if I decided to. But for 24/7 use inside a case I use different mounts.
What you see here is what I have done and used for some time now. When I ran my QX9770 on a 790i Ultra with Phase 24/7 mounted inside a TJ07 this setup stayed dry and did not give me any issues what so ever.
You can modify what I do here to whatever you decide to do to fit whatever mods or other case considerations you please. So do not take what I have shown as the only way to do things.
Everything I show here I was inspired by loc.o and his first post about using art eraser on LN2 setups. He gave me great inspiration on this  He does a great job on his setup and deserves full credit for his skill in prepping a board for LN2. I have just copied his techniques and adapted it to a Phase setup.
http://www.xtremesystems.org/forums/...d.php?t=201916
Also please keep in mind that depending on where you live you might have different condensation issues so adjust whatever you need to do to keep your equipment dry.
So let’s get started
I will start off with the Classified Motherboard for this and show the basic steps I take in prepping it for Phase Change Cooling. This is also how I prep just about any motherboard for the bench or 24/7 use.
Here is the basic list of materials I use for this.
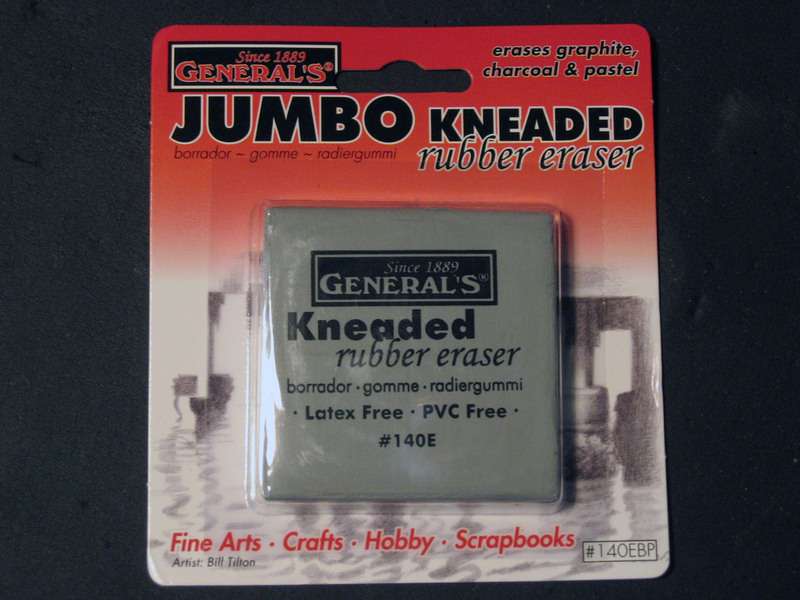
Art Eraser, Frost King & Blue Shop Towels.
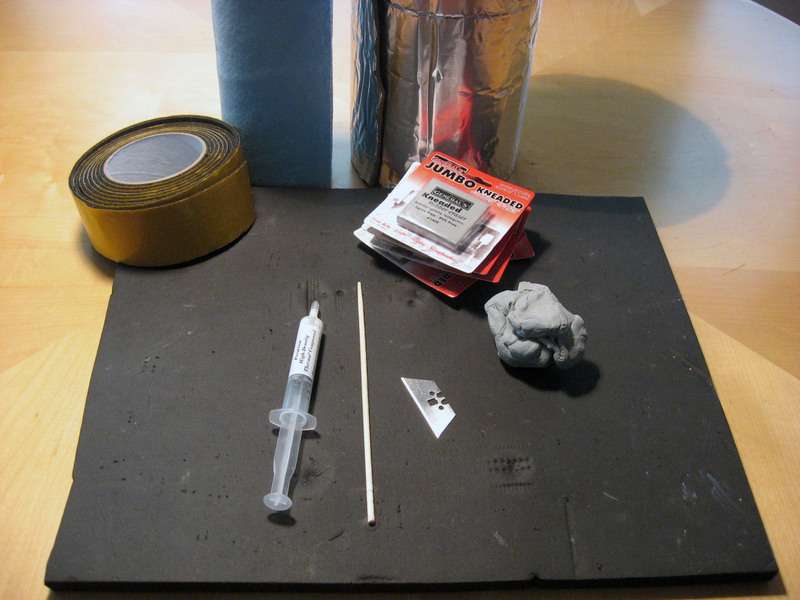
This is the brand of eraser I use. I usually get 8-10 of these to have extra on hand. You should only need 4-5 or so depending on motherboard etc.
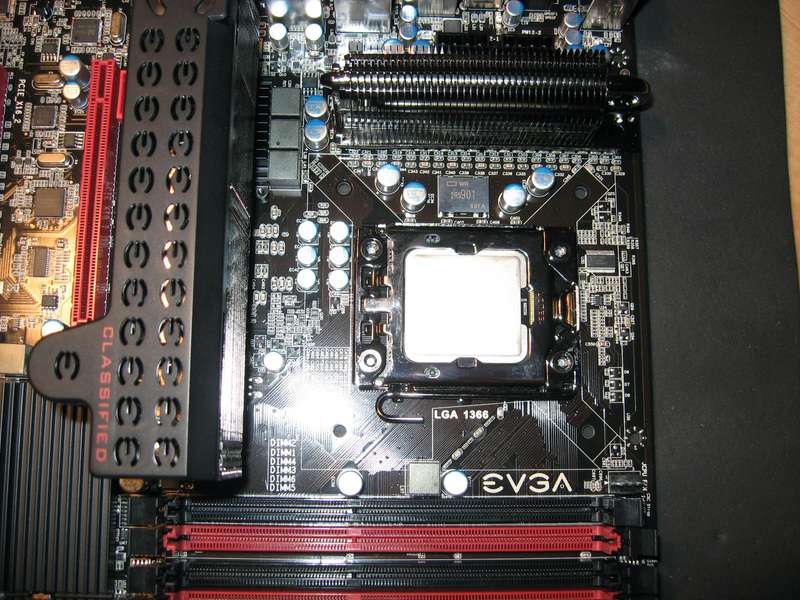
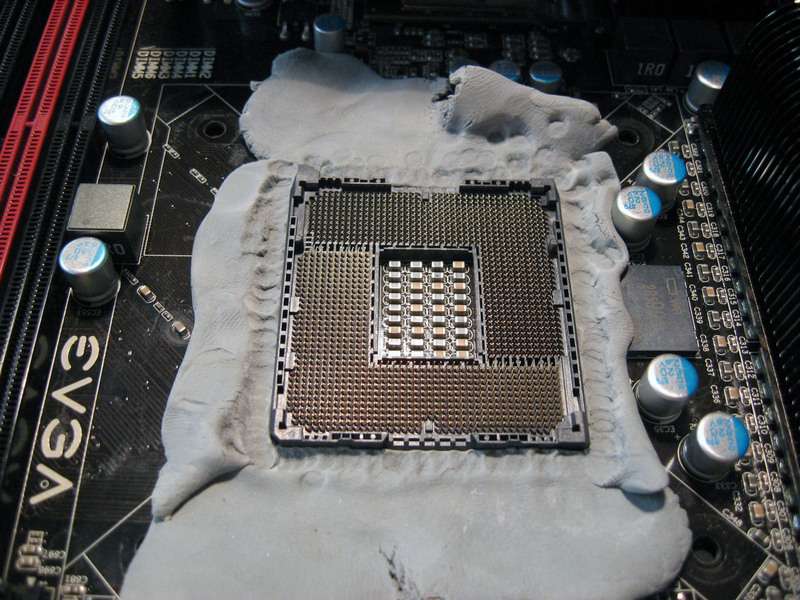
Here is the bare Classified CPU area that I will be working on and prepping for Phase Cooling on the bench. The 965XE has been installed.
I will start by adding art eraser to the area I show in the pic.
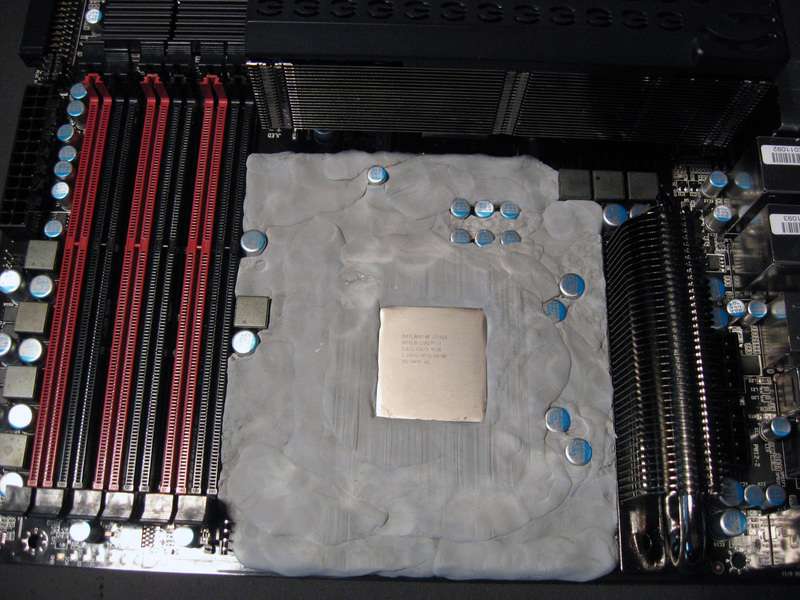
Taking the big chunk of art eraser I have and putting it in the micro wave for 20 seconds to soften it up and make it easier to apply to the board. I tear off small chucks and start filling in areas of the board. I used a wooden chop stick to help push the eraser into small area around caps and other places to be sure that I had a good seal around all items. The idea here is to not leave any air pockets and form a nice seal to keep out any air. Depending on the motherboard you may need to push the eraser inbetween caps and what not that are close to the CPU.
I filled the area up to the top of the CPU socket, then taking small chucks and flatten it up I layered the eraser right up to the top of the CPU, filling in all the areas around the top of the socket to seal it all in nice and tight.
This is what it looked like all finished up.
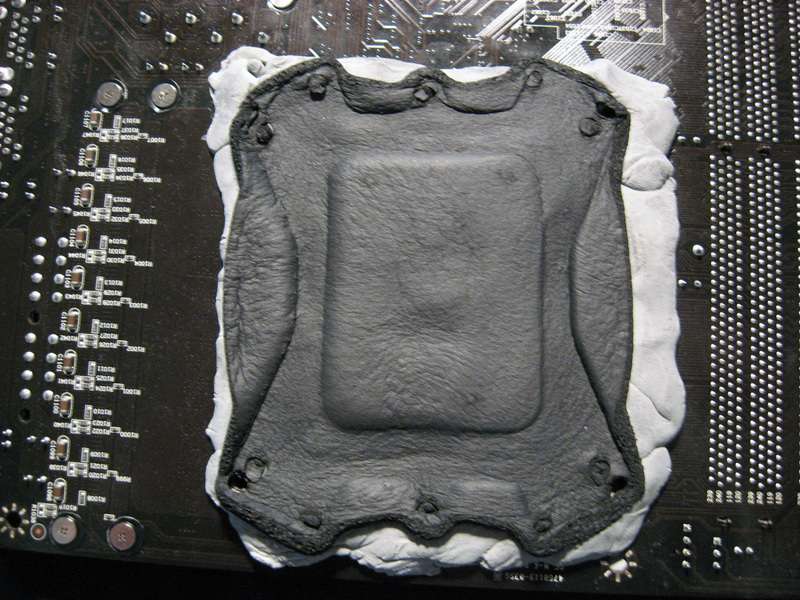
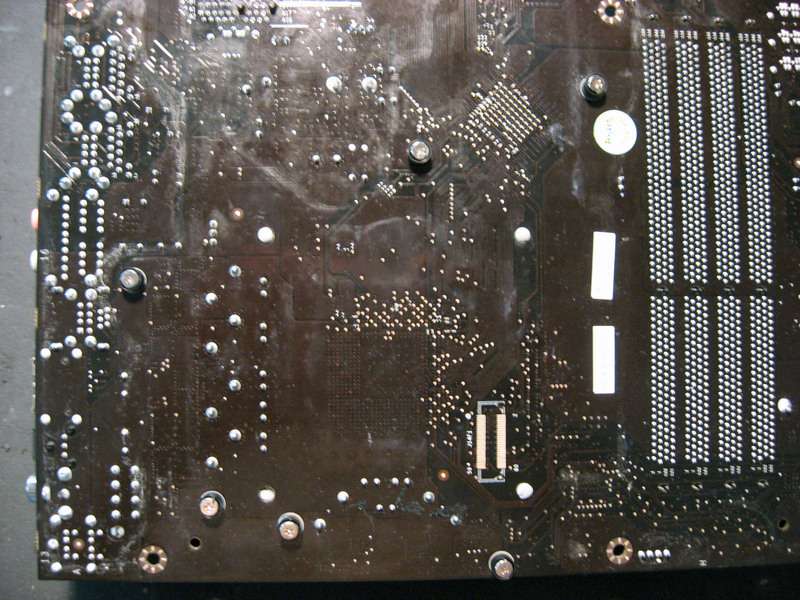
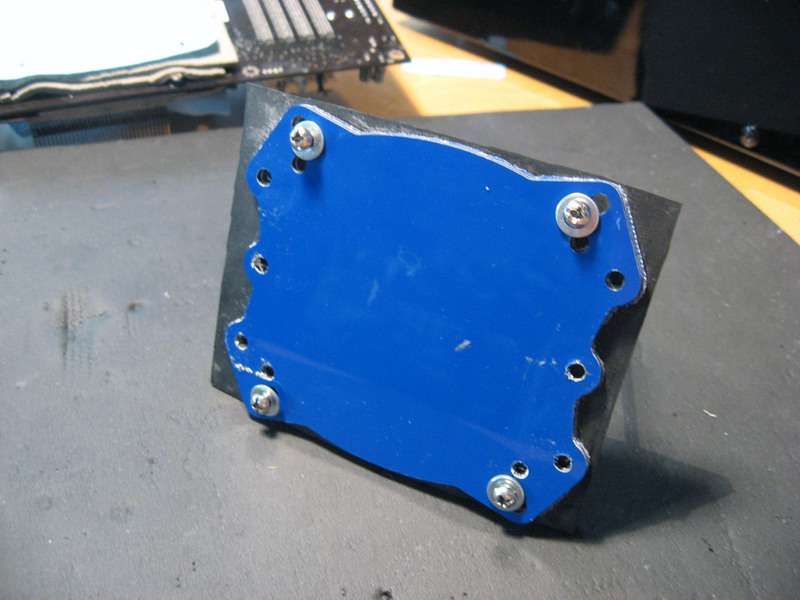
Now let’s take a look at the back side. As you can see there is that metal plate on the back which I will fill in the center hole with art eraser.

And I had a whole layer all ready to fit onto the back from the other X58 setup, so I just applied that whole thing. The black foam on the back kind of stuck to that patch of eraser so I kept it all in one piece. It looks fuggy but fits very well.
This patch has seen a lot of use as time has gone on and seen better days LOL. I used this very same patch at GOOC 2009 and it held just fine after 8+ hours of LN2 benching. It may not look pretty but it works just fine.
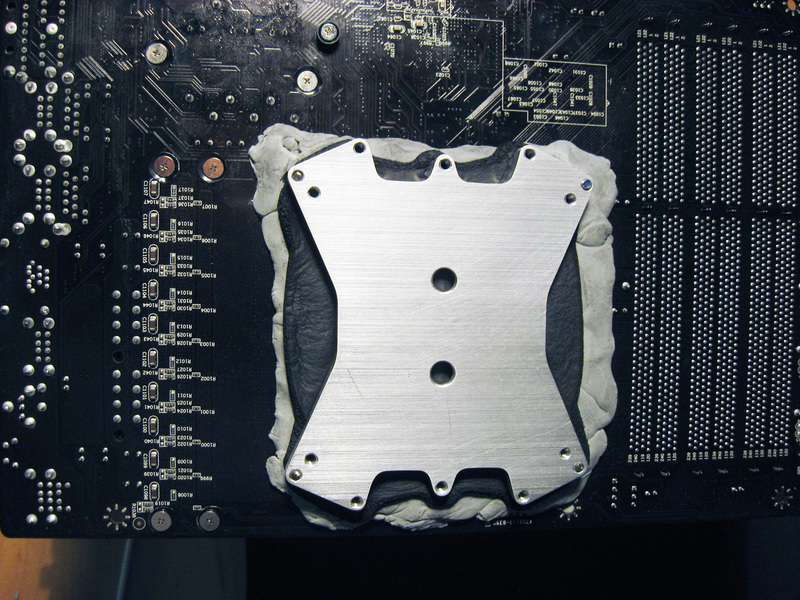
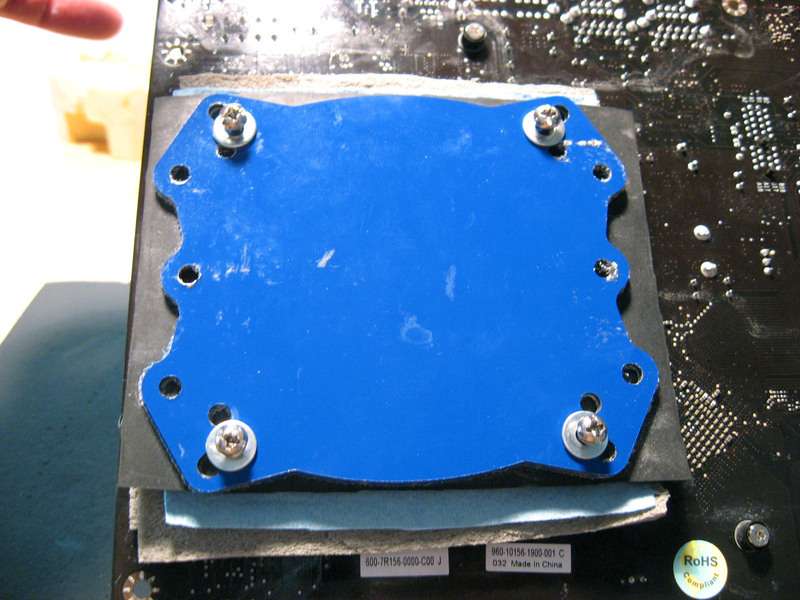
Using the wooden chop stick I punched some holes through all the eraser for the mounting screws.

As I often setup my bench so I can switch out to LN2 I will use the F1 mountings for all this.
The back plate, I know kind of fuggy looking. With this same setup on the other X58 and a bunch of LN2 runs this back side held very well with no problems.
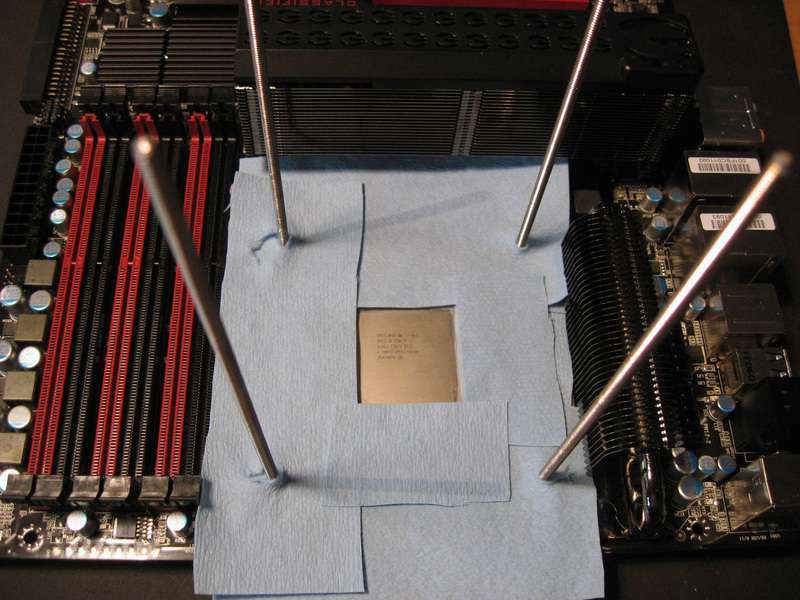
And the mounting screws installed.

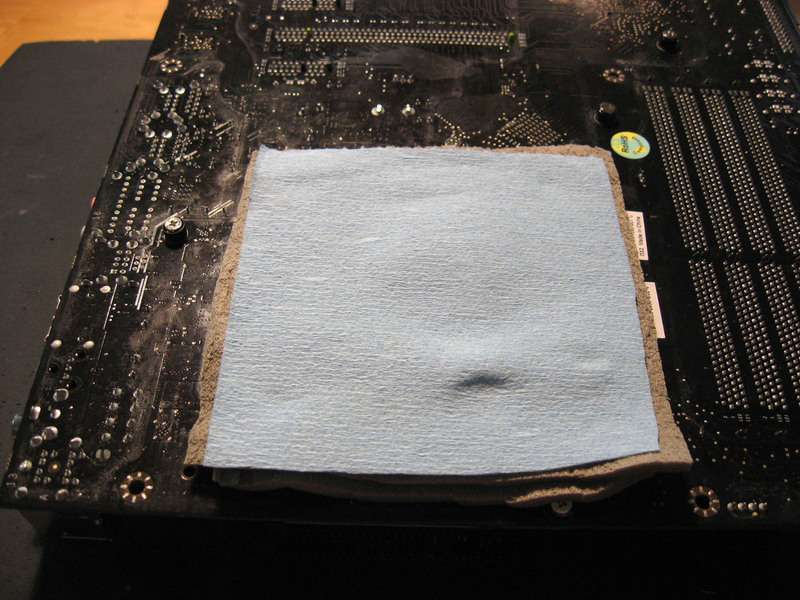
I laid two layers of shop towels around the mounting areas. This will help wick up any moisture that may form durning use.
And now the foam gasket installed. I have lots of pieces of this stuff, all used at one time or another.

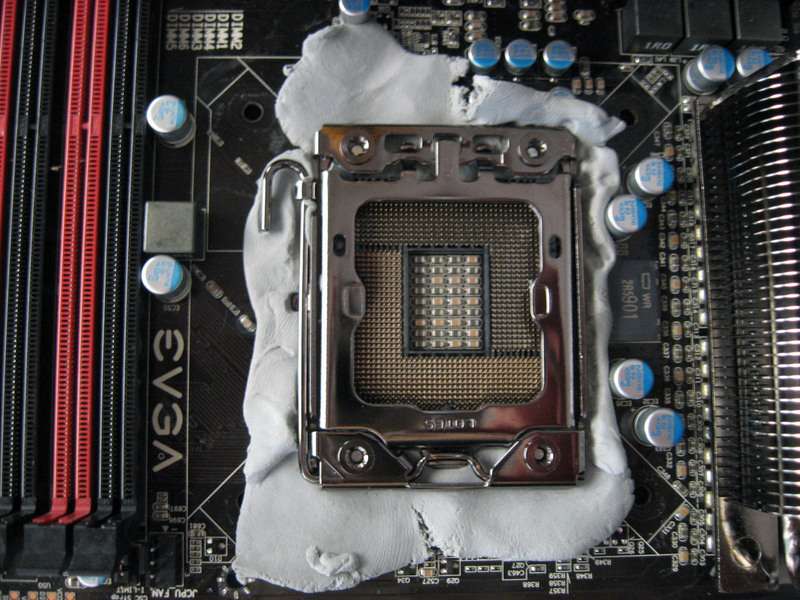
Ok lets mount that Evap !
Be careful here to not screw down the mounting screws really hard, this can cause issues with warpping the motherboard to much. You only really need to screw the mountings down for a good firm contact and pressure. If you need remove the mountings and check to be sure your TIM has good contact.
I use Ceramique for TIM and make a small pea shapped ball of TIM in the center of the CPU.
Some like to spread it all around or use larger amounts of TIM, apply the TIM as you normally would and things should work fine.


Here we go with the 9800gx2's and ARC-1231ML installed

Another option would be to take off the CPU hold down clamp assembly, that way there would be no metal plate on the back side. I would then do something like I show next.
Just a word of warning when doing this. Be very careful when working around the socket, the pins can be damaged very easly !
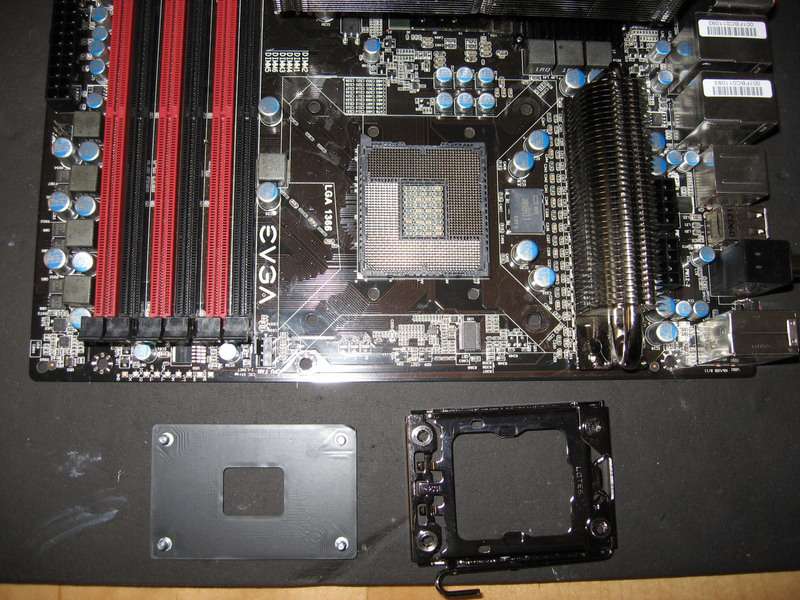
Here is the Classified with it's CPU hold down assembly removed. Use an allen wrench and unscrew the 4 screws on the top, they will not fall out as there is a screw socket on the ends of each screw. At this point I would install the CPU to protect the socket pins, I would do so in these pictures but all my CPU's are in use atm
Next take a thin layer of the eraser and apply all around the socket, I use the wooden chop stick to push the eraser in real tight and help make the layer thin.
I also screwed back the CPU hold down assembly and would finish up like I did in the beginning.
Ok how would I do this for mounting inside a case for 24/7 use.
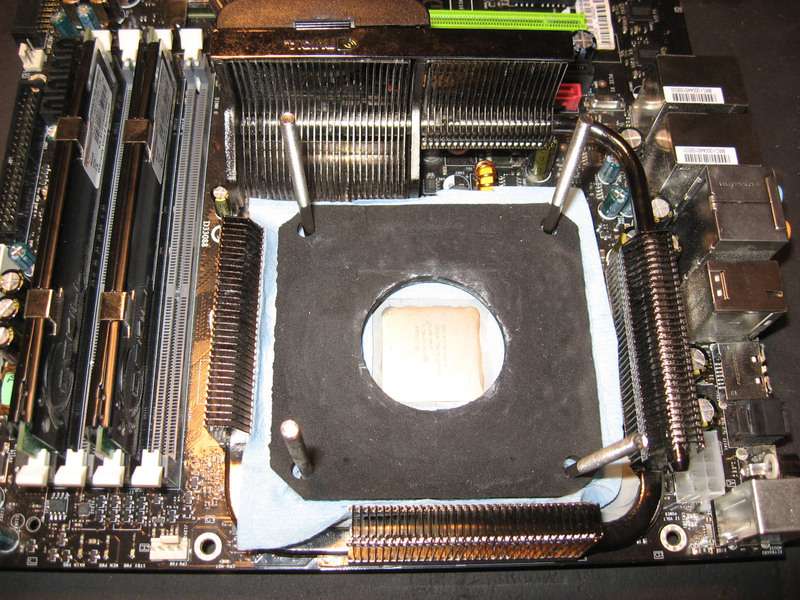
I would prep the top side of the motherboard just like I did above, but do the back side a bit different.
So here is the back side of a 790i Ultra
I add 2 layers of Frost King and a layer of Blue Shop Towel
Here I have a piece of neoprene and a back plate with screws going through to complete the back side mounting.
I would also like to add here that the blue back plate may not even be needed if you don't have one. Just get some large washers and use those instead. If you use too small of washer for that it could pull through the neoprene. When I was benching P4's and other older CPU's my back plates where in use on other setups I skipped the neoprene all together. I just used two layers of Frost King, mounting screws and wide plastic washers and it worked just fine.
And the screws going through the motherboard with the back plate assemble all installed.
Let’s take a look at the Evap and see how the clam shell is installed. There are many different Evap Clam Shells, or at least a few that I have seen. The one I use here is pretty common for the socket 775 CPU’s. There are different shells out there but they basically work the same.
Here we have bare Evap from my Chilly1 Phase unit.
Notice the temp probe is not fixed in place. I would not drill a hole into the Evap to mount the temp probe.
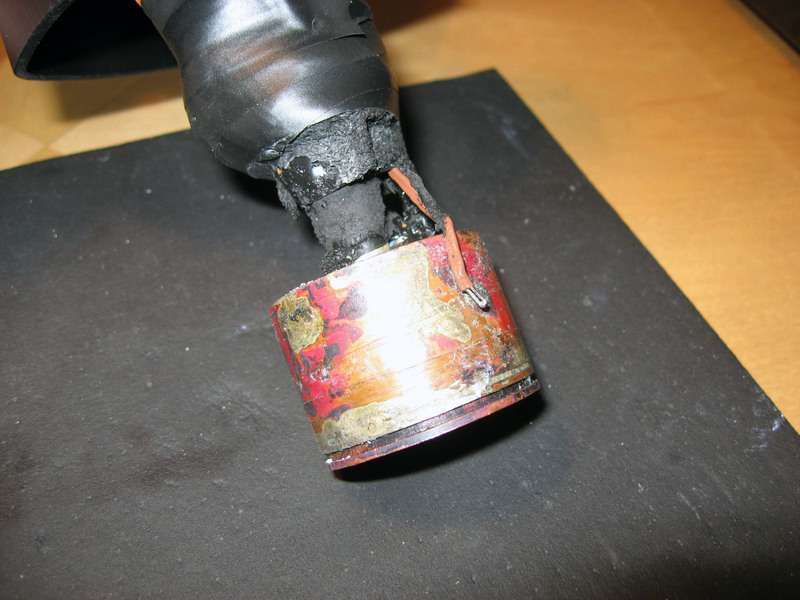
I use black electrical tape to hold the temp probe next to the Evap.
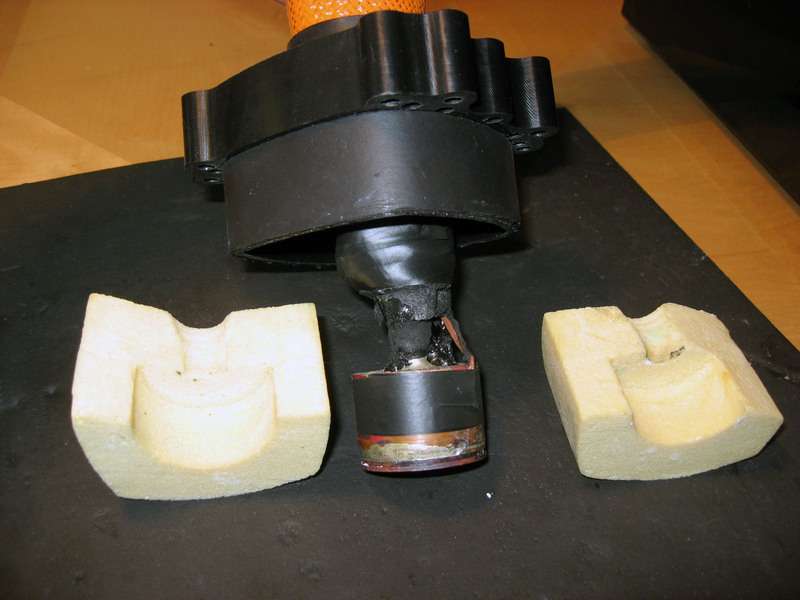
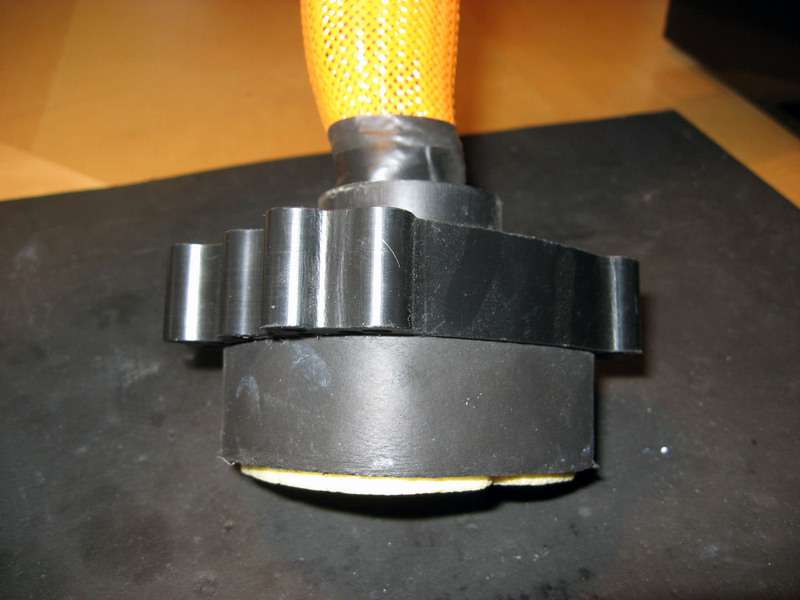
Next slide the Clam Shell to the back position and place the two halves of the Evap insulation blocks in place.
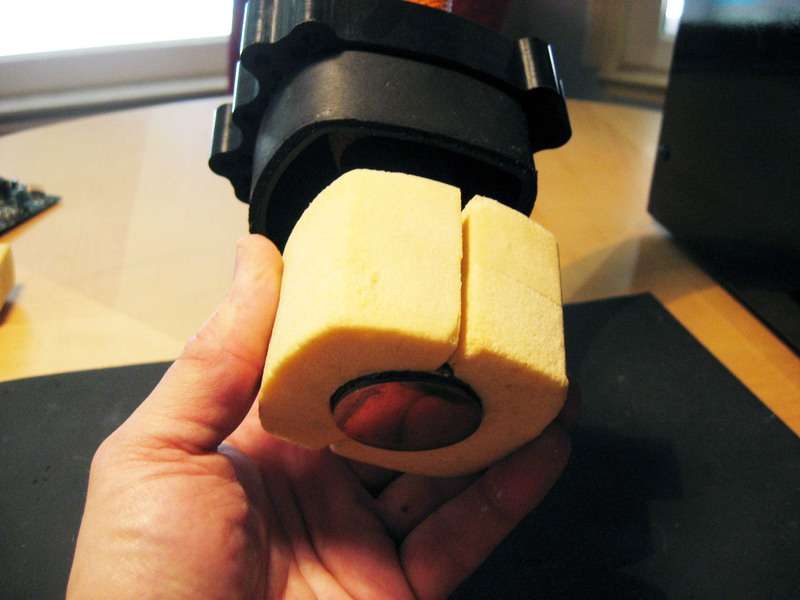
Then just slide the outer Evap Clam Shell over the insulation and your done. It should be a tight fit. I do not use a O-Ring at all as the Clam Shell fits pretty tight and does not move.
Note: The first few times I ran my Phase unit mounted inside my TJ07 and closed up for 24/7 use I would get condensation around the bottom area of the outer Clam Shell. So I wrapped Armaflex tape around this area and that solved this problem.
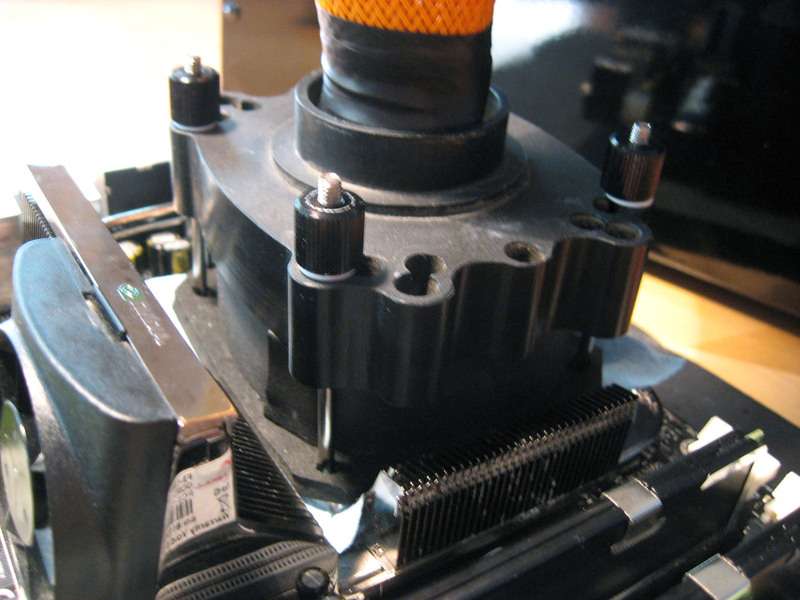
The 790i has been all prepped and ready to mount the Evap.
And here it is all mounted down.
Well there you go, I hope that some found it helpful. Don't be afraid to try different things to achive what ever you want to do with your build. Some of you guys who do builds with high quality like Murder Mods can clean this up a lot. Back when I first started doing Phase I used to send a great deal of time making sure everything was just right, but my builds just don't seem to stay that way for long as I am always changing stuff around.
Cascade users can pretty much do the same as I have shown above, they do get much colder than a SS Phase and might need to add extra insulation, use grease and nail polish. Someday when I have a Cascade I will update this
-
Absolutely awesome guide!
But shouldn't it be under vapour phase change cooling? Mind you I guess that the insulation techniques are the same for Ln2 as well. Maybe have a duplicate in phase change section?
 Posting Permissions
- You may not post new threads
- You may not post replies
- You may not post attachments
- You may not edit your posts
-
Forum Rules


 Reply With Quote

Bookmarks