

yea espeicaly when the ones I have are 7000 MCD from what I remeber :POriginally Posted by sniperbob

Ninja


yea espeicaly when the ones I have are 7000 MCD from what I remeber :P
Ninja
Computer Worklog (Scratch Build)- [Great Heights]
"Peace Is About Having A Bigger Stick Than The Other Guy"
Update
Well all is good, I was aloud to use the Milling Machine during lunch and the afternoon. SoI got 90% of the Milling done
Therefore drilling can start tomorrow which puts me well ahead of where I though I would beso I'm bout 2 weeks ahead which is always a nice though.
Should Have some pictures up sometime tonight.
Ninja
Computer Worklog (Scratch Build)- [Great Heights]
"Peace Is About Having A Bigger Stick Than The Other Guy"
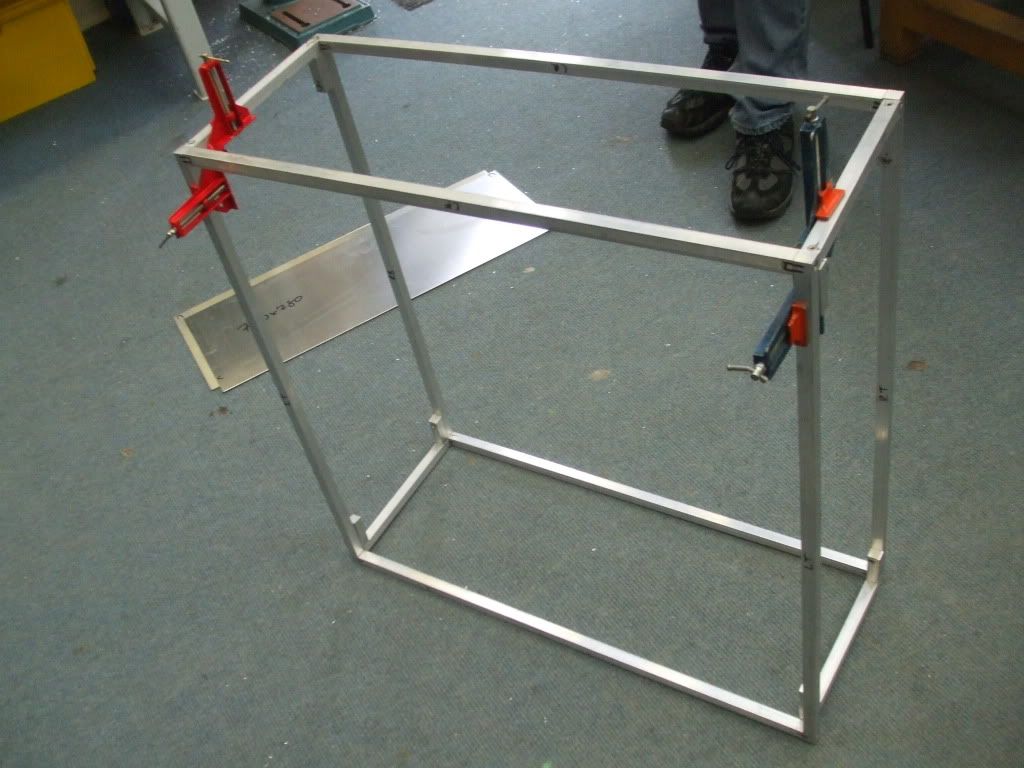
Well Here are the pictures from today hope you enjoy all my hard slaving away it took to do all this today :P :o
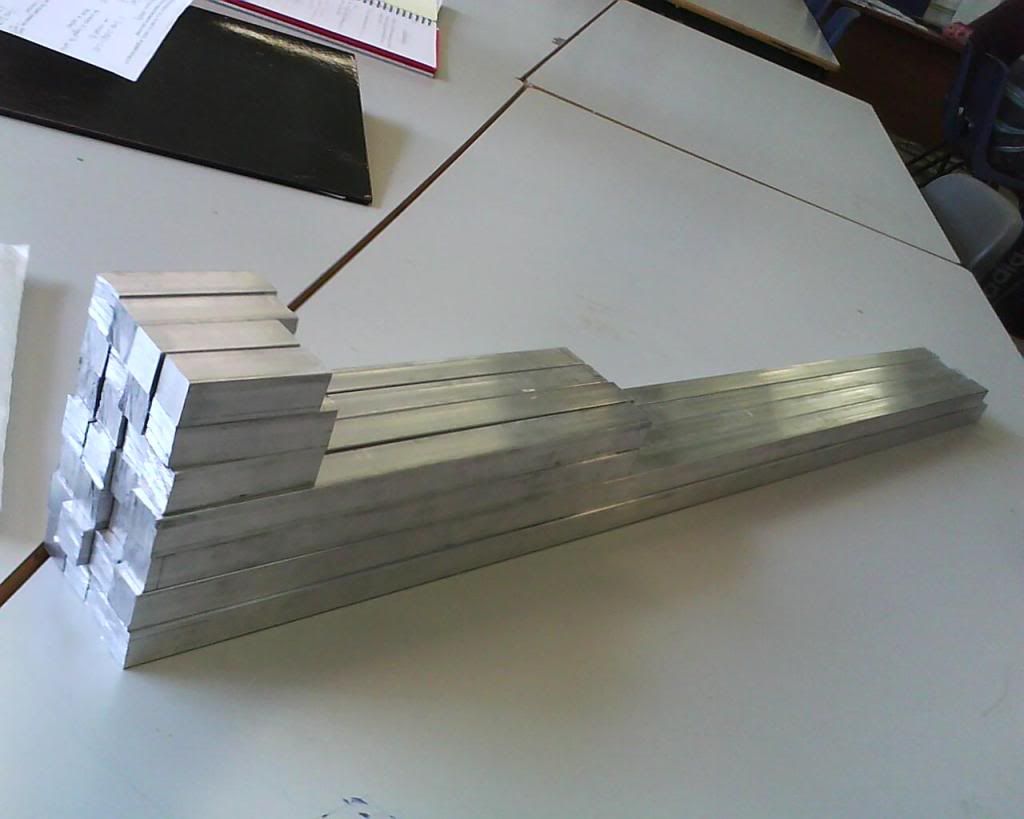
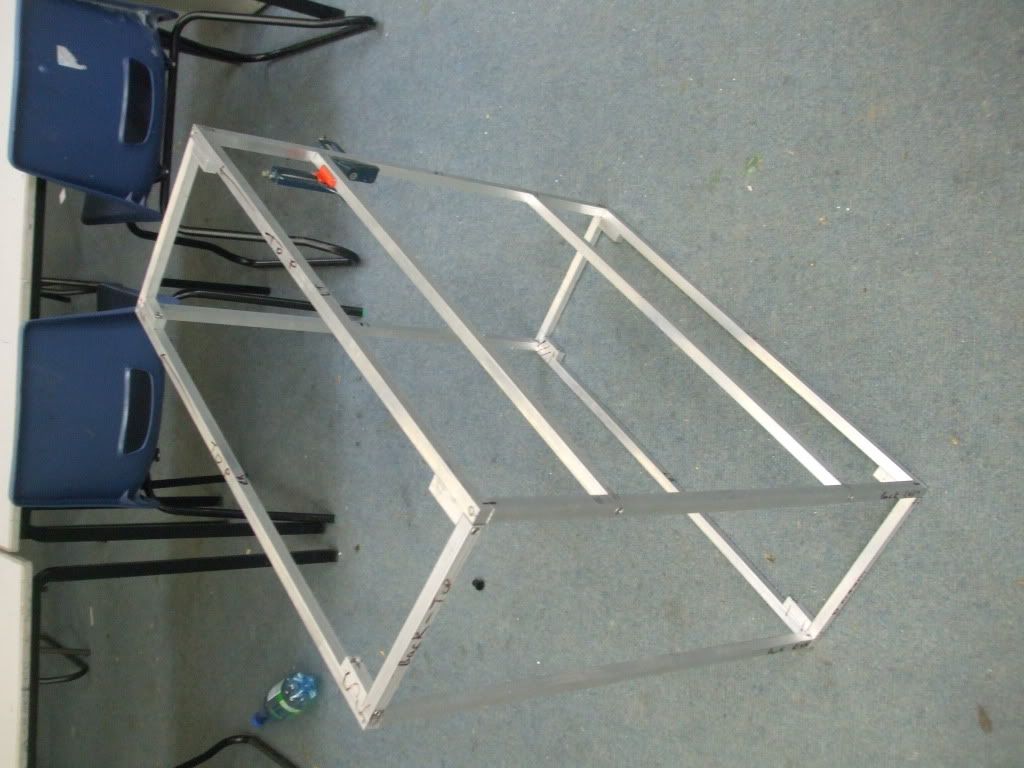
well all of the Bar's cut, all *bar*4, that I will cut later on:
Side View:
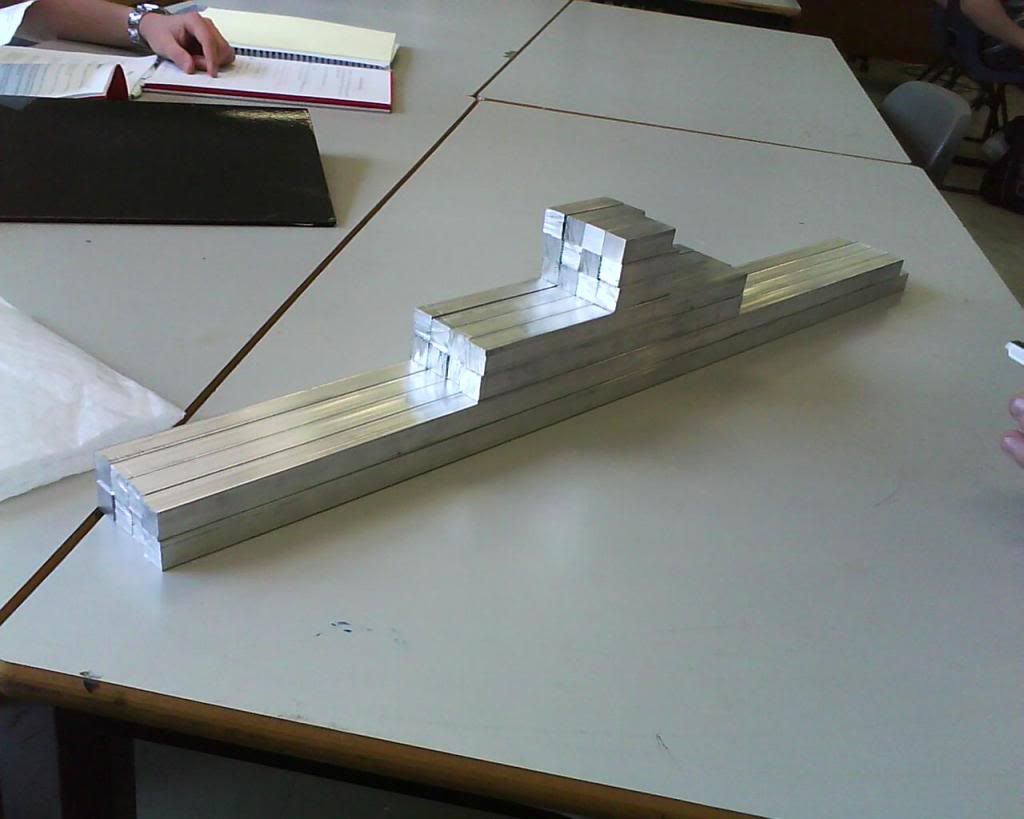
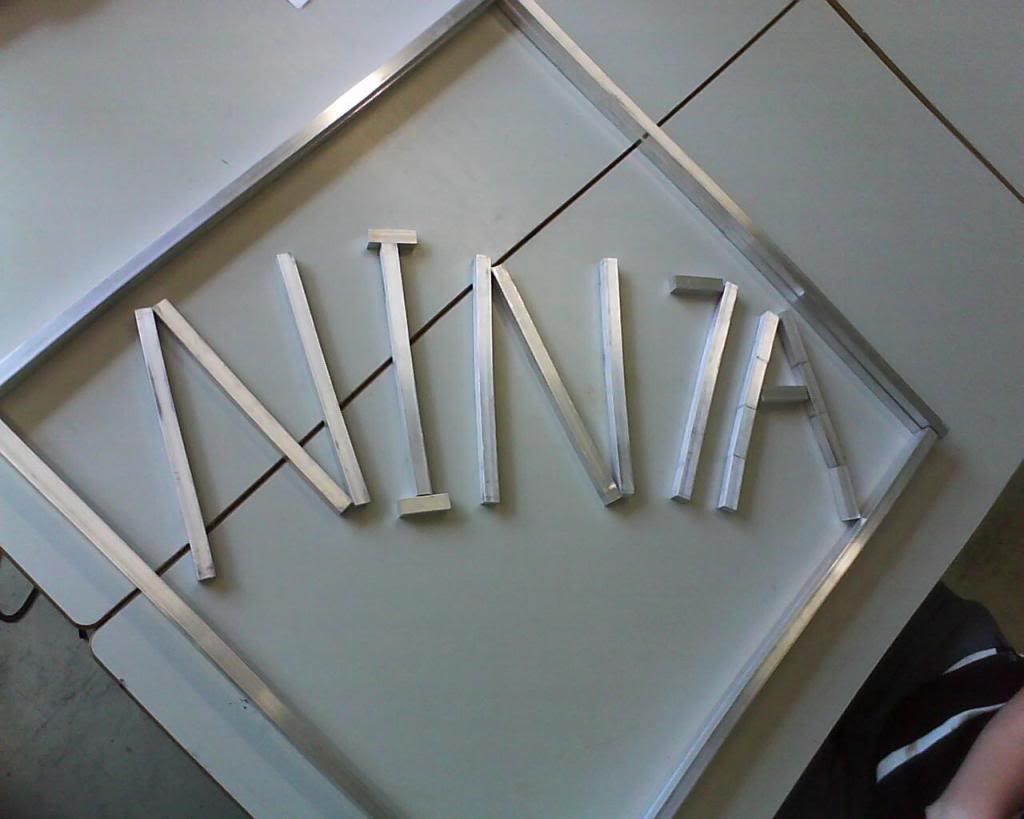
Here some pictures from when I got bored in my lesson :P
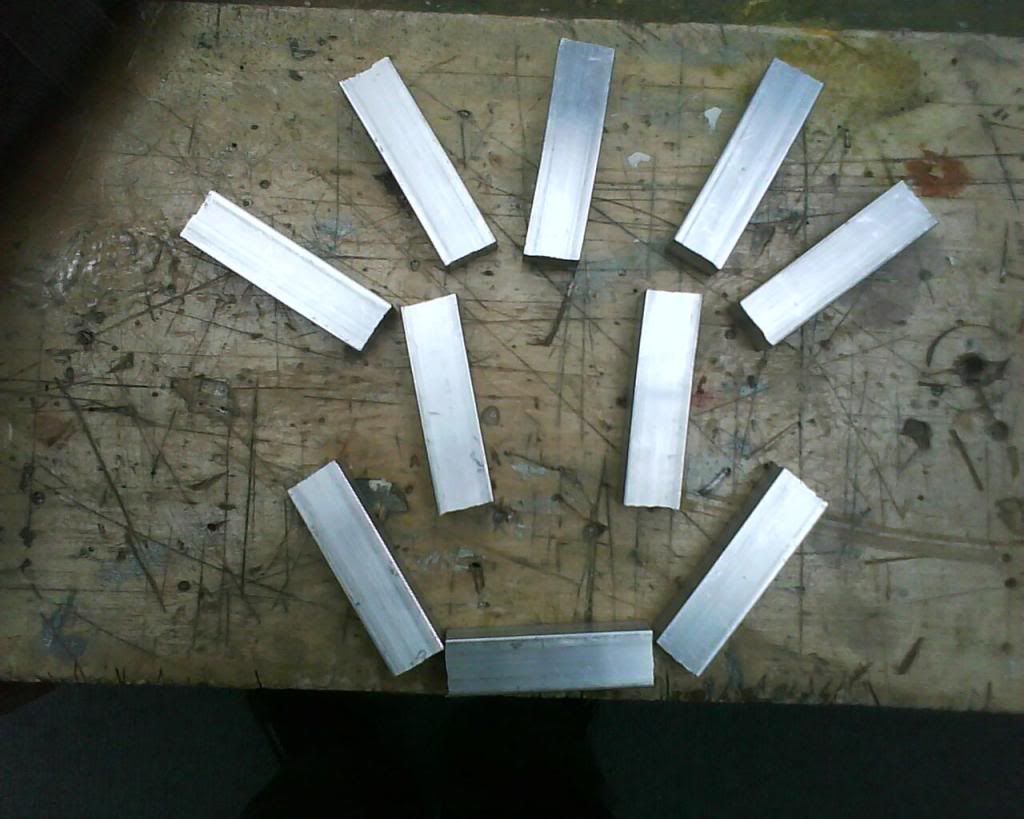
Pyramid View:
Steps View:
Couldnt Resist doing this
There was some reason behind this the square bars is roughly the size of the side panels
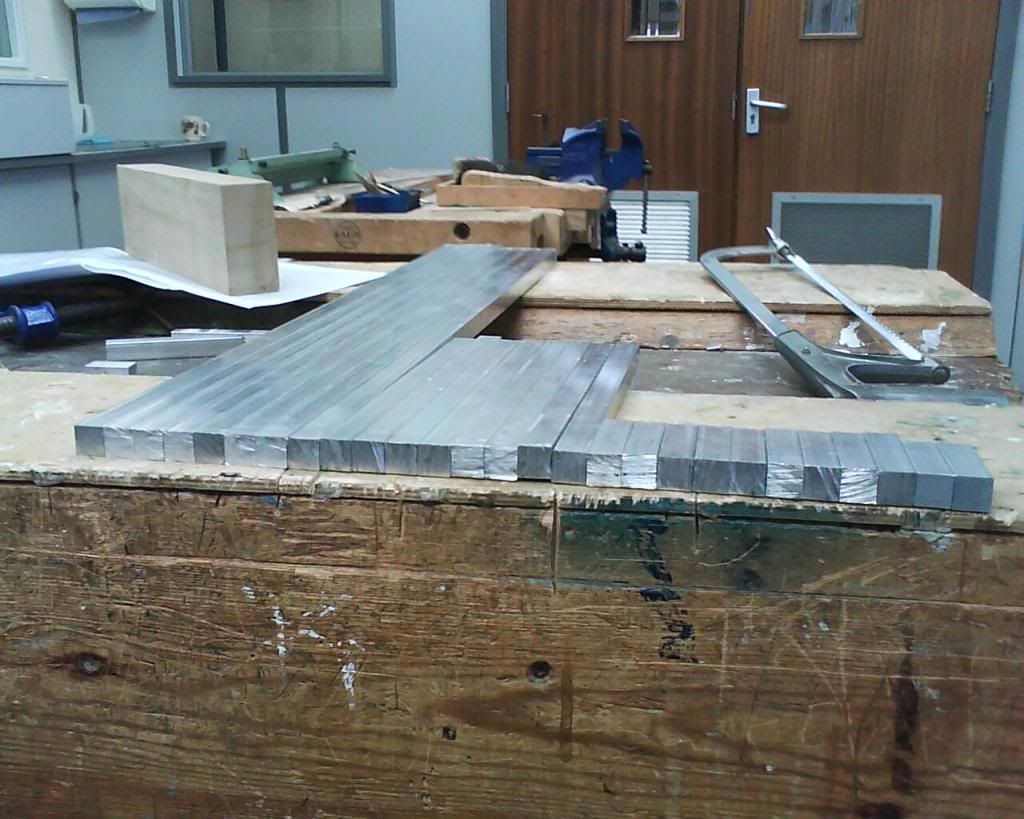
and finally the bars that still need to be Milled off:
Ninja
Computer Worklog (Scratch Build)- [Great Heights]
"Peace Is About Having A Bigger Stick Than The Other Guy"
Have you tried tapping with a drill press? My problem with doing it by hand is ensuring that everything is straight.
Nice job by the way!
Thankyou, can you explain a drill press ?
Ninja
Computer Worklog (Scratch Build)- [Great Heights]
"Peace Is About Having A Bigger Stick Than The Other Guy"
There are auto reversing heads that can be used; that activate when you pull out.
Case: Silverstone Raven RV01
CPU: Intel i7 920 with Swiftech Apogee GTZ
MOBO: EVGA E760 CLASSIFIED 1366 Intel X58 on water
MEM: CORSAIR Dominator GT 12GB (6 x 2GB) DDR3 2000
GPU: Custom Case Mod EVGA 9800GX2 with EK-FC9800 GX2 Nickel-Plated
HDD: 2x Raptor Xs in Raid 0 - XP Pro 32bit, 2x Raptor Xs in Raid 0 - Vista Ultimate 64bit
Audio: Creative Sound Blaster X-Fi Titanium Fatal1ty Professional
PSU: CORSAIR CMPSU-1000HX 1000W ATX
Radiator: Feser 240 (push and pull via S-flex Fs)
Pump: MCP655-B, EK D5 X-Top, Bitspower D5 Mod Kit
Reservoir: EK-BAY SPIN Reservoir
Tubing/Coolant: Tygon 1/2" ID, 3/4" OD, Feser One - UV Black
MON: Gateway 24 LCD
Work Log: Custom Project: Black Silverstone TJ-10
Work Log: Silverstone Raven
Flickr
Ahhh, I get you so basically does the tapping job for you, I'll ask at school see if there is one available
Ninja
Computer Worklog (Scratch Build)- [Great Heights]
"Peace Is About Having A Bigger Stick Than The Other Guy"
Anyway to an Update ***
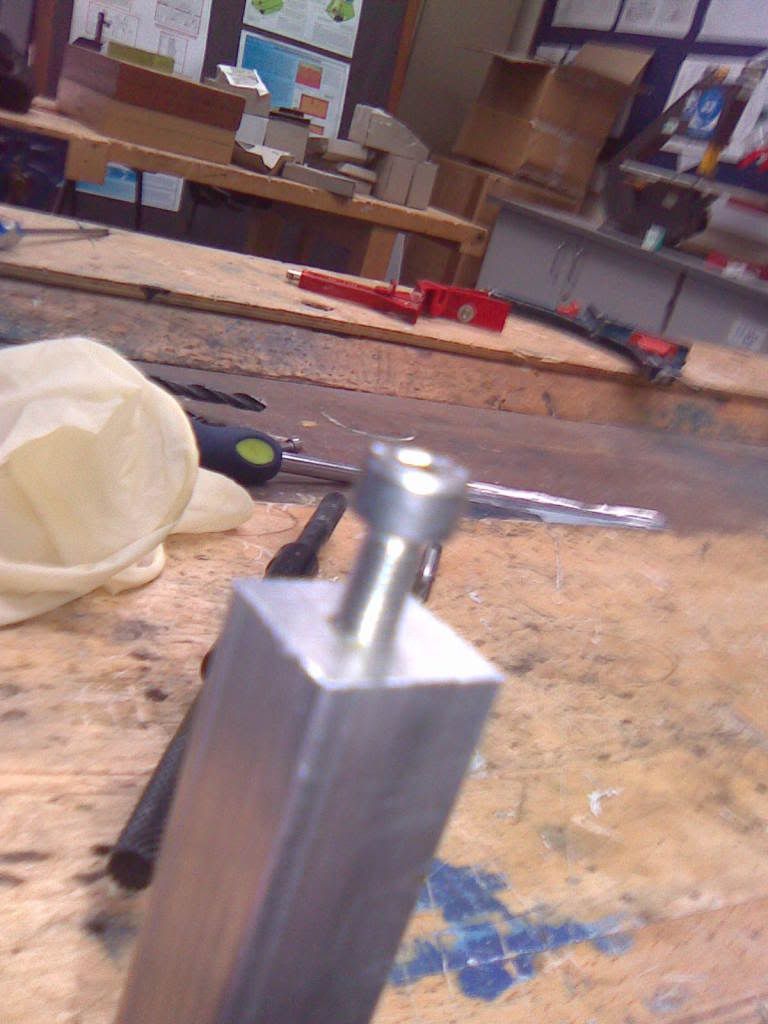
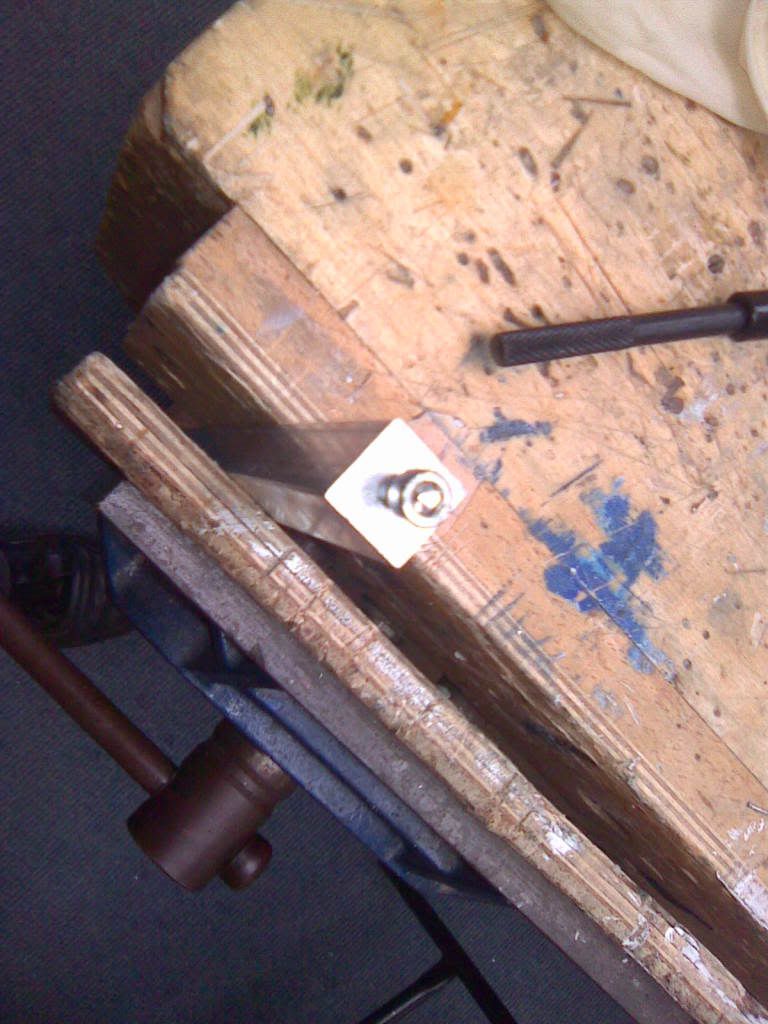
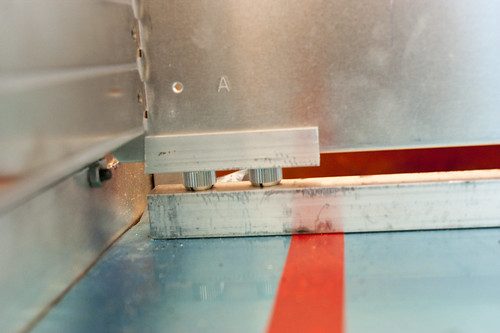
Well haven't worked on the case as its still at school :P however found some pictures from Friday when I made my first join/tap
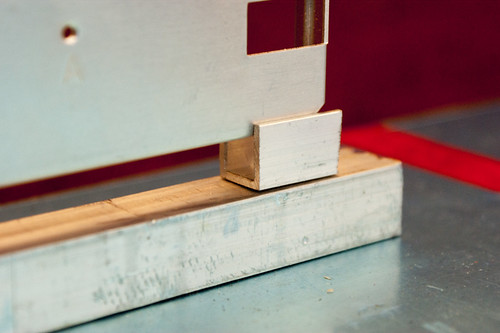
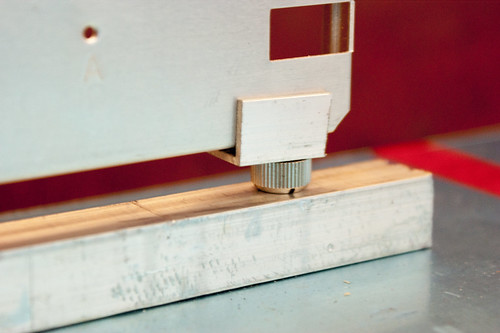
Checking the Bolt fits:
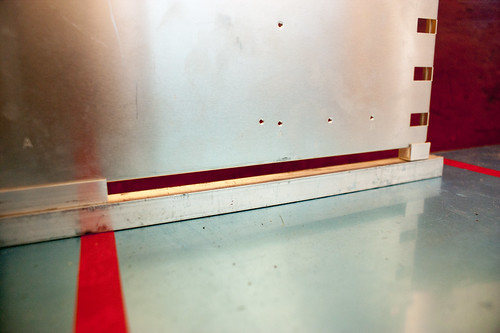
Final Shot Of The Bar In Place:
Side View Of Bar In Place:
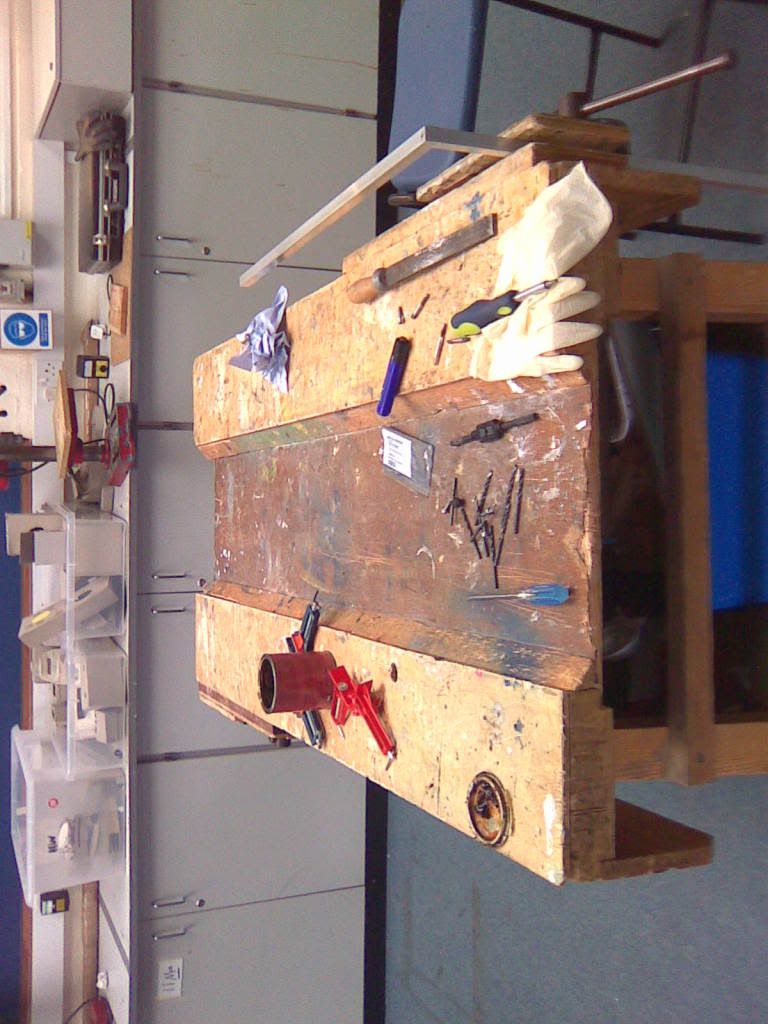
My Workstation for that lunch
Many Thanks
Ninja
Computer Worklog (Scratch Build)- [Great Heights]
"Peace Is About Having A Bigger Stick Than The Other Guy"
Update ***
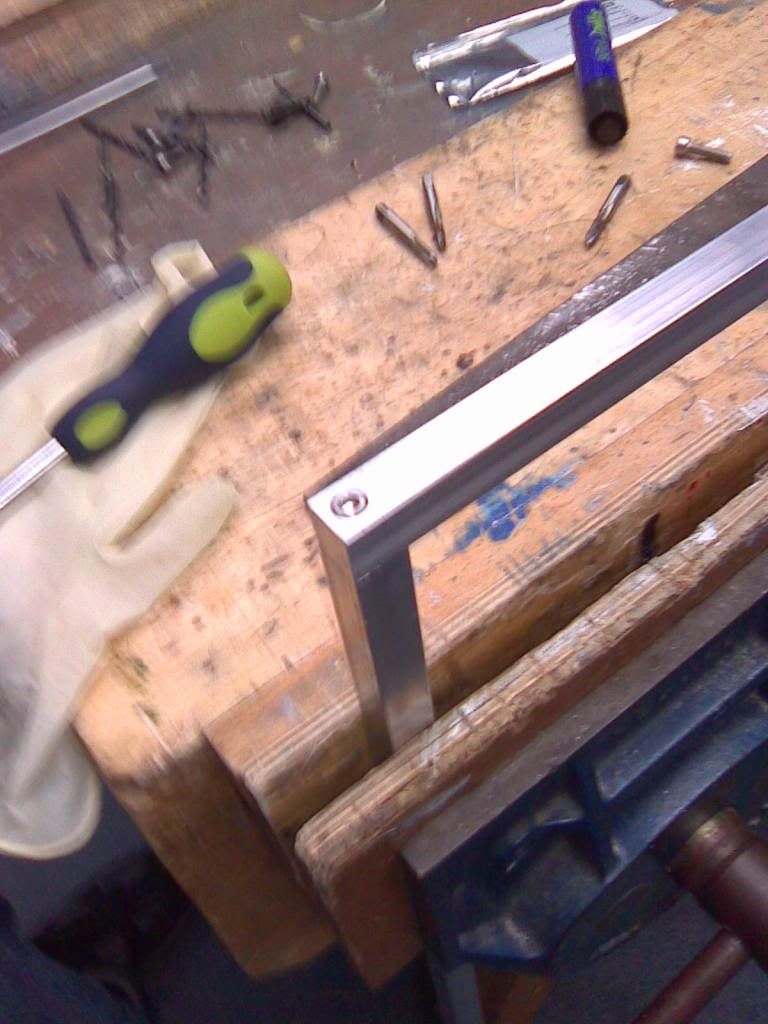
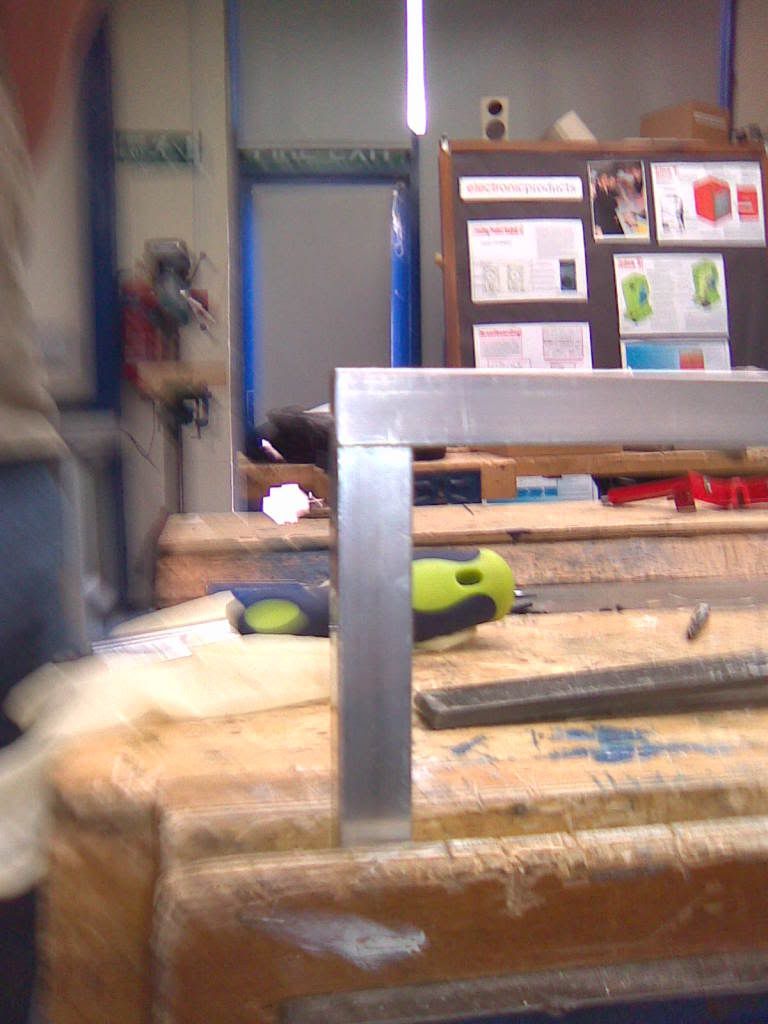
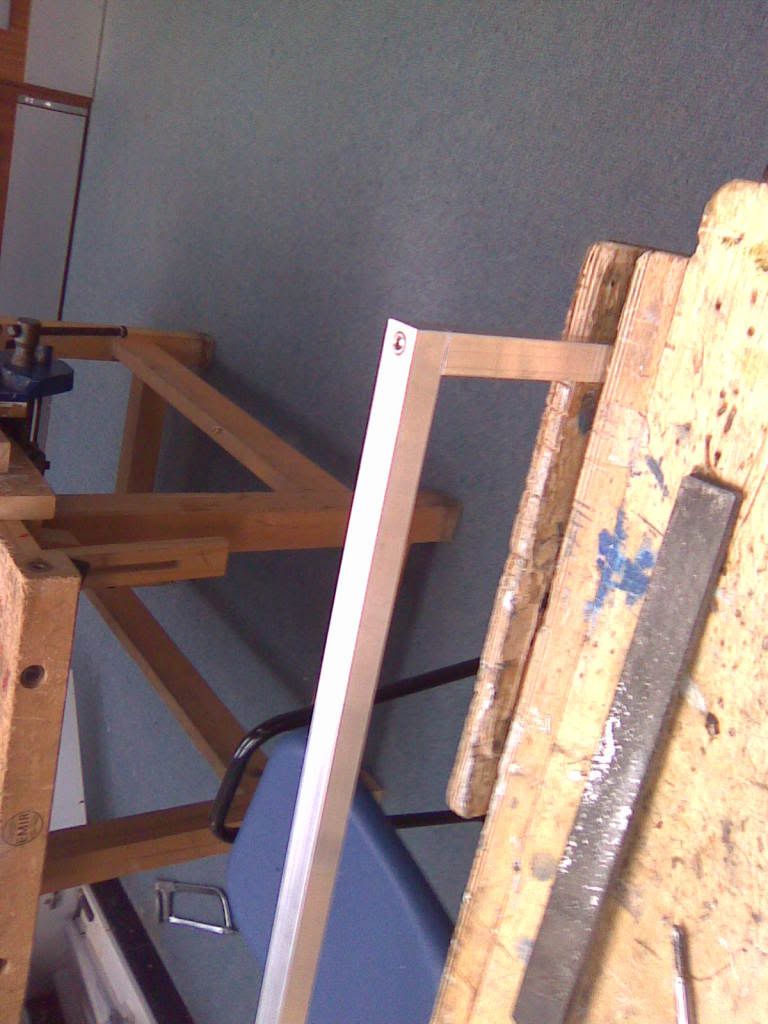
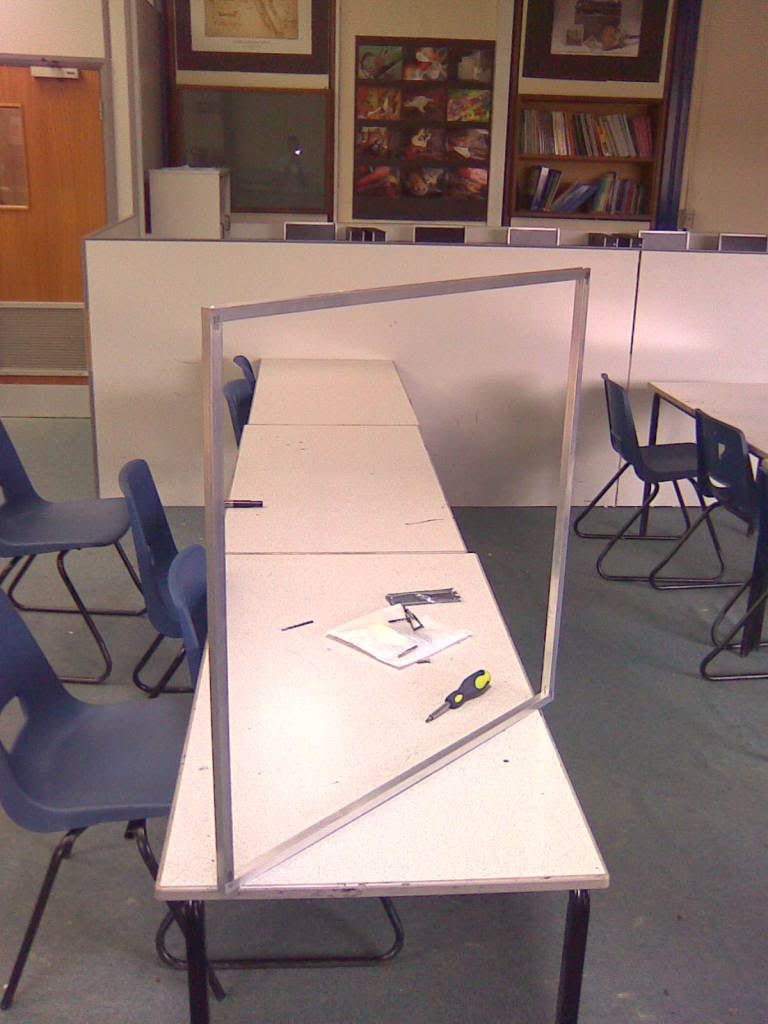
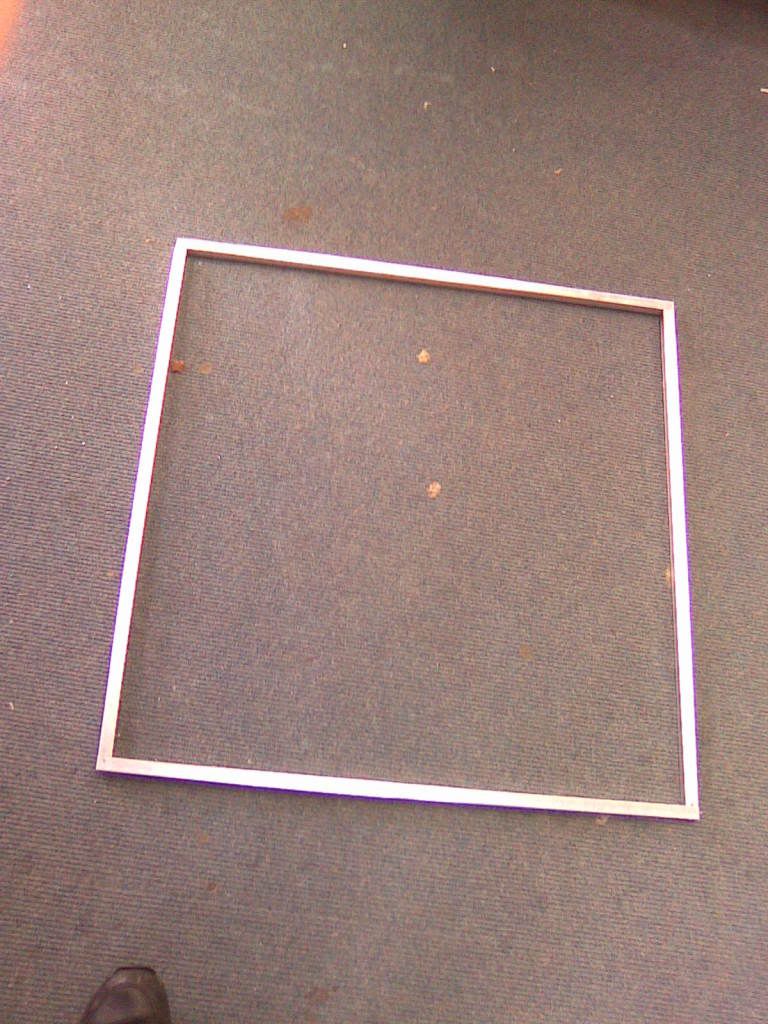
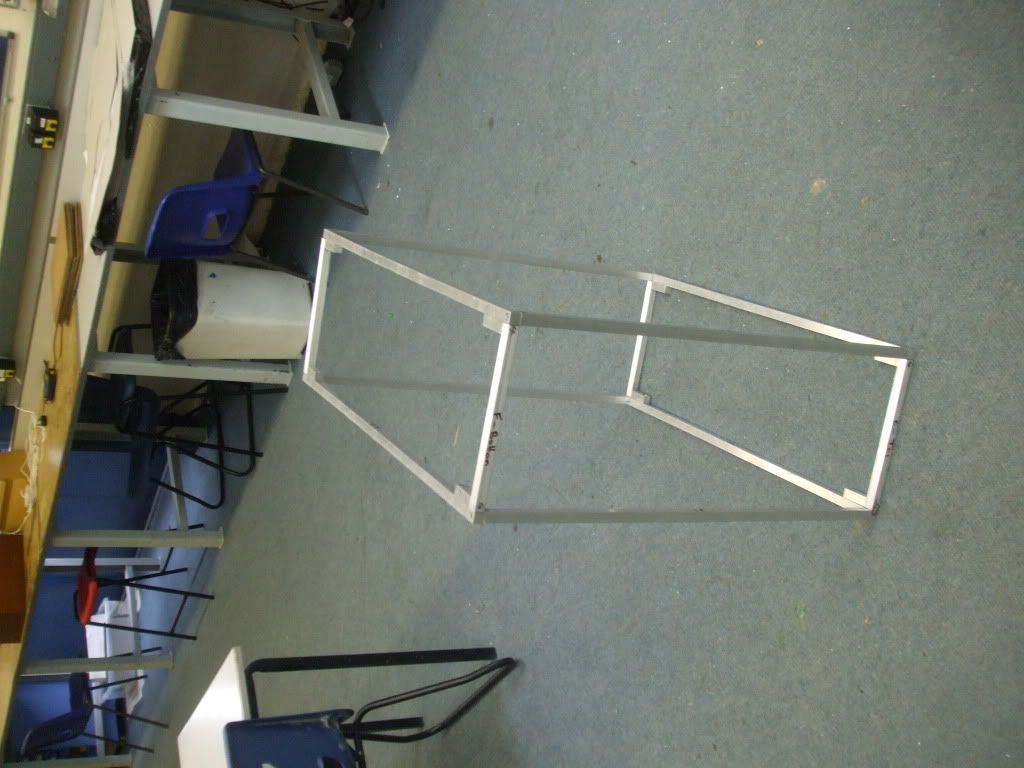
Well did loads today, got one of the side frames done and 75% of the second
Well here is the pictures from the first one (forgot to take pictures of the second one):
Sorry for little update but at least I'm getting there
Ninja
Computer Worklog (Scratch Build)- [Great Heights]
"Peace Is About Having A Bigger Stick Than The Other Guy"
*** Bit of an Update
just been drilling and tapping recently and done the two side squares and the crossbars so will start bolting them together tomorrow
Ninja
Computer Worklog (Scratch Build)- [Great Heights]
"Peace Is About Having A Bigger Stick Than The Other Guy"
**Update Major One
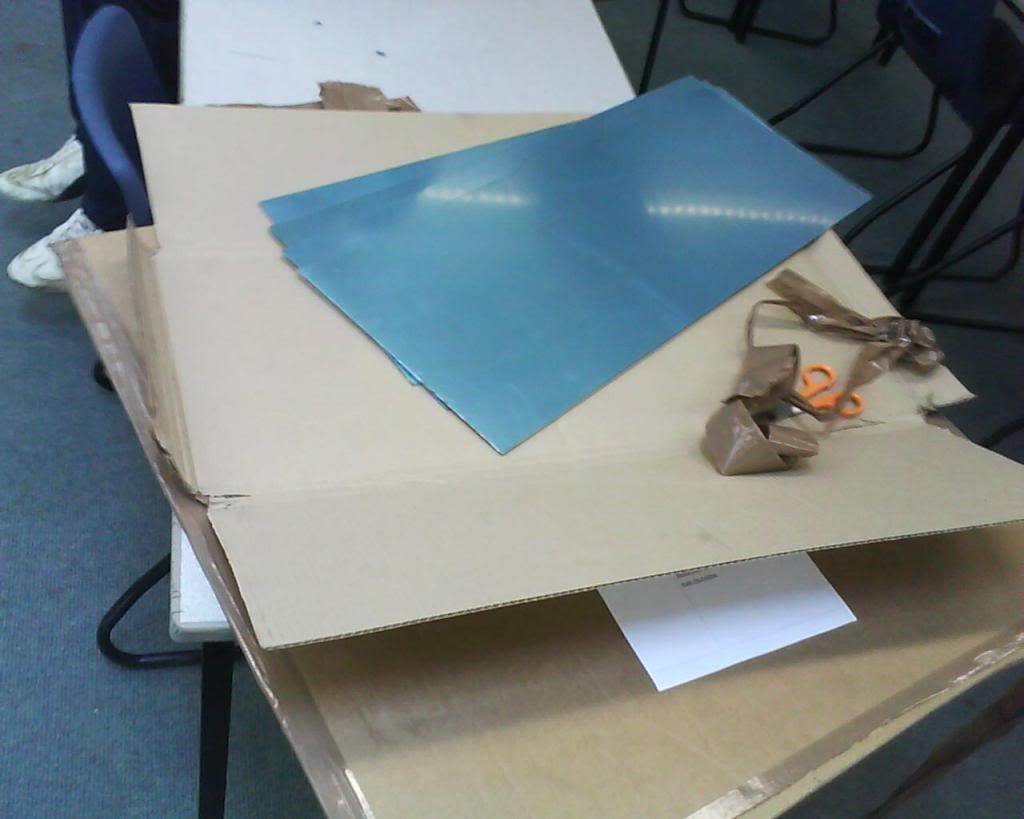
Well had some rather nice surprises today, got my sheet aluminum through in the post
Now on to the pictures
Opening Of My Parcel('s)
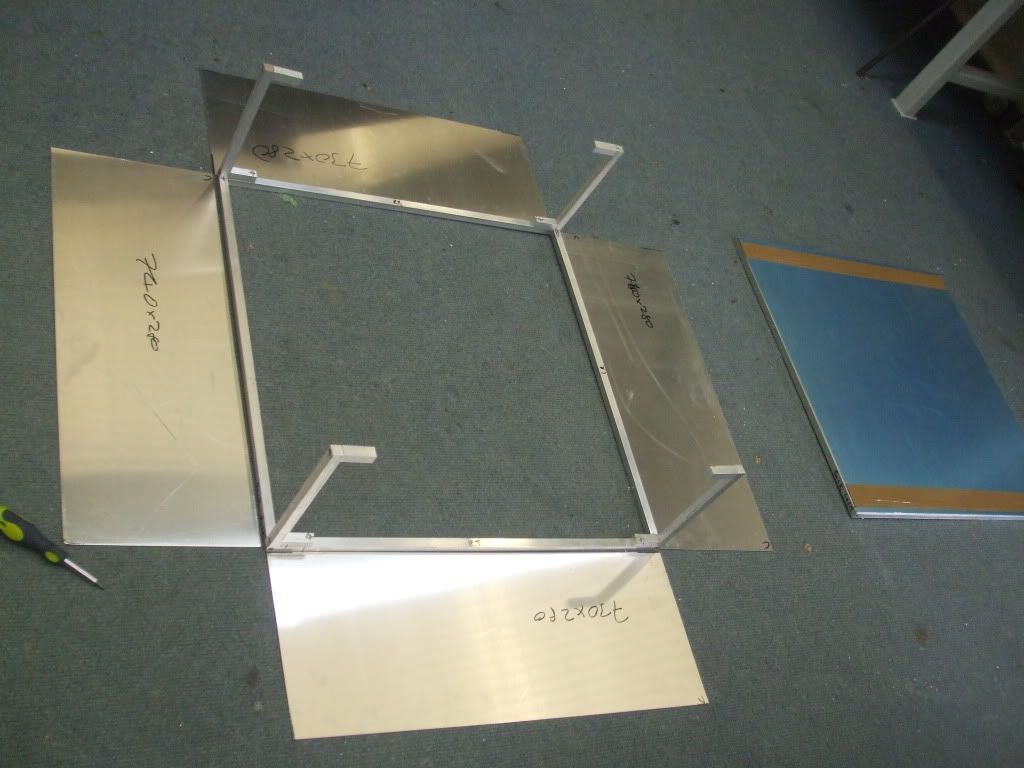
Well started the day by laying out my new aluminum round my case.
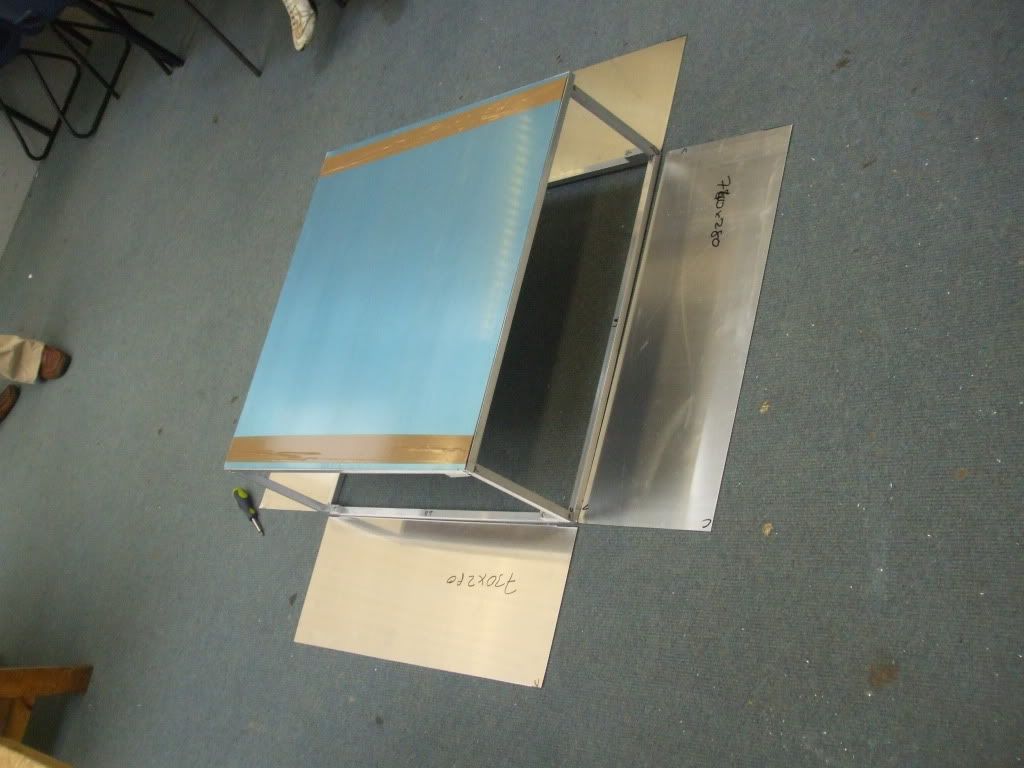
Without the top panel on:
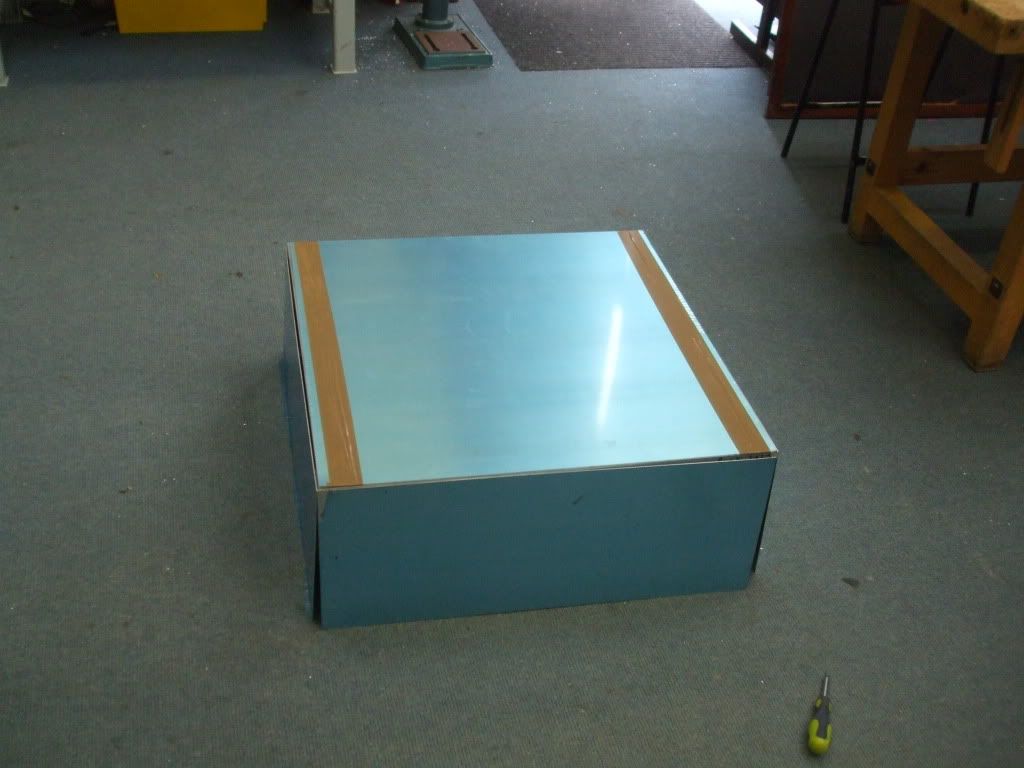
With top panel on:
All boxed up:
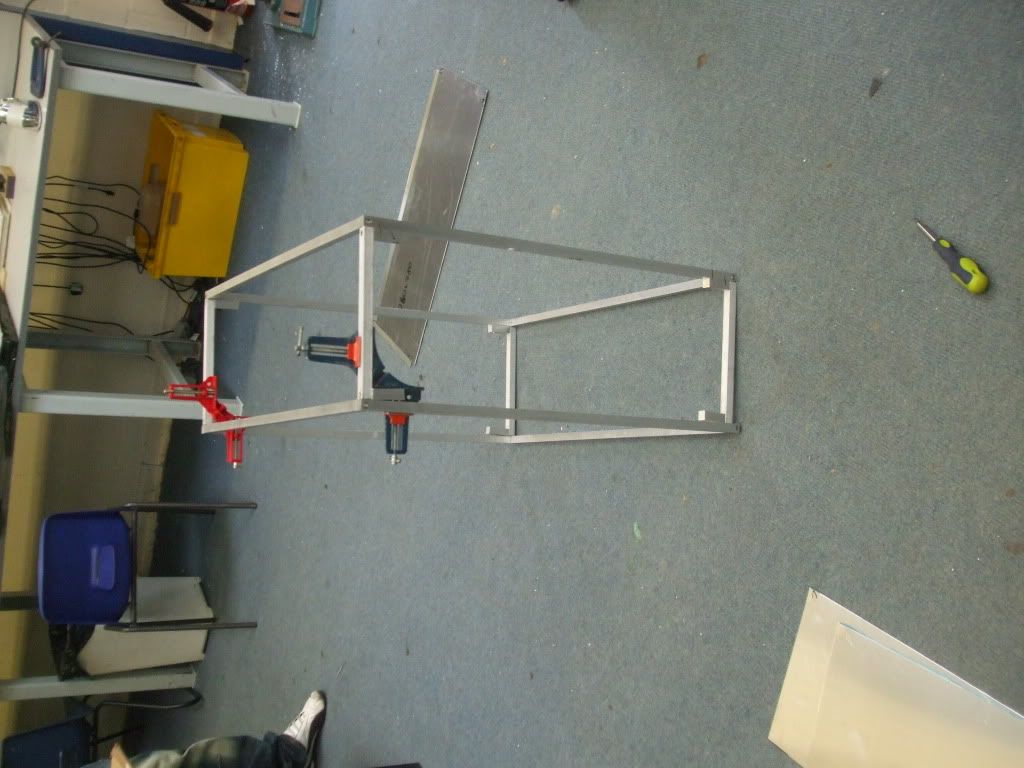
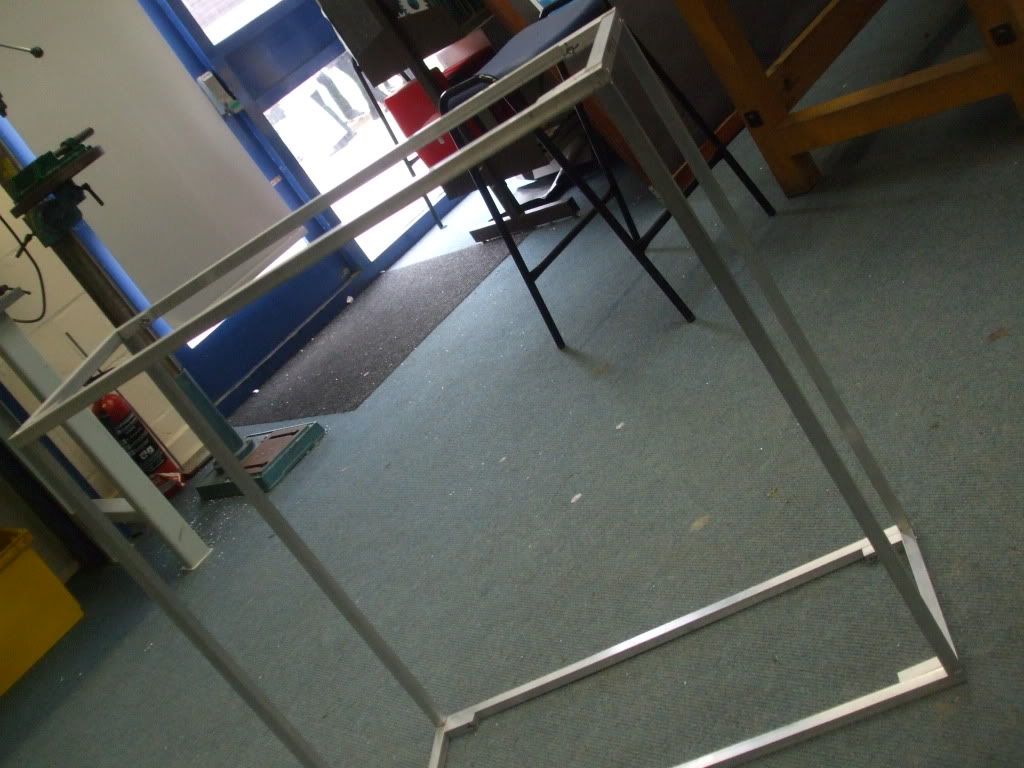
Anyway back to the construction:
Little mock up of the outer frame
Front:
Side:
4 Taps/Bolts Later:
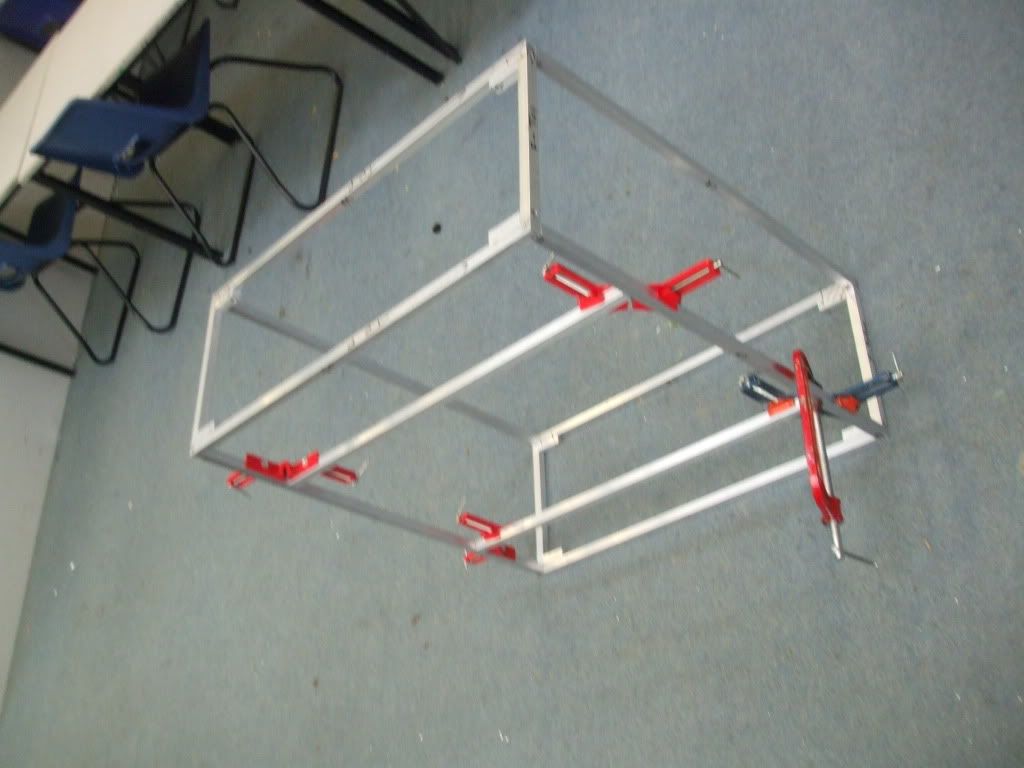
In the afternoon moved onto the cross bars
Mock up of them:
After doing 3 more Taps/Bolts:
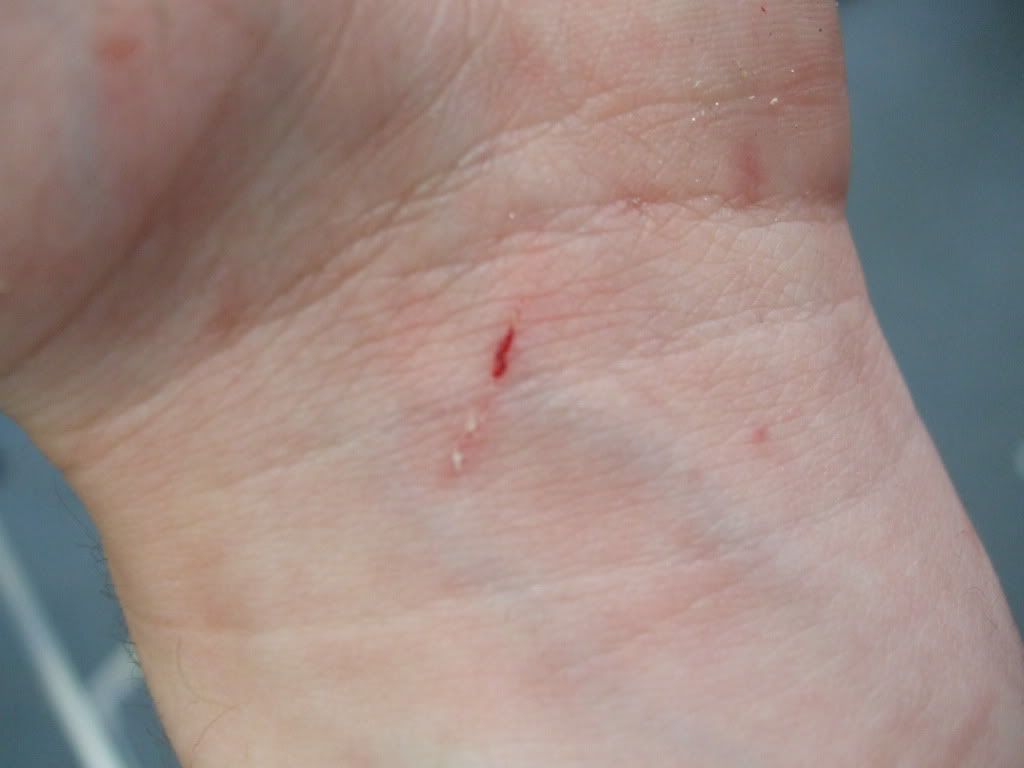
My first war wound from this case, I get the feeling its starting to hate me :P
Thanks To All
Ninja
Computer Worklog (Scratch Build)- [Great Heights]
"Peace Is About Having A Bigger Stick Than The Other Guy"
Now it's really taking shape, looking good
Where did you get the precut aluminium sheet ?
Used the same guy of ebay as the aluminum square bar just sent him what I need and they cut it for me
Ninja
Computer Worklog (Scratch Build)- [Great Heights]
"Peace Is About Having A Bigger Stick Than The Other Guy"
The time has come to update Xtreme Systems Forum with the details of the build I know I said I would have updated it a very long time ago now however I have my reasons but now is not the time to go into this.
Times have moved on things have been upgraded, I am now in presence of a better mind set. Moving on from my naivety off "its good enough", which lead me to look back over what I had done and think what utter rubbish I had made, completely off square. . . things not flush with each other etc. . . this I would like to add is not all completely my fault some of the bars had twisted over time.
So due to this I stripped everything down and started again, squaring off ends and joints, re-tapping holes to get them flush re-setting each side frame dead square and same lengths as the other. This did leave me with a loss width wise but that's not an major issue and needed to be done.
Once this was sorted it allowed me to rivet the external panels onto the case giving it some structure and cross beams for added support. My custom ATX removable motherboard tray arrived finally after 18 months of waiting for it.
The motherboard tray slot has been cut within the case so it now slides in as it is meant to, ATX PSU hole has been cut in the rear of the case so PSU now fits into it.
Work then stopped due to my University January exams.
The intermediate aluminium plates where still in their original sizes so the corners needed to be altered to allow them to slot into the case. This is where my new toy comes into play decided that it was about time I treated myself to a Dremel and by god I am so glad I did has allowed me to proceed much more than I anticipated.
I have now cut all but one of my intermediate plates meaning that the whole project is now taking shape.
I am now planning to cut the last plate this week sometime. On another route I have bent into place a HDD rack and have ordered a fabricated 5.25" Bays holder (Hopefully wont get into to much trouble here) from Mountain Mods, this will arrive at some point silly USPS. So that will be fitted at some point when it arrives.
Additional Info: Was a Dremel 4000 that I purchased.
Sorry for those people that had lost their faith in this project log but will have it back on track soon, pictures will be coming up if anyone wants pictures of specific things let me know or if you want me to go over details/processes of things I have done just leave a message.
Regards
-Ninja
Computer Worklog (Scratch Build)- [Great Heights]
"Peace Is About Having A Bigger Stick Than The Other Guy"
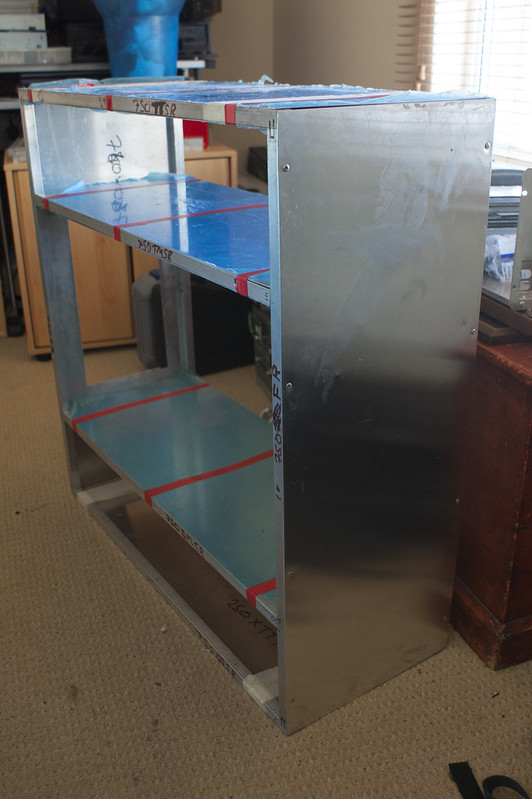
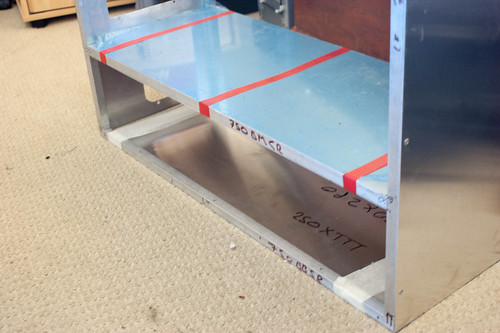
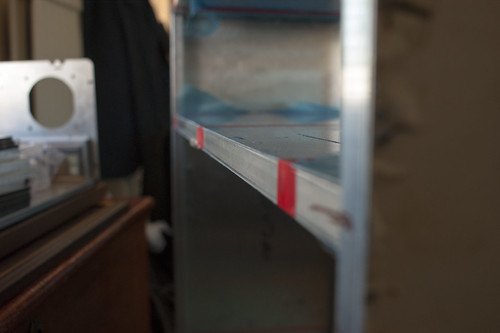
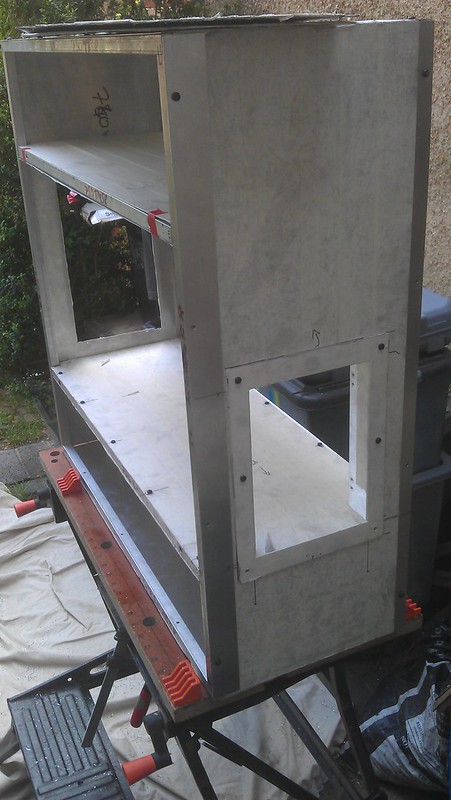
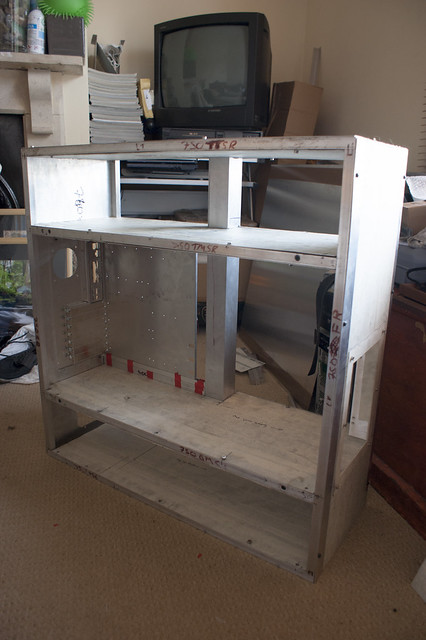
Everybody loves pictures so this is what this post will all be about, the following images will show the current state as of this morning which the case is in.
Caption: Showing all but one plate taped into position to give an overview of the case.
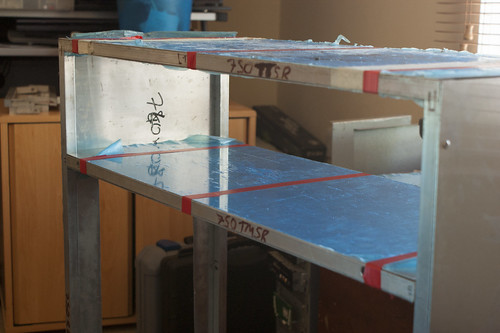
Caption: Showing top section of the case.
Caption: Showing mid and lower section of the case (Bottom section is missing a plate).
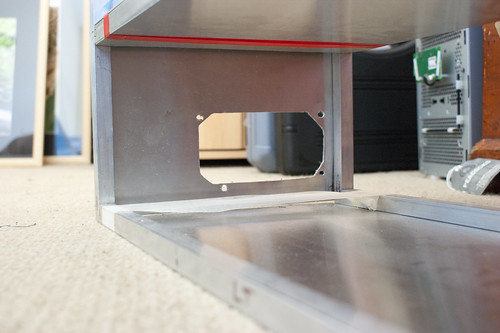
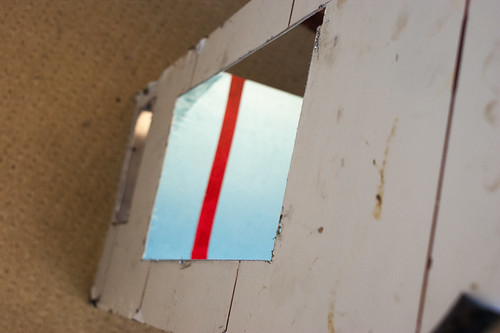
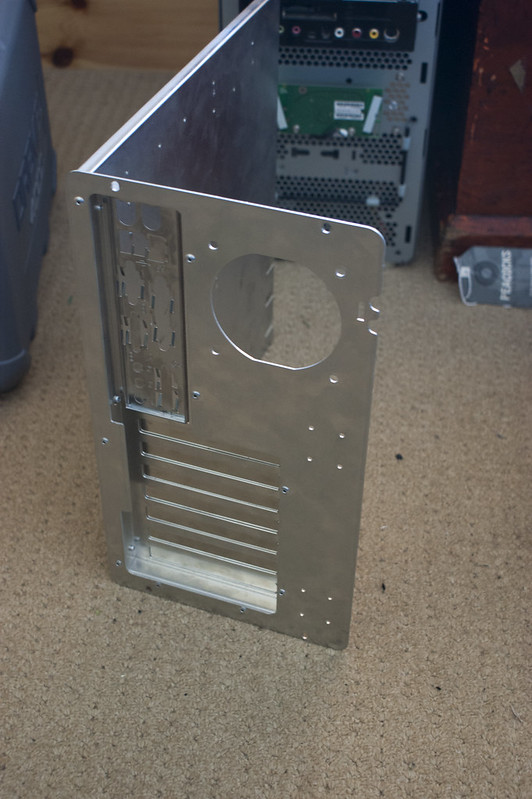
Caption: Showing motherboard tray cutout in mid section.
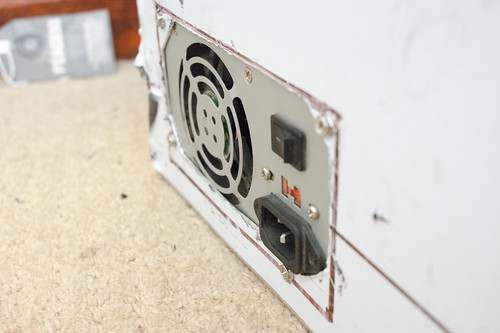
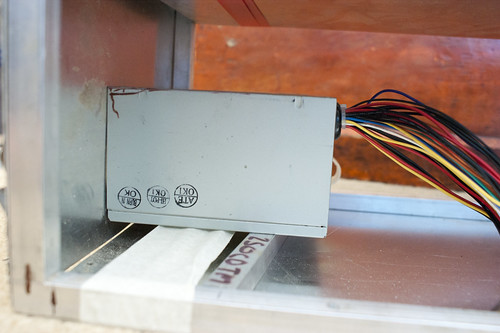
Caption: Showing PSU cutout in lower section.
Caption: Showing Rear of case looking down.
Caption: Showing rear of case both motherboard and PSU cutouts.
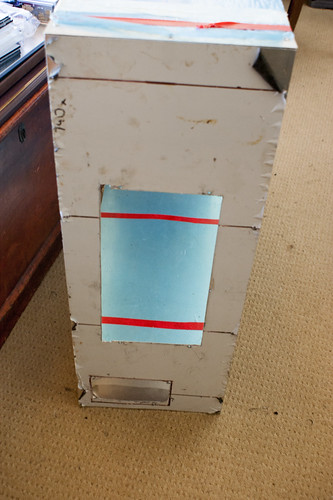
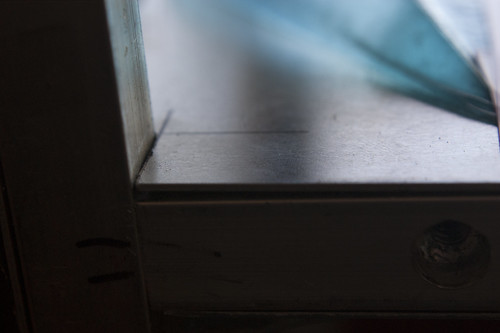
Caption: Showing top mid section top and bottom plates taped into place.
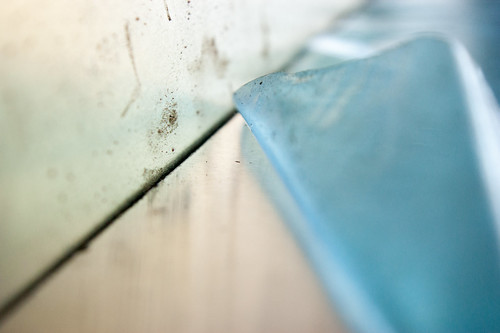
Caption: Showing top mid section plate fitting round corner column.
Caption: Showing top mid section plate butting up to the rear panel.
Caption: Showing rivet attaching outside panels, (These are in the process of being removed and replaced with M4 bolts.
Caption: Showing PSU (bog standard one that was laying around) fitted to the case outside view.
Caption: Showing PSU fitted to the case inside view.
Caption: Showing custom fabricated motherboard tray back view.
Caption: Showing inside view.
Caption: Showing motherboard tray fitted to case outside view.
Caption: Showing motherboard tray fitted to case inside view.
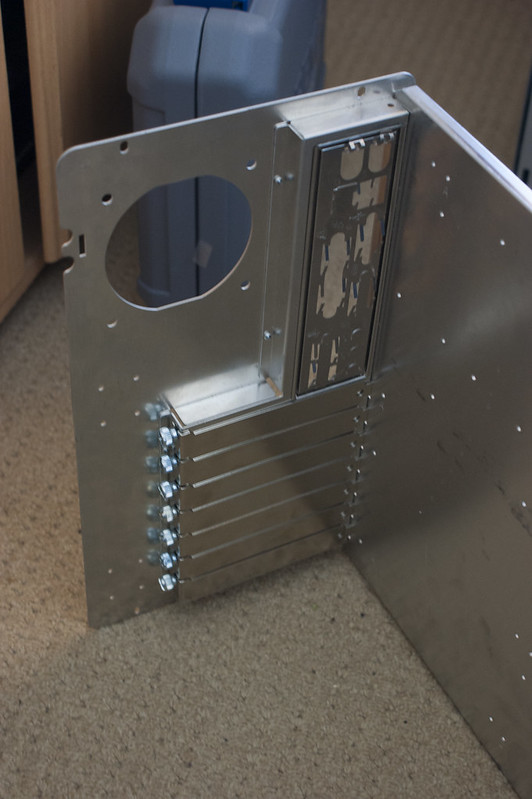
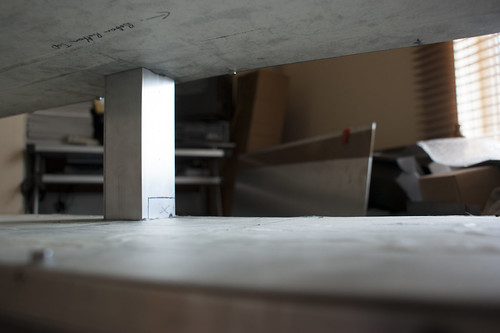
Caption: Showing motherboard tray mounting rail concept 1 overview.
Caption: showing motherboard tray mounting rail concept 1 close up.
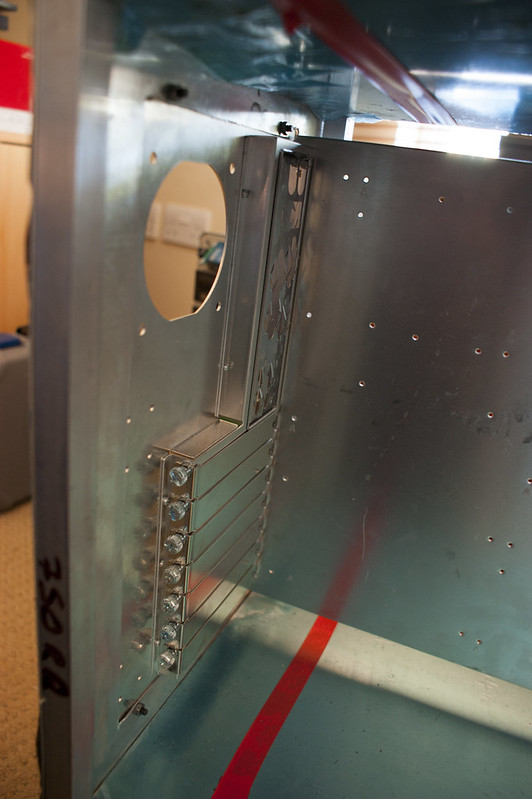
Caption: showing motherboard tray mounting rail concept 2 overview.
Caption: Showing motherboard tray mounting rail concept 2 close up.
The last 4 images are concept ideas for how to make this and will consist of solid piece of bar and then a U profile extrusion of aluminium like the one shown. So that the motherboard tray cannot move once slotted in.
Hope you enjoy the pictures and the update.
If you want to check out the images at larger resolution check out the flick set in the following link: Link Here
Little Update: Just had a little stint on a local auction site (not strictly competition as engineering supplies) but awaiting some new drill bits as broke a few drilling out rivets earlier, and some shiny marine grade A4 stainless bolts which should look awesome
Regards
-Ninja
Computer Worklog (Scratch Build)- [Great Heights]
"Peace Is About Having A Bigger Stick Than The Other Guy"
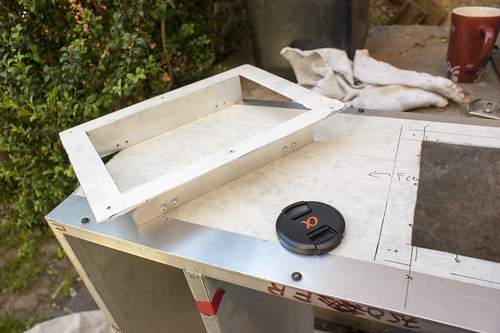
Cutting of the 5.25" Drive Bays
You will also see that I have lost the blue wrap to the aluminium and masked everything up, this is just because the blue wrap was falling off and I wanted something more to protect while I was working on it, to reducing any more scratching.
Marking up, probably took about 20 mins to make sure everything was dead square and in the right position:
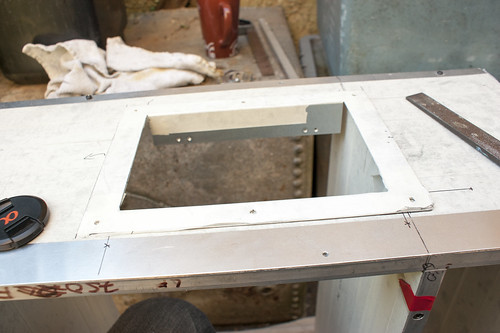
First cut this does take a long time but is worth it both to preserve the cutting disk and keep a straight edge:
Hour later and a couple of cups of tea and the hole was cut:
Aluminium plate that was removed and favourite tool the dremel:
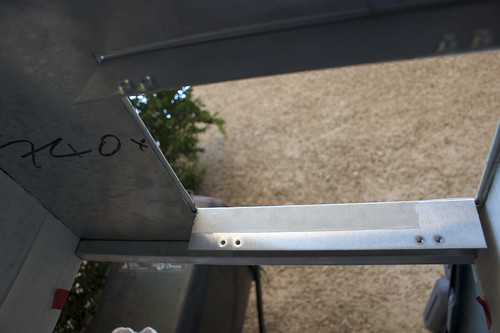
5.25" Bay waiting to see if it slots in first time:
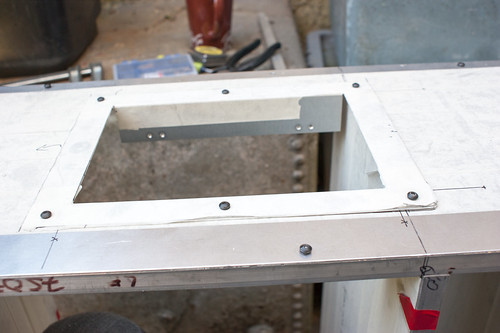
And remarkably it did fit showing outside and inside view:
Finally all bolted in:
Regards
-Ninja
Computer Worklog (Scratch Build)- [Great Heights]
"Peace Is About Having A Bigger Stick Than The Other Guy"
Final Pictures of the drive bay fascia installed:
Regards
-Ninja
Computer Worklog (Scratch Build)- [Great Heights]
"Peace Is About Having A Bigger Stick Than The Other Guy"
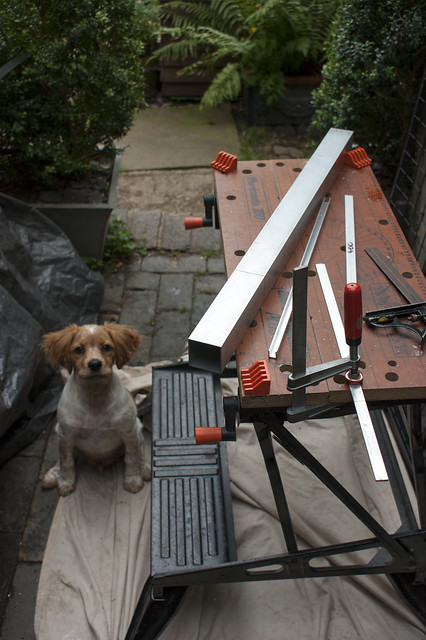
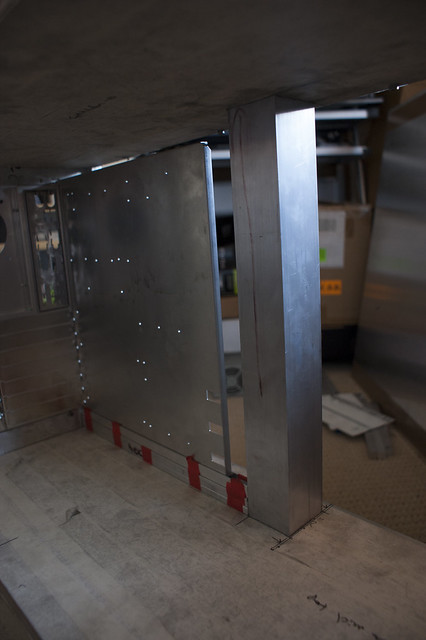
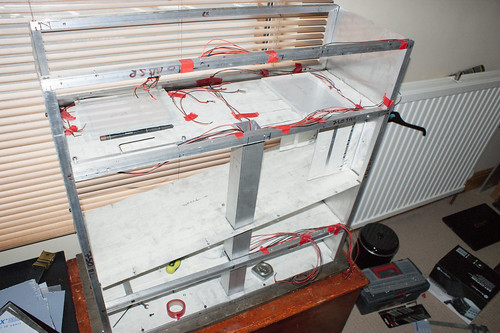
Wire Management Instillation , I will be hiding all the wires in a central column within the case, this means that they won't be seen until they are used throughout the case, this will use a 2" x 2" box aluminium which allows wires to transfer "invisibly" between the middle section and top section. Cuts will be made along the box section at bespoke points where needed. At the same time I also got the remaining aluminium to make the slider for my motherboard tray and stainless angle for the corners.
The following image shows some of the aluminium and also my little helper that always seems to run off with things I need:
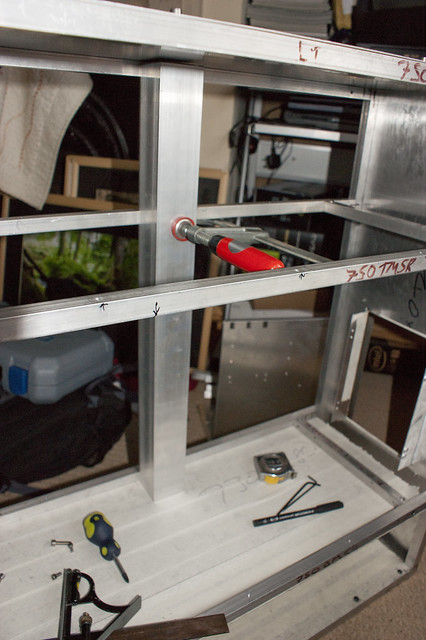
This image shows the 2" x 2" box section installed using M5 bolts directly to the frame.
I then started the long process of cutting each individual sheet so that the column can pass through, this has now been done.
The following images show the column in place with the temporary motherboard sliding rail, how the column passes through the top section and the middle section.
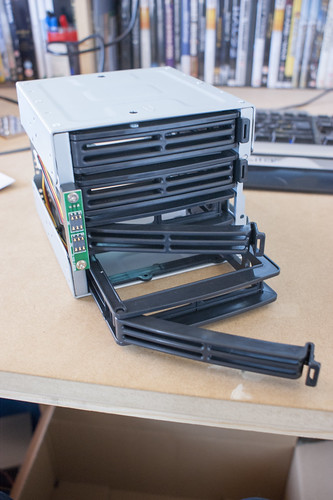
On the that note it was last week while I was away that some goodies arrived such as a Hot-swap HDD cage, new radiators & stands and some cables.
Regards
-Ninja
Computer Worklog (Scratch Build)- [Great Heights]
"Peace Is About Having A Bigger Stick Than The Other Guy"
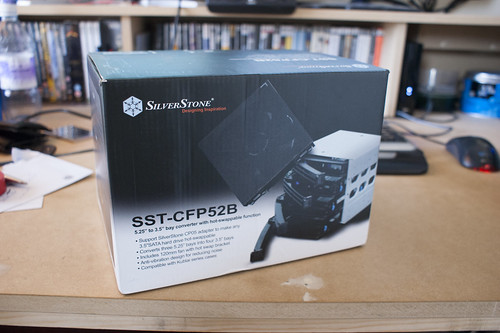
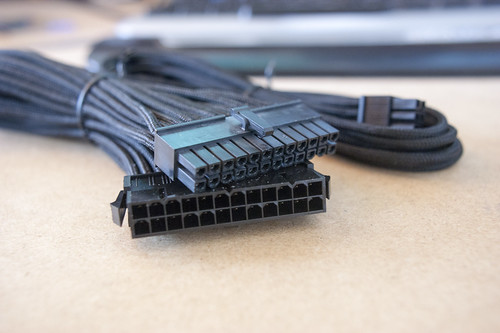
Here are a few images of some things that will be going into this build soon/later on.
Silverstone Hot-swap HDD cage:
Unfortunately I don't think I will be able to use the Front fan directly but will use it somewhere love the touch contacts it has.
So I will be using this part of the unit in the top section of the case:
Silverstone Screws for the vibration absorbing cages:
BitFenix pre-braided extension cables:
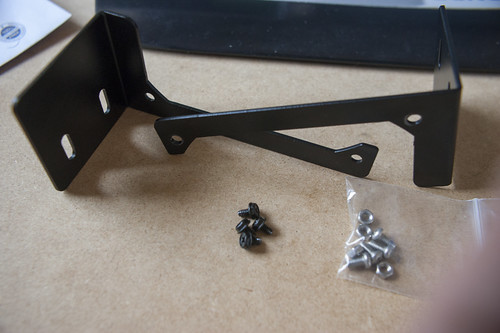
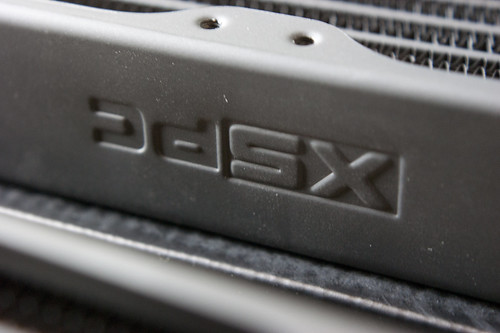
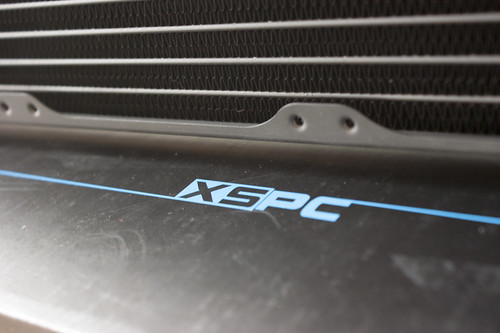
XSPC Universal Rad Stands (x2):
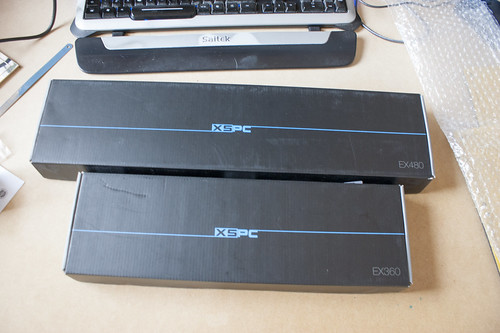
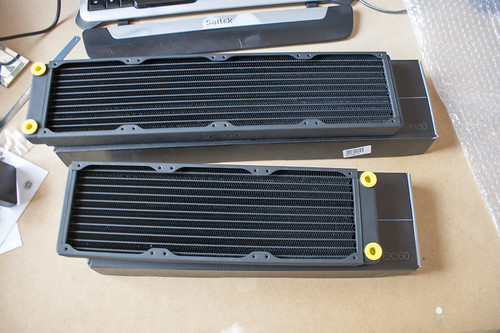
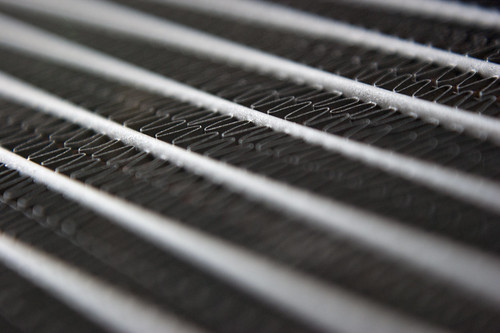
XSPC EX480 and XSPC EX360 radiators:
That's all for now, got some more stuff arriving this week, will update with today's work either a bit later or tomorrow.
Regards
-Ninja
Computer Worklog (Scratch Build)- [Great Heights]
"Peace Is About Having A Bigger Stick Than The Other Guy"
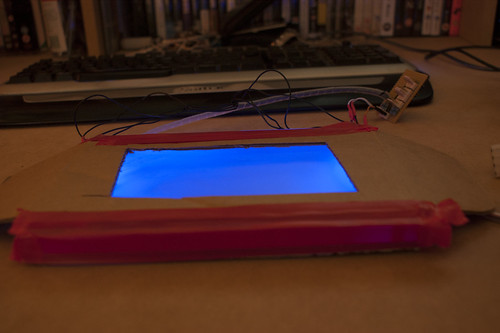
In this post I will show some pictures of more new hardware, a long with a prototype light box I'm trying to make this uses 10mm Frosted Acrylic currently with a 5mm gloss acrylic underneath to bounce the light upwards, using 4 blue 5000cmd LED's placed in each corner. I will be looking to get some mirror acrylic and see what sort of effect that creates but here is the gloss black for now.
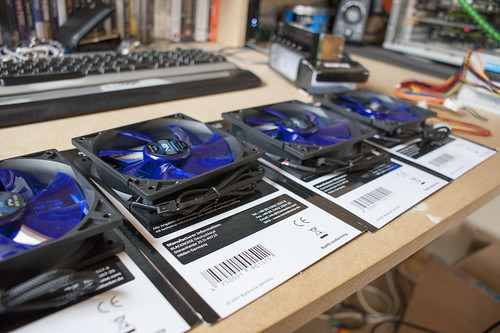
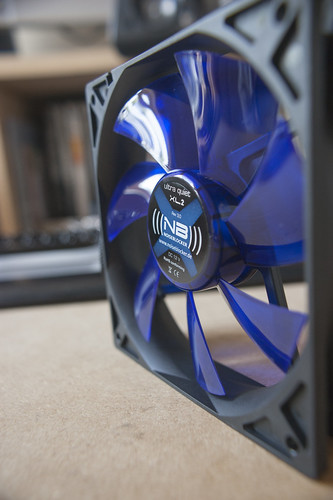
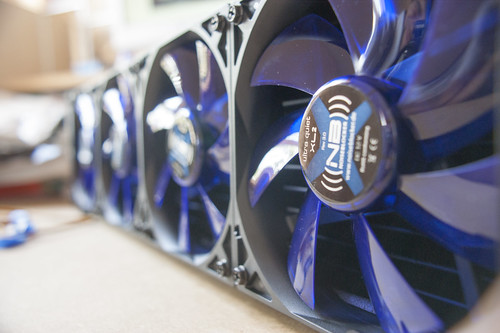
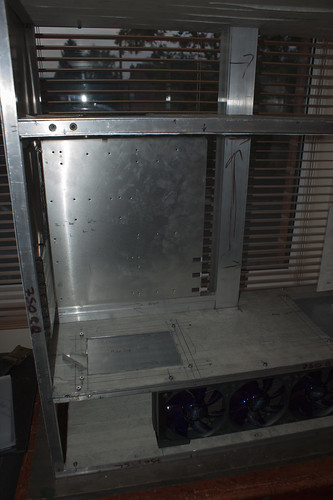
New hardware, got myself some Noiseblocker XL2 fans for the radiators (Might get some more for general case fans later on:
Singular Shot of fan:
All four attached to the 480:
And staying in control with Zalaman MFC1-Plus:
As for the prototype lightbox
The setup:
How it looks from shallow angle:
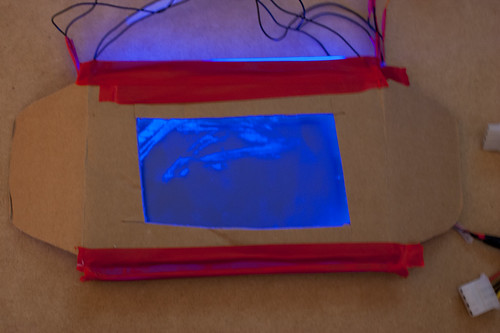
How it looks from above notice the more perpendicular you go the less light is viewable:
With a cardboard shroud around, this is because it will be attached to the panels of the case (cardboard = aluminium sheet):
Please note that this was a spare piece of acrylic due to the imperfections in the face which you can see from the above pictures, as always you can view the rest of the images over on my flickr (Link Here.) and if you have any questions please don't hesitate to ask.
Regards
-Ninja
Computer Worklog (Scratch Build)- [Great Heights]
"Peace Is About Having A Bigger Stick Than The Other Guy"
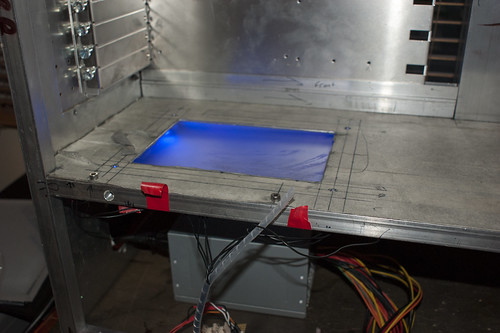
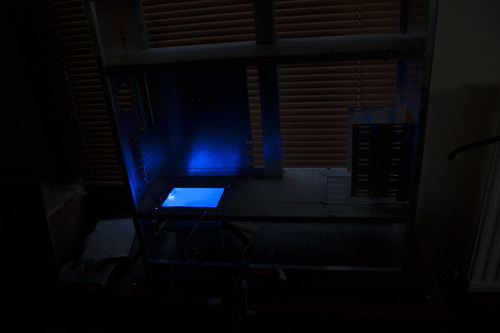
Today's update, after completing the lightbox prototype, I set about cutting the holes in the top of the bottom mid-plate so that the light is case upon the motherboard, so after a 2 hour cutting session, I managed to mount two other pieces of acrylic and some cable management holes.
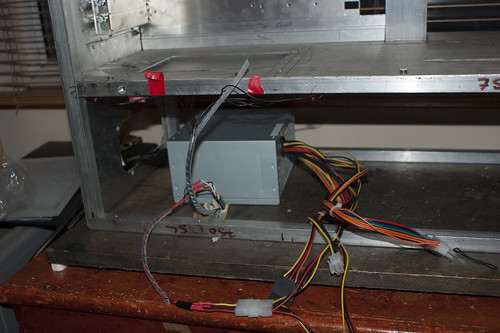
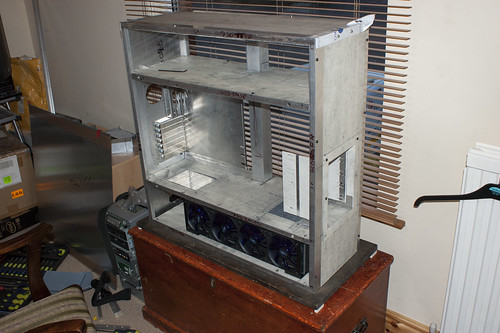
I also finished mounting my radiators to the bottom of the case, and put everything together to see how the lightbox would case on the rest of the case.
Setting up prototype lightbox, my testing PSU and LED' splitter:
Lights on Lightbox on:
Lights off Lightbox on:
As you can see even with the black acrylic as a reflector, it gives a very good cast so I think I will keep it for now, also looking down it will match the case when it gets powdered.
So as for the rest of the setup with the actually pieces of acrylic bolted in place:
Regards
-Ninja
Computer Worklog (Scratch Build)- [Great Heights]
"Peace Is About Having A Bigger Stick Than The Other Guy"
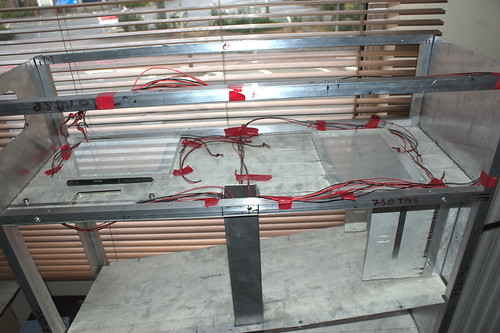
Today's work consisted of entirely cable management in all ~4 hours of it, I had to modify the existing 2" x 2" square tube, so that between the mid-plates wires could pass through it.
I then wired up the 3x 3-Pin Fan Channels which passed between the top section to the bottom section, along with the Front Header wires (Power Switch, Reset Switch, Power LED and Activity LED). Also wired in the 2 wires for the Light-boxes. This itself made for case that looked like it had been attacked by Spiderman.
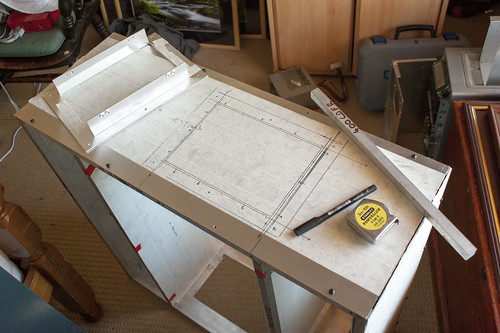
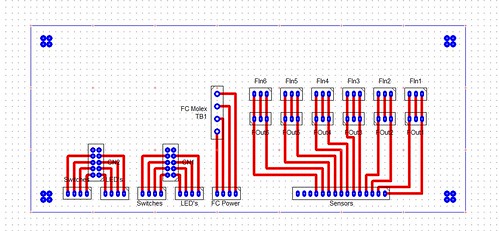
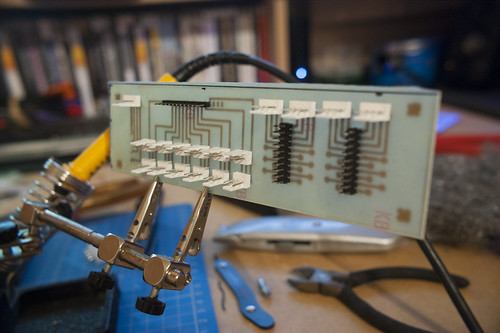
Also spend the afternoon designing a custom Circuit Board for my control panel. Which led me to order all the parts I need for this and a box to hide it all in which should hopefully be here in a few days (Also avoids me breaching any warranty on my fan controller and fans.). The Circuit board is pretty simple for now but leaves room for expansion at a later date.
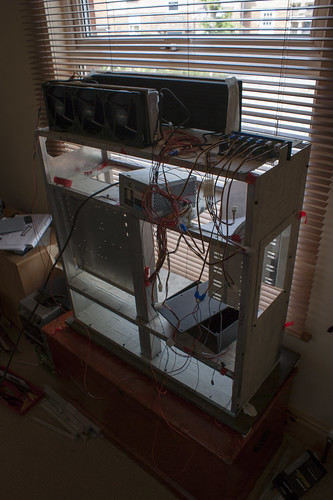
Here is the overall picture of all the wires in place:
The lightbox LED wires:
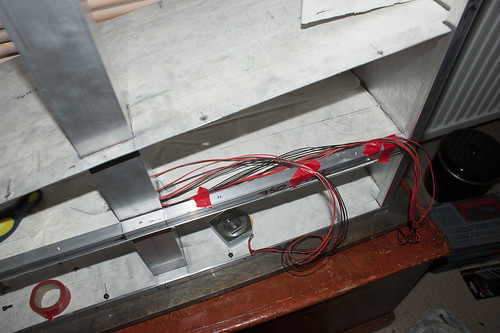
All the wires going to the control panel circuit:
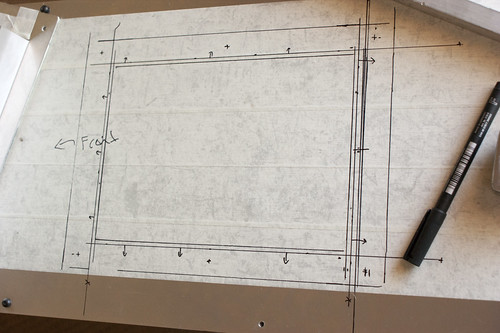
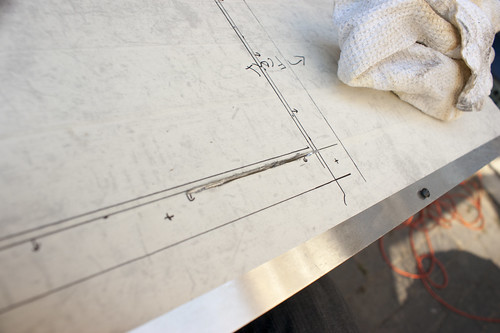
Copy of the PCB Design the grid shown is 0.1 inch scale to give some perspective.
Regards
-Ninja
Computer Worklog (Scratch Build)- [Great Heights]
"Peace Is About Having A Bigger Stick Than The Other Guy"
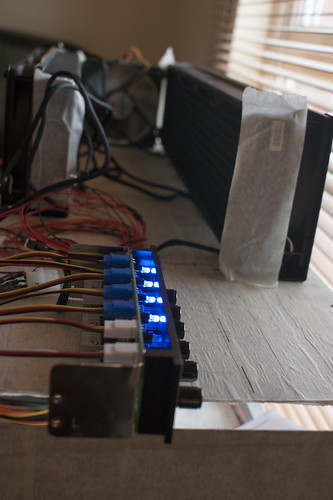
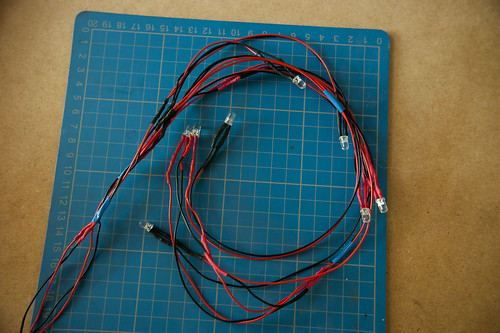
Haven't updated on this project for a while, due to fact my first attempt of making the circuit board to be a failure as the tracks didn't come out properly. So had to get some more materials, due to that I went on to constructing the necessary wires for the fans which I have no completed, to be safe it is 2 fans a channel to not exceed the watts per channel. So a quick couple of images of the final setup for testing, I will hopefully be putting together a post/tutorial about going from wire, housing, terminals and pins to a final full wire.
Regards
-Ninja
Computer Worklog (Scratch Build)- [Great Heights]
"Peace Is About Having A Bigger Stick Than The Other Guy"
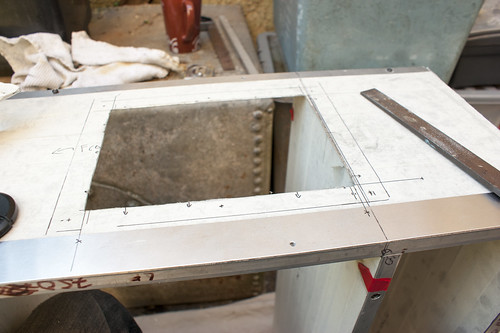
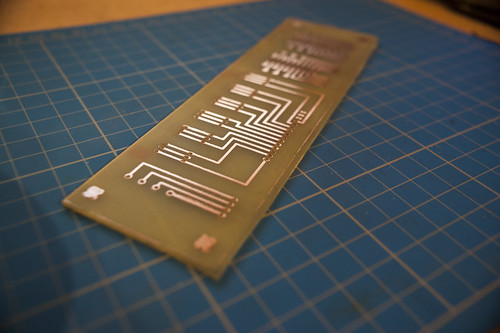
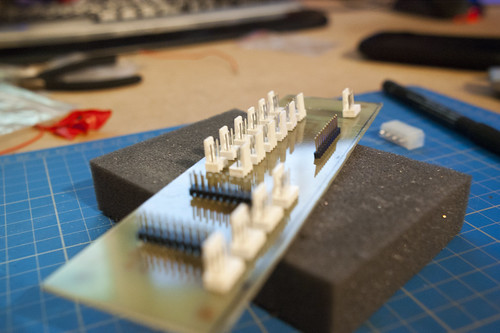
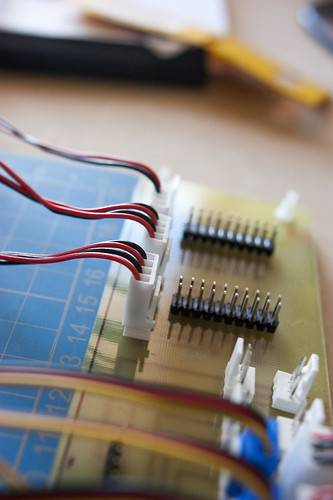
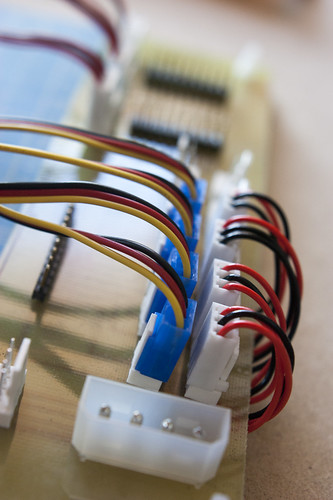
Take two of creating a custom PCB was a success so I now have completed this, the following images show steps during the process.
The etched PCB then sanded to remove the protective coating:
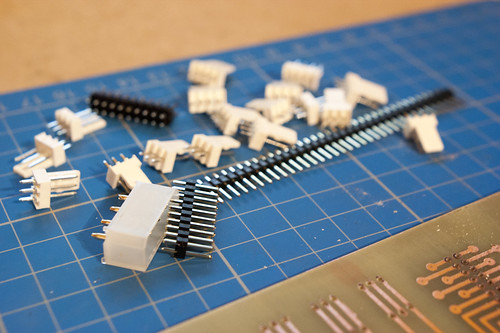
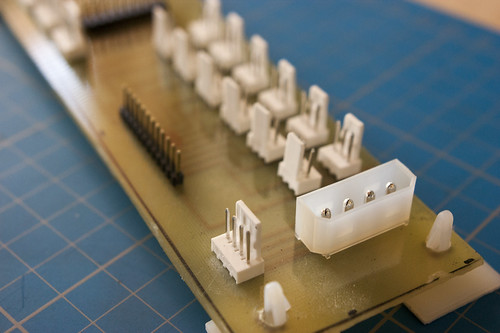
All the components that will be going onto circuit board:
Dry fitting of components:
Finally all soldered onto board:
Lightbox LED's fully constructed:
and finally the PCB with some of the wires attached:
Later on I will show some pictures of how the fitted lightbox's are at night.
Regards
-Ninja
Computer Worklog (Scratch Build)- [Great Heights]
"Peace Is About Having A Bigger Stick Than The Other Guy"
Well just received my case back via "Dad-Express" and it looks amazing quality is outstanding and price was awesome, so here as a teaser:
Regards
-Ninja
Computer Worklog (Scratch Build)- [Great Heights]
"Peace Is About Having A Bigger Stick Than The Other Guy"
 Posting Permissions


 Reply With Quote
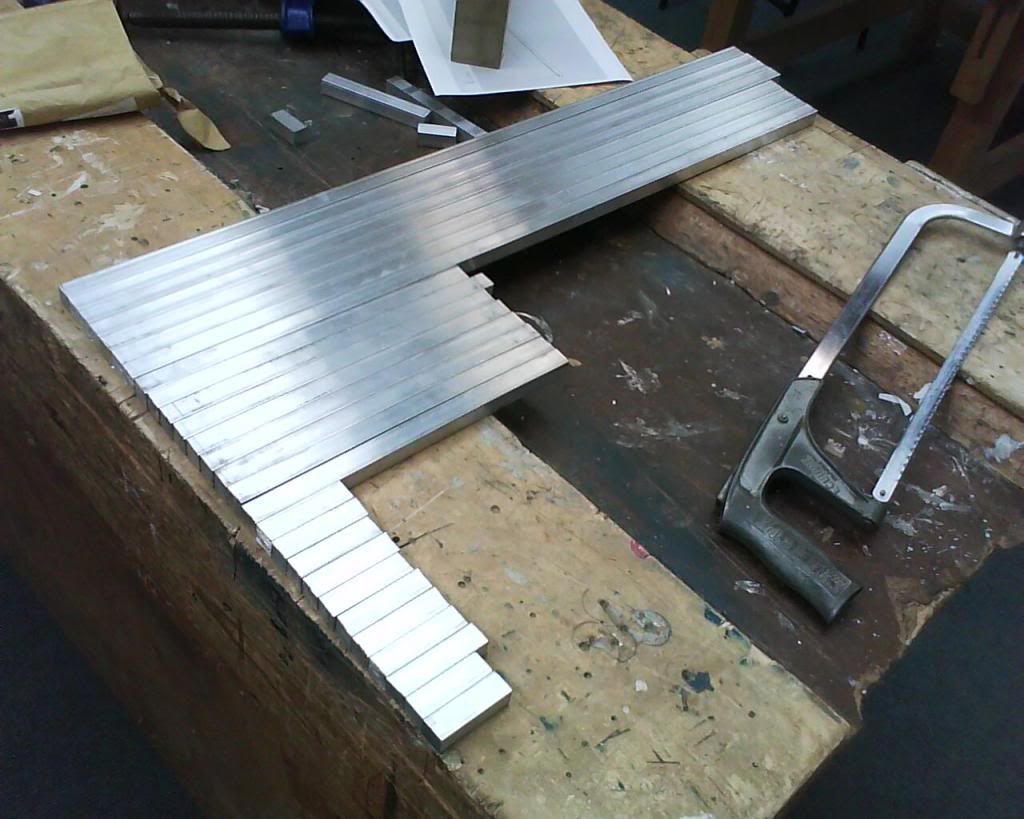


Bookmarks