Page 4 of 5 FirstFirst 12345 LastLast
Results 76 to 100 of 107

Thread: eVGA 9600GSO Dual-Slot volt mod?

  1. #76
    Registered User
    Join Date
    Nov 2008
    Posts
    69
    Awesome, I got my multimeter and VR's today. Sadly I don't really have the time to get at this (still in high school...2nd semester senior so not much really needs to get done but still, got a project to do...), and I still need to pick up some 30 AWG wire. I ran out and all I have is 22 AWG, and I think 22 is a bit big for this.

    And using air cooling, an Accelero S1 with the turbo module, which now runs in the mid 50 degrees range on load with my current oc, how much could I likely raise the voltage to? Sadly I don't use water cooling, but still.

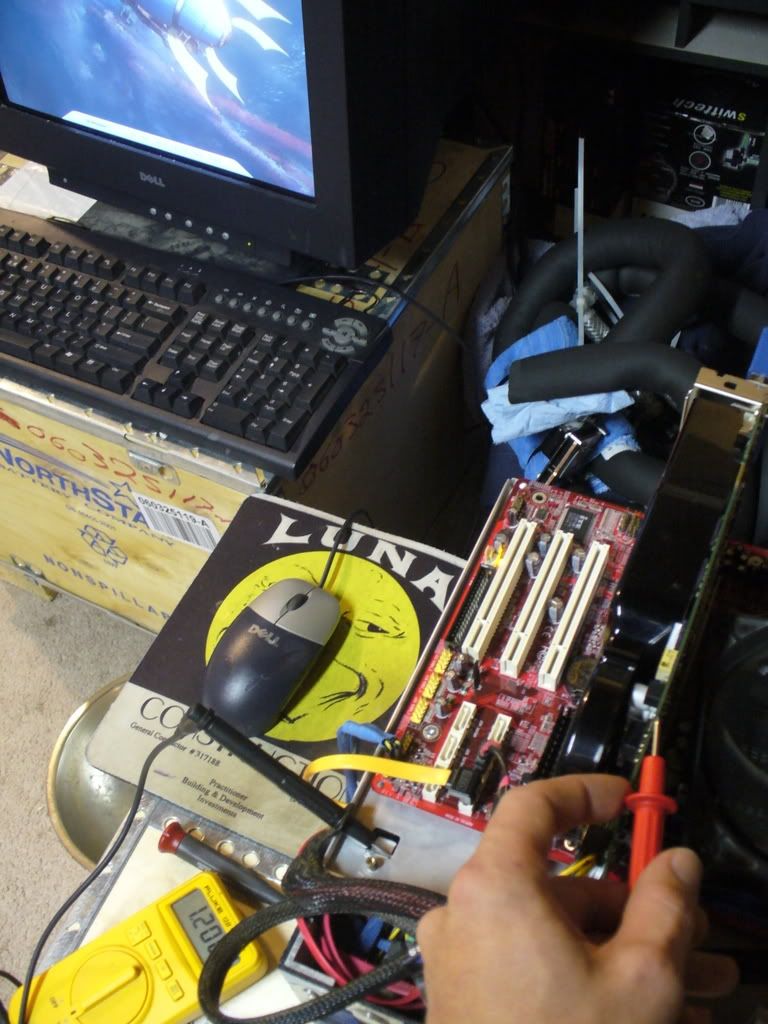
    Also, what ground do I use for measuring voltage while the card is on? Is it any of the back three pins of the PCI-Express connector? Should i be fearful of shock?

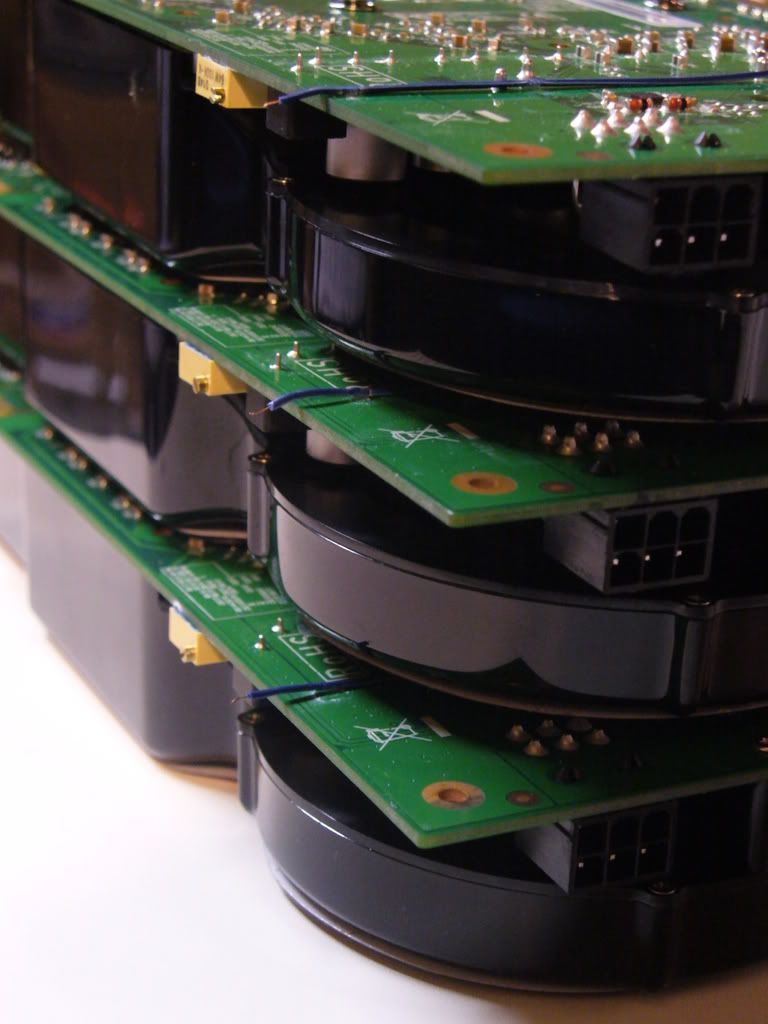
    UPDATE: I played around with one of the VR's, measuring resistance. So, turning clockwise while the VR is connected by the right 2 pins causes resistance to decrease, increasing voltage, while turning counter-clockwise increases resistance and decreases voltage.

    Or, connecting by the left 2 pins and turning clockwise causes resistance to increase and voltage to decrease, while turning counter-clockwise decreases resistance and increases votage.

    You guys probably already knew that, but I'm a n00b so this is interesting for me :P

    I have it set to maximum resistance right now. I'm not sure if my multimeter is inaccurate or whether its just the +/- 5% error but I read 98.4k ohms as the resistance on my 100kohm vr.

    Does the system have to be off while resistance is adjusted?
    Last edited by quadomatic; 01-08-2009 at 03:41 PM.

  2. #77
    Xtreme Member
    Join Date
    Mar 2008
    Location
    NCAL
    Posts
    259
    1ST thing... YES the system needs to be OFF to measure resistance values.. measuring while powered = bridged resistor = BOOM.. no resistor

    ..as for ground to use while measuring GPUv ..I just ground to my case or tech station.. Its generally not a good habit to probe with ground and positive leads, while powered. Also.. for the VR's.. you can just clip one of the outer legs off, if you dont wish to solder both [as shown in my pic, on previous page].

    *I would say, 1.3v idle should be OK for air cooling.. shader clocks will benefit from having cooler core temps though..which might be attainable easier [on air] at a lower GPUv.

    ...just my ..Im sure others will have things to add. Good modding.

    **Hey Whodie !! ..birds of a feather..
    "If you wield a sword you must be intent on cutting the enemy" - Musashi

  3. #78
    Registered User
    Join Date
    Nov 2008
    Posts
    69
    Thanks for the response, but I'm confused by a couple things. First, I know that I can't measure resistance while it's on, but could I adjust the VR without measuring resistance and just measuring voltage all while the system is powered on?

    Also:

    Quote Originally Posted by CL3P20 View Post
    ..as for ground to use while measuring GPUv ..I just ground to my case or tech station..
    so do you just put the red probe on the GPUv point and the black probe on the metal of the case? That works?...I guess I could try it right now. Again, do I need to worry about shocking myself or something? I'm a little paranoid...

    BTW: Any results on your mod?

    UPDATE: I tried measuring the voltage. I measured 1.18V using the upper vGPU point, which seems odd since it should be 1.1V I guess. I tried reaching for the deeper point to see but it was too far away to reach. Anyways, after I did that I guess I must have poked somewhere I shouldn't have because my display got all distorted with white dots all over it like it was crosshatched like crazy. I rebooted and its all good now I guess.

    UPDATE 2: Tried measuring voltage again. I didn't miss this time, and my computer didn't die afterwards. I measured using both points and used my case as the ground, and I got 1.18V. I was warned that the multimeter I bought wasn't the best one around though, so it's very possible that it's just off on it's reading. Somewhere I read that voltage goes up ~ .05V in 3D. I'm using Aero. I might've read that in this thread...but I can't find where...oh yeah it was in the thread Largon wrote on how to volt mod 8800 series cards.

    I did try to pencil mod the card unsucessfully. I tried to erase as much as I could, but since that "mod" didn't give me any results I'm guessing that maybe the card just runs at this voltage. I could try disabling Aero and measuring again...maybe later.
    Last edited by quadomatic; 01-08-2009 at 06:09 PM.

  4. #79
    Xtreme Member
    Join Date
    Mar 2008
    Location
    NCAL
    Posts
    259
    Fixed*
    adjust the VR and just measure voltage while the system is powered on?


    Your findings are pretty normal.. most of the 8xxx and 9xxx GPU's I have mod'd all reacted the same way.. with GPUv increasing on load ~.04v.

    *As for the soldered mod.. I havent made it to the store yet.. hoping to get over there tomorrow.. busy w/ the kids an all
    "If you wield a sword you must be intent on cutting the enemy" - Musashi

  5. #80
    Xtreme Guru
    Join Date
    Jan 2005
    Location
    Tre, Suomi Finland
    Posts
    3,858
    Quote Originally Posted by quadomatic View Post
    I know that I can't measure resistance while it's on, but could I adjust the VR without measuring resistance and just measuring voltage all while the system is powered on?
    Yes, once you have the VR soldered correctly you can adjust it even when the card is powered while monitoring the voltage.
    You were not supposed to see this.

  6. #81
    Registered User
    Join Date
    Nov 2008
    Posts
    69
    OMG....This is not good:


    Foolishly, I tried to do the vMEM mod. Unfortunately, I lifted the trace, and ripped off the fb pin in the process...I don't suppose there's anything I can do to fix this...? Or would one of you guys be able to fix it?
    Last edited by quadomatic; 01-09-2009 at 04:27 PM.

  7. #82
    Xtreme Member
    Join Date
    Mar 2008
    Location
    NCAL
    Posts
    259
    omg.. I am sorry for your loss.

    Short of getting a whole new chip..and attempting to replace the whole thing.. other than that.. you might be able to 'jump' the connection with a short wire..soldered in place to the connecting resistor..

    *I imagine Largon, to be more experienced in this department... Repair is not my specialty :o ..usually I smash broken parts and keep the mangled pieces as trophies.
    "If you wield a sword you must be intent on cutting the enemy" - Musashi

  8. #83
    Registered User
    Join Date
    Nov 2008
    Posts
    69
    Quote Originally Posted by CL3P20 View Post
    omg.. I am sorry for your loss.

    Short of getting a whole new chip..and attempting to replace the whole thing.. other than that.. you might be able to 'jump' the connection with a short wire..soldered in place to the connecting resistor..

    *I imagine Largon, to be more experienced in this department... Repair is not my specialty :o ..usually I smash broken parts and keep the mangled pieces as trophies.
    I was thinking of jumping the connection. I need to see if I can actually get a wire to attach to the chip though...there's still a TINY bit of the leg of the chip showing, so if I got a glob of solder to sit on it, it maybe could be done. Or maybe I could take a knife/dremel to it to make it show more of the leg.

    Or maybe it's just not worth the trouble and I should pick up a new video card....gaaahhh!!! So much money...sure this card was just $34, but still. I'm not going to find another card like this for that price...
    Last edited by quadomatic; 01-09-2009 at 04:55 PM.

  9. #84
    Registered User
    Join Date
    Nov 2008
    Posts
    69
    I took the blade of a scissor and started scraping at the chip to expose the leg:


    I guess I exposed something. I think I'll try soldering to it and then soldering to the resistor...omg I'm scared.

  10. #85
    Registered User
    Join Date
    Nov 2008
    Posts
    69
    Tried soldering to it, and solder won't adhere. Now I can't even see the exposed leg anymore. I guess this card is pretty much done for...DAMNIT.

    Looks like I'm going to have to look for something new. I bet someone will buy it on eBay.

    But if anyone has suggestions on what I can do, please let me know.

    Maybe get a HD4830 and pencil mod it lol...
    Last edited by quadomatic; 01-09-2009 at 06:55 PM.

  11. #86
    Xtreme Member
    Join Date
    Mar 2008
    Location
    NCAL
    Posts
    259
    GPUv mod confirmed!! Pics of the ordeal below.. THANK YOU LARGON !!


    pic of mod.. with correct VR: 100k ohm


    reading resistance: post mod


    corresponding voltage, to above resistance level


    ..well I got 1x down... 7 more to go now
    "If you wield a sword you must be intent on cutting the enemy" - Musashi

  12. #87
    Xtreme Member
    Join Date
    Dec 2008
    Posts
    118
    Sorry for being lazy and not reading through the 4 pages of technical stuff, but has vmod successfully worked for anyone here?

  13. #88
    Xtreme Member
    Join Date
    Mar 2008
    Location
    NCAL
    Posts
    259
    how did you miss the post above yours..?
    "If you wield a sword you must be intent on cutting the enemy" - Musashi

  14. #89
    Xtreme Member
    Join Date
    Dec 2008
    Posts
    118
    But has it translated into higher clocks in the card?

  15. #90
    Xtreme Member
    Join Date
    Mar 2008
    Location
    NCAL
    Posts
    259
    I havent finished testing the GPU's yet for OC.. but increased GPUv = higher clocks.. that is never really in question. Previous efforts at this mod, have not resulted in increased GPUv.... if that answers your Q any.. if not, I'll guess youll have to wait for screenies of the OC, wont you?!
    "If you wield a sword you must be intent on cutting the enemy" - Musashi

  16. #91
    Xtreme Guru
    Join Date
    Jan 2005
    Location
    Tre, Suomi Finland
    Posts
    3,858
    CL3P20,
    Please test if there is an aggressive OVP. Tune it to, say, 1.40v to see if/when it trips.

    quadomatic,
    Ouch!
    =(

    There are several pin-compatible chips (RT9259, ISL6549, eg.) that are very common on different motherboards and video cards, if you have some dead components laying around you might want to consider scavenging for such a part and attempting to replace the chip.
    You were not supposed to see this.

  17. #92
    Xtreme Member
    Join Date
    Mar 2008
    Location
    NCAL
    Posts
    259
    Quote Originally Posted by largon View Post
    CL3P20,
    Please test if there is an aggressive OVP. Tune it to, say, 1.40v to see if/when it trips.
    .. Roger that.. testing today. Will post back some screenies, and pics of the 'mini mod-farm'.
    "If you wield a sword you must be intent on cutting the enemy" - Musashi

  18. #93
    Registered User
    Join Date
    Nov 2008
    Posts
    69
    Quote Originally Posted by largon View Post
    CL3P20,
    Please test if there is an aggressive OVP. Tune it to, say, 1.40v to see if/when it trips.

    quadomatic,
    Ouch!
    =(

    There are several pin-compatible chips (RT9259, ISL6549, eg.) that are very common on different motherboards and video cards, if you have some dead components laying around you might want to consider scavenging for such a part and attempting to replace the chip.
    I decided it's not worth the trouble. If the card had cost me $100 and it performed very well, I'd go for it. But, since the card only cost me $34 and it's probably not going to last TOO much longer as far as it's performance compared to the current generation of cards, and since it's apparent my soldering skills are sub-par at best, I've decided to throw it on eBay and let somebody else use it for parts or try to fix it themselves.

    Still though, how often do people rip legs and lift traces like that? It's probably because I was yanking the wire to remove it when the joint was a bad cold joint. I guess it was still good enough a joint to tear up. Lesson learned.

    I think I'll pick up an HD4830. A simple bios flash vmod can let you oc it to past the speed of an overclocked 8800GT. Also I'll still have the Accelero S1 and the turbo module I bought for the 9600GSO. It should fit on the HD4830, and then I'd get better clocks than I've seen from others. At $90, it's the best I'm going to do. I don't really want to spend too much, since I'm going to college this year and it seems likely that I won't be able to take my computer with me.

  19. #94
    Xtreme Member
    Join Date
    Mar 2008
    Location
    NCAL
    Posts
    259
    Some updated pics and runs ..+ mod farm pics, of the 7x GPU's I just finished...


    ..In the process of finishing up 7x [8th GPU completed already and not shown] mod'd EVGA Dual-slot 9600GSO's [96sp] for a client..

    These will be running air cooled with GPUv mods for daily folding use. Preliminary results are good.. getting ~720mhz core and 1898mhz shaders @ ~1.15v idle.

    Here are some pics of the fiasco under way..


    GPU's fresh out of the EVGA store packaging..


    backside of GPU's..


    coolers removed for modding..


    overview of the 'mod station' ..aka meh work bench


    one of the core shots.. very nice batch #.. similar to GS/SC editions


    ..shot with GPUv mod completed


    setting ~3.68k ohms on the VR = ~1.18v idle GPUv


    ..the 7x GSO's shown, should net ~35k PPD together.. should be wonderful addition to the clients farm.


    AS5 going on..


    Glue drying on vmeasure points


    completed 9600GSO with GPUv and v-measure point [relocated for easy access]


    the test rig..


    monitoring GPUv under load..


    Screenies as promised

    quick bench run with 3D 06, using 1.288v

    792mhz core
    1826mhz shader strap
    1038mhz mem


    with these settings for folding use, you would gain ~1200 PPD over stock.


    ...also, for those dual-slot 9600 owners.. Zalman RAM sinks DO fit under the cooler, on the mosfets.. so no worries about keeping them cool anymore. :thumb:


    Sorry for the late RE... and @ largon- I havent had any time to check for OVP limits yet.. sorry.. been busy though.
    "If you wield a sword you must be intent on cutting the enemy" - Musashi

  20. #95
    Registered User
    Join Date
    Nov 2008
    Posts
    69
    Very nice! Not a bad core OC. Try pushing shaders more?

    I found out I'll be getting a 9800GT relatively soon, so I'll be okay.

    Don't think I'll be modding anytime soon though...
    Last edited by quadomatic; 01-15-2009 at 11:49 AM.

  21. #96
    Xtreme Member
    Join Date
    Mar 2008
    Location
    NCAL
    Posts
    259
    @ quadromatic- Thanks! ...stock cooling is preventing better clocks, thats all... obvious in the shaders case.. I cannot hold them at the 1898mhz strap, for stable use with load temps over ~55c.
    "If you wield a sword you must be intent on cutting the enemy" - Musashi

  22. #97
    Registered User
    Join Date
    Nov 2008
    Posts
    69
    Quote Originally Posted by CL3P20 View Post
    @ quadromatic- Thanks! ...stock cooling is preventing better clocks, thats all... obvious in the shaders case.. I cannot hold them at the 1898mhz strap, for stable use with load temps over ~55c.
    Really? Can't be over 55? On stock I was still stable on 60 something.

    What oc's were u getting before you increased voltage?

  23. #98
    Xtreme Member
    Join Date
    Mar 2008
    Location
    NCAL
    Posts
    259
    before mods, most all the GPU's were topping out around 630mhz core and 1650mhz shaders... after mods, setting the shaders for 1889mhz develops shader arties within a few minutes of benching... lowering them to the previous strap setting, of 1836mhz cleared all artifacts.

    *these are similar results to my GS/SC's.. keeping temps below ~50 on load, allowed me to run 2166mhz for shaders for stable use.. Keep in mind the GPU's I am using came from EVGA store...refurbed.. so I think results are pretty good, considering.
    "If you wield a sword you must be intent on cutting the enemy" - Musashi

  24. #99
    Registered User
    Join Date
    Nov 2008
    Posts
    69
    Ah, from eVGA store. I guess I might've gotten really lucky with my card then, considering I got much better OC's on stock voltage.

  25. #100
    Registered User
    Join Date
    Apr 2008
    Posts
    8

    Mem mod works

    I did the vMem mod and it works great. 
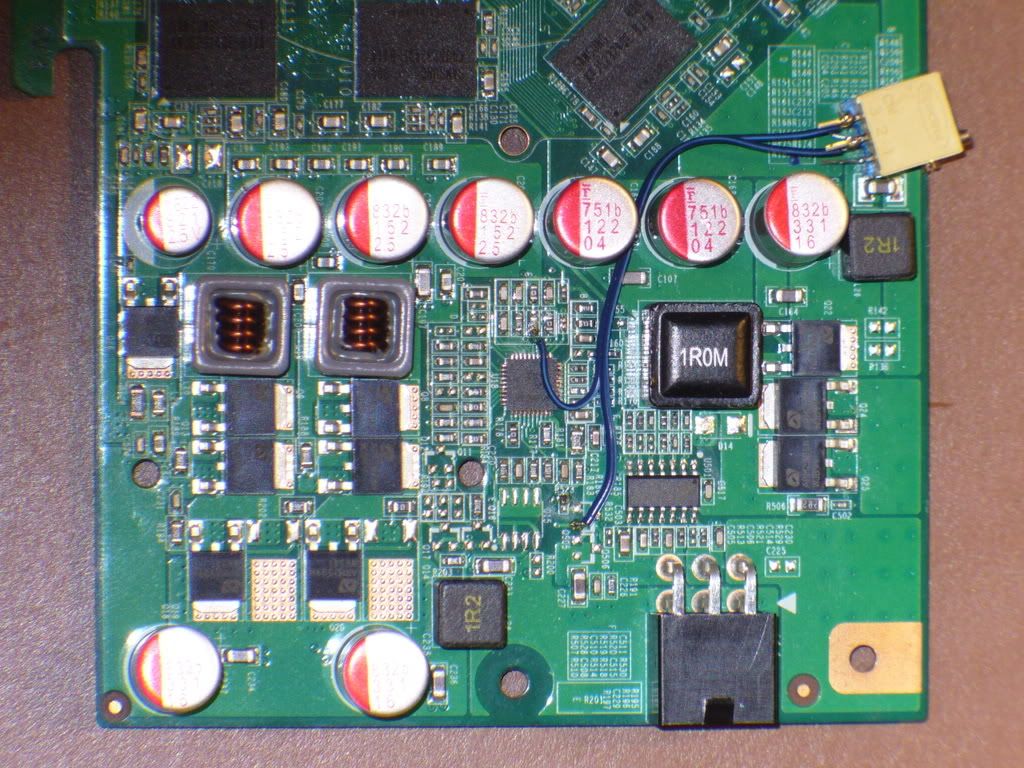
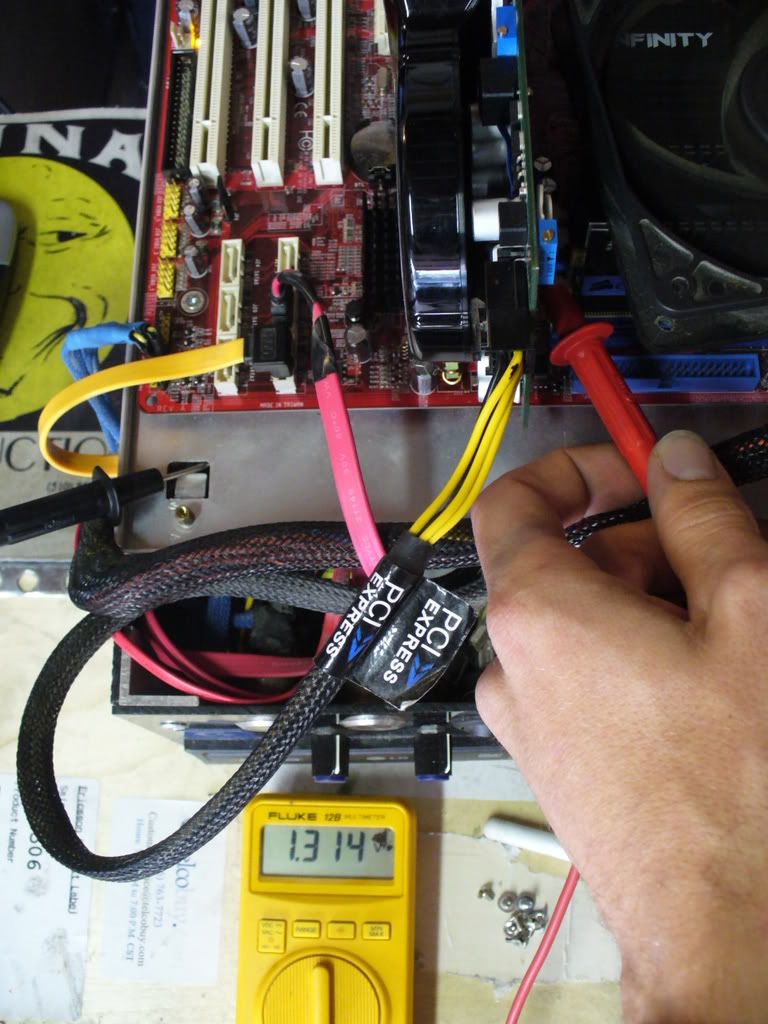
Before the mod my max stable speed was about 930mhz and vMem was 1.9V. After, with the resistor still set to 10K and using the same ground point CL3P20 used in his pics, I got 2.0V and am at 1060mhz and still testing.

    I'll do the vGPU once I pick up a 100K vr. I'm a little confused about raising VID by removing the 2 resistors that largon showed. If I removed those resistors, would the voltage for vGPU increase to 1.3V from the current 1.18V without adding the 100K vr? Or would just the over voltage cutoff threshold be raised, but the vGPU remain at 1.18V (unless the 100K vr is used)? Thanks for the great info!

    edit: I got impatient and removed those two resistors as suggested by largon hoping it'd raise vgpu without using a vr. Bad Idea! They came off with little problem, but vGPU has dropped to 1.06V, from 1.18V previous! My previous overclock of 660/1674 is nolonger stable. But stock speed still is. I'm going to pick up a 100K VR and see if I can fix this.
    Last edited by OrangeGator; 01-23-2009 at 10:19 PM.

Page 4 of 5 FirstFirst 12345 LastLast

Bookmarks

Bookmarks

Posting Permissions

  • You may not post new threads
  • You may not post replies
  • You may not post attachments
  • You may not edit your posts
  •