Page 1 of 3 123 LastLast
Results 1 to 25 of 69

Thread: Lian Li 1200 Inside Case Polishing

  1. #1
    Xtreme Member
    Join Date
    May 2007
    Posts
    129

    Lian Li 1200 Inside Case Polishing

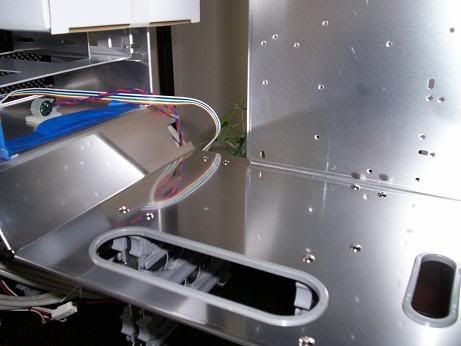
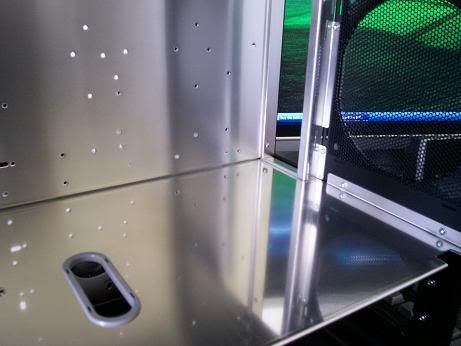
    As stated, I have a Lian Li 1200 and I'm looking for the most effective way to polish the inside compartment separator plate. The plate the separates the motherboard compartment from the PSU and HDD slots. I've seen this plate polished to a mirror shine on a few cases right here in this very forum.

    Is there a way I can polish this to a near mirror shine without sanding/orbital buffer? Will a few passes with brasso work...is there a specific polish for aluminum I can use?

    Thanks for any advice you can give.
    [SIGPIC][/SIGPIC]


    ....forgive me Father..

  2. #2
    ¿
    Join Date
    Jul 2003
    Posts
    4,772
    You need to hand sand it to 1000 grit or so and then use a hand buffer with ALU polishing compound. Not a small project

  3. #3
    I am Xtreme
    Join Date
    Oct 2005
    Location
    Grande Prairie, AB, CAN
    Posts
    6,140
    If there are no scratches in the metal, it is fine to start with 1000 grit. Then move to 1500. Then move to 2000. Make sure you are using a lot of clean water and a good flat sanding block. Then afterwards move to a good polishing compound. I prefer 3M Rubbing compound, which can be bought @ Wal-Mart.

    All in all, it is a good 4-6 hours worth of work.

    And here is how it could turn out.....
    and another one, although it is too crowded to see the detail.
    http://i18.photobucket.com/albums/b1...nternals-1.jpg

  4. #4
    Xtreme Enthusiast
    Join Date
    Aug 2006
    Location
    North Carolina, USA
    Posts
    839
    If you don't want to go so hardcore, you could just use a can of Mother's aluminum polish:


    When I finished mine, it had a perfect mirror-like reflection. Took a few coatings and a good 4-5 hours worth of work, but it works.

  5. #5
    Xtreme Enthusiast
    Join Date
    Jan 2007
    Posts
    535
    You guys are making me really want to convert to a Lian Li now!
    C2D E8400 @ 4.4 Ghz
    Asus P5K Deluxe
    Nvidia 8800 GTS @ 648/900
    2GB Ballistix
    Dtek, Swiftech & EK blocks, 2x D5, PA120.3, 2, & 1.
    WD Raptor X 150GB & Seagate 7200.10 320GB
    X-Fi Prelude
    Corsair HX620
    Silverstone TJ07
    Dell 2407 WFP

  6. #6
    Xtreme Member
    Join Date
    May 2007
    Posts
    129
    That is EXACTLY what I'm talking about Lowfat & Xion X2. You guys know your stuff here. I see there's no real easy way to do this. Each technique is in the 5 hour range. Regardless, now I know how to get it done. Thanks for the insight.
    [SIGPIC][/SIGPIC]


    ....forgive me Father..

  7. #7
    Xtreme Member
    Join Date
    May 2007
    Posts
    129
    Ok, so I bought some aluminum polish and started on a small area on the back side of the case. This is what it looks like after an hour of polishing on this one small spot.


    I've rubbed my finger nearly off. QUESTION: If I want more of a mirror-like quality finish, does the sanding process include wet-sanding with 1000, 1500, and 2000 grit? Or can I simply dry sand with the same grits?
    [SIGPIC][/SIGPIC]


    ....forgive me Father..

  8. #8
    Xtreme Member
    Join Date
    Aug 2006
    Posts
    336
    Quote Originally Posted by Dark Prodigy View Post
    I've rubbed my finger nearly off. QUESTION: If I want more of a mirror-like quality finish, does the sanding process include wet-sanding with 1000, 1500, and 2000 grit? Or can I simply dry sand with the same grits?
    I wouldn't dry sand. You'll just create more scratches in the metal. I'm pretty sure your only option is to wetsand.

  9. #9
    I am Xtreme
    Join Date
    Oct 2005
    Location
    Grande Prairie, AB, CAN
    Posts
    6,140
    Quote Originally Posted by JayG30 View Post
    I wouldn't dry sand. You'll just create more scratches in the metal. I'm pretty sure your only option is to wetsand.
    correct. Always use lots of CLEAN water when polishing.

  10. #10
    Registered User
    Join Date
    May 2006
    Location
    Texas
    Posts
    32
    That looks sharp! I would try something like that with a new case, but not with my current one (New case has no parts to remove, and I'm slightly lazy 
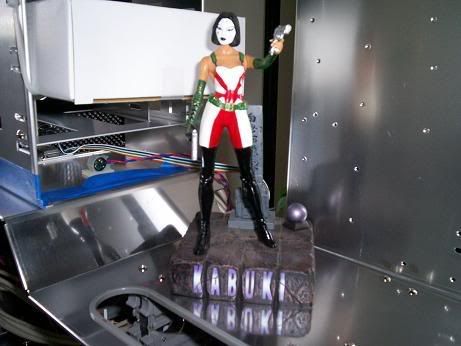
). Looks great though.... gave me some ideas.

  11. #11
    Xtreme Addict
    Join Date
    Sep 2006
    Location
    North East UK
    Posts
    1,029
    If you think thats hard work you want to try polishing a whole Wavemaster

  12. #12
    I am Xtreme
    Join Date
    Oct 2005
    Location
    Grande Prairie, AB, CAN
    Posts
    6,140
    Quote Originally Posted by coolmiester View Post
    If you think thats hard work you want to try polishing a whole Wavemaster
    that sir, is a piece of art.

  13. #13
    Xtreme Member
    Join Date
    May 2007
    Posts
    129
    This is what I have after a day of on and off polishing...


    Not bad but I know it can look better. I'll probably spend a week or so doing some on/off polishing. Right now I'm using the Mothers™ Aluminum Polish, but I'll see what some 3M Rubbing compound can do also...
    [SIGPIC][/SIGPIC]


    ....forgive me Father..

  14. #14
    Xtreme Cruncher
    Join Date
    Jul 2005
    Location
    London - UK
    Posts
    3,349
    Wow, that wavemaster looks so good
    Core 2 Quad Q6600 @ 3GHz . DFI DK P45-T2RS Plus . XFX 9800GT 512MB . 8GB OCZ Blade PC2-9200 . WD6400AAKS AHCI .
    Creative X-Fi XtremeMusic . Hanns.G 28" LCD . Thermalright U120-E . Seasonic S12 600w . Windows 7 Professional E Retail x64 .

  15. #15
    Xtreme Member
    Join Date
    May 2007
    Posts
    129
    Alright, I think this is as good as its going to get for me.


    The last pic was simply showing the refelction compared to the motherboard tray.

    Thanks for the advice folks. =)
    [SIGPIC][/SIGPIC]


    ....forgive me Father..

  16. #16
    Xtreme Member
    Join Date
    May 2007
    Posts
    129
    Ok, so I wasn't quite satisfied with the polishing job. I was simply using solvents and alot of rubbing, as I didn't want to get to get too 'hardcore' with this. As a few days passed I couldn't shake the feeling that I was half-assing it and decided to put more effort into it.

    This is the result:


    I tell you this, when you decide to not halfass is its ALOT of friggin work. It took me three days of wetsanding and polishing to get it to true mirror quality. And you couldn't pay me to do it again. heh

    Once again, thanks to all for the advice.
    [SIGPIC][/SIGPIC]


    ....forgive me Father..

  17. #17
    Xtreme Member
    Join Date
    Oct 2006
    Location
    BOSTON
    Posts
    366
    haha nice. it looks like a tri-cpu motherboard now.
    AMD 64 3700+ San Diego
    Geil Ultra 1GB PC3200 RAM
    250+640GB
    Sapphire X850XT PE
    SINGLEC0RE4EVER

  18. #18
    I am Xtreme
    Join Date
    Apr 2005
    Location
    Upstate, NY
    Posts
    5,425
    Holy crap, amazing job!
    Core i3-550 Clarkdale @ 4.2GHz, 1.36v (Corsair A50 HS/F) LinX Stable
    MSI H55-GD65 Motherboard
    G.Skill 4GBRL DDR3-1600 @ 1755, CL9, 1.55v
    Sapphire Radeon 5750 1GB
    Samsung F4 320GB - WD Green 1TB
    Xigmatek Utgard Case - Corsair VX550

  19. #19
    Xtreme Addict
    Join Date
    Aug 2006
    Location
    St. Louis
    Posts
    1,055
    Quote Originally Posted by NickS View Post
    Holy crap, amazing job!
    Seconded.

    i5 750 @ 3.2 Ghz, stock volts on stock cooling
    4GB G.Skill DDR3-1600 7-7-7-21
    Gigabyte P55-DS2
    EVGA GTX260 192shader

  20. #20
    Xtreme Enthusiast
    Join Date
    May 2007
    Posts
    510
    sometimes i worry where you guys get the time :P
    Gaming Rig
    Intel E6300
    Intel Mobo
    2 Gig OCZ 800 (800 5,5,5,15)
    Saphire Ati 4870
    22inch LG Flatron W2230S

  21. #21
    Xtreme Addict
    Join Date
    Nov 2003
    Location
    NYC
    Posts
    1,592
    If it's removable (undoable by screws or drilling out rivets) it's possibly to get something to a mirror shine in 30-45minutes with a bench grinder and the right wheels and a good technique.

    http://www.hobbytool.com/

    Along the same lines there are rotary buffing wheels and bits for dremels for the finer work.

  22. #22
    Xtreme Member
    Join Date
    Mar 2007
    Location
    The Netherlands
    Posts
    199
    Why don't you just place a mirror on the bottom?

  23. #23
    Xtreme Addict
    Join Date
    Aug 2006
    Location
    St. Louis
    Posts
    1,055
    Heavier and not as fun? Fun is a relative term.

    Plus it is cheaper, specially since the mirror was custom cut.

    i5 750 @ 3.2 Ghz, stock volts on stock cooling
    4GB G.Skill DDR3-1600 7-7-7-21
    Gigabyte P55-DS2
    EVGA GTX260 192shader

  24. #24
    Royal Administrator
    Join Date
    Jul 2005
    Location
    New York City
    Posts
    3,434
    Wow, that's amazing, guys!

  25. #25
    Xtreme Member
    Join Date
    May 2007
    Posts
    443
    that looks purely awesome, keep up the good work!

    A mirror would look good but it would take the fun out of it.

Page 1 of 3 123 LastLast

Bookmarks

Bookmarks

Posting Permissions

  • You may not post new threads
  • You may not post replies
  • You may not post attachments
  • You may not edit your posts
  •