


Source: http://www.over-clock.com/articles.p...&showarticle=6
Time and time again we get asked how we mount radiators in our cases, or how we fit windows... well, the theory is all the same for both... masking tape, time, care and attention, a jigsaw, some files, and some blowhole rubber...
Here comes the guide!
DO NOT START UNTIL YOU HAVE READ AND DIGESTED THIS GUIDE FROM BEGINNING TO END.
For illustrative purposes, the plan is to fit a ThermoChill HE120.1 and then a 120.2 into a LianLi case....
The LianLi PC60 has one distinct disadvantage when it comes to fitting watercooling to it... namely, the position and style in which the top panels' 80mm fan is mounted...
And this opening is of course right up by the PSU...
First things first is to take your masking tape and cover the whole panel in question. Cases scratch very easily...
For the jigsaw, u want some GOOD QUALITY metal cuting blades, suitable for sheet steel and aluminium upto 2.5mm thick...
And follow all precautions as stated on the packet... JIGSAWS ARE DANGEROUS!
Eye and finger protection is the most important. Both myself and Stevie have been to hospital as a result of metal shards in the eye from not wearing goggles when cutting...
First things first is to mark off the line of where the PSU comes to... 14cm from the back of the case usually...
Now, we lay the rad in place, noting where the fan will line up to as the 120mm hole must cover all of the 80mm grill to get it to look good... this means a tight squeeze at the back of the PSU, and also rules out the use of PSUs with externally mounted 80mm fans on the back...
Next, useing a ruler, we mark the center line and an additional line where the end pair of screw holes will need to be for the fan.
Then we take our template (from http://www.over-clock.com/guides/) and line it up in place to the lines we drew...
Remembering to line it up at BOTH ENDS of the case...
Where the horizontal lines on the template are, we mark with dots. This represents the screw holes...
Criss-cross to get the center point of each fan...
Then with a compass set to 59mm draw on the circles, or alternatively, lineup a fan grill to the 4 holes and draw round the outer rim...
Now, lay your rad back on top on it's side, check and recheck and check again that everything lines up... make any corrections...
Take a hammer and a big 6" nail and punch the center for each of the 4 fan-screw holes, and punch the center circle about 10mm in from the edge.
Grab your drill and drill bit (we tend to use a 5mm bit), and push a chunk of rubber (ie: PENCIL ERASER) over the end. This means when you drill the hole, as the drill goes through if it crashes into the case it won't mark or scratch it.
Plug in the drill, put on your goggles and gloves etc.
Go ahead and drill your holes... Hammer action turned off... drill speed fairly high. Line the bit up to the punch hole, make sure it's vertical, and off ya go.
DON'T USE BLUNT BITS.
Grab a 120mm fan and check them again, make sure the main center circle lines up to the fan, ten reach for your jigsaw and masking tape. You need to mask the shoe of the jigsaw as metal filings get trapped underneath and leave deep scratches in the cases surface that cannot be easily removed unless your case is steel and u have some T-Cut that matches your cases paintjob...
Goggles n' gloves again, plug in the jigsaw. Insert the jigsaw thru the hole you drilled on the main center circle, and cut away the circle you drew. This can be done with ease, fairly quickly after you've had some practice... Keep your hand constantly turning with the curve. TAKE YOUR TIME.
Once done, take your files and file away any burr and rough edges, then remove the masking tape...
See how our main circle crosses the original 80mm fans' screw holes? If you followed all the measurements above, yours should be the same. Don't worry. Blowhole rubber will cover this up...
And you're HE120.1 / 120mm fan mounting hole is complete...
And if you did the HE120.2 template, then it'll look like this!
It's the same for window panels... without the screw holes!
Mask the panel, punch 5mm inside the edge of the design, insert jigsaw and cut away. On tight corners or points positioning of the drilled starting hole is essential so plan these out. My case design took over 30 punched and drilled starting holes. Fliptone's took more... but all were done by hand using this method with a jigsaw.
Then lay the panel onto your perspex (WITHOUT removing the plastic protective film) and draw thru the sidepanel as tho it were a stencil with a CD Pen. Remove the case, then handdraw this on again with a 5 to 10mm border to overlap behind your panel so that you can bond them together.
Cut the perspex with a jigsaw.... the metal cutting blade should do fine. Fairly high speed... and try and keep moving in continuous fluid motions.
Once done, simply remove the film, and either attach sticky backed velcro pads to the inner of the case panel and pop the window on with those, or use Prometeia sealing string around the edges of complex designs, or use superglue along the back of the blow-hole rubber if you've decided to use it....
Hand finish rough edges with detail-metal files... for rounded edges use a crescent file (with a flat side and a rounded side). When filing, always use long fluid strokes. This keeps the entire edge even.
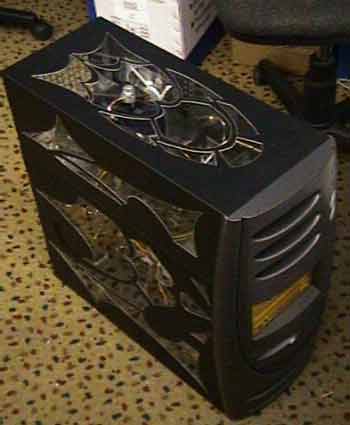
Mine:
Fliptones:


 Reply With Quote


Bookmarks