Results 1 to 19 of 19

Thread: Q: PSU mod - remove SATA power "molex" connectors?

  1. #1
    Banned
    Join Date
    Jun 2003
    Location
    Broomfield, CO
    Posts
    3,882

    Q: PSU mod - remove SATA power "molex" connectors?

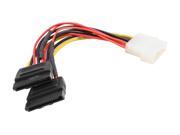
    I am looking to sleeve a portion of a PCP&C PSU that I have and need a tool (or procedure) for removing the SATA power connectors so that I can complete the sleeving and then re-attach the same connectors. Anyone know where to find such a tool or tutorial? I'd rather not go through the trial by fire and break one trying to figure this out. I have a feeling that I'm the one thats going to have to share this with everyone else.

    -FCG

  2. #2
    Xtreme Cruncher
    Join Date
    Aug 2006
    Location
    Sydney, Australia
    Posts
    760
    I've just had a look at the various SATA power connectors I have here and I can identify three different types. Most typical, and those used on the TT ToughPower and Enermax Liberty are the right-angle 'self-crimping' type, i.e., the contacts of the connector 'cut' through the insulation of the wires when both parts are pressed together. The last connector is the molded type and doesn't appear to be 'servicable' but could easily be cut off and replaced. On some converters and splitters that I have they are a push pin variety similar to the sockets on a fan header plug for instance.

    I'm interested too because I would like to customise some of my leads. The distance between connectors is never appropriate for me. For instance, with three drives in a row, I want three connectors about an inch apart, not 3-6 inches!

    I've thought about making up my own leads from scratch too, particularly given I have modular PSU's I can basically 'crimp' the molex pins of the molex and PSU connectors and use the same right-angle 'self-crimping' SATA power connectors that 'splice'
    themselves on-see here: http://www.pccasegear.com.au/prod3336.htm. You can see the fan header style referred to above here: http://www.pccasegear.com.au/prod3334.htm.

    If you're talking about the 'self-crimping' variety, then removing them is very easy, but I guess you're not because I don't think you would be asking the question .

    Actually, I just noticed another variety: pins/sockets like that on the 'speaker' connector to your motherboard, where you have to 'lift' the little plastic tabs while extracting the pins as opposed to pressing the metal tabs/pins down like the fan header connector.

    Let me know what 'variety' you have.

    Hope this helps.

    ps. I have plenty of sacrificial stuff here if you'd like me to experiment with you.
    Last edited by GAM; 10-08-2006 at 04:57 AM.

  3. #3
    Banned
    Join Date
    Jun 2003
    Location
    Broomfield, CO
    Posts
    3,882
    I need to know about the SATA power molexes. Standard 4-pin for either peripherals or floppies, 6-pin for PCI-e, 4- or 8-pin for aux 12v, 20- or 24-pin for ATX power and small 4-pin headers for fans are all just about the same, and yes, easy to remove. The headers for case to motherboard connector leads are also easy to work with. It's the PSU connector for attaching SATA style power connectors that have me scratching my head...

    See picture here: (SATA connectors shown in black in the foreground)


    -FCG

  4. #4
    Xtreme Cruncher
    Join Date
    Aug 2006
    Location
    Sydney, Australia
    Posts
    760

    Examples

    I couldn't resist. Pic of examples mentioned (from top-left to bottom-right: jewellers screwdrivers used, cap of self-crimping, molded, self-crimping, PC speaker connector type(lift tabs), fan connector type(depress pins):

    Recognise any?

  5. #5
    Xtreme Cruncher
    Join Date
    Aug 2006
    Location
    Sydney, Australia
    Posts
    760
    More like the one on the left?:

    The molded version on the right-no hope, I believe.
    The version on the left-Hmmm... difficult!

  6. #6
    Xtreme Cruncher
    Join Date
    Aug 2006
    Location
    Sydney, Australia
    Posts
    760
    Hey, FCG, I was feeling brave when I awoke this morning and took apart the version on the left of the previous pic. One casualty that didn't seem to affect the connector. One of the four little tabs that hold the connector housing together broke. It went back to together okay though.
    The blade driver used initially to open up the gap was a little smaller.

    One of the four tabs on one piece that broke. It still went back together okay though.

    The two housing pieces and the central connector core. This bit is still a problem. Too large for the 'ideal' diameter braid.
    Last edited by GAM; 10-08-2006 at 03:04 PM.

  7. #7
    Xtreme Cruncher
    Join Date
    Aug 2006
    Location
    Sydney, Australia
    Posts
    760

    The 'core' connector piece - problem!

    This WILL NOT come apart. This could be a problem.


  8. #8
    Xtreme Cruncher
    Join Date
    Aug 2006
    Location
    Sydney, Australia
    Posts
    760

    Wink Or not...

    Why stop there?

    A little brute force and viola! Each wire and its connector simply pull out of the central connector core section and... more importantly, can be reinserted with care. Observe:


    ...now, I bet this ISN'T the SATA Power Connector/Plug that you have, right?

    ps. Technically speaking, I don't think these power connectors can be called 'Molex' connectors. Moot point, but worth mentioning.

  9. #9
    Banned
    Join Date
    Jun 2003
    Location
    Broomfield, CO
    Posts
    3,882
    Here's what I have. Still not sure how to remove the middle ones (top, right in this pic). End ones came off easy, I don't think I looked at those close enough...lol. Anyway, appreciate the help...now how do you open those middle ones??

    Oh, BTW, mine have "molex" stamped on them (the name of the company that makes them) so I think I am OK to call them that.


  10. #10
    Xtreme Cruncher
    Join Date
    Aug 2006
    Location
    Sydney, Australia
    Posts
    760

    Arrow Remove inline 'self crimping' SATA Power Connector (2 types)

    The 'cap' on the circled 'these in the middle' is sitting directly above in the photo.

    I have two slightly different examples of the same style of self crimping inline connector, neither of which are Molex branded and hence may be different again. I appreciate your point re Molex, sorry. To me a 'molex' connector is always the 4 pin 12v power connector that we love or hate . Another one those things, Hoover vs Vacuum cleaner, Teflon vs non-stick surface

    Type 1:
    This one conveniently has a slot on one side to insert a blade bit.

    Insert a blade bit and lift, then slide the driver in further so it is more or less under or beyond the middle of the cap and lever it up (pushing down on the driver so that the blade bit is lifting the cap up from underneath.


    Type 2:
    No convenient slot on this one, but they're similar nevertheless.

    This is obviously harder with the wires in there, but try to get the blade bit under the edge and lever it out and off. Do the same on the opposite end of the same side and it should come free.


    End result. Note the interlocking system (pic above and below)


    ...and Bob's your uncle!
    Last edited by GAM; 10-09-2006 at 04:18 PM.

  11. #11
    Banned
    Join Date
    Jun 2003
    Location
    Broomfield, CO
    Posts
    3,882
    Hmmm....unfortunately mine appears to be Type 3....lol. I'll post pics up soon...I do think though that a special tool may be required for it's disassembly...ugh.

  12. #12
    Xtreme Cruncher
    Join Date
    Aug 2006
    Location
    Sydney, Australia
    Posts
    760
    I figured as much (type 3), as I've seen some of your work before and know you to be a capable modder . ...and this stuff isn't rocket science.

    Look forward to pondering Type 3 and offering any assistance if I can (you never know, a type 3 may be lying around here somewhere too )

  13. #13
    Registered User
    Join Date
    May 2005
    Location
    City: Montreal, Country: Quebec
    Posts
    22
    Hi guys, could anyone explain to me(or give me a web link) how to cut the SATA connector and how to replace them on my PSU? I got this stupid SEALED connector at the end of my Phantom500, The whole PSU has been sleeved, except the two SATA cables, because of their connectors at the ends.

    Those are my super wack connector:


    Thanks in advance,
    Last edited by Mari0-Br0s; 10-20-2006 at 02:40 PM.
    Intel Core 2 Duo E8400 @ 4.0GHz | Kingston KHX6400D2LLK2/2GN @ | ASUS P5K-E WIFI/AP w/ 1006 BIOS | BFG 8800GT/512MB @ 700MHz/2.0GHz
    Mac mini 2.0GHz | 2GB
    MacBook Pro 15.4" | 2.4GHz | 2GB | 8600M GT 256MB

  14. #14
    OCTeamDenmark Founder Nosfer@tu's Avatar
    Join Date
    May 2004
    Location
    Denmark, Copenhagen
    Posts
    2,335
    OWNAGE HELP provided by GAM

    Detailed enougt that you only need 5 min more work and you have a guide for XS to sticky
    Former owner of OCTeamDenmark.com
    MSI MOTHERBOARD!!!!!!

    Linkedin


  15. #15
    Xtreme Cruncher
    Join Date
    Aug 2006
    Location
    Sydney, Australia
    Posts
    760
    @Mario-bros, I don't think there is anyway to salvage that last connector even if you could prise/cut it apart. You could try to slice it carefully around the edges with a razor blade, hobbie knife, etc. but I don't think it will go back together very well... maybe with some glue.

    I have the same cables and want to add two right angled SATA power connectors so that I can have 4 drives powered off one cable, about an inch apart and with no 'extra' cable between. My intention is to cut the last connector off totally just below the second last connector and then sleeve the ends of each wire with heatshrink. I haven't looked at it closely again for awhile but you could probably also cut those wires on the last connector so that they do not protrude from the connector. This would eliminate the visible heatshrinked ends.

    (I might get around to doing this today, now that I have my fully functional 'Test/Lab PSU'! Yipppee, my latest mod which I am very happy about. )

  16. #16
    Xtreme Cruncher
    Join Date
    Aug 2006
    Location
    Sydney, Australia
    Posts
    760
    @Nosfer@tu, thanks mate. What do you think it needs to finish it off and I'll see what I can do

    (It'd be my first sticky if that was the case )

    EDIT: Actually, this is FCG's thread.
    Last edited by GAM; 10-21-2006 at 01:39 PM.

  17. #17
    OCTeamDenmark Founder Nosfer@tu's Avatar
    Join Date
    May 2004
    Location
    Denmark, Copenhagen
    Posts
    2,335
    Quote Originally Posted by GAM
    @Nosfer@tu, thanks mate. What do you think it needs to finish it off and I'll see what I can do

    (It'd be my first sticky if that was the case )

    EDIT: Actually, this is FCG's thread.
    Yes it is his thread. But Im QUITE sure he would agree to You did the work.

    It is just sto put it togeater in a word doc.

    Give it a headline called. How to sleave Sata power plugs
    You practicaly made it already.

    Just take it out of the thread and put it togeather
    Former owner of OCTeamDenmark.com
    MSI MOTHERBOARD!!!!!!

    Linkedin


  18. #18
    Xtreme Cruncher
    Join Date
    Aug 2006
    Location
    Sydney, Australia
    Posts
    760
    New thread with link to full guide now here: http://xtremesystems.org/forums/show...36#post1820936

  19. #19
    Xtreme Addict
    Join Date
    Oct 2004
    Location
    London UK
    Posts
    1,392
    Does anyone know where I can get the self crimping sata connector in the UK? I would like the UV version but I's settle for plain black as I need to repair some broken ones on an Etasis PSU.
    ******************************************
    Respec'
    System:Bunch of crappy overclocked PC's that cost an arm and a leg


Bookmarks

Bookmarks

Posting Permissions

  • You may not post new threads
  • You may not post replies
  • You may not post attachments
  • You may not edit your posts
  •